How to Draw Hello Kitty: Easy 10-Step Guide for Kids
Bring the iconic Hello Kitty to life with this beginner-friendly drawing guide. Designed for children ages 5 and up, this activity requires only a pencil, paper, and an eraser to build confidence and artistic precision. Follow along to master her signature look in just a few simple strokes.
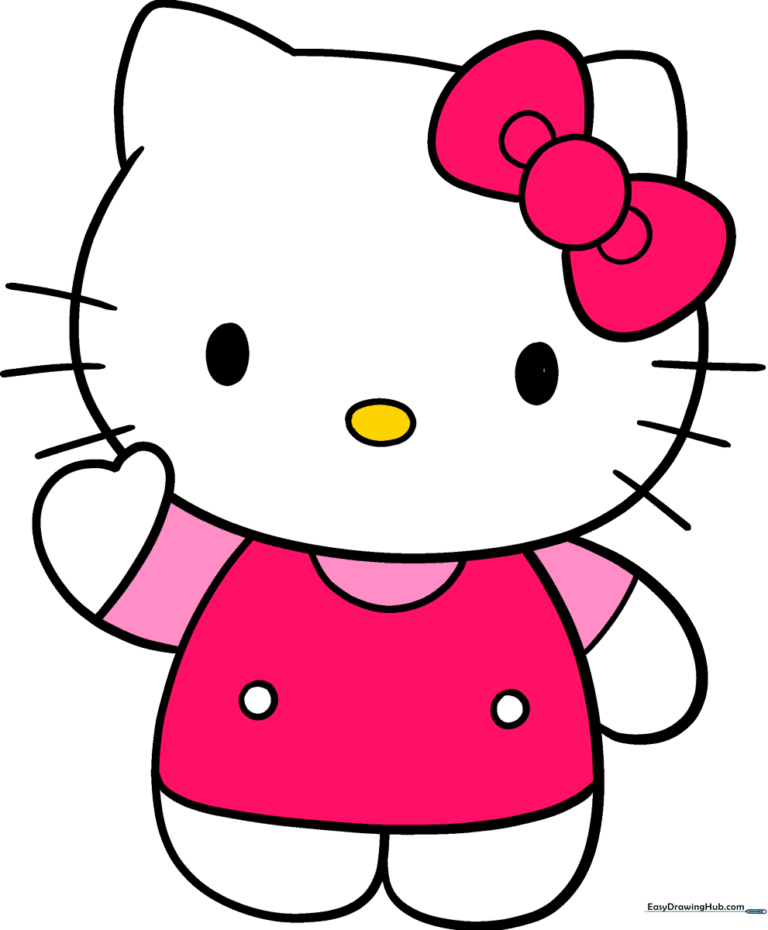
🎯 Final Result
Step-by-Step Instructions
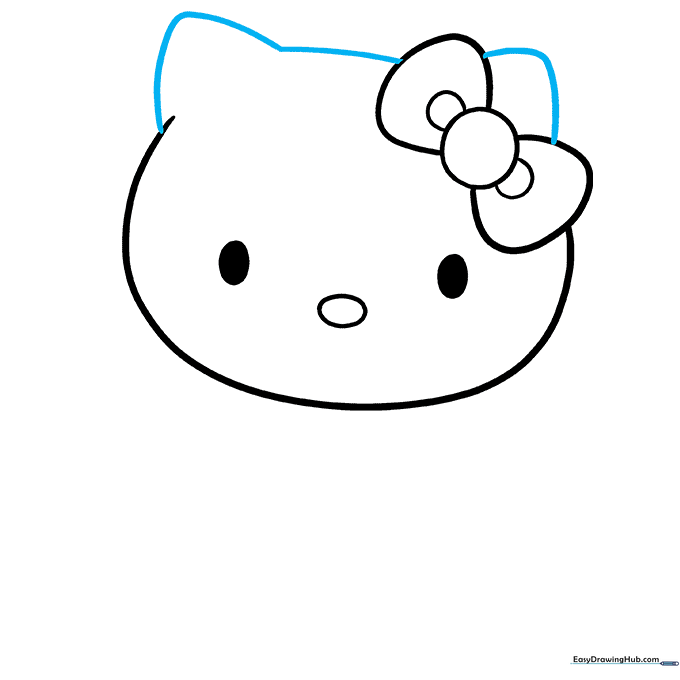
Step 1: Sketching the Face Features
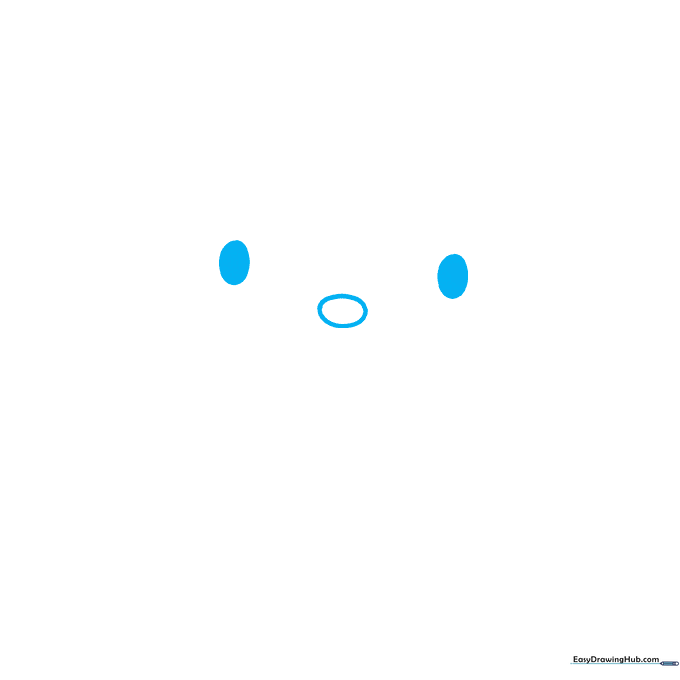
Draw two small, horizontal ovals for the eyes and a slightly smaller oval centered between them for the nose. Teacher's Tip: Keep these shapes small and centered to leave plenty of room for the rest of her head.
Step 2: Outlining the Head
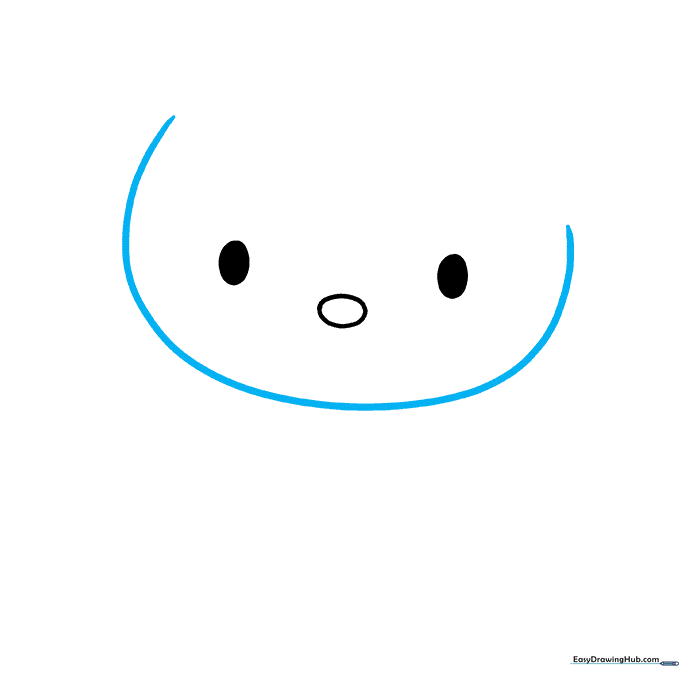
Draw a large, smooth curved line around the eyes and nose to form the shape of her head. Teacher's Tip: Try to draw this in one fluid motion to keep the line clean and rounded.
Step 3: Adding the Signature Bow
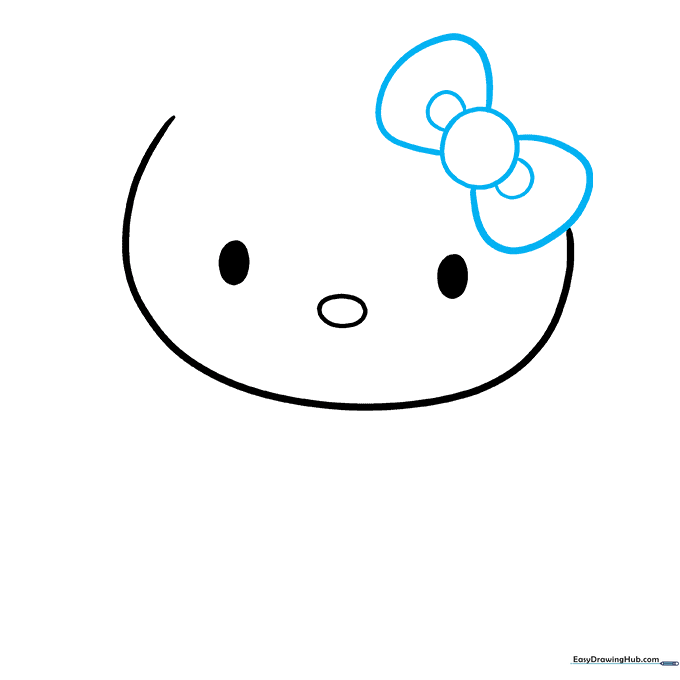
Draw a small circle for the center of the bow, then add two rounded lobes on either side. Add a smaller curved line inside each lobe for detail. Teacher's Tip: Make the bow slightly off-center to give it a natural, cute appearance.
Step 4: Drawing the Ears
Add two small triangles on top of the head for her ears. Teacher's Tip: Keep the tips of the triangles slightly rounded rather than sharp to match her soft cartoon style.
Step 5: Sketching the Whiskers
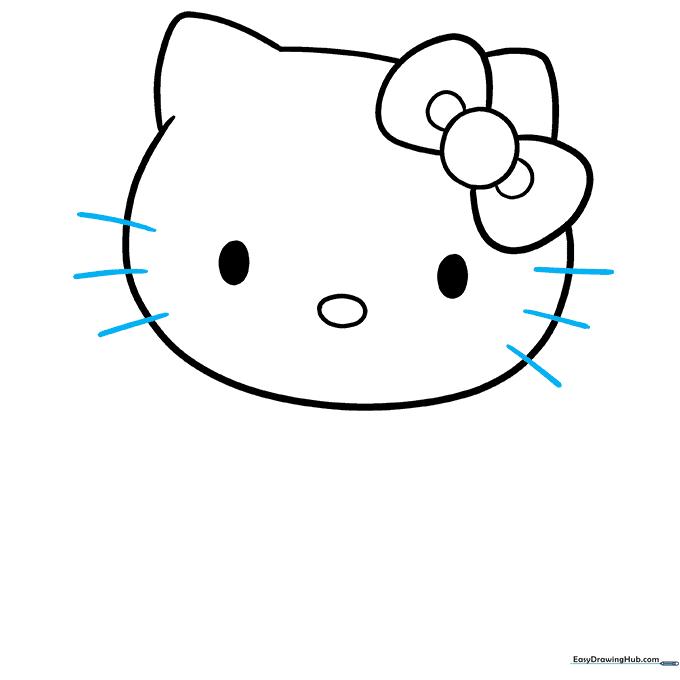
Draw three short, horizontal curved lines on each cheek. Teacher's Tip: Space them out evenly so they look like they are radiating from her nose area.
Step 6: Starting the Body
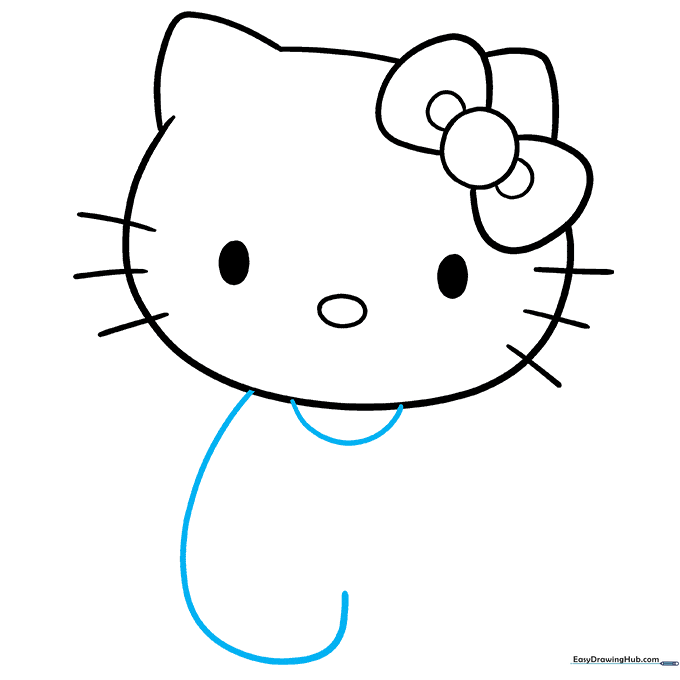
Draw a curved line under the head to create the collar of her blouse, then extend lines down to outline the torso and one leg. Teacher's Tip: Keep the lines smooth to ensure the body looks proportional to the head.
Step 7: Completing the Lower Body
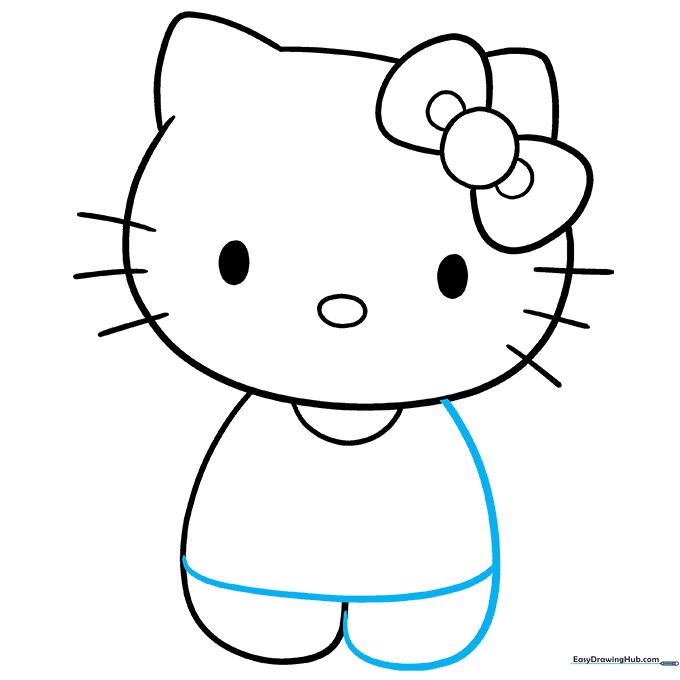
Mirror the curved line on the other side to finish the legs, and add a horizontal line across the top of the legs to define the bottom of the blouse. Teacher's Tip: Use a light touch to keep the legs looking balanced.
Step 8: Adding the Arms
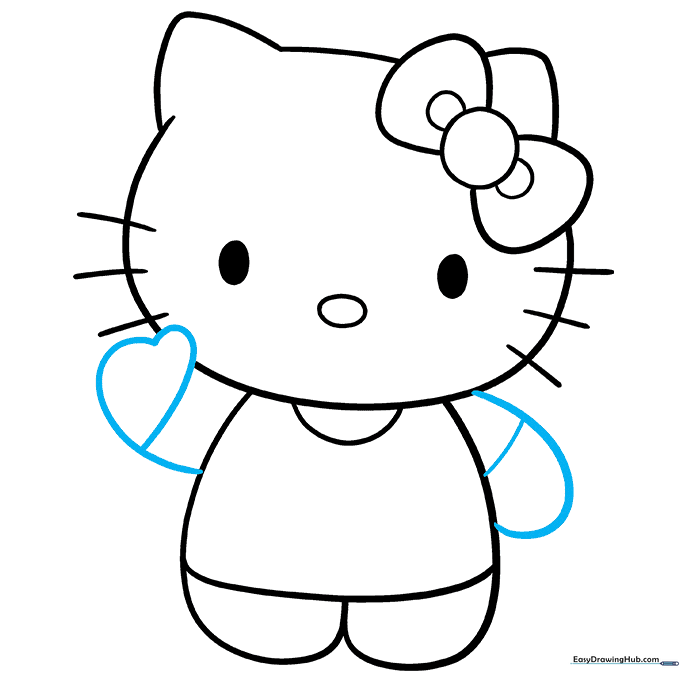
Draw the arms using curved lines, adding a small bulge on one side to represent a 'thumbs up' gesture. Add a curved line at the end of each sleeve. Teacher's Tip: Keep the arms simple and rounded to maintain the character's style.
Step 9: Final Details
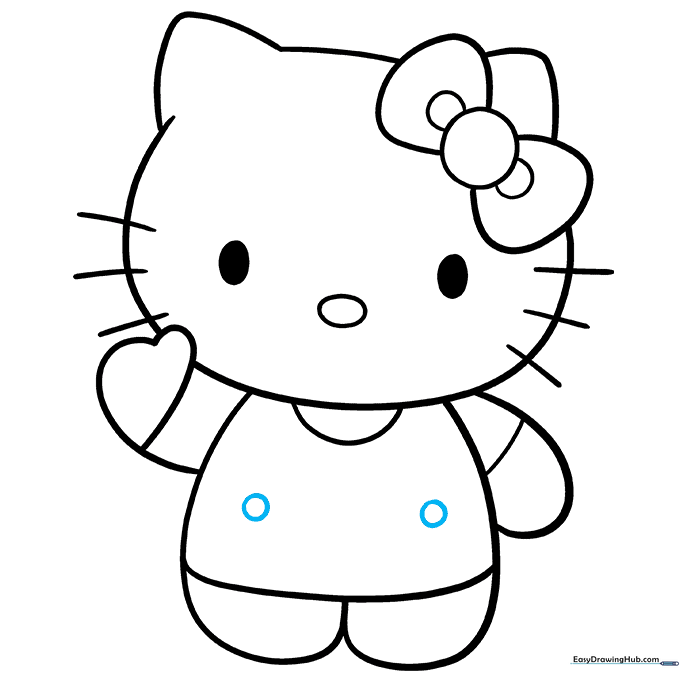
Add two small circles on the blouse to represent buttons. Teacher's Tip: Make sure they are vertically aligned for a neat, finished look.
Step 10: Color Your Masterpiece
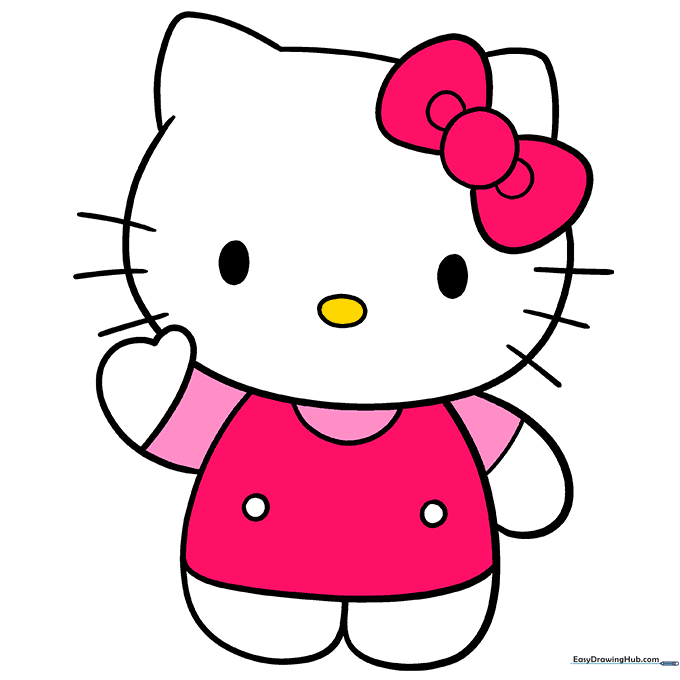
Your outline is ready! Use classic colors: white for her fur, yellow for her nose, and a bright pink for her bow and outfit. Teacher's Tip: Use light, even strokes to fill in the color for a professional-looking finish.
More Tutorials


