How to Draw Goku Ultra Instinct: Easy Full-Body Guide
Ready to bring Goku's most powerful form to life? This tutorial is designed for intermediate artists looking to capture Goku's iconic Ultra Instinct stance. You’ll need a pencil, eraser, and paper to follow along as we break down his complex anatomy into manageable, professional-looking shapes.
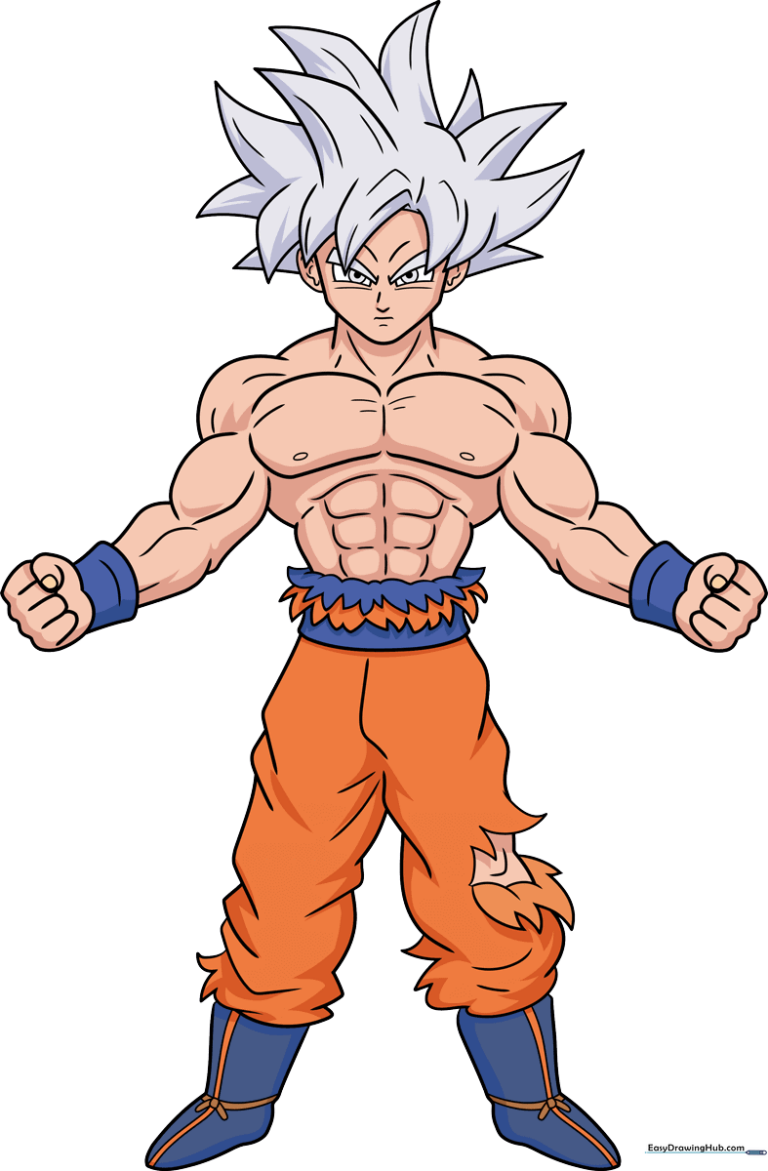
🎯 Final Result
Step-by-Step Instructions
Step 1: Mapping the Face and Hair
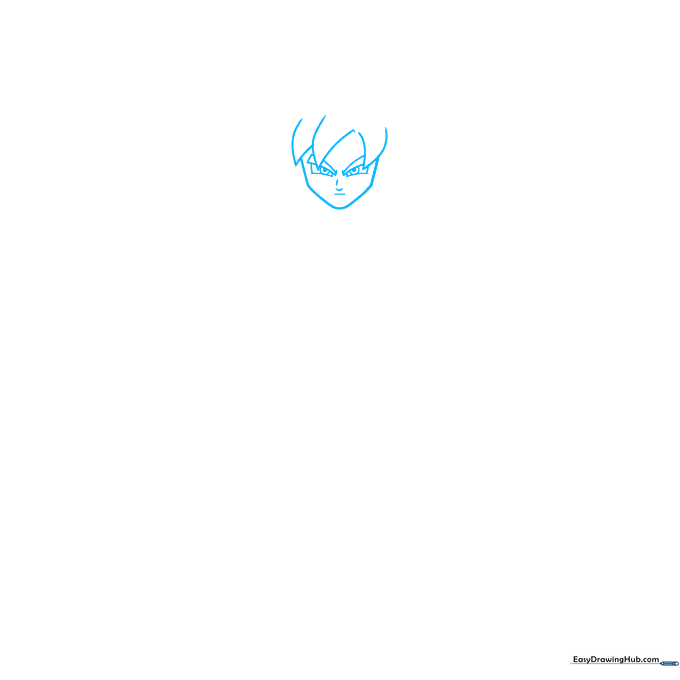
Start by sketching the face shape using a long, curved line. Add the signature spiky hair using V-shaped points. Tip: Keep your pencil pressure light so you can easily adjust the hair spikes later if they look too symmetrical.
Step 2: Defining the Spiky Hair
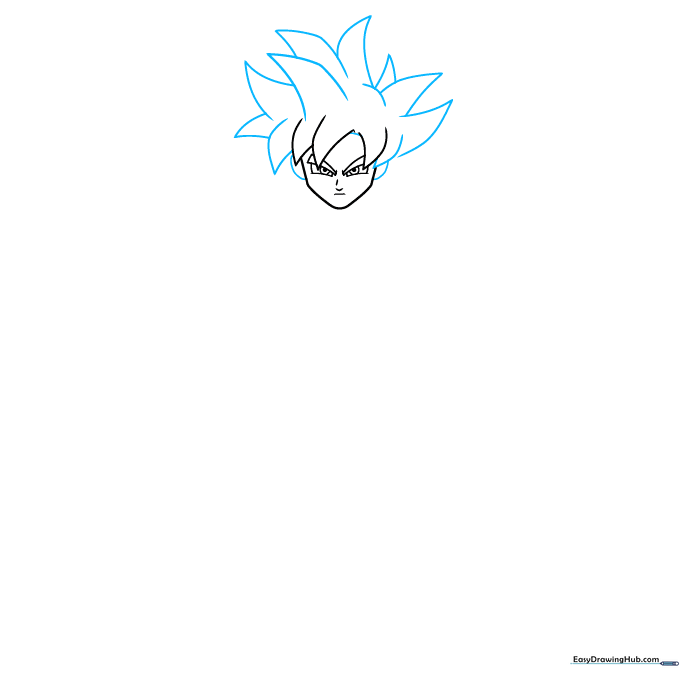
Continue building the hair volume by adding more jagged, overlapping spikes around the crown. Add the ears using simple curved lines. Tip: Think of the hair as large, triangular shards rather than individual strands to keep the anime aesthetic clean.
Step 3: Neck and Upper Torso
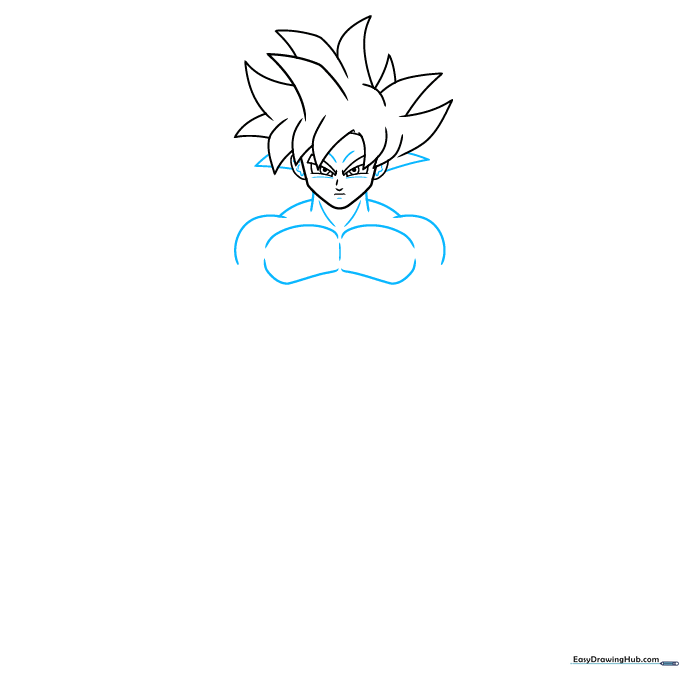
Draw the neck and shoulders using overlapping curved lines to suggest muscle mass. Add small lines to define the collarbone and chest. Tip: Use short, quick strokes for the muscle definition to give the drawing a sense of energy and tension.
Step 4: Arms and First Fist
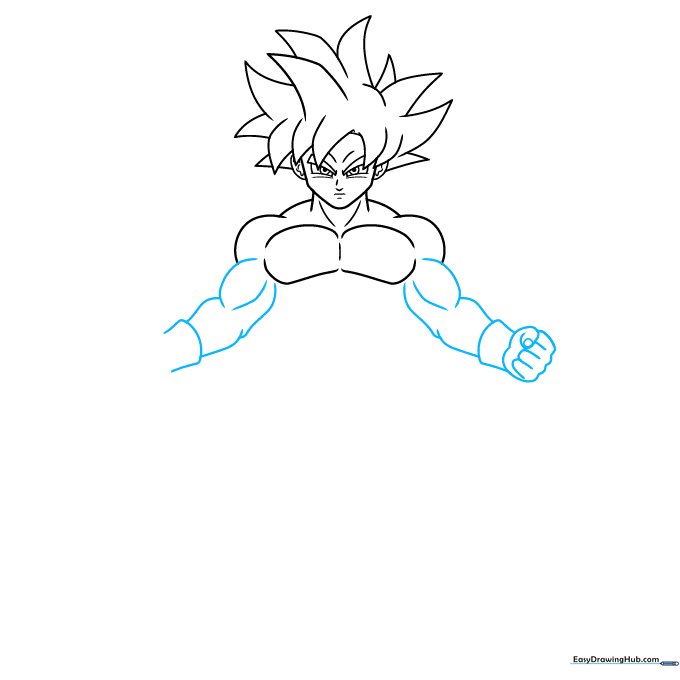
Sketch the muscular arms leading down to the wrist gauntlets and a clenched fist. Tip: When drawing the fist, keep the knuckles rounded to make the hand look natural rather than boxy.
Step 5: Torso and Abdominals
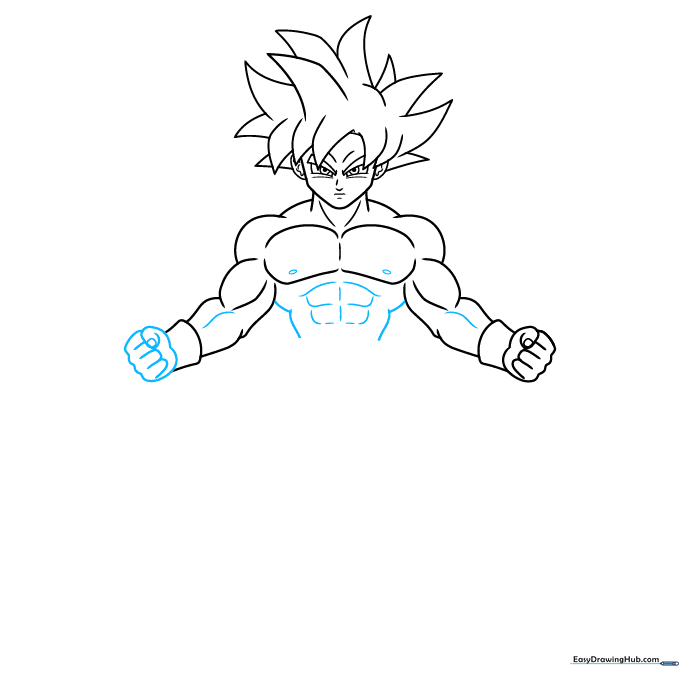
Outline the torso and add the abdominal muscles using curved lines. Add two small ovals on the chest for detail. Tip: Focus on the flow of the lines; they should curve inward to emphasize his athletic build.
Step 6: Pants and Lower Body
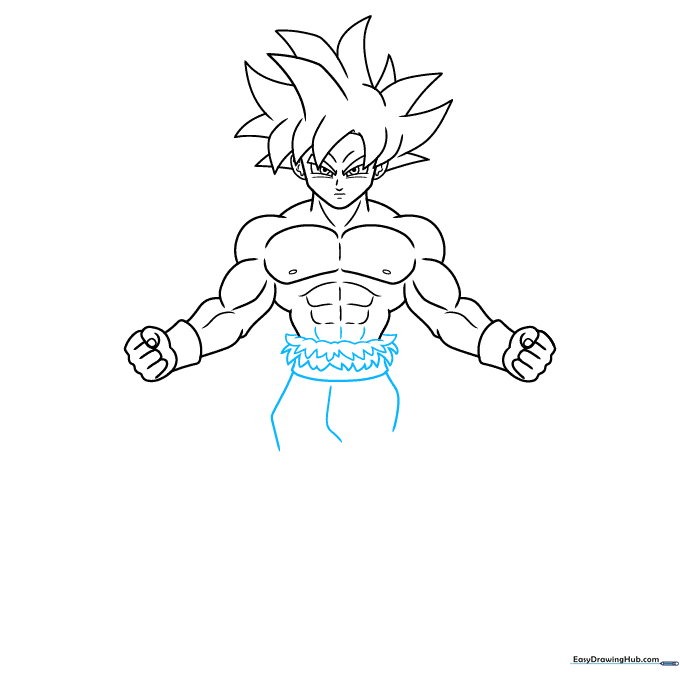
Draw the shredded fabric at the top of his pants using jagged, uneven lines. This adds a sense of battle-worn action. Tip: Don't worry about making the tears perfect—the more irregular they are, the more realistic the 'torn' look will be.
Step 7: Legs and Boots
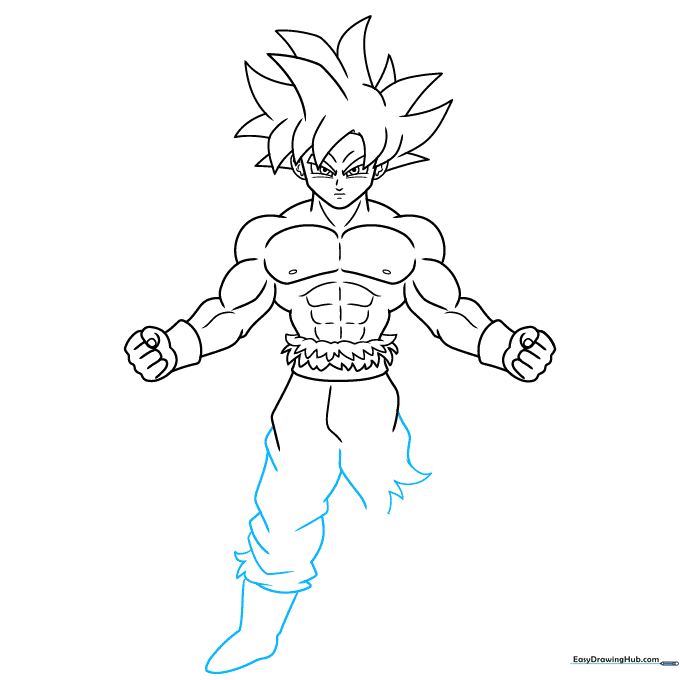
Continue the legs and add the boots. Use overlapping lines to show the folds in the fabric. Tip: Use long, sweeping lines for the legs to maintain his tall, heroic proportions.
Step 8: Finalizing the Boots
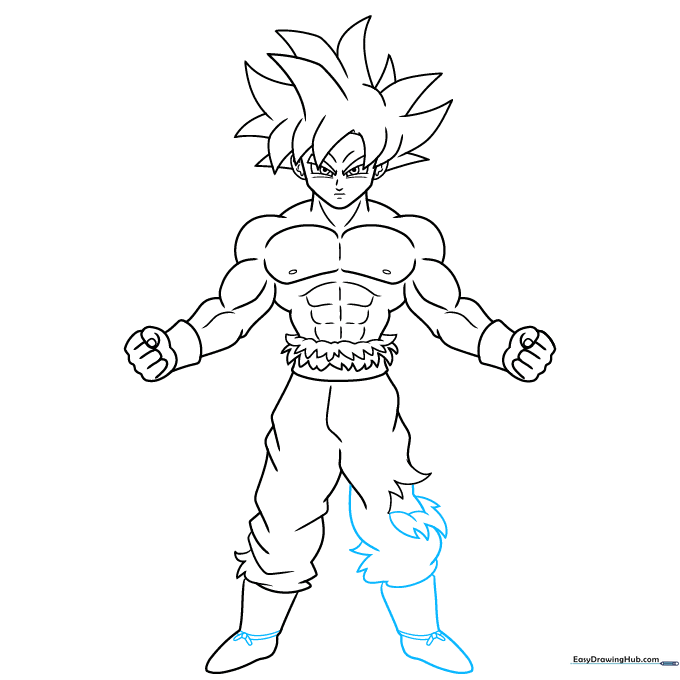
Complete the second boot and add details like the laces and the large rip at the knee. Tip: Adding small parallel lines on the boots creates a 'banded' texture that looks great once colored.
Step 9: Final Touches
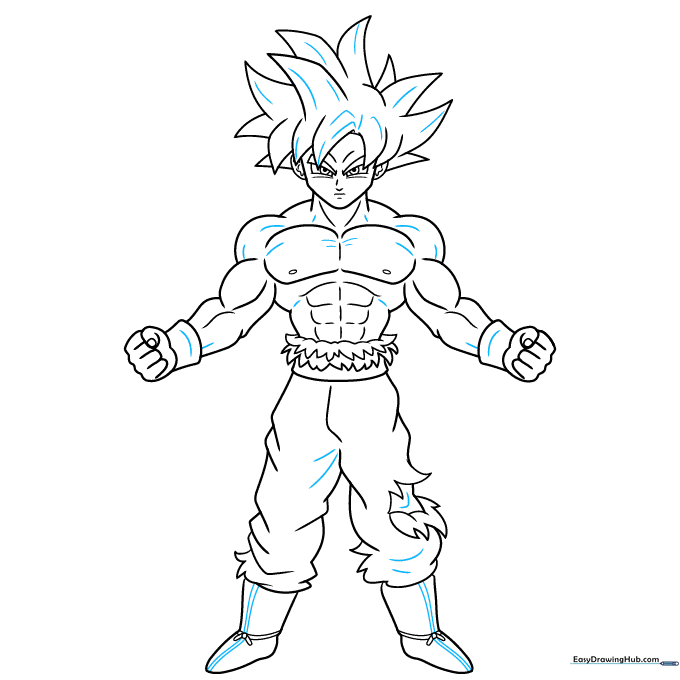
Add final contour lines to the hair, muscles, and clothing to give the drawing depth. Tip: A few well-placed lines on the knees and elbows can make your character look much more three-dimensional.
Step 10: Bring Goku to Life with Color
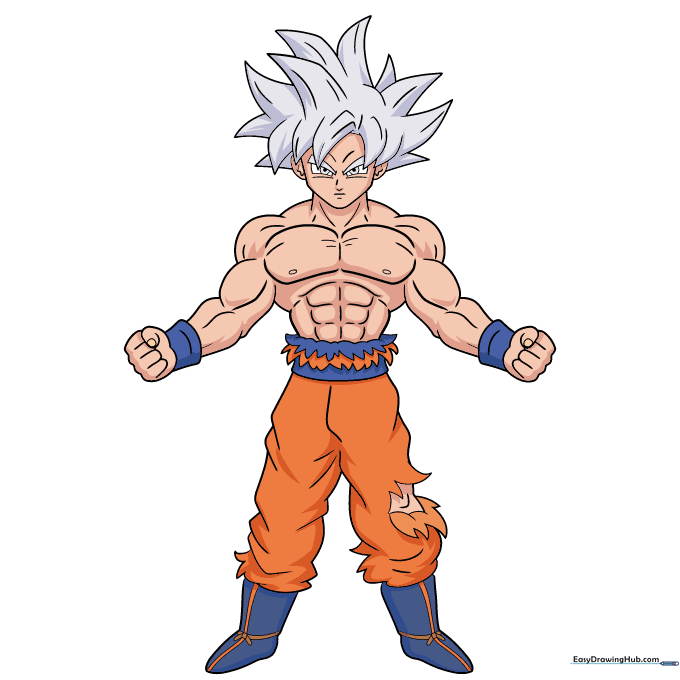
Time to color! Use a light greyish-purple for his hair to signify the Ultra Instinct form, and keep his classic orange and blue gi colors. Tip: Use a slightly darker shade of orange in the folds of the fabric to create a professional shadow effect.
More Tutorials


