How to Draw Freddy Fazbear: Easy Step-by-Step Guide
Ready to bring the iconic Freddy Fazbear to life? This tutorial is perfect for young artists and FNAF fans looking to practice their character design. Grab your pencil, eraser, and paper, and follow along to master his signature look in just a few simple steps.
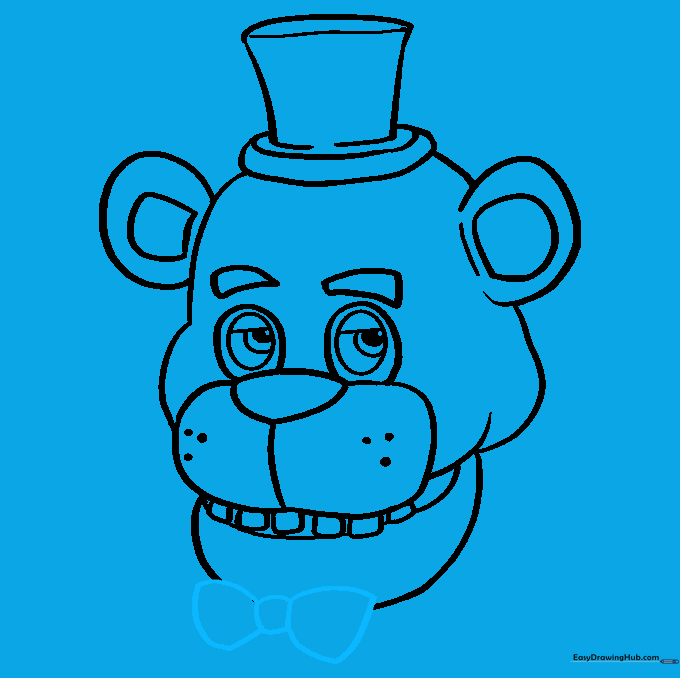
🎯 Final Result

Step-by-Step Instructions
Step 1: Sketching the Face Shape

Start by sketching the general shape of Freddy's face using overlapping curved lines. Tip: Keep your pencil pressure light so you can easily adjust the lumpy, rounded contours as you go.
Step 2: Defining the Upper Jaw
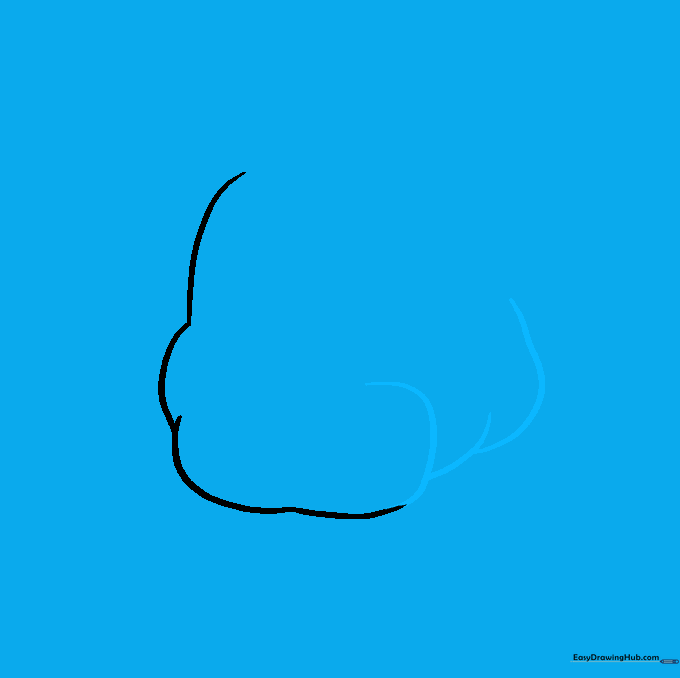
Add more overlapping curved lines to define the muzzle area. Notice how the first line dips deeper into the face to create the upper jaw. Tip: Focus on the curve's depth to give him that classic animatronic look.
Step 3: Sketching the Hat and Ear

Draw a large 'C' shape for the ear and an oval on top for the hat brim. Build the hat's crown with two divergent lines connected by a curve. Tip: Use a ruler if you struggle with the hat's symmetry, but keeping it slightly rounded adds character.
Step 4: Adding the Second Ear

Mirror the first ear on the opposite side using another 'C' shaped line. Add a small, irregular rounded shape inside to represent the inner ear detail. Tip: Ensure both ears are roughly the same height to keep the head balanced.
Step 5: Drawing the Lower Jaw and Teeth
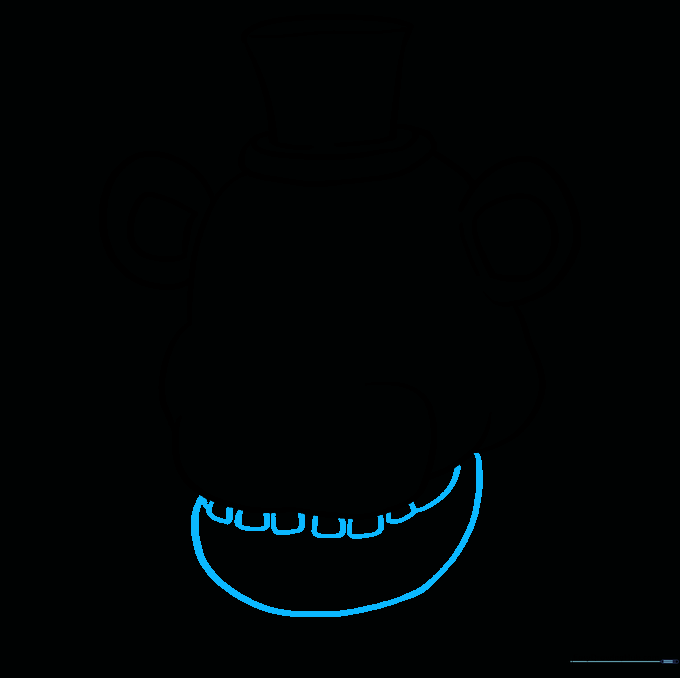
Enclose the lower jaw with a long, curved line. Add several rounded squares along the upper jaw for his blunt teeth. Tip: Space the teeth evenly to make them look like a cohesive set.
Step 6: Eyes and Eyebrows
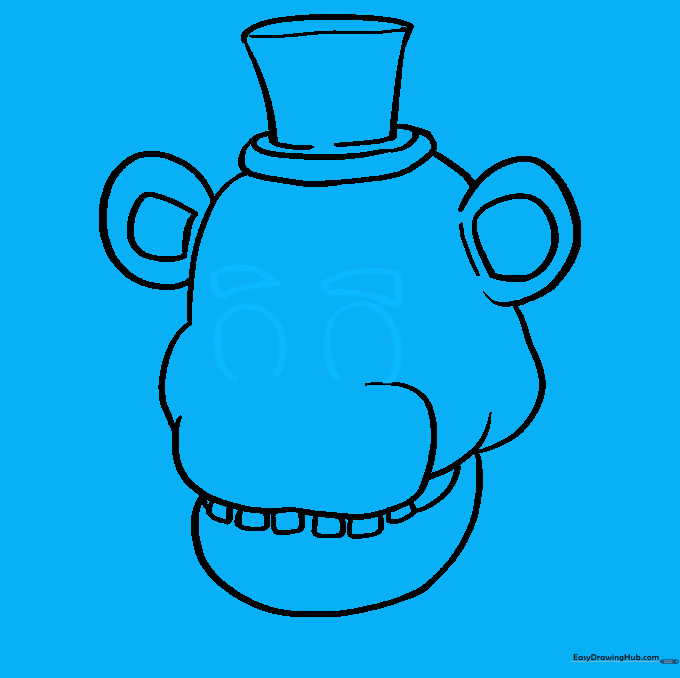
Sketch two partial circles for the eyes. Above them, draw three short curved lines for each eyebrow. Tip: Angling the eyebrows slightly downward will give Freddy his signature stern, animatronic expression.
Step 7: The Nose and Philtrum
Draw an inverted, rounded triangle between the eyes for the nose. Connect it to the jaw with a vertical line for the philtrum. Tip: Keep the nose shape soft and rounded to match his cartoonish style.
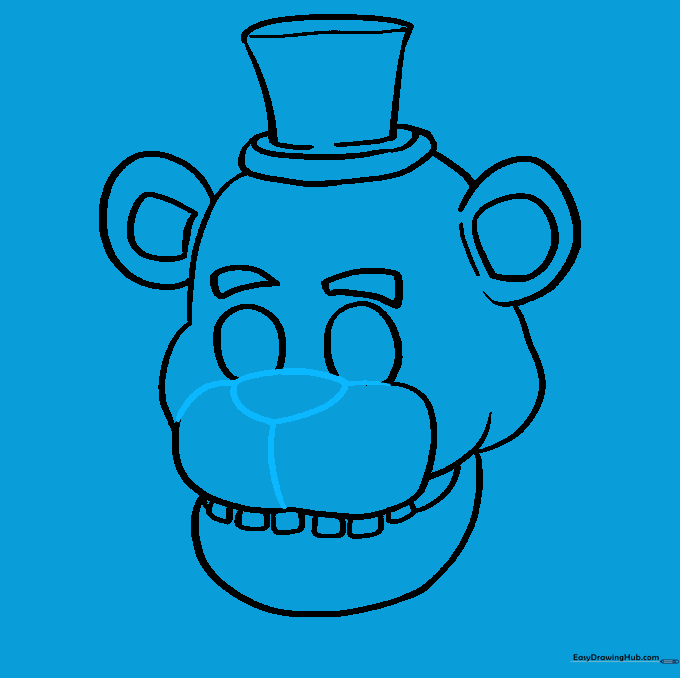
Step 8: Refining Eyes and Mouth

Add eyelids, pupils, and whisker dots. Draw a curved line inside the mouth to show it's open. Tip: When drawing the pupils, shade the center circle to make his eyes look more realistic and intense.
Step 9: Adding the Bowtie
Finish the outline by drawing the bowtie below the chin. Erase any overlapping guide lines. Tip: Use smooth, flowing curves to make the bowtie look like fabric.
Step 10: Adding Color

Bring Freddy to life with color! Use brown for his fur and black for his hat and bowtie. Tip: If you're feeling creative, try the 'Blacklight' version using light blue and fuchsia for a fun, neon twist.
More Tutorials


