How to Draw Frankenstein’s Monster: Easy 10-Step Guide
Bring this classic movie monster to life with our simple, 10-step drawing guide. Designed for artists ages 5 and up, this project requires only a pencil, eraser, and paper to build confidence and character-drawing skills. Follow along to create your own spooky masterpiece!
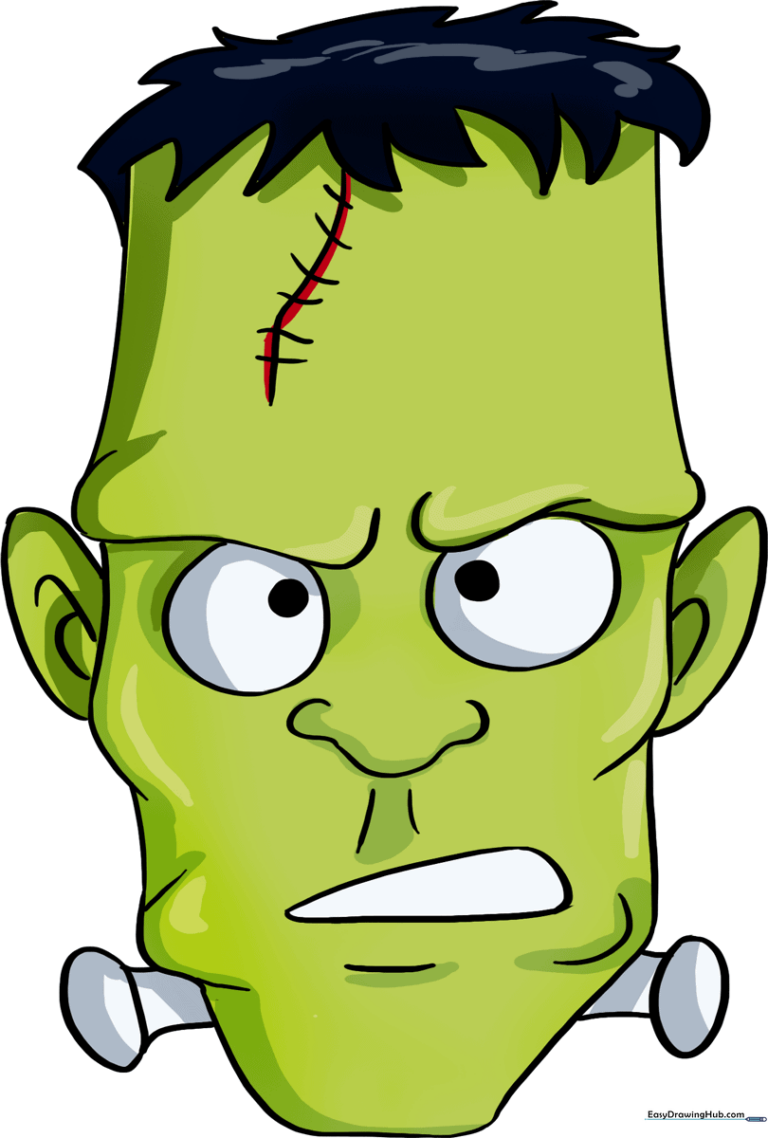
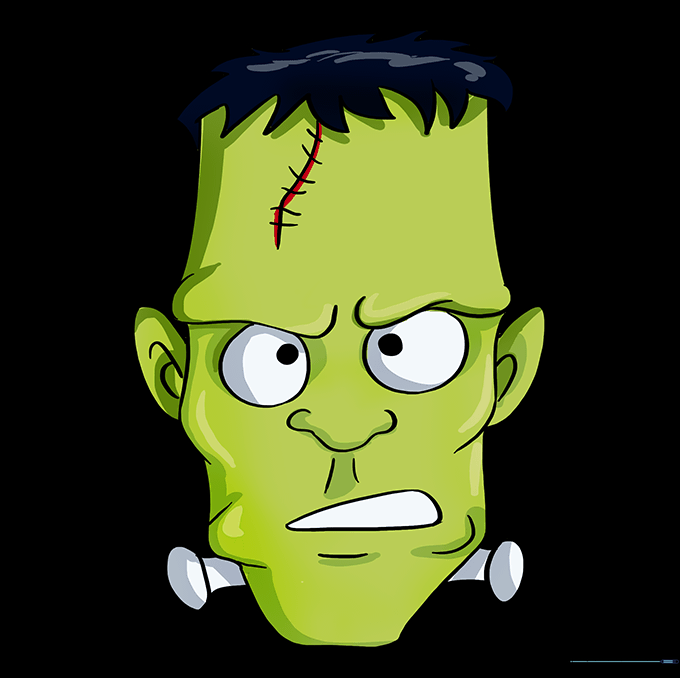
🎯 Final Result
Step-by-Step Instructions
Step 1: Sketching the Forehead

Draw two vertical curved lines to establish the width of the forehead. Teacher's Tip: Keep your pencil pressure light so these lines can be easily adjusted or erased later.
Step 2: Defining the Brows

Add a rounded 'W' shape beneath each forehead line to create the heavy, iconic brows. Tip: Make these lines thick and bold to give the monster his signature grumpy expression.
Step 3: Shaping the Face

Use a series of curved lines to trace the left side of the face, including the cheek and jawline. Tip: Focus on creating small 'bumps' to give the face a rugged, textured look.
Step 4: Completing the Jawline

Mirror the lines on the right side to close the face shape. Tip: Overlap your lines slightly at the cheekbone to create a strong, angular structure.
Step 5: Drawing the Eyes
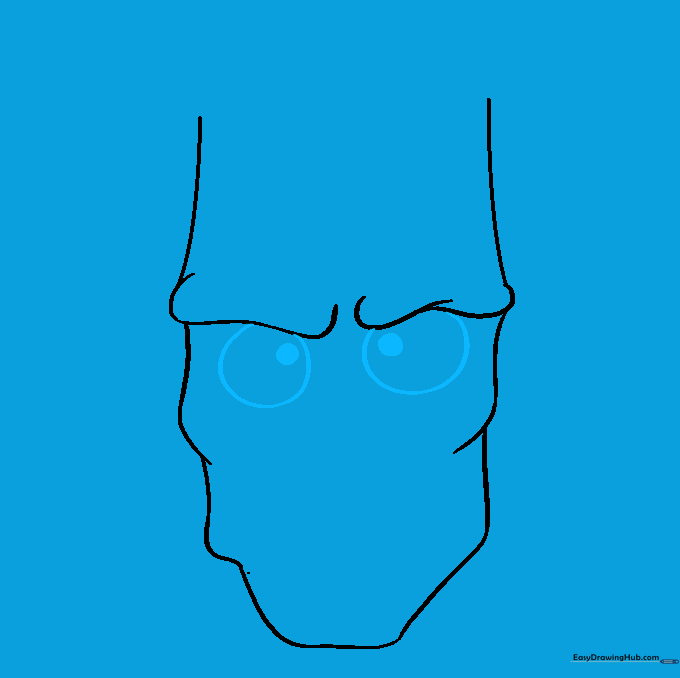
Draw a circle under each brow, then add a smaller, shaded circle inside for the pupil. Tip: Keep the pupils centered to give the monster a focused, intense stare.
Step 6: Sketching the Nose

Use a curved line to create a large, bulbous nose. Tip: Add two small 'C' shapes at the bottom for nostrils to add depth to the face.
Step 7: The Mouth and Chin
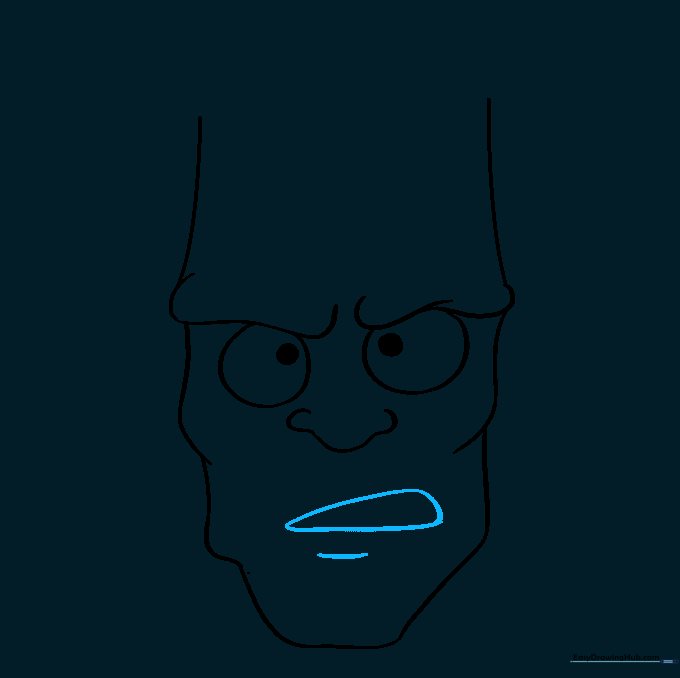
Draw a rounded triangle shape for the mouth and a small curve below for the chin. Tip: Make the mouth slightly lopsided to give your monster a unique personality.
Step 8: Hair and Scars
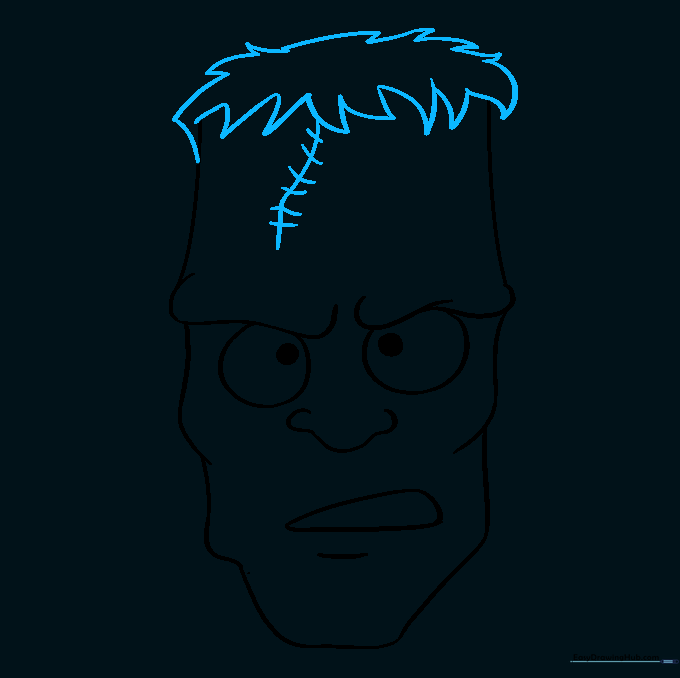
Draw jagged, short lines for the hair, and add a horizontal line across the forehead with small vertical 'stitches.' Tip: Use a darker pencil stroke for the stitches to make them stand out.
Step 9: Ears and Neck Bolts
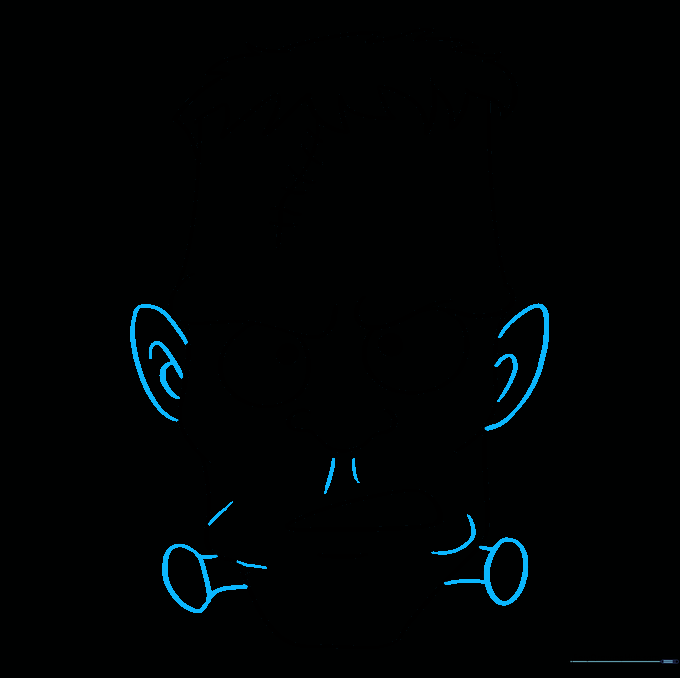
Add 'C' shaped ears and draw circles on the neck to represent the bolts. Tip: Connect the bolts to the chin with two short lines to make them look like they are attached.
Step 10: Adding Color
Bring your drawing to life with color! Use shades of green for the skin and dark tones for the hair. Tip: Use a light green base and add darker green shading near the jawline for a 3D effect.
More Tutorials


