How to Draw Fozzie Bear: Easy Step-by-Step Guide
Wocka Wocka! Ready to bring everyone's favorite comedian bear to life? This tutorial is perfect for young artists ages 6+ looking to practice character proportions. Grab your pencil, eraser, and paper, and let's master Fozzie's iconic hat and fuzzy features together.
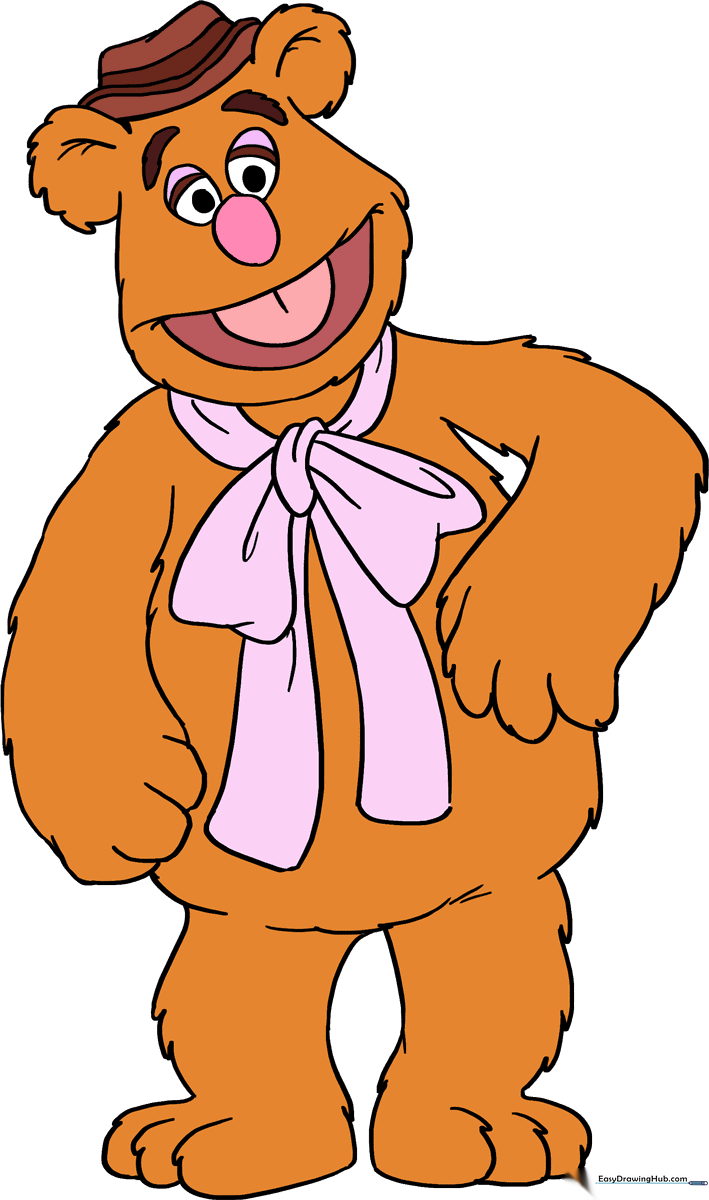
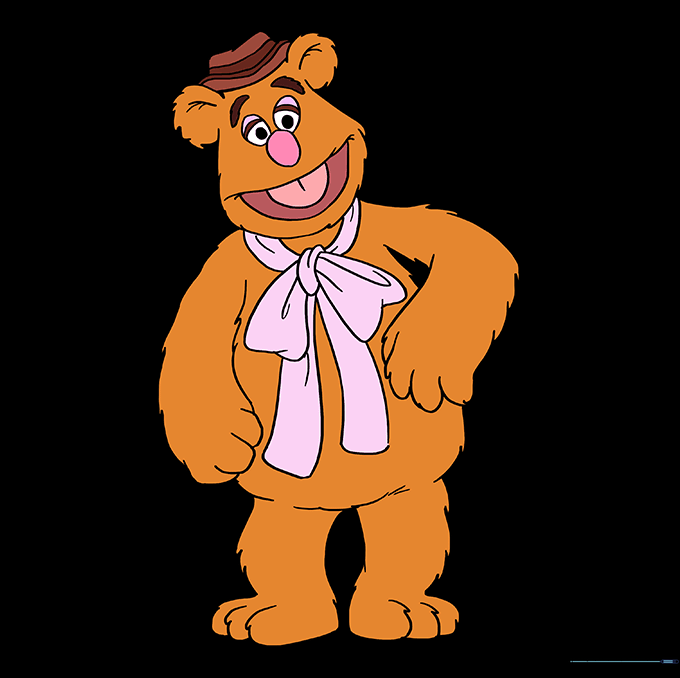
🎯 Final Result
Step-by-Step Instructions
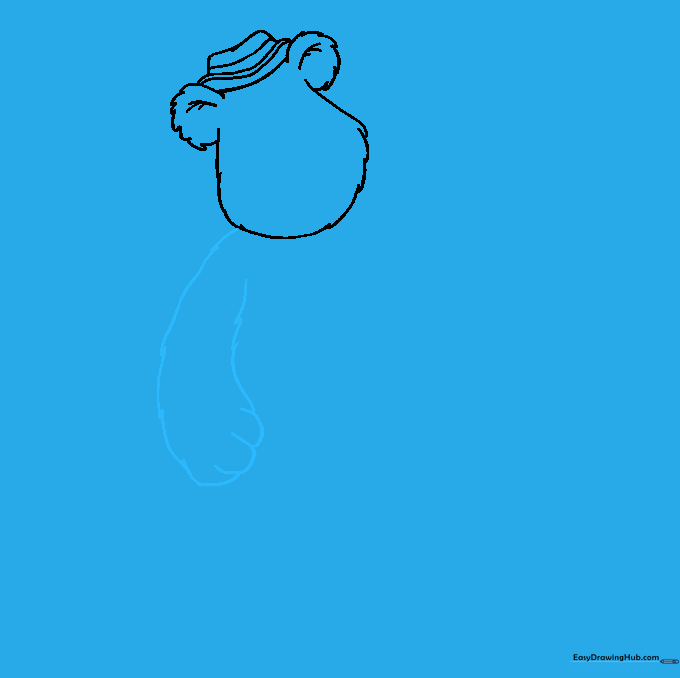
Sketching the Head and Hat

Start with a rounded, slightly irregular shape for the head to give him that classic fuzzy look. Add small circles for ears on the sides. Tip: Keep your pencil lines light—you'll want to erase the overlapping lines inside the hat brim later!
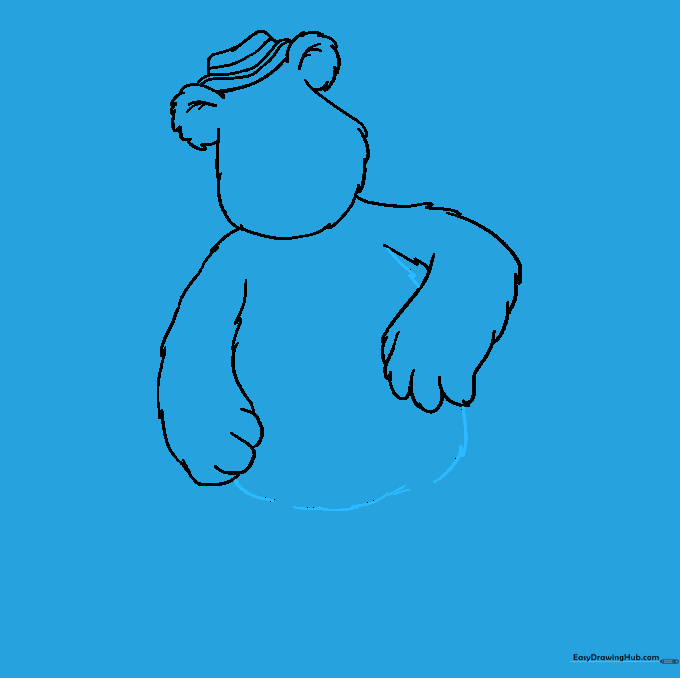
Drawing the First Arm
Draw the arm using short, jagged strokes to represent his fur. Use 'U' shapes for the fingers. Tip: Don't worry about making the fur perfect; Fozzie is a messy, lovable character, so a few uneven lines add personality!
Adding the Second Arm

Mirror the first arm on the other side of the body. Keep the strokes consistent with the first arm. Tip: Try to keep the arms at a similar length so your Fozzie looks balanced.
Forming the Belly
Connect the arms with a large, rounded curve for the belly. Tip: Use overlapping 'C' shapes to create a soft, furry texture along the edges of his tummy.
Drawing the First Leg
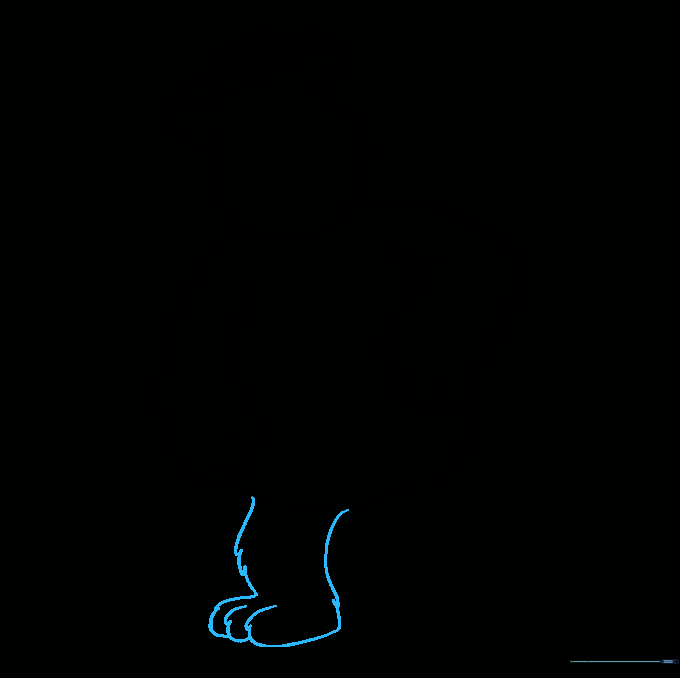
Draw the first leg extending downward. Use 'U' shapes for the toes. Tip: Make the toes slightly larger than the fingers to give him a sturdy, bear-like appearance.
Drawing the Second Leg
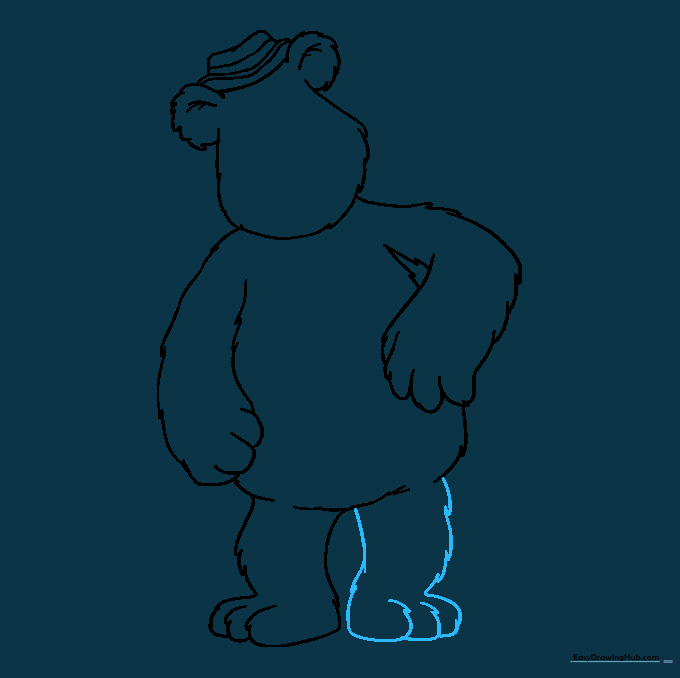
Repeat the process for the second leg. Ensure the furry texture matches the first leg. Tip: If the legs look too stiff, add a slight curve to the lines to show movement.
Adding the Bow Tie
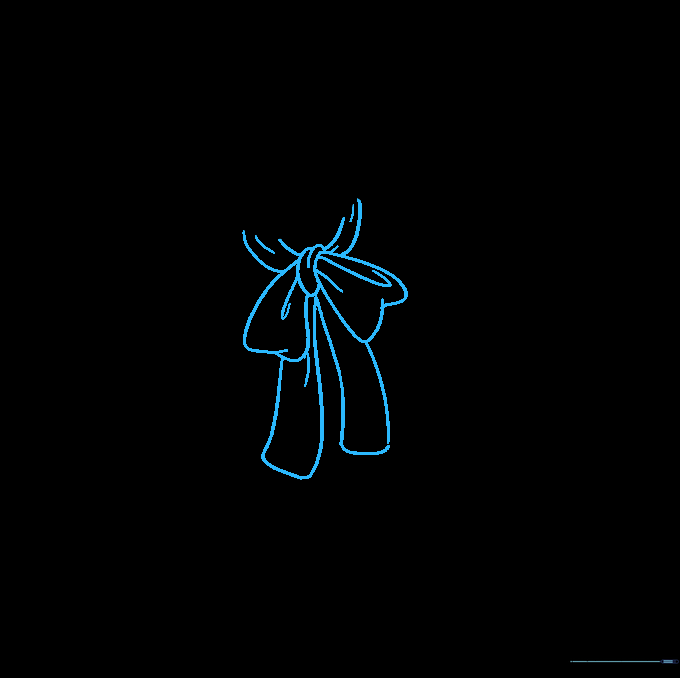
Draw his signature polka-dot-ready bow tie right under the chin. Use a central knot and two 'W' shapes for the lobes. Tip: Adding a few extra curved lines inside the bow creates the illusion of fabric folds.
Detailing the Face

Add the nose, eyes, and eyebrows. Use ovals for the eyes and a larger oval for the nose. Tip: Draw the eyebrows slightly angled to give Fozzie his classic worried-but-happy expression.
Drawing the Mouth

Finish the face with a big, wide smile. Use a curved line for the mouth and a 'U' shape for the tongue. Tip: A small line down the center of the tongue adds depth to your drawing.
Adding Color
Time to bring him to life! Use warm browns for his fur and a bright color for his hat and tie. Tip: Use a darker brown for the shadows under his arms to make the drawing pop.
More Tutorials


