How to Draw Foxy from FNAF: Easy Step-by-Step Guide
Ready to bring Foxy to life? This guide is perfect for young fans and budding artists looking to master their favorite animatronic character. Grab your pencil, a piece of paper, and an eraser to follow along with these simple, confidence-building steps.
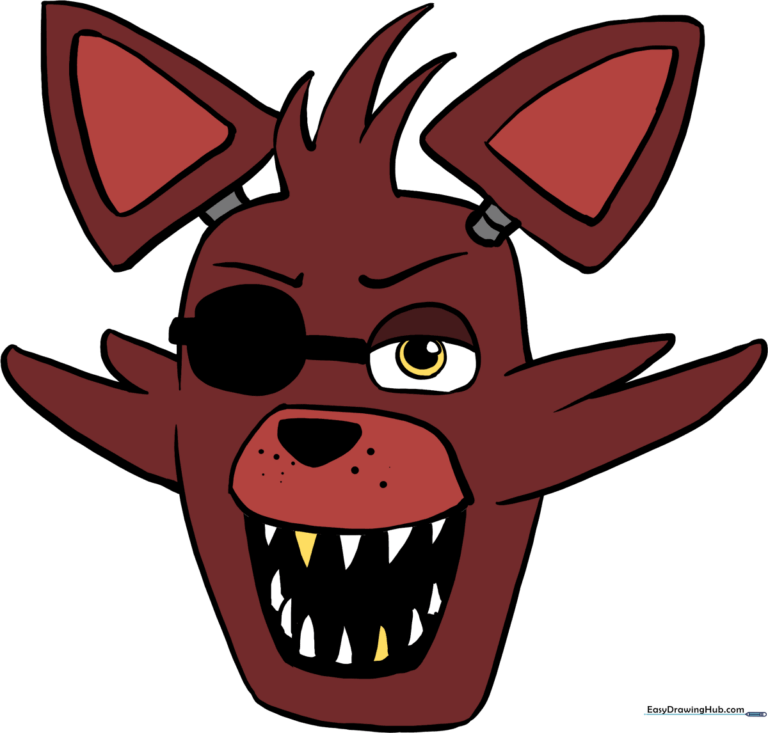
🎯 Final Result
Step-by-Step Instructions
Step 1: Sketching the Hair Tuft

Start by drawing three sets of connected, curved lines that meet in sharp points at the top and bottom. Teacher's Tip: Keep your pencil pressure light here so you can easily adjust the shape if needed later.
Step 2: Outlining the Face

Outline one side of Foxy's face using two curved lines. Remember, these lines don't need to meet in the middle yet. Tip: Think of this as creating a gentle 'C' shape for the cheek.
Step 3: Defining the Chin

Use a long, sweeping curved line to connect the chin and define the opposite side of the face. Tip: Try to keep this line fluid and continuous to give Foxy a smooth, cartoon-like appearance.
Step 4: Adding Cheek Fur
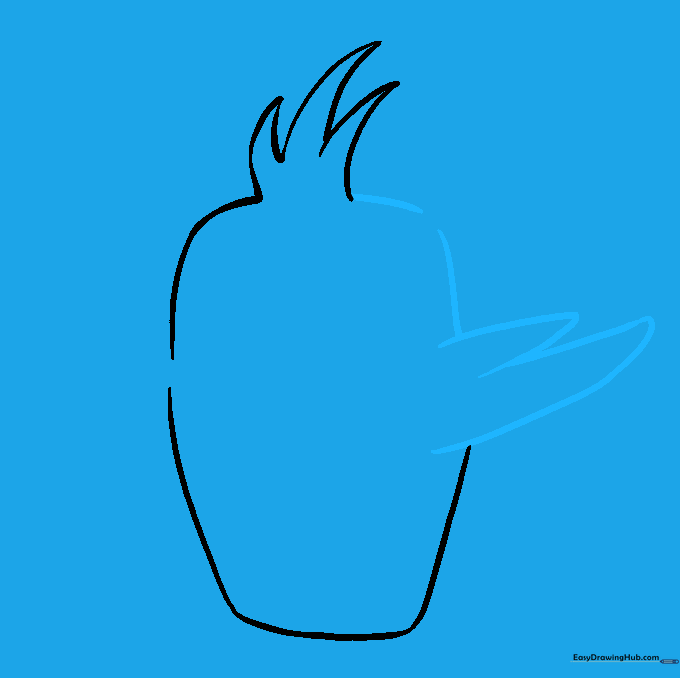
Draw the tufts of fur extending from the cheek using curved lines of varying lengths that meet at gentle points. Sketch the remaining head portion with two more curved lines. Tip: Varying the size of the fur tufts makes the drawing look more organic.
Step 5: Balancing the Fur

Repeat the process on the opposite side to add the matching tufts of fur. Tip: Check your symmetry—if one side looks too different, just use your eraser to soften the lines.
Step 6: Drawing the Ears
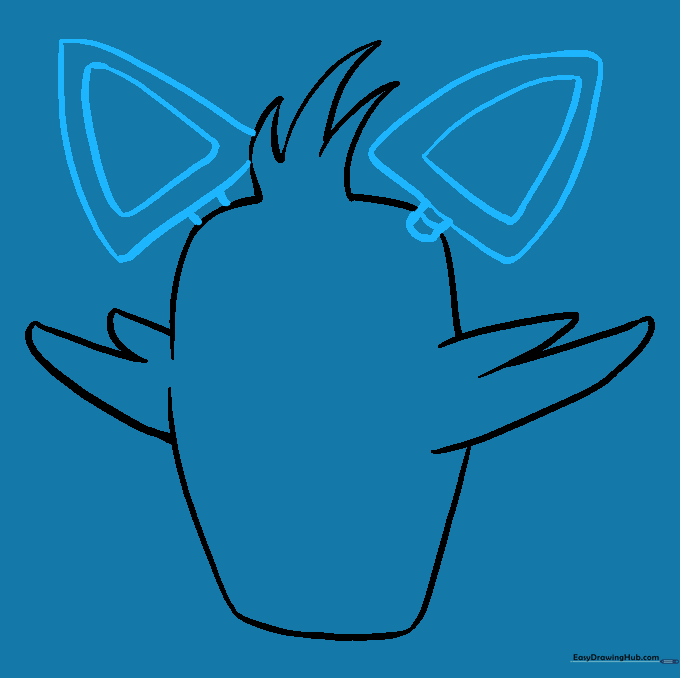
Draw two rounded triangles above the head for the ears, then add a smaller triangle inside each for detail. Connect them to the head with short, sturdy lines. Tip: Keep the ears slightly angled to give Foxy a curious expression.
Step 7: Eyes and Eye Patch
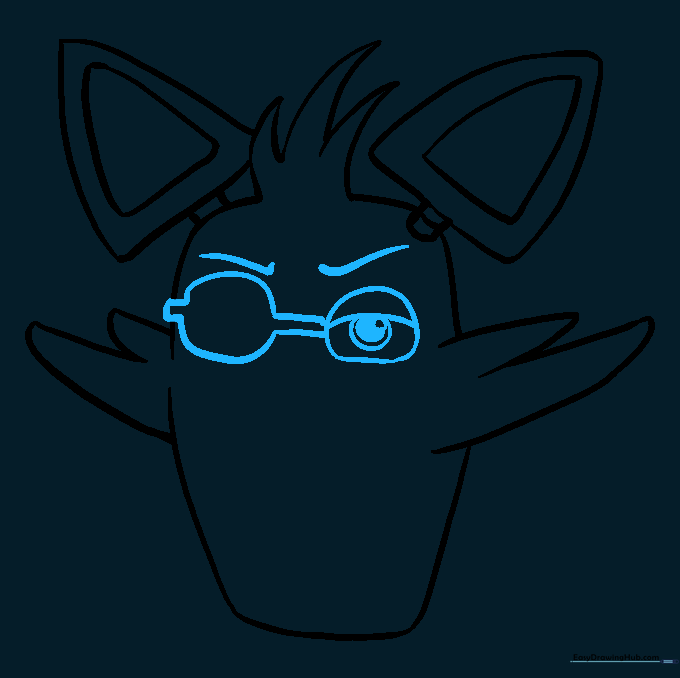
Enclose an oval for the eye, adding a curved line for the lid. Draw three nested circles for the pupil, shading the center. Create the eye patch with two half-circles and add checkmark shapes for the brows. Tip: The eye patch is a key feature—make sure it looks bold!
Step 8: The Snout and Whiskers
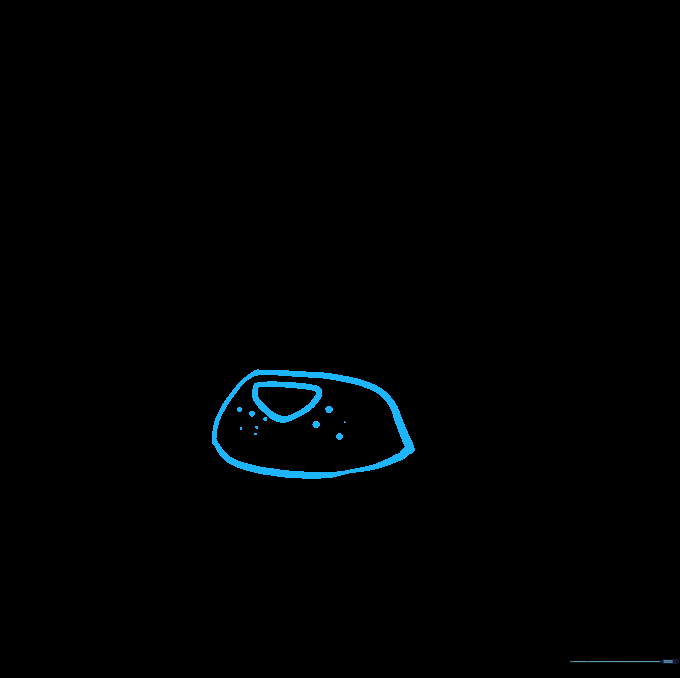
Enclose an irregular shape for the snout, placing a small rounded triangle inside for the nose. Add a few dots for the whisker spots. Tip: Keep the snout centered to maintain the character's proportions.
Step 9: Adding the Teeth
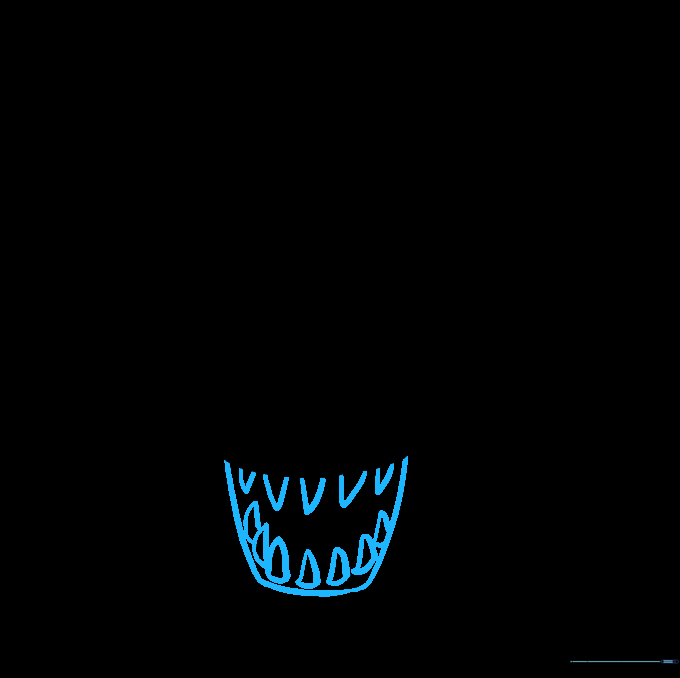
Draw a long, curved line for the bottom of the mouth and fill it with sharp, triangular teeth. Tip: Don't worry if the teeth aren't perfectly uniform; it adds to Foxy's rugged, animatronic look!
Step 10: Bring Foxy to Life with Color

Time to color! Use a reddish-brown for the fur, black for the eye patch, and a touch of gold for the teeth. Tip: Use light, circular motions with your colored pencils for a smooth, even finish.
More Tutorials


