How to Draw Father’s Day Balloons: Easy Step-by-Step Guide
Celebrate Dad with a handmade touch! This tutorial is perfect for ages 5 and up, requiring only a pencil, eraser, and paper. Follow these simple steps to build a festive balloon arrangement that makes for a thoughtful, personalized Father's Day gift.
🎯 Final Result

Step-by-Step Instructions
Step 1: Sketching the First Balloon

Draw a semi-circle on the left side of your page. Add a diagonal vertical line with a bump on top and a smaller bump and rounded square at the bottom. Teacher's Tip: Keep your pencil lines light so you can easily adjust the shape if it looks a bit wobbly.
Step 2: Adding Lettering and Shapes
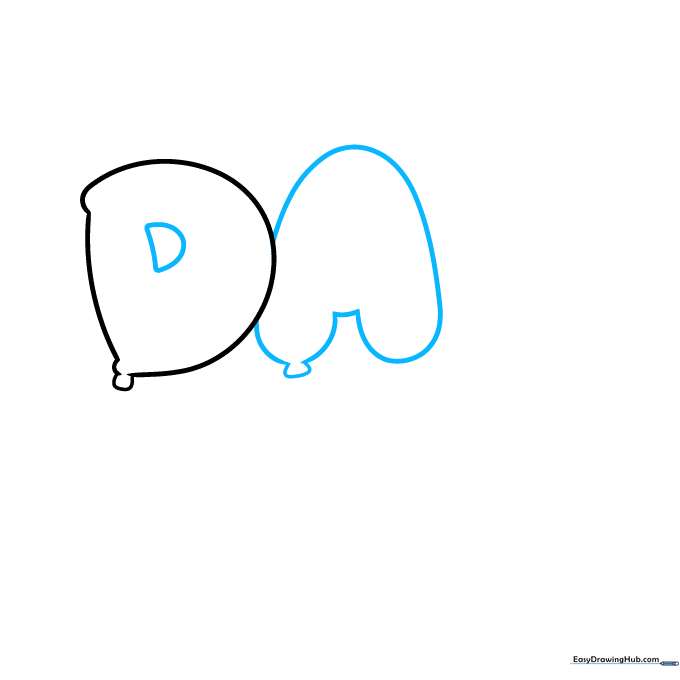
Draw the letter 'D' inside the first shape. Start your second balloon by drawing a hill shape, two semi-ovals beneath it, and a small triangle at the base. Teacher's Tip: Use the 'D' as a guide for the center of the balloon to keep your composition balanced.
Step 3: Refining the Balloon Details
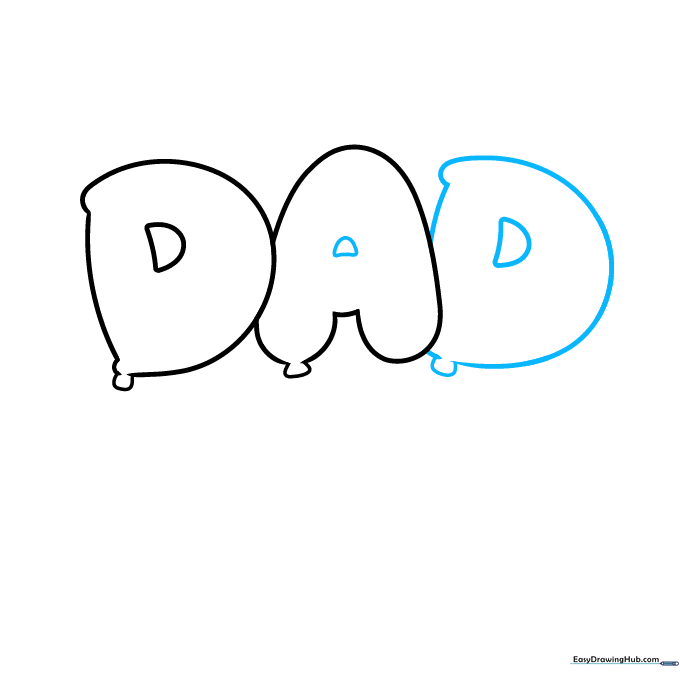
Draw a tiny semi-oval inside your second balloon. Add another large 'D' with a smaller 'D' inside it, a bump on top, and a small rectangle at the bottom. Teacher's Tip: Focus on keeping the 'D' shapes uniform to make the text look professional.
Step 4: Drawing the Mustache Balloon
Outline the mustache-shaped balloon using two hills on top and two wide, sweeping curves beneath. Add a small rectangle for the knot. Teacher's Tip: Mustache shapes are all about smooth curves—don't rush the line work!
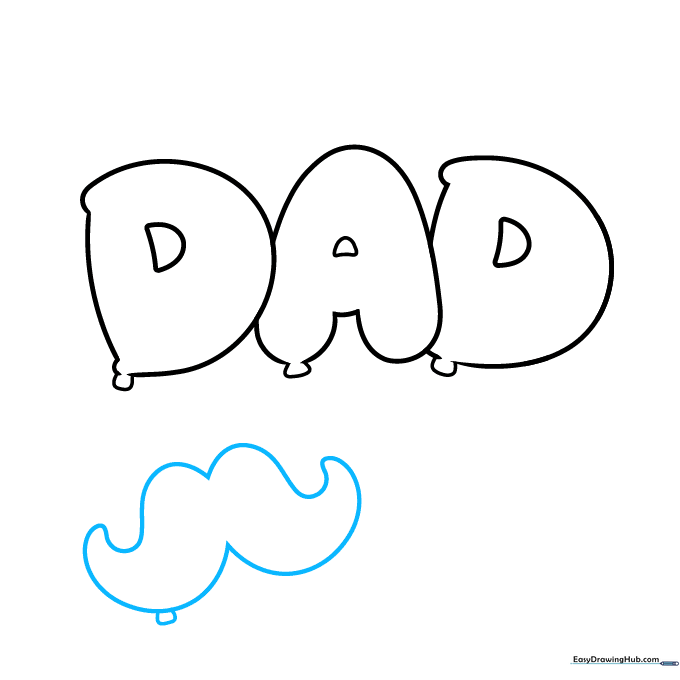
Step 5: Creating the Trophy Balloon
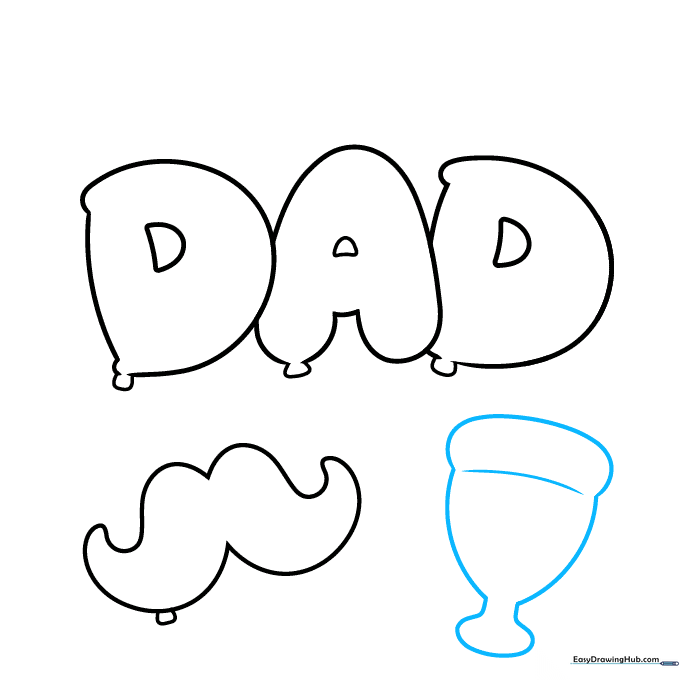
Sketch a funnel shape with two curves pointing outward, topped with a cylinder like a hot dog bun. Draw an oval and two vertical lines beneath this shape. Teacher's Tip: This trophy balloon is the centerpiece, so make sure it stands tall in the middle of your page.
Step 6: Adding Decorative Hearts
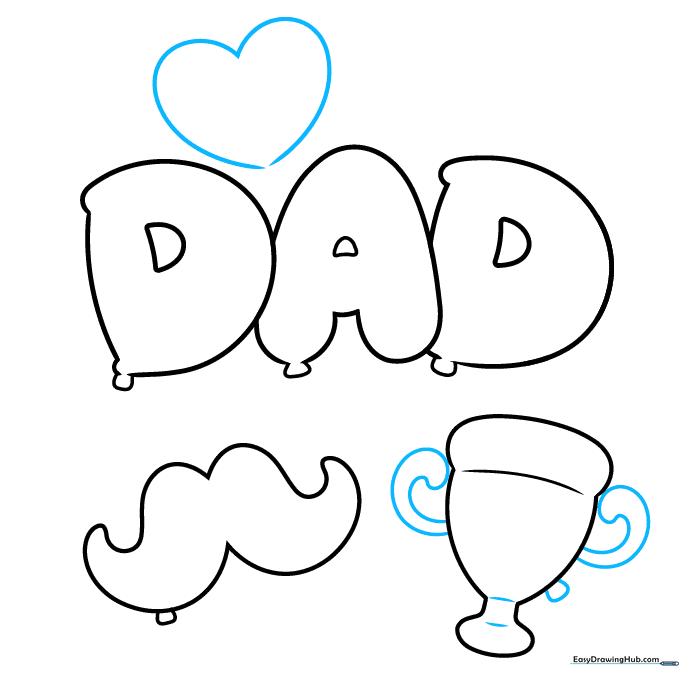
Add two dashes inside the balloon and a square to the right. Use sweeping curves for the handles, then sketch a heart above your balloons. Teacher's Tip: Hearts are easier to draw if you start with a 'V' shape and add two rounded bumps on top.
Step 7: Adding Star Balloons

Sketch a square beneath the heart, and draw another heart that overlaps the last letter in 'DAD.' Next, draw a simple star shape and round off the corners. Teacher's Tip: Rounding the corners makes the star look more like a real, inflated balloon.
Step 8: Expanding the Balloon Bunch
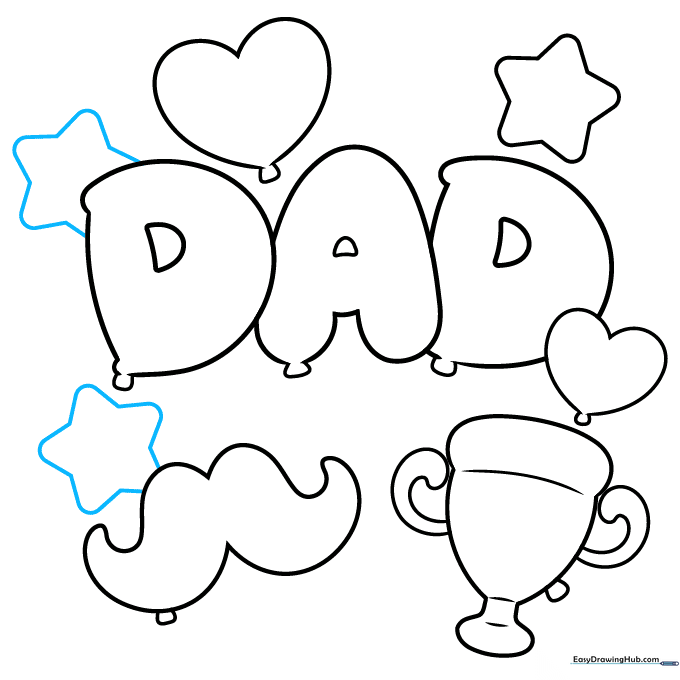
Repeat the previous star-drawing process to add two more star balloons to your bunch. Teacher's Tip: Vary the sizes of the stars slightly to create a more dynamic and natural-looking cluster.
Step 9: Finalizing the Outline
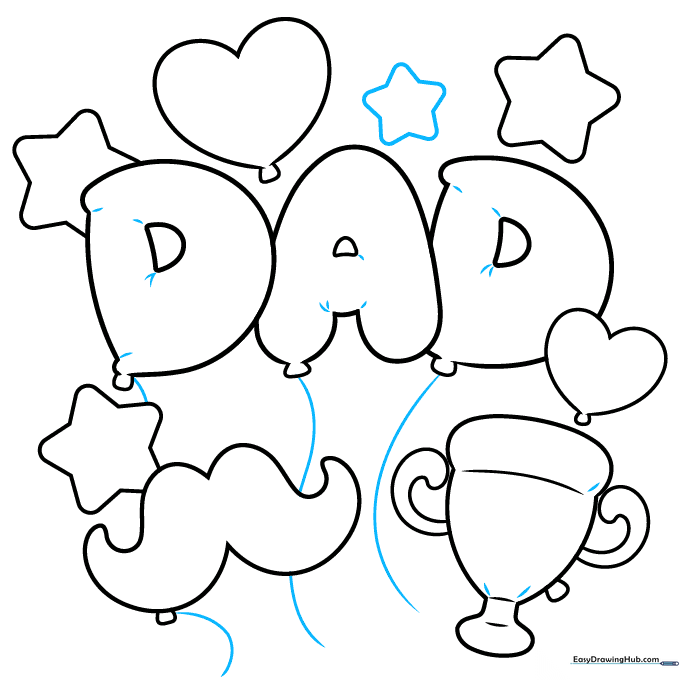
Outline another star, and draw strings attached to the 'DAD' balloons. Add dashes inside the 'DAD' and trophy balloons for texture. Finally, go over your sketch with a black ink pen. Teacher's Tip: Use a steady hand for the strings—they don't have to be perfectly straight, as balloons sway!
Step 10: Adding Color

Bring your balloons to life with color! We recommend blue for the 'DAD' balloons, yellow for the trophy and stars, and red for the hearts. Teacher's Tip: Use light pressure with your colored pencils to create a soft, vibrant look, or press harder for bold, saturated colors.
More Tutorials


