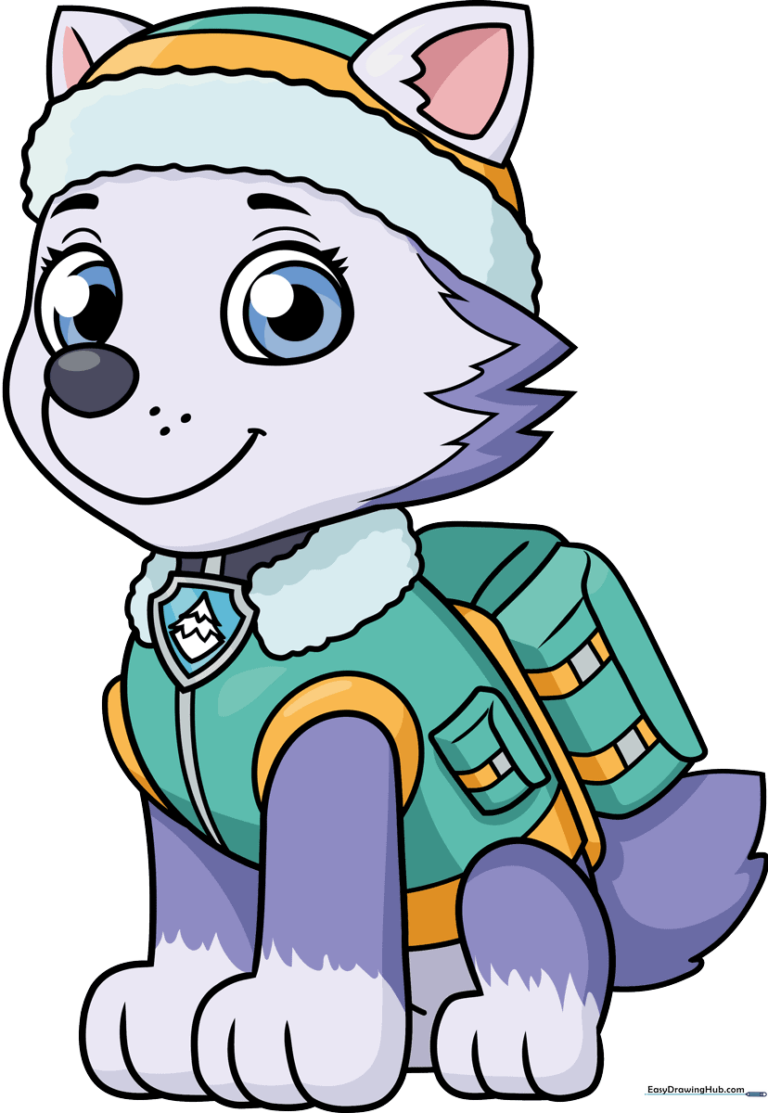
How to Draw Everest from PAW Patrol: Easy Step-by-Step Guide
Ready to bring the snowy pup from Adventure Bay to life? This tutorial is perfect for young artists ages 5 and up who want to practice their character sketching. Grab a pencil, an eraser, and some paper to start building Everest’s signature look through simple geometric shapes.
🎯 Final Result
Step-by-Step Instructions
Step 1: Sketching the Facial Foundation
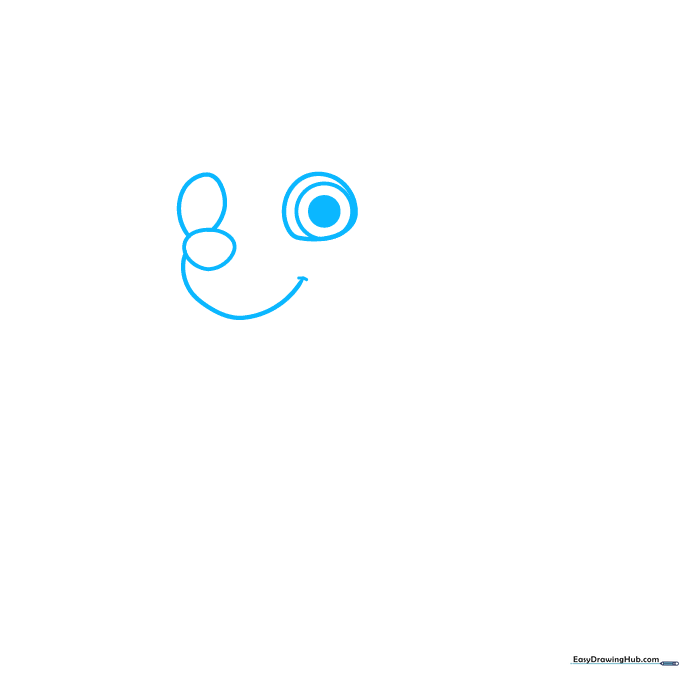
Start by drawing three light circles. One will be the nose, and the other two will frame the eyes. Tip: Keep your pencil pressure very light here so you can easily erase the construction lines later. For the eye, draw two smaller circles inside and shade the center one to create that bright, cartoonish look.
Step 2: Defining the Eyes and Brows
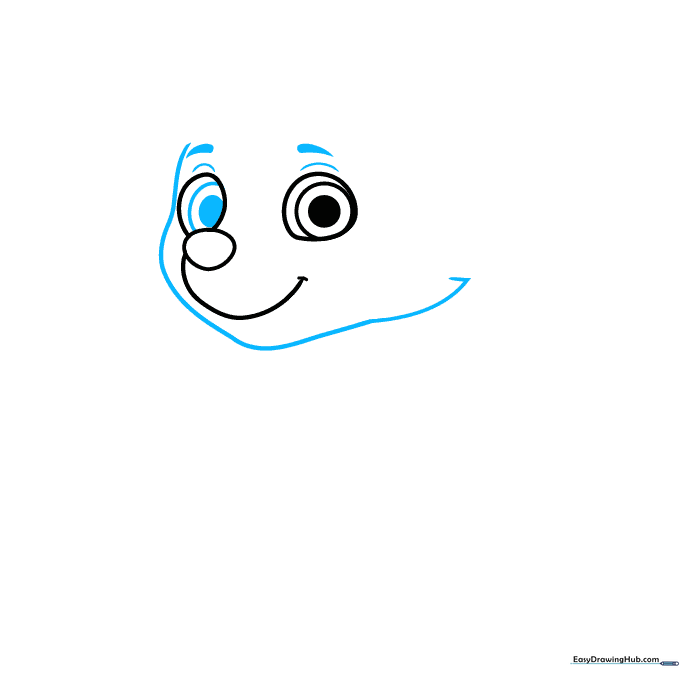
Add the second eye using the same circular method. Use soft, curved lines to outline the face shape and the upper eyelids. Add two teardrop shapes above the eyes for her expressive eyebrows. Tip: If the eyebrows look too stiff, try rounding the edges slightly to make her look friendly.
Step 3: Adding the Winter Hat
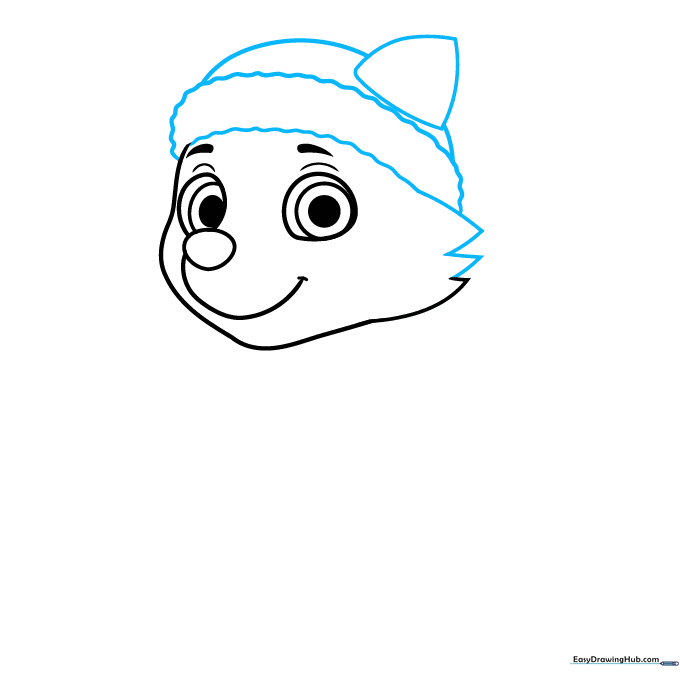
Draw a wavy line across the forehead to create the brim of her winter hat. Add a triangular ear shape and connect the top of the hat with a smooth arc. Tip: Use a zig-zag line where the hat meets the cheek to simulate the texture of her fluffy fur.
Step 4: Ears and Collar Detail
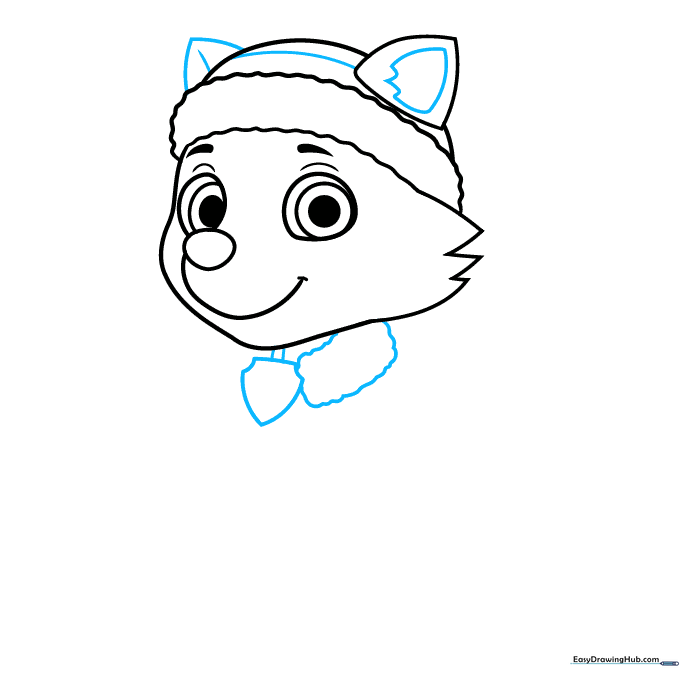
Draw the second triangular ear and add internal details with curved lines. Below the chin, sketch the shield-shaped pup tag and connect it to the collar. Tip: Ensure the collar is drawn as a rectangular band to give it a sturdy, uniform look.
Step 5: Starting the Vest

Use curved lines to draw the vest, sleeve, and the first front leg. Tip: Keep the lines for the leg slightly rounded to show the natural shape of a puppy's limb rather than drawing straight, stiff lines.
Step 6: Adding the Remaining Legs
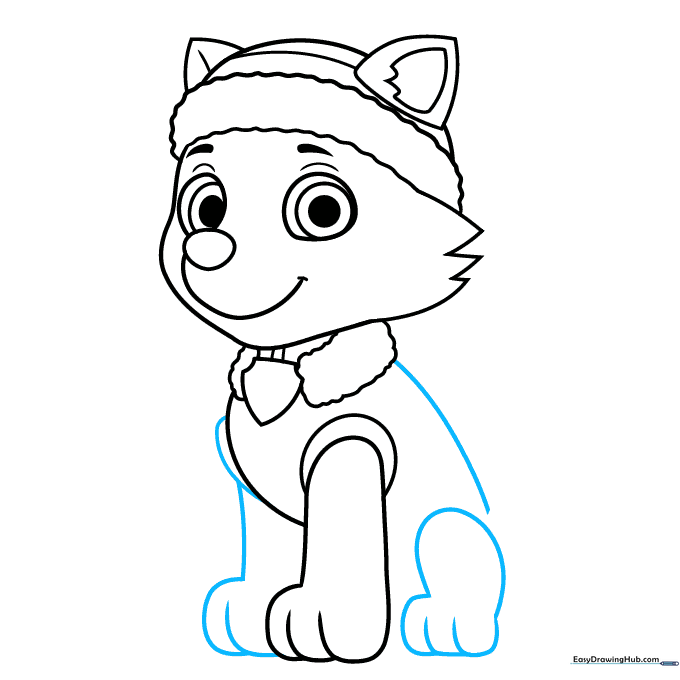
Draw the other two legs using overlapping lines to create depth. Continue the lines of the vest to show the back of the uniform. Tip: Overlapping lines are a great way to show which parts of the body are in front of others.
Step 7: The Pup Pack
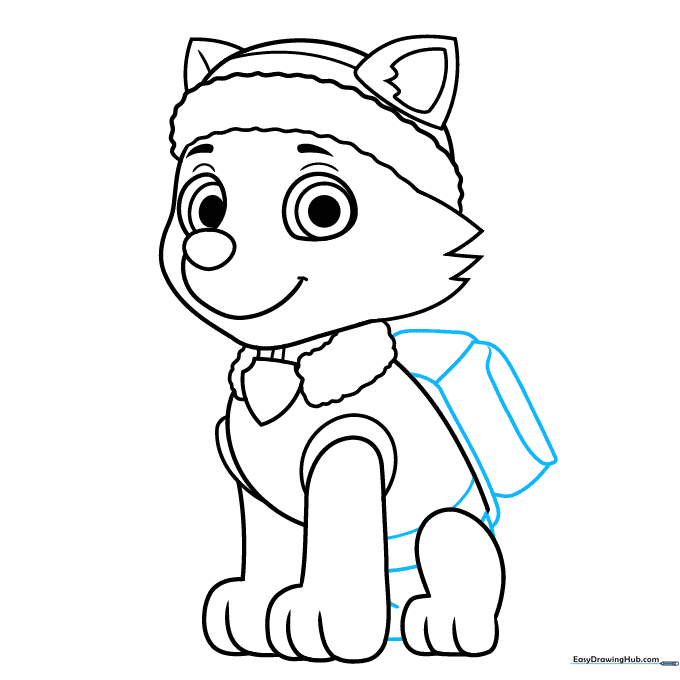
Finish the vest and back, then draw the Pup Pack on her back using a series of curved rectangles. Tip: Think of the Pup Pack as a small backpack; keep the shapes boxy but rounded at the corners to match the cartoon style.
Step 8: Tail and Vest Details
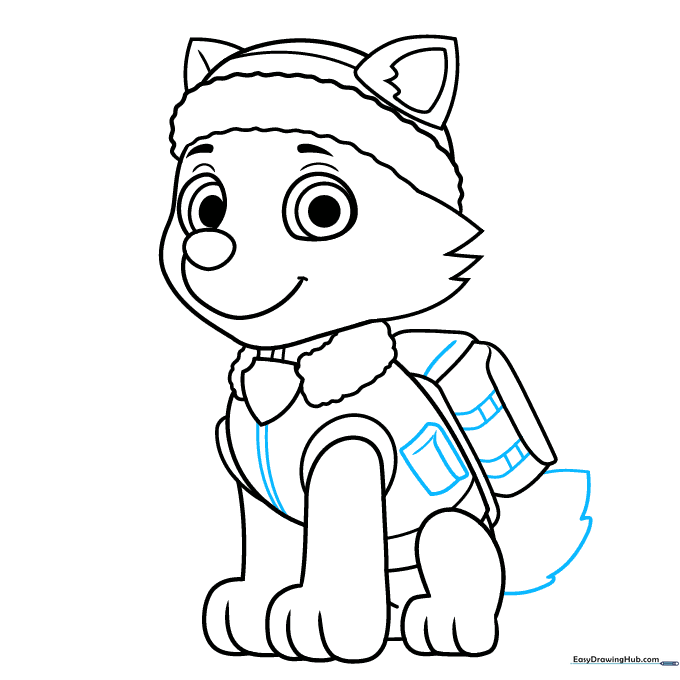
Add a pocket to the vest and draw the bushy tail using jagged, connected lines. Tip: To make the tail look fluffy, don't make the jagged points too uniform—varying the size of the points makes it look more natural.
Step 9: Final Touches
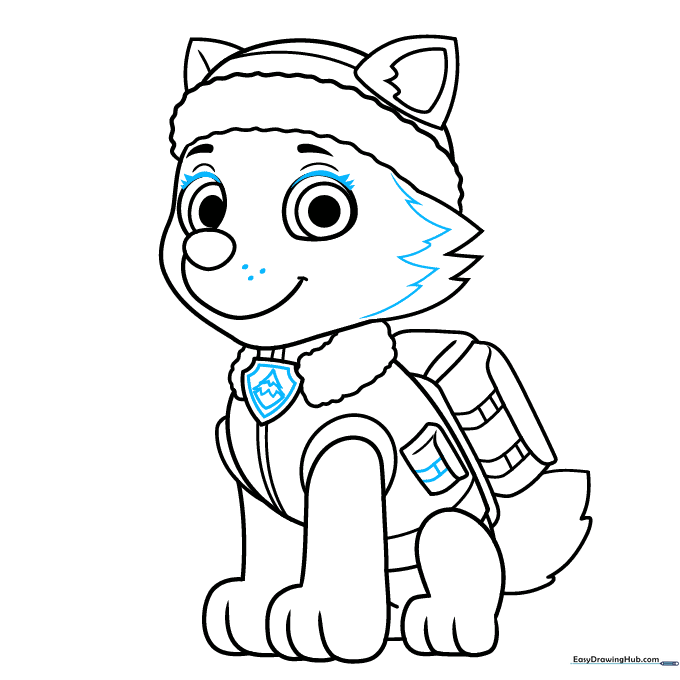
Draw the spruce tree icon inside the pup tag. Add small dots to the snout for whiskers and darken the eyelashes. Tip: Use a slightly thicker line for the top of the eyes to make them pop.
Step 10: Bring Everest to Life with Color
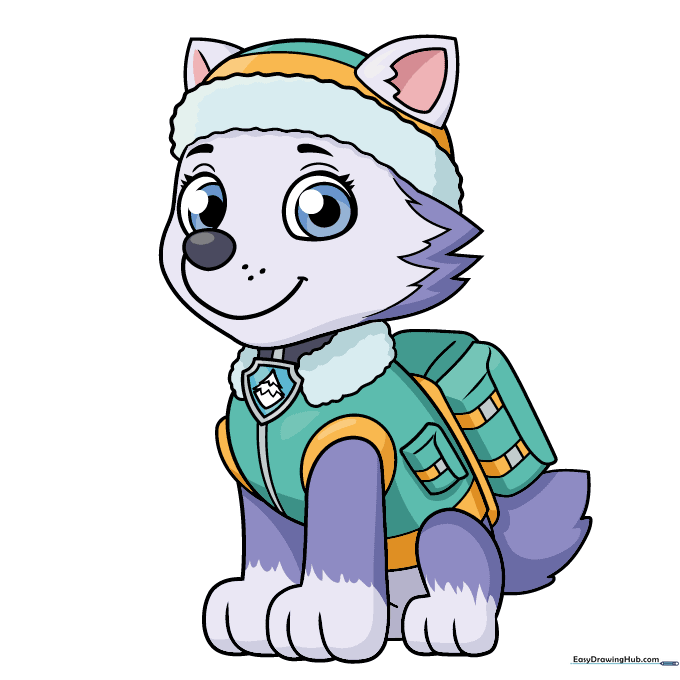
Now for the fun part! Use white and purple for her fur, and vibrant bluish-green and orange for her vest. Tip: Use light pressure with your colored pencils to layer colors, creating a smooth finish on her uniform.
More Tutorials


