How to Draw a Dragon Head: Easy 10-Step Guide
Ready to bring a mythical creature to life? This tutorial is perfect for young artists ages 7+ looking to practice character design. You only need a pencil, an eraser, and a piece of paper to start building your dragon's anatomy from the snout up.
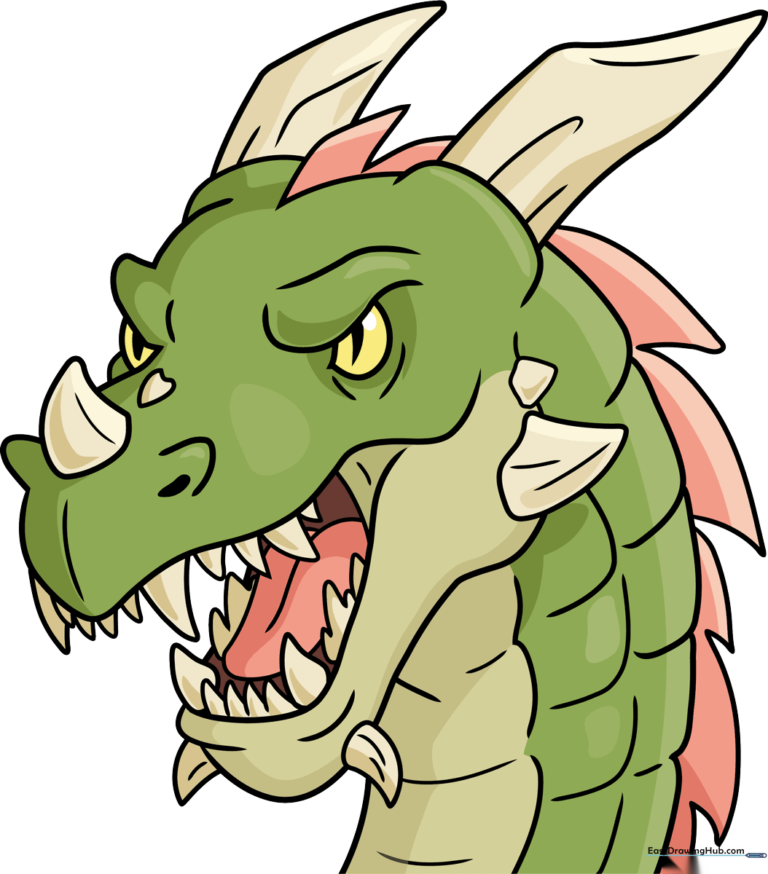
🎯 Final Result
Step-by-Step Instructions
Step 1: Sketching the Snout and Eye

Start by sketching a rounded triangle for the nose horn and the almond shape of the eye. Teacher's Tip: Keep your pencil pressure light here so you can easily adjust the proportions before committing to darker lines.
Step 2: Defining the Jawline
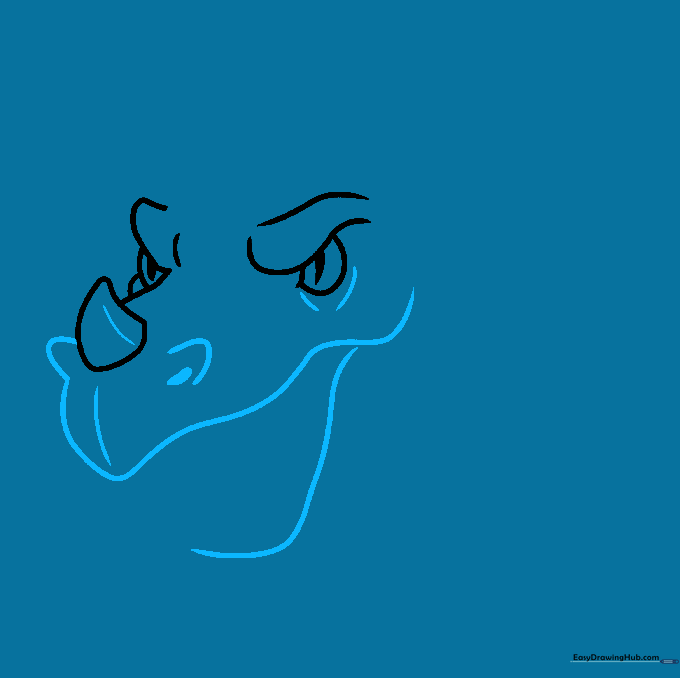
Use long, sweeping curved lines to connect the snout to the jaw. Add a small, shaded oval for the nostril. Tip: Think of the jaw as a wide 'U' shape to give your dragon a powerful, snapping look.
Step 3: Adding Teeth and Mouth Detail
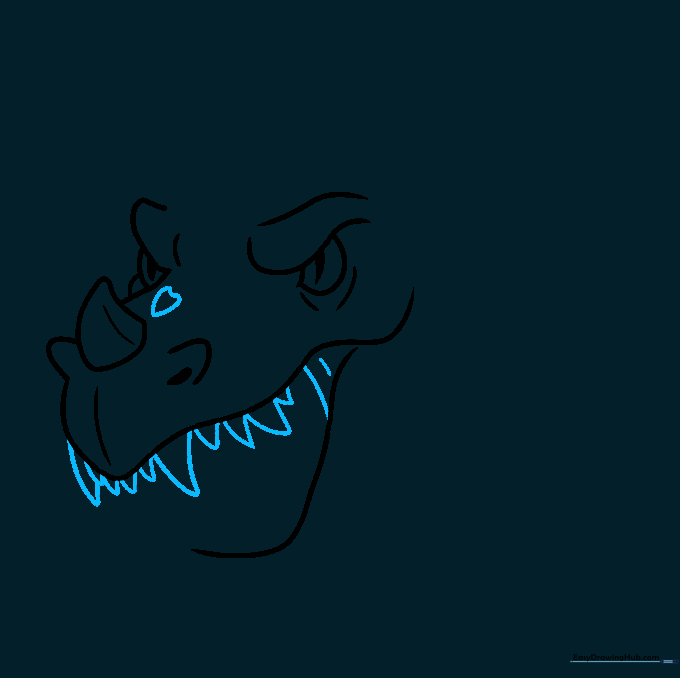
Sketch a small heart-like shape on the snout and add sharp, triangular teeth. Tip: Vary the size of the teeth to make the dragon look more realistic and menacing.
Step 4: Sketching the Tongue
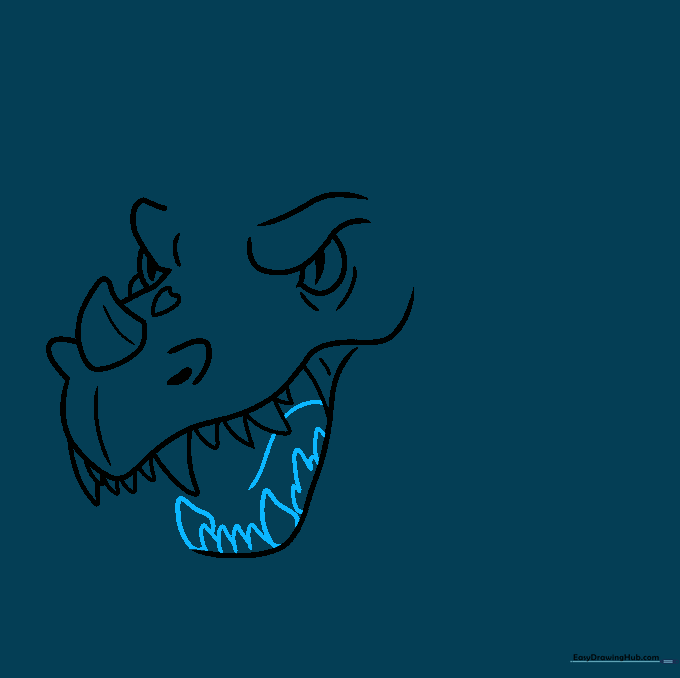
Draw a curved line for the tongue and add the bottom row of teeth. Tip: Make the tongue look slightly 'forked' or pointed to emphasize the dragon's reptilian nature.
Step 5: Defining the Chin and Tusks
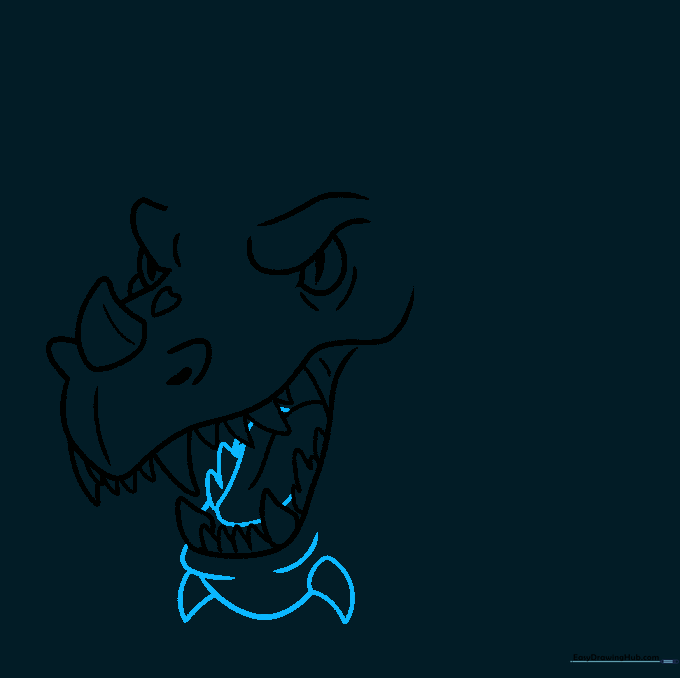
Complete the lower jaw and add two triangular tusks on the chin. Tip: Use firm, confident strokes for the chin to show the dragon's strength.
Step 6: Adding Facial Spikes
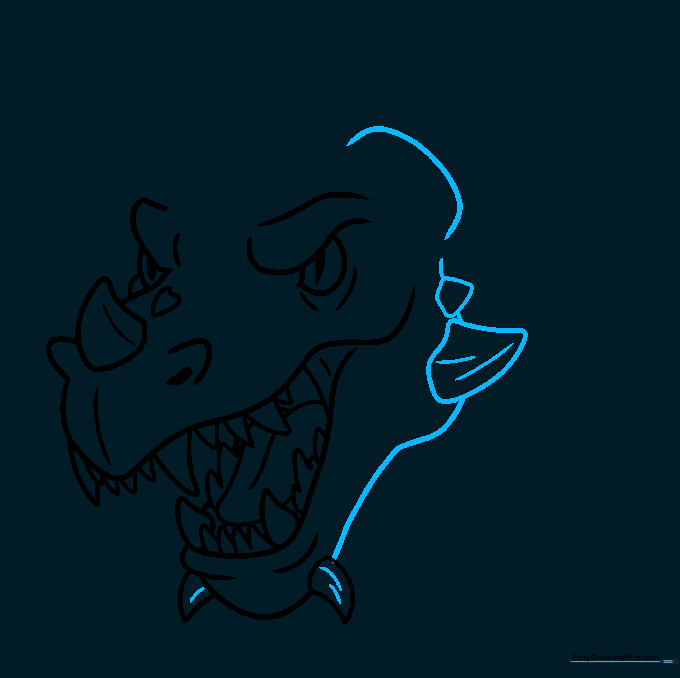
Draw triangular spikes along the side of the face. Tip: Don't make them perfectly symmetrical; nature is rarely uniform, and it makes your dragon look more organic.
Step 7: The Head Crest
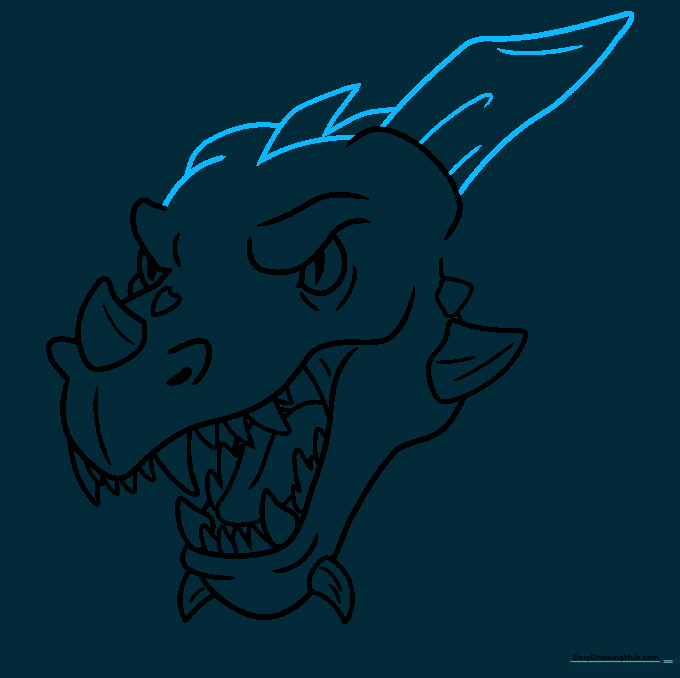
Sketch a large horn at the back of the head and a crest of spines along the skull. Tip: Use overlapping lines to create the illusion of depth where the horn meets the head.
Step 8: Detailing the Neck
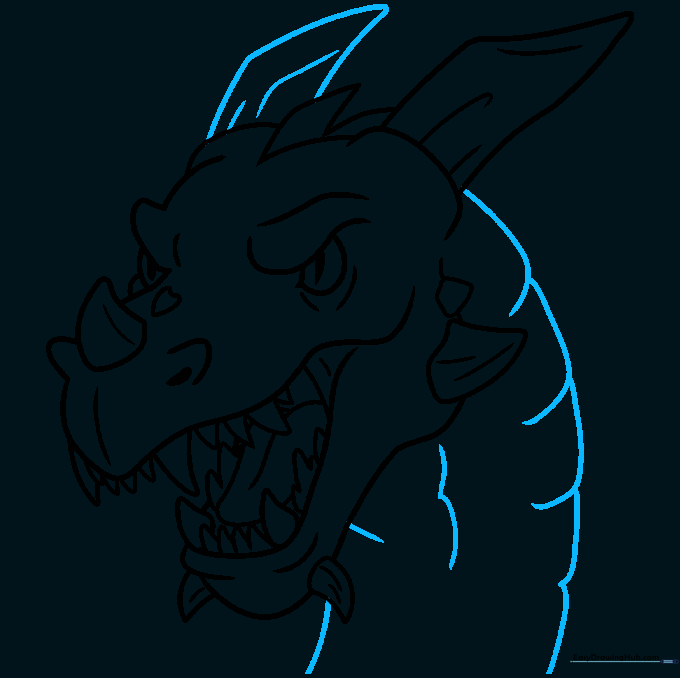
Add the remaining horn and draw bony plates along the neck. Tip: Use curved, 'C' shaped lines to suggest the overlapping texture of dragon scales.
Step 9: Finalizing the Outline

Add final spikes to the neck and detail the scales. Tip: Use a darker pencil or pen to go over your final lines, then erase any stray guide marks for a clean, professional look.
Step 10: Bringing Your Dragon to Life with Color

Time to color! Use vibrant greens or deep reds to give your dragon personality. Tip: Try using two shades of the same color—a lighter one for the highlights and a darker one for the shadows—to make your drawing pop.
More Tutorials


