How to Draw Dracula: Easy 10-Step Guide for Kids
Bring the classic vampire to life with this fun, step-by-step drawing lesson! Designed for young artists and beginners, this activity requires only a pencil, paper, and an eraser. Follow along to build your character-drawing skills and create your own spooky masterpiece.
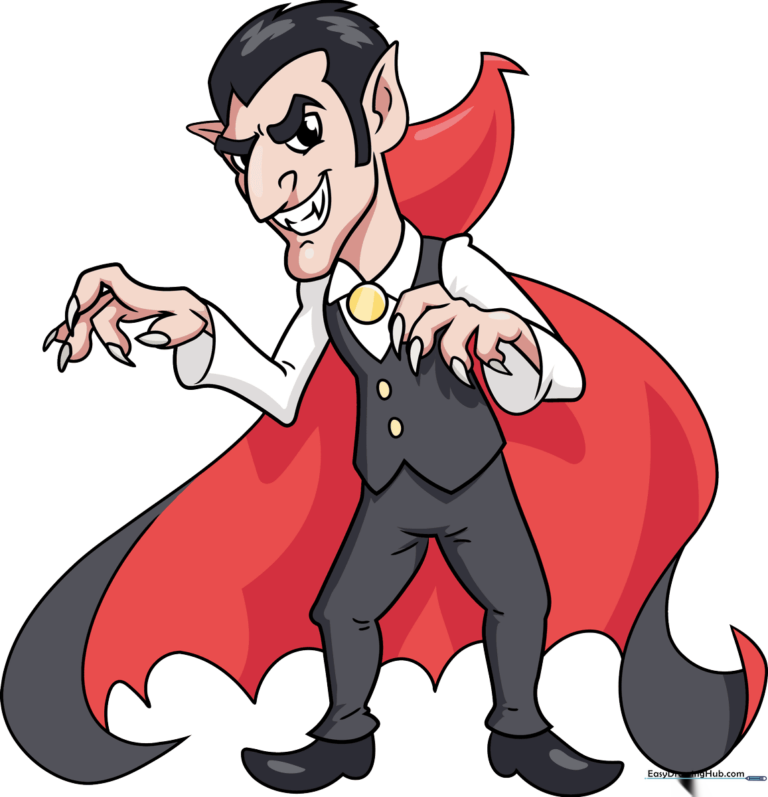
🎯 Final Result
Step-by-Step Instructions
Step 1: Sketching the Face and Nose
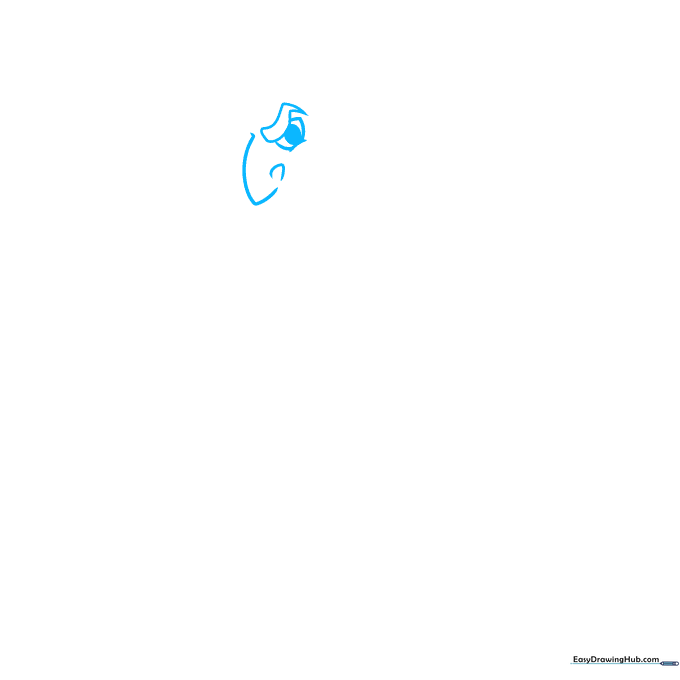
Start by drawing a downward-pointing triangle for the nose and a small upward triangle for the bridge. Tip: Keep these shapes small and centered to maintain the right proportions for the face.
Step 2: Adding Eyes and Fangs
Draw a lemon-shaped eye and a wide, curved mouth. Add two small triangles for the fangs. Tip: Use light, feathery strokes for the mouth to give it a friendly, cartoonish expression.
Step 3: Defining the Ears and Hairline

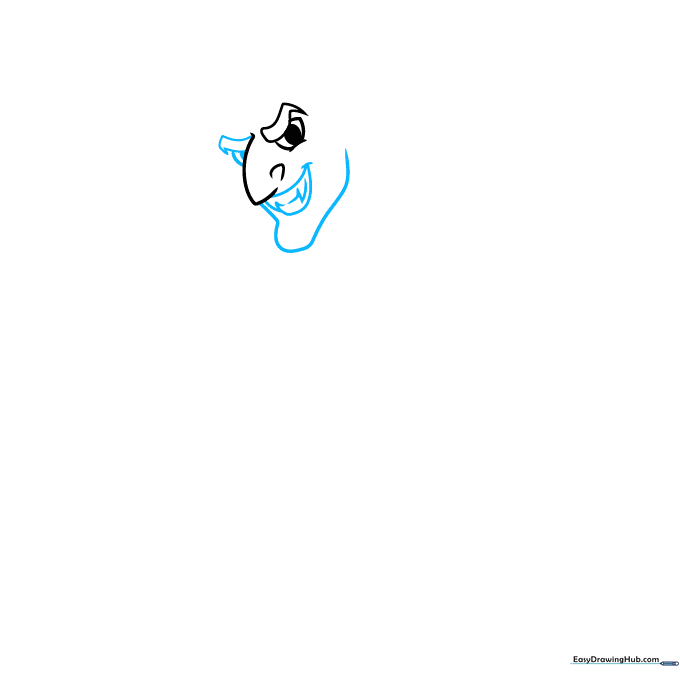
Sketch the ears using triangles and semi-circles. For the hair, use jagged, triangular shapes to create a widow's peak. Tip: Don't worry about making the hair perfectly symmetrical; messy hair adds character!
Step 4: Sketching the Neck and Torso
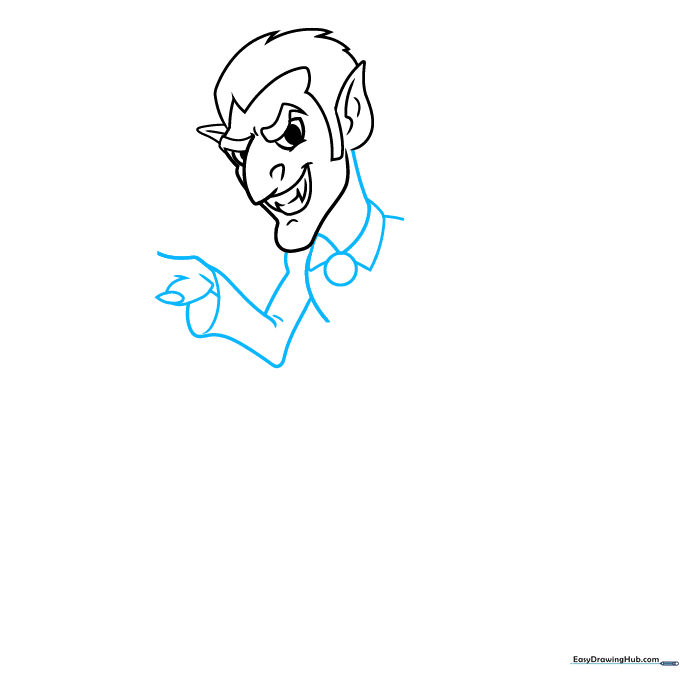
Draw a straight line for the neck and a circle for the chest area. Add an oval for the sleeve. Tip: Keep the neck narrow to make the head look more prominent.
Step 5: Drawing the First Hand
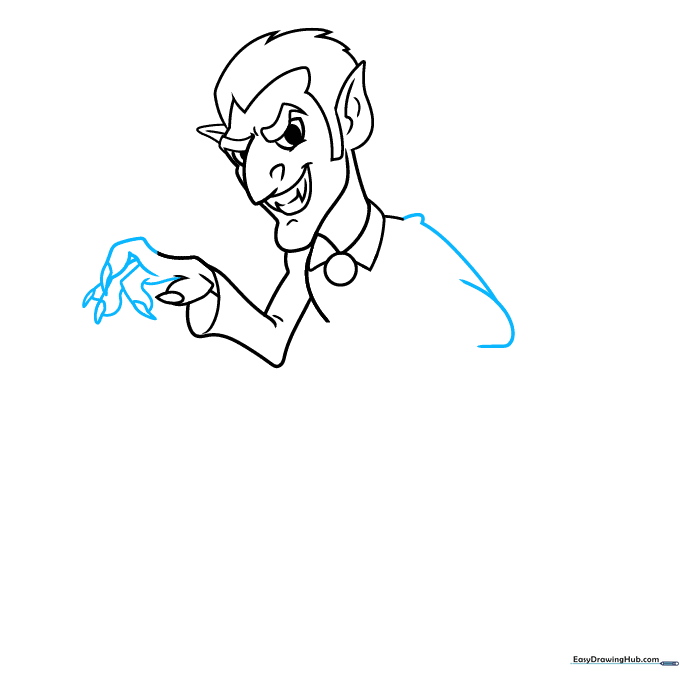
Use small ovals to map out the fingers and add teardrop shapes for the fingernails. Tip: If the fingers look too long, just erase and shorten them—drawing hands takes practice!
Step 6: Drawing the Second Hand
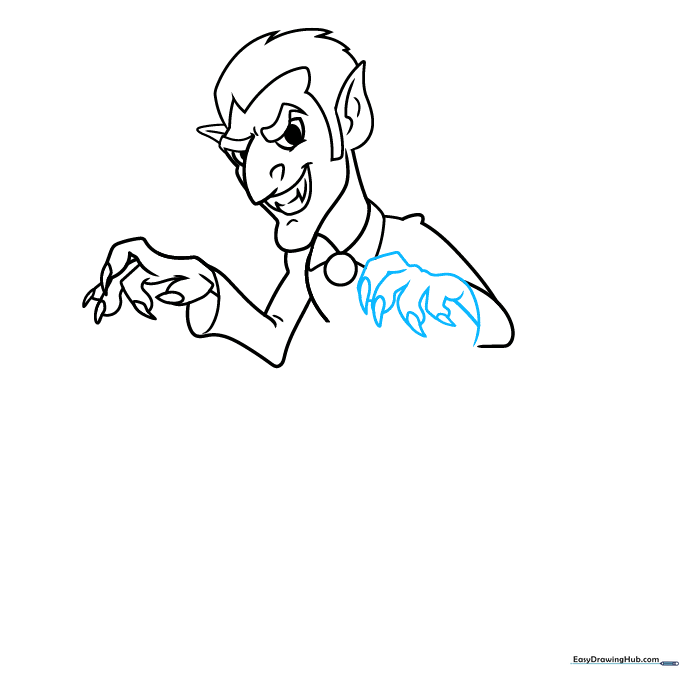
Repeat the process for the second hand, ensuring the size matches the first. Connect it to the sleeve with a smooth curve. Tip: Use a light touch so you can easily adjust the wrist angle.
Step 7: Adding the Collar and Legs
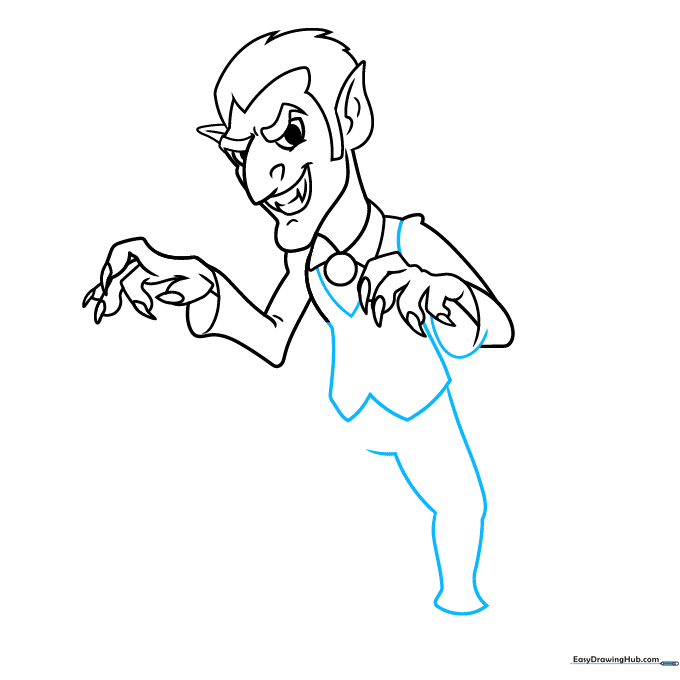
Draw the high, dramatic collar using triangles and add curved lines for the legs. Tip: The collar is a signature Dracula feature, so make it nice and tall!
Step 8: Shoes and Cape Details
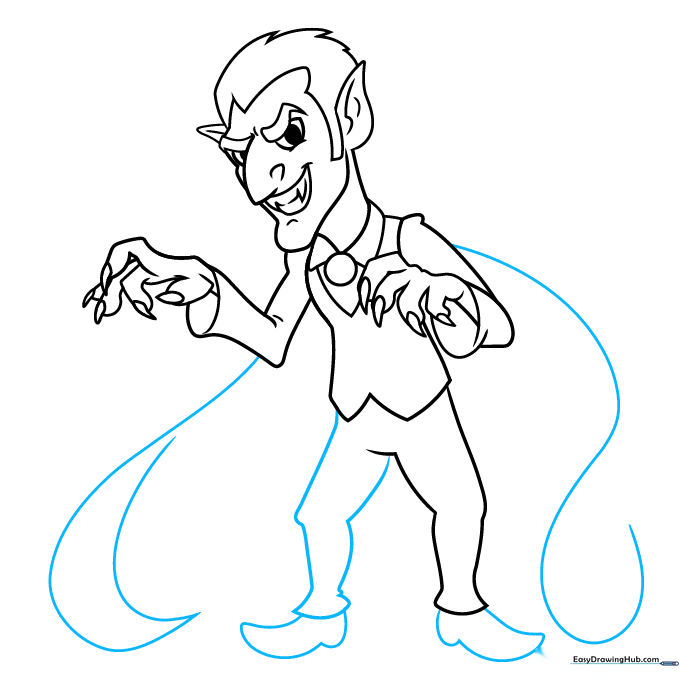
Add rounded triangles for the shoes and use long, swooping lines to create the cape. Tip: Make the cape lines flowy to give the character a sense of movement.
Step 9: Finalizing the Outline
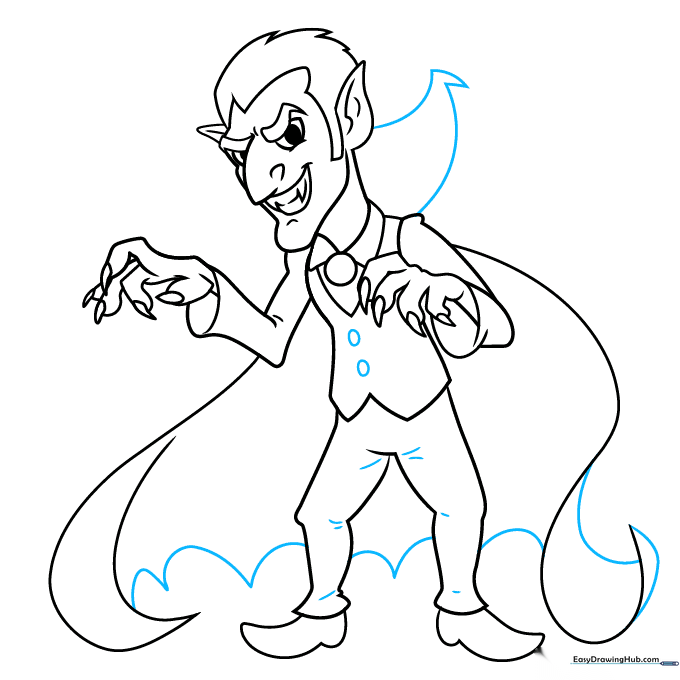
Add buttons to the coat and refine the cape with hill-like shapes. Tip: Go over your final lines with a darker pencil or ink to make the drawing pop.
Step 10: Adding Color
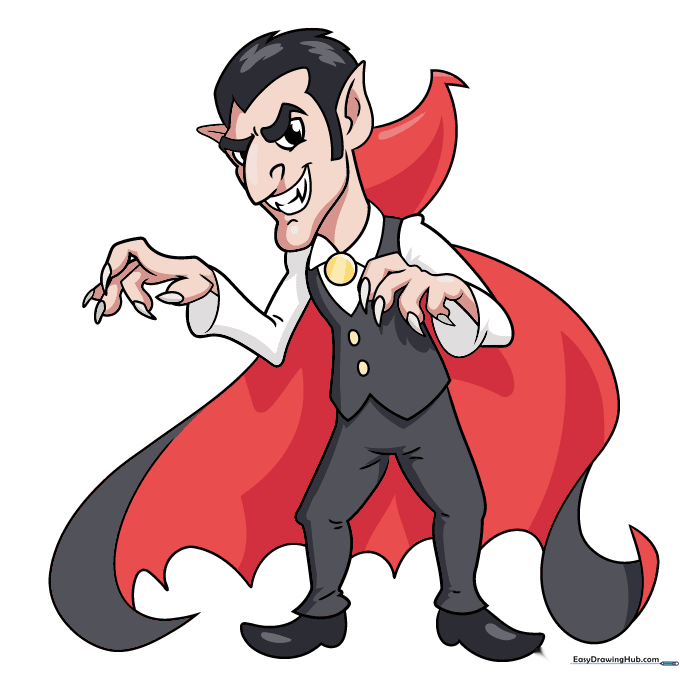
Bring your Dracula to life! Use dark gray for the suit, red for the cape lining, and yellow for the medallion. Tip: Use a light skin tone for the face to contrast with the dark clothing.
More Tutorials


