How to Draw Dory: Easy 20-Step Guide for Kids
Bring everyone's favorite blue tang to life with this step-by-step drawing tutorial, perfect for young artists ages 6 and up. All you need is a pencil, an eraser, and a piece of paper to get started. By following these simple shapes, you will build confidence in your sketching skills while creating a vibrant, recognizable character.
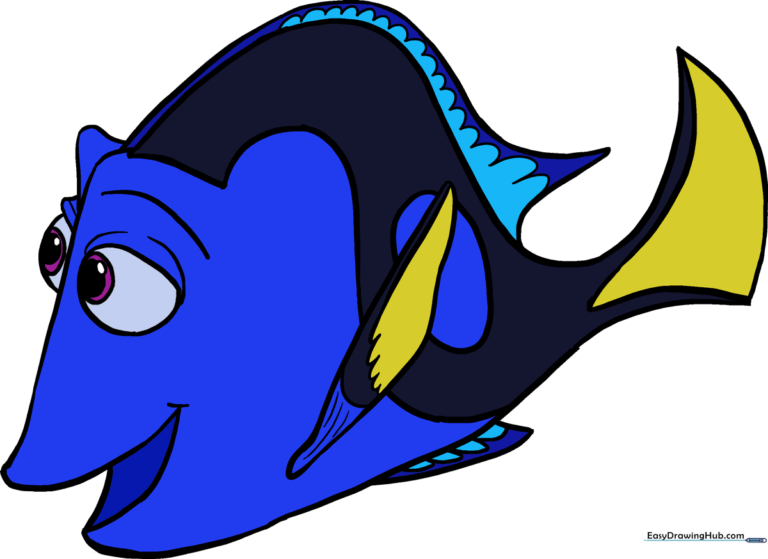
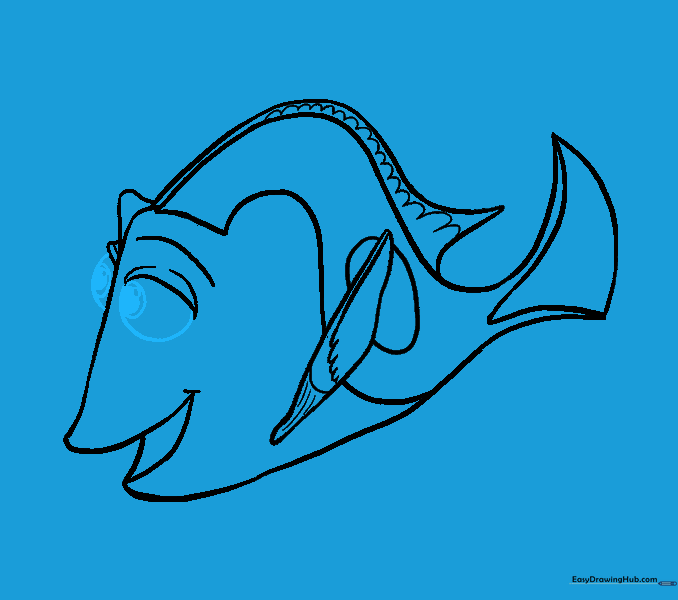
🎯 Final Result
Step-by-Step Instructions
Step 1: Sketching the Face Base

Start by drawing a slightly curved line for the top of the face. Teacher's Tip: Keep your pencil pressure light so you can easily adjust the shape if needed later.
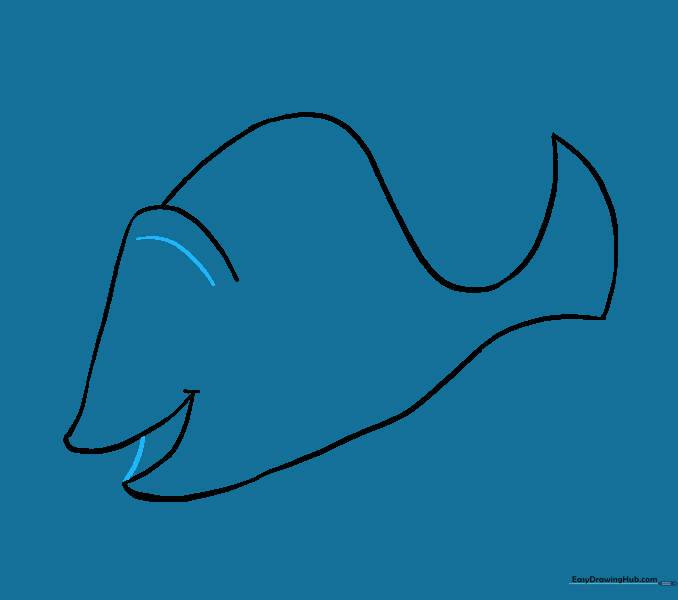
Step 2: Defining the Face

Add a curved line to each end of your first line to frame the face. Tip: Think of this as creating a rounded triangle shape for her snout.
Step 3: Outlining the Body

Draw long, sweeping curves from the face to create the top and bottom of the body. Tip: Make these lines smooth and fluid to give the fish a natural swimming motion.
Step 4: Forming the Tail
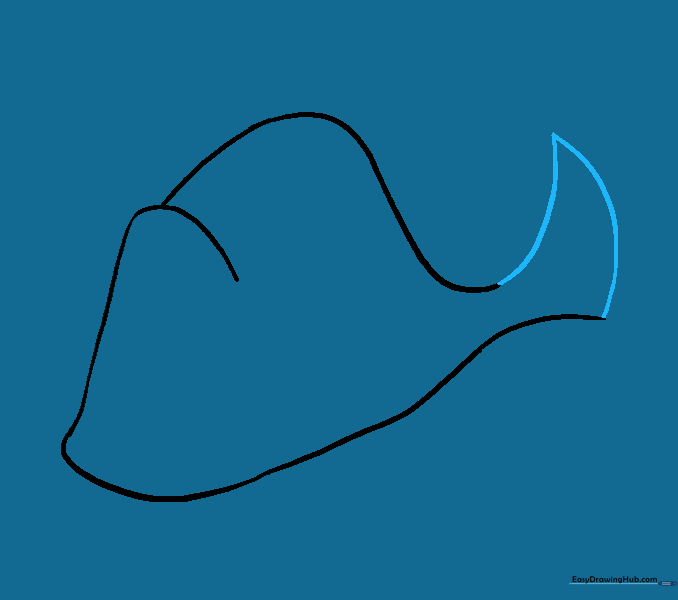
Connect the body lines with a point at the back to form the tail base. Tip: Keep the tail narrow where it meets the body to maintain the correct proportions.
Step 5: Sketching the Mouth

Draw two inward curves that meet at a point for the mouth, adding a small curve for the smile. Tip: A small smile makes the character look friendly and approachable!
Step 6: Cleaning Up

Gently erase the extra guide lines around the mouth. Tip: Use a soft eraser to avoid smudging your paper.
Step 7: Adding Facial Details
Draw the inside of the mouth and a ridge line on the forehead. Tip: Parallel lines help create depth and dimension on the face.
Step 8: Creating the Body Pattern
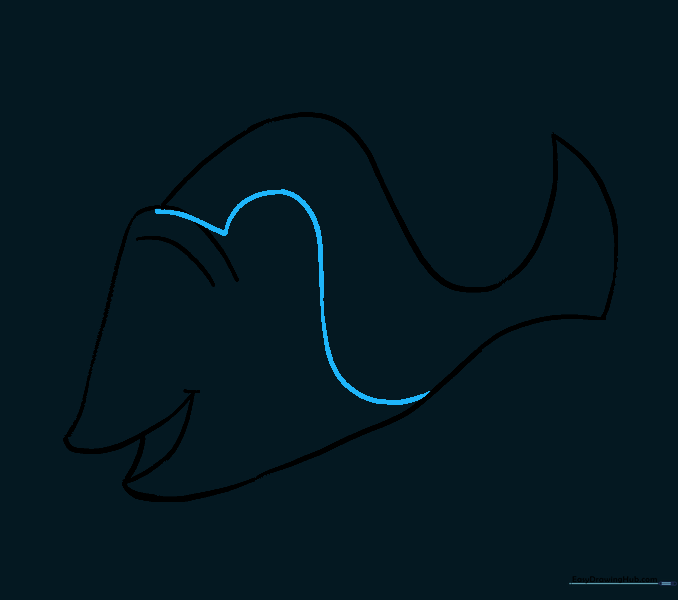
Draw a backward 'S' curve across the body. Tip: This line will eventually help you separate the blue and yellow colors of her scales.
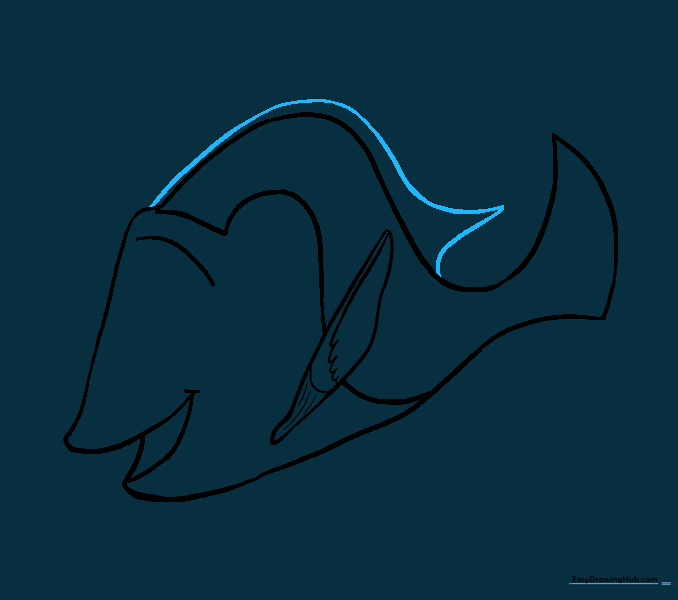
Step 9: Drawing the Dorsal Fin

Erase the forehead guide lines and sketch the dorsal fin with two curved lines. Tip: Make the fin look like a soft, rounded triangle.
Step 10: Refining the Fin

Erase any overlapping lines inside the fin to make it look clean. Tip: A clean drawing makes coloring much easier later!
Step 11: Adding Fin Texture

Add small 'U' shapes and lines to detail the fin. Tip: These small details give the fin a realistic, fan-like appearance.
Step 12: Creating the Top Fin
Draw a long, sharp curved line above the back. Tip: This fin should look sleek and pointed, contrasting with the rounded dorsal fin.
Step 13: Scalloped Details
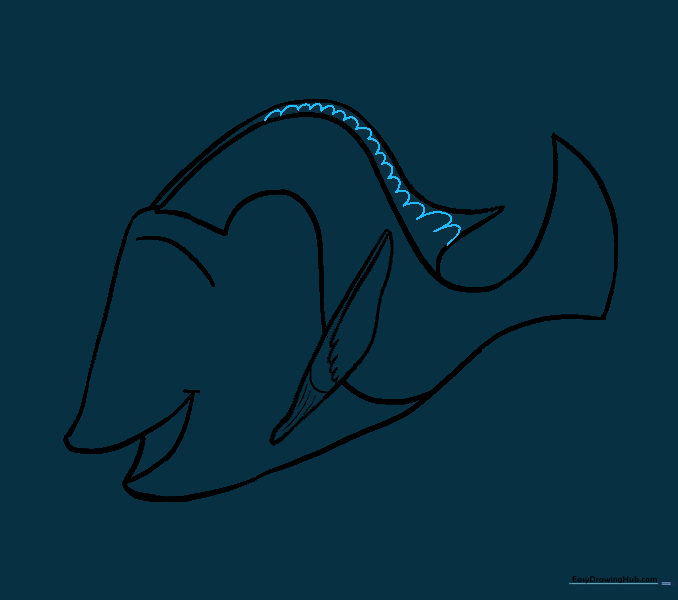
Add a scalloped pattern to the top fin using connected upside-down 'U' shapes. Tip: Keep the 'U' shapes consistent in size for a professional look.
Step 14: Adding the Side Oval

Draw an oval on the side of the body. Tip: This shape acts as a guide for the blue and black color pattern on her side.
Step 15: Detailing the Tail

Add parallel lines to the tail to give it structure. Tip: Make sure the lines follow the curve of the tail shape.
Step 16: The Far Fin

Draw a small curved line near the forehead to indicate the pectoral fin on the other side. Tip: This adds a sense of 3D perspective to your drawing.
Step 17: Drawing Eyelids
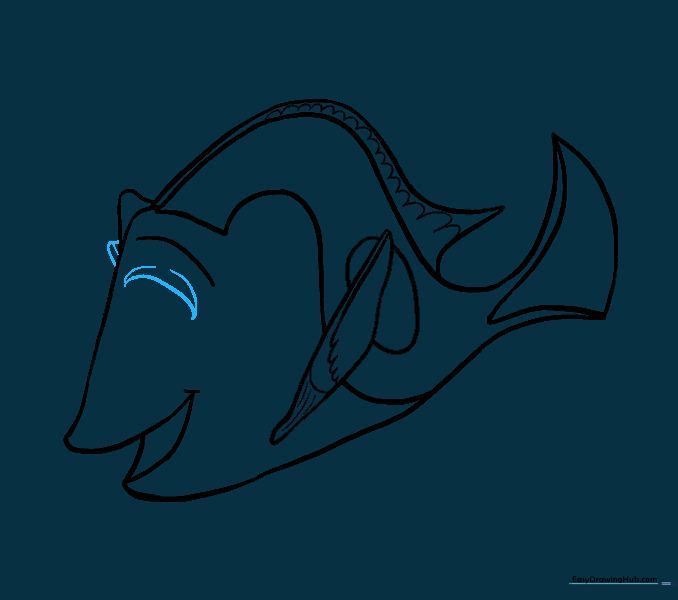
Draw curved lines for the eyelids. Tip: Eyelids give the character expression—make them slightly curved to show she is happy.
Step 18: Adding Eyes
Draw the oval eyes with smaller pupils inside. Tip: Leave a tiny white dot inside the pupil to create a 'glint' or sparkle, making the eyes look alive.
Step 19: Lower Fin Detail
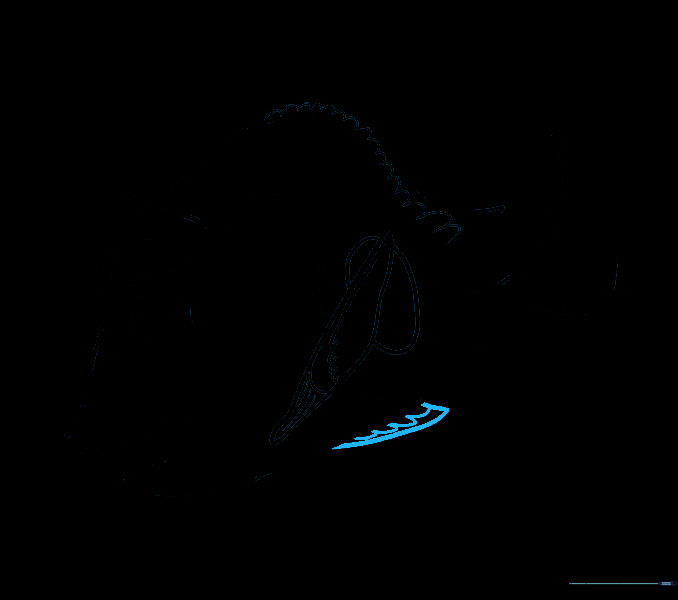
Draw the lower fin with a curved line and add 'U' shaped details. Tip: Keep the lines light until you are happy with the shape.
Step 20: Bringing Dory to Life

Color your Dory! Use bright blues for the body and vibrant yellow for the tail and fins. Tip: Use a darker blue for the shadows to give your drawing a 3D effect.
More Tutorials


