How to Draw Curious George: Easy 9-Step Guide for Kids
Bring everyone's favorite mischievous monkey to life with this simple drawing tutorial, perfect for children ages 5 and up. You only need a pencil, an eraser, and a piece of paper to get started. Follow these steps to build confidence in your sketching skills while creating a fun, recognizable character.
🎯 Final Result

Step-by-Step Instructions
Step 1: Sketching the Expressive Eyes

Draw two circles for the eyes, placing a smaller dot inside each for the pupils. Shade the pupils, leaving a tiny white spot for a 'sparkle' effect. Tip: Keep these close together to give George his signature curious look.
Step 2: Defining the Mouth and Jaw

Outline the lower face with a long, gentle curve. Add two lines to create a wide, happy smile. Tip: Use a light touch here; a soft curve makes George look friendly and approachable.
Step 3: Shaping the Head

Draw an 'M' shaped curve across the top of the face to define his forehead. Extend a curved line upward from the cheek to complete the side of the head. Tip: Think of this as the top of a rounded cap.
Step 4: Adding Ears and Fur Texture
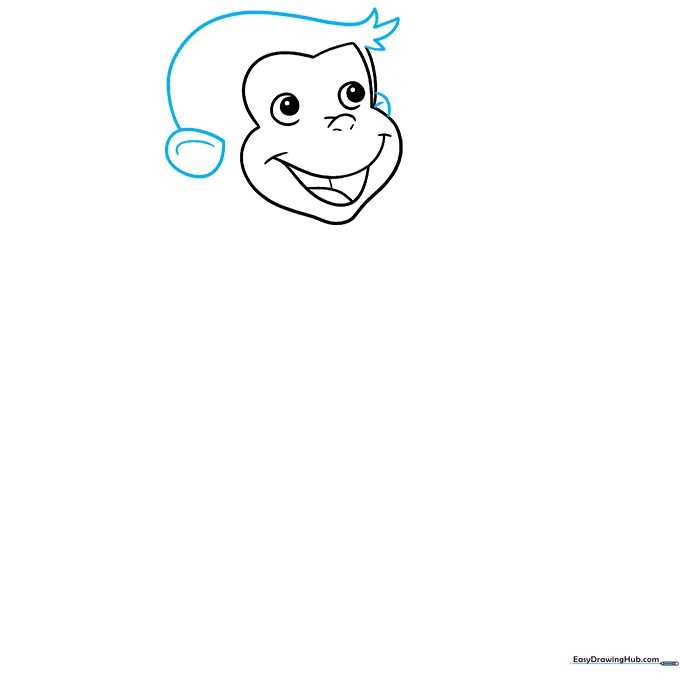
Sketch the ears on the sides of the head. Connect the top of the head using short, jagged strokes to create a tuft of fur. Tip: The jagged lines add a 'fuzzy' texture that makes the drawing look more realistic.
Step 5: Sketching the First Arm
Draw a curved line down from the ear to form the arm. Use jagged lines at the wrist to show where the fur meets the hand. Tip: Keep the elbow bent to give George a playful, active pose.
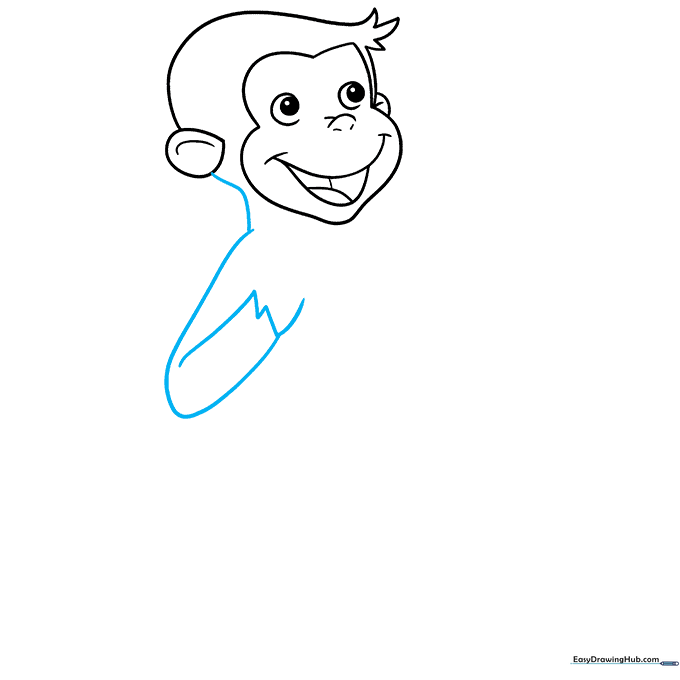
Step 6: Drawing the Hands and Second Arm
Use overlapping curved lines to draw the hand. Then, extend a line from the chin to form the second arm, adding more jagged lines for texture. Tip: Overlapping lines help create depth, making the hand look like it's reaching out.
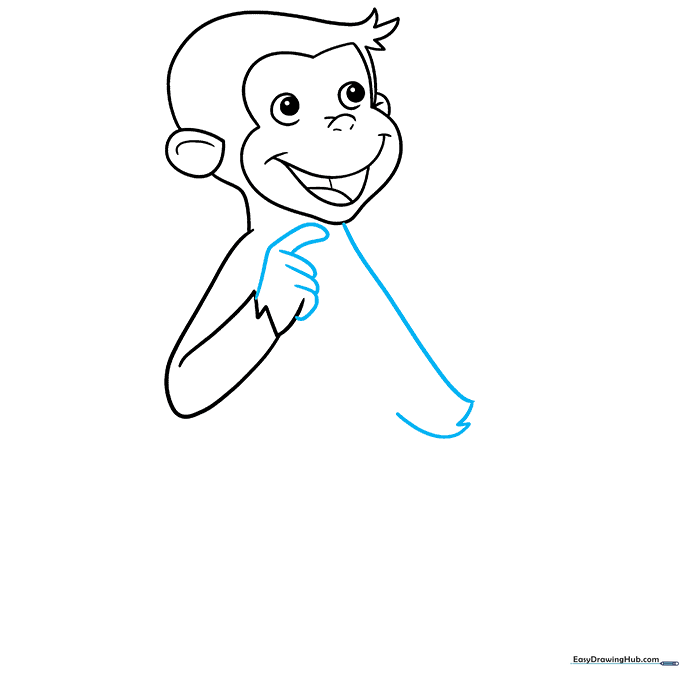
Step 7: Defining the Belly

Draw the second hand using the same overlapping technique. Then, draw a long, smooth curve to form George's round belly. Tip: A nice, round belly makes him look extra cute and friendly!
Step 8: Adding the Rear Leg
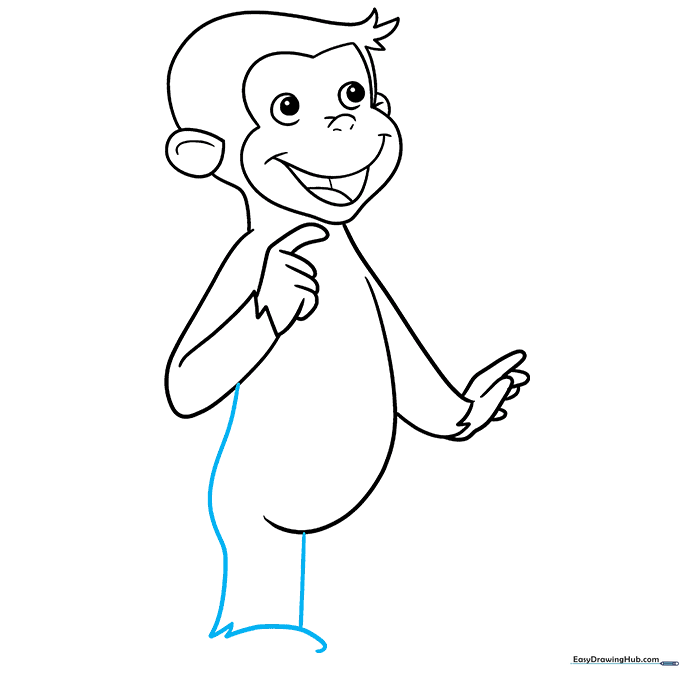
Use curved lines to sketch the back leg. Add jagged lines near the foot to maintain the furry look. Tip: Think of the leg as a gentle 'C' shape to keep it looking natural.
Step 9: Finalizing the Feet
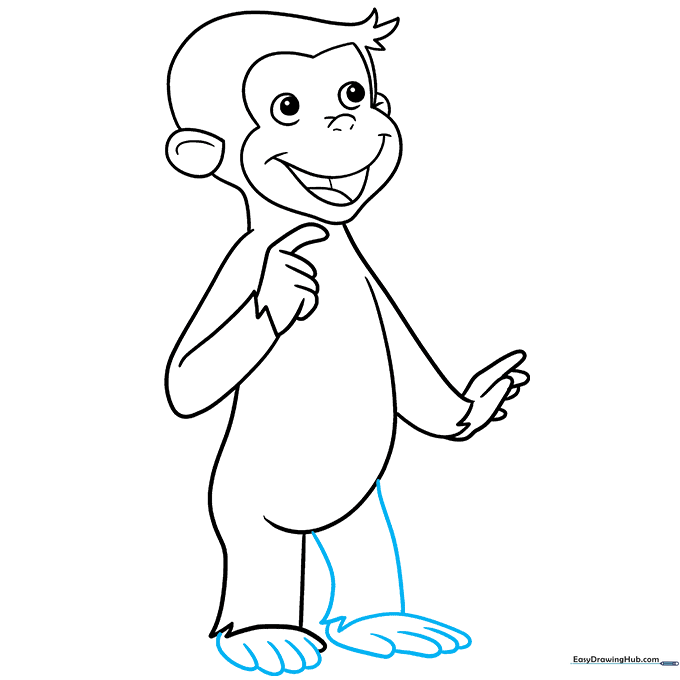
Draw the remaining leg and finish both feet using 'U' shaped lines for the toes. Tip: Make the toes small and rounded to match the cartoon style.
Step 10: Bringing George to Life with Color
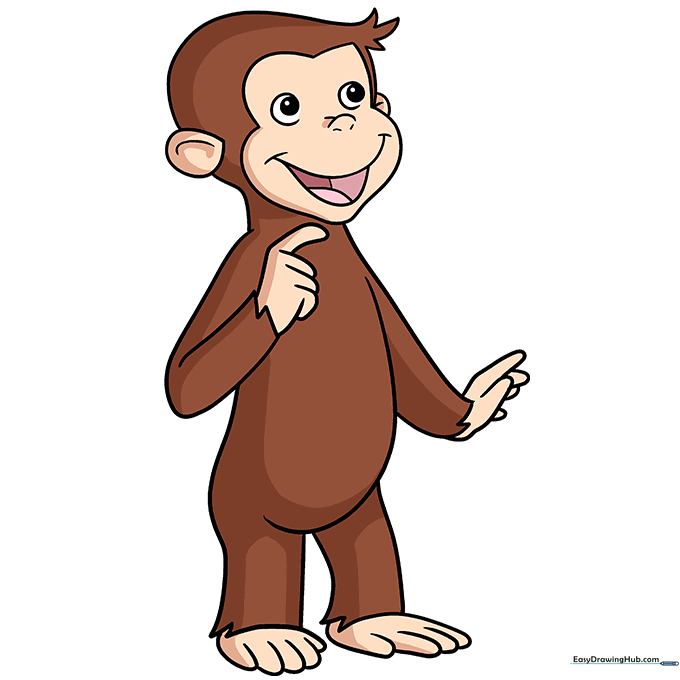
Now for the fun part! Color George's fur a warm brown, and use a soft peach or light tan for his face, ears, hands, and feet. Tip: Use light pressure with your colored pencils to create a smooth, even look.
More Tutorials


