How to Draw Courage the Cowardly Dog: Easy 9-Step Guide
Bring everyone’s favorite anxious pup to life with this simple drawing guide. Designed for young artists and beginners, this activity requires only a pencil, paper, and an eraser. Follow these steps to master Courage’s expressive features and signature pose.
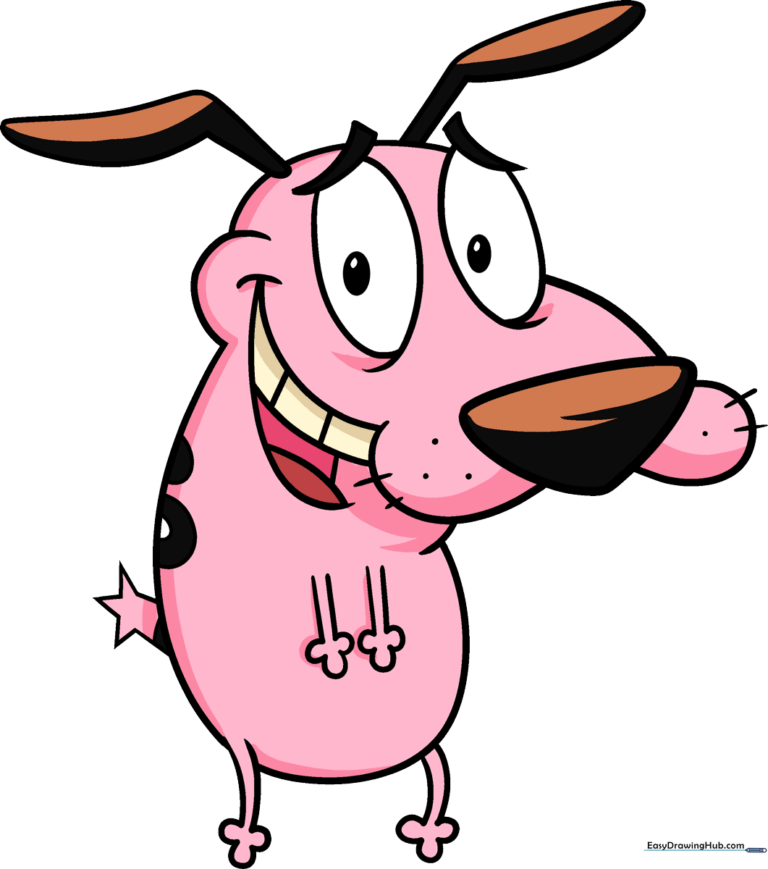
🎯 Final Result
Step-by-Step Instructions
Step 1: Sketching the Expressive Eyes

Start by drawing two large ovals for the eyes. Add smaller ovals inside for the pupils and shade them in. Tip: Draw a tiny curved line under each eye to give him that classic worried look, and add a thin triangle above each eye for his eyebrows.
Step 2: Defining the Muzzle

Draw an upside-down triangle with soft, rounded corners for his nose. Connect it to the eyes with a gentle curved line to create the bridge of his snout. Tip: Keep your pencil pressure light here so you can easily adjust the shape if it looks a bit crooked.
Step 3: Adding Whiskers and Mouthline

Outline the upper lip using soft, curved lines. Add a few small dots on the muzzle and short, quick strokes for whiskers. Tip: Use a flicking motion with your pencil to make the whiskers look natural and sharp.
Step 4: Sketching the Open Mouth

Create his signature open-mouthed expression using three curved lines that meet at a point. Add small rectangles for his teeth and a curved line inside for the tongue. Tip: Don't worry about perfect symmetry; Courage is a cartoon, so a little quirkiness adds character!
Step 5: Forming the Head and Ears

Draw a smooth curve for the top of his head. Extend two long, floppy ear shapes from the sides, doubling the lines back to give them volume. Tip: Make the ears look soft and droopy to match his timid personality.
Step 6: Outlining the Body
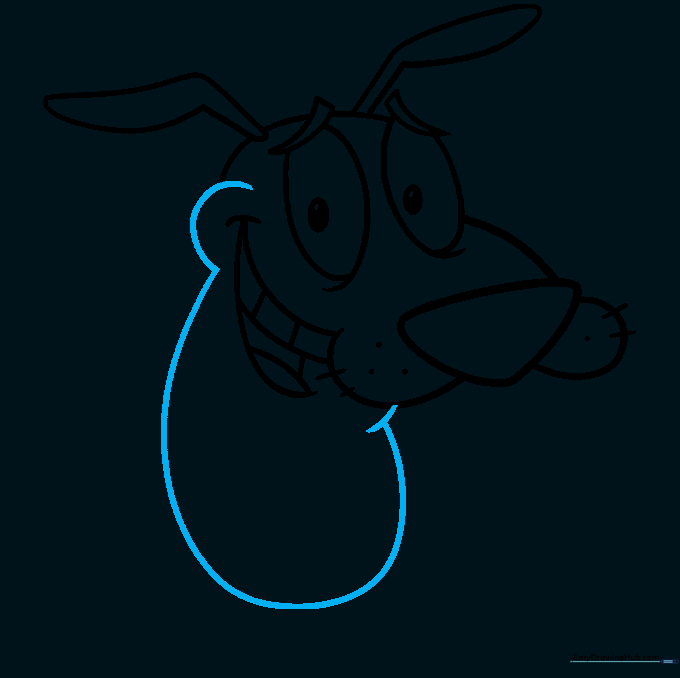
Use fluid, curved lines to define his cheek, chin, and the start of his torso. Tip: Keep the lines continuous to make the character look like he’s ready for animation.
Step 7: Drawing the Arms
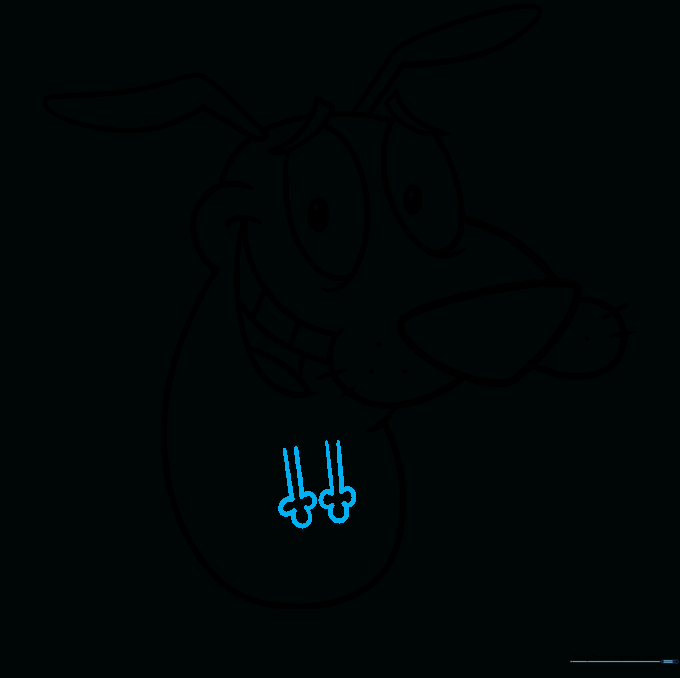
Draw two parallel lines for each arm. At the ends, use three small 'U' shapes to form his fingers. Tip: Ensure the arms are thin to emphasize his lanky, cartoonish build.
Step 8: Adding the Legs
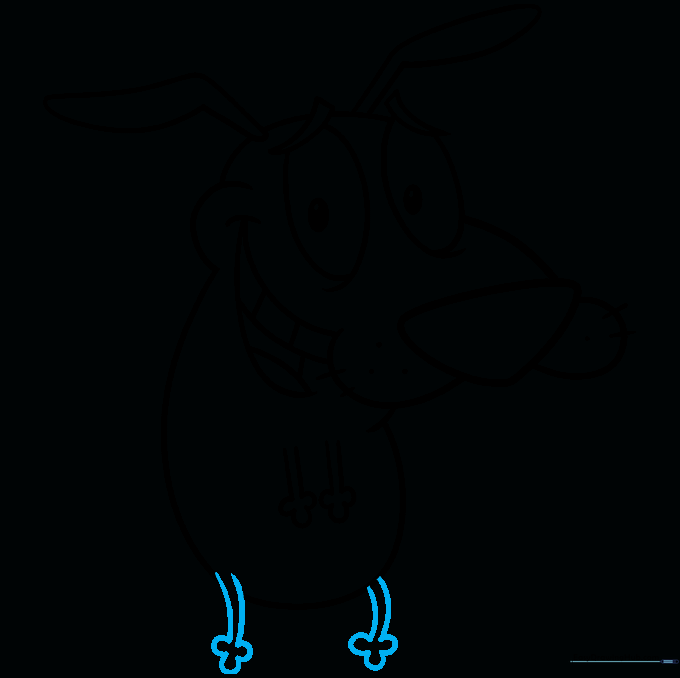
Extend curved lines from the body to create his rear legs. Finish the feet with three small 'U' shapes for toes. Tip: If you make a mistake, use a kneaded eraser to gently lift the graphite without damaging the paper.
Step 9: Final Details and Tail
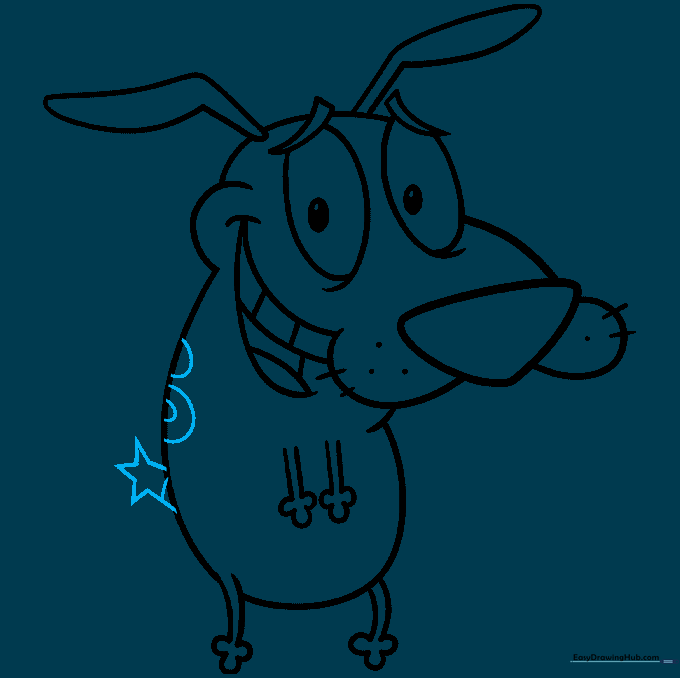
Finish your drawing by adding a tail with three points at the tip. Add a few spots on his back to complete the look. Tip: Use a darker pencil or a fine-liner to trace your final lines before erasing the construction marks.
Step 10: Bringing Courage to Life with Color
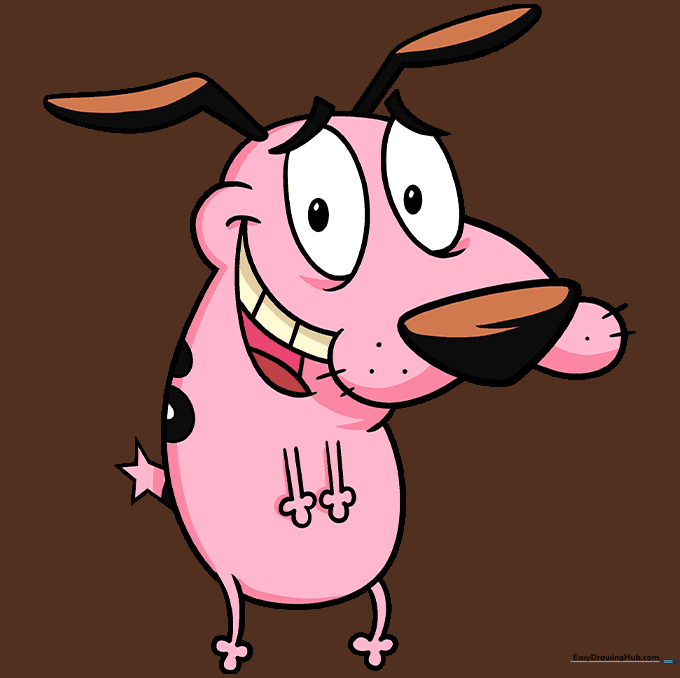
Time to color! Use a soft pink for his body, black for his spots, and brown for his ears. Keep the teeth a light yellowish-white. Tip: Use light, circular motions with your colored pencils to get an even, smooth coat of color.
More Tutorials


