How to Draw Cherries: Easy 10-Step Guide for Beginners
Ready to draw some sweet summer fruit? This tutorial is perfect for young artists ages 5 and up. All you need is a pencil, an eraser, and your favorite coloring tools to create a pair of juicy cherries with realistic leaves.
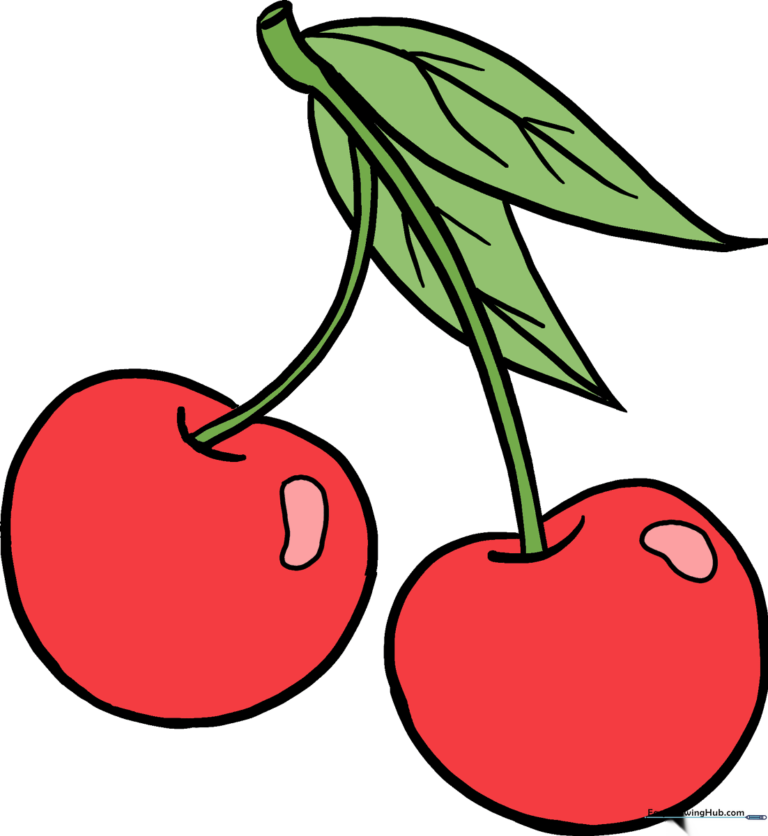
🎯 Final Result
Step-by-Step Instructions
Step 1: Sketching the First Stem

Draw two narrow, parallel curved lines to start the first stem. Teacher's Tip: Keep these lines close together to make the stem look delicate and realistic.
Step 2: Adding the Second Stem

Draw a second set of parallel curved lines branching off the first. Teacher's Tip: Imagine the letter 'V' but with soft, rounded curves to help the stems look natural.
Step 3: Creating the Fruit Tops

Draw a wide 'U' shape at the base of each stem. This creates the little dimple where the stem meets the fruit. Teacher's Tip: Press lightly; this is just a guide for the fruit's shape.
Step 4: Outlining the First Cherry

Extend a long, curved line from the stem to form a round cherry shape. Teacher's Tip: Don't aim for a perfect circle—cherries are slightly irregular, so a natural, organic curve looks best.
Step 5: Outlining the Second Cherry
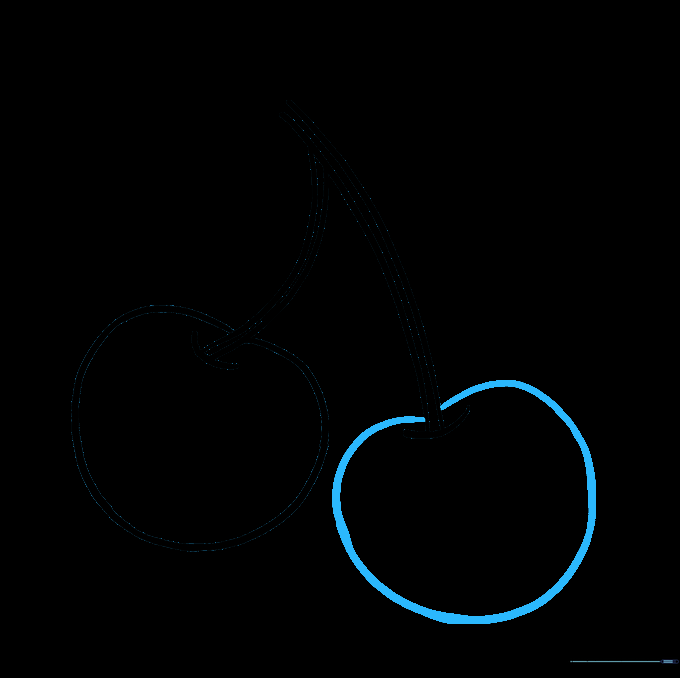
Repeat the process for the second cherry. Teacher's Tip: Try to make this one roughly the same size as the first to keep your drawing balanced.
Step 6: Drawing the Stem Top
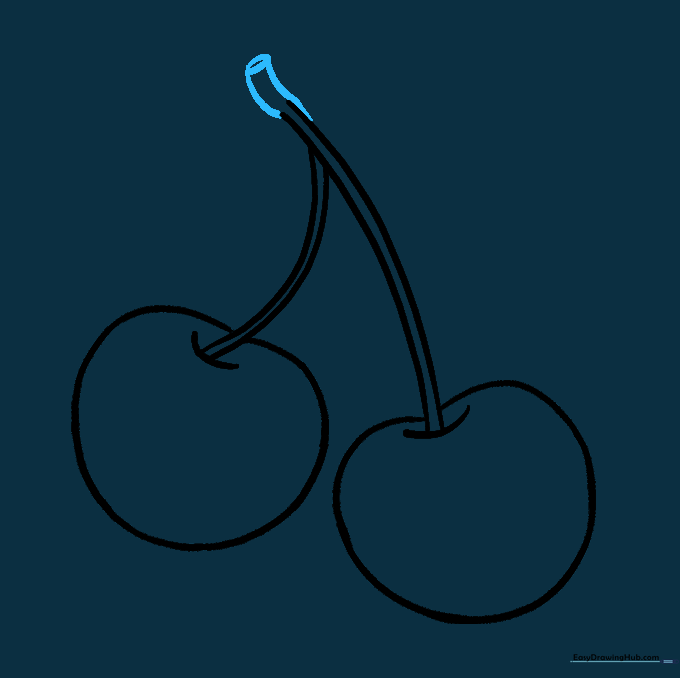
Add two short lines at the very top of the stems and connect them with a small oval. Teacher's Tip: This little detail shows where the stem attaches to the tree branch.
Step 7: Adding the First Leaf
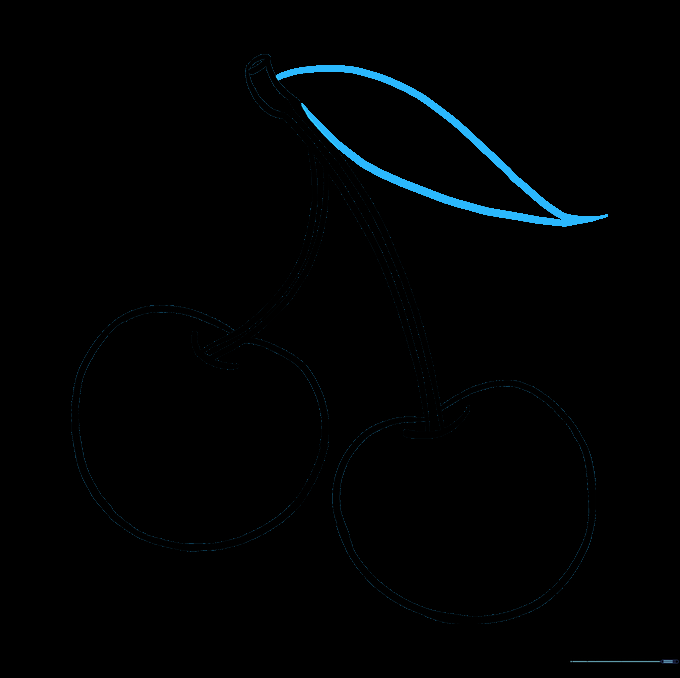
Draw two long, curved lines meeting at a point to create a leaf. Teacher's Tip: Leaves have veins, so keep the edges slightly wavy to make them look more realistic.
Step 8: Adding the Second Leaf

Draw a second leaf behind the first one. Teacher's Tip: Drawing it behind the stem creates 'depth,' making your drawing look 3D instead of flat.
Step 9: Adding Texture and Detail
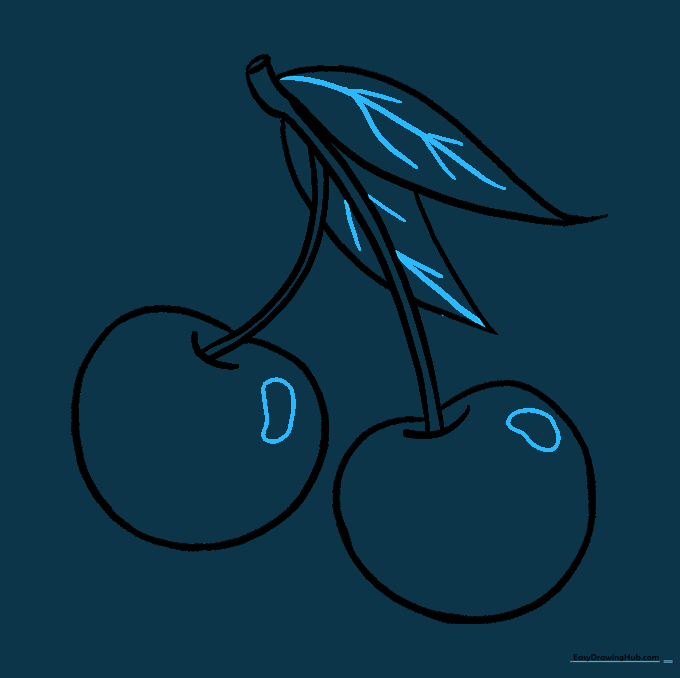
Draw small irregular shapes on the cherries for highlights and lines on the leaves for veins. Teacher's Tip: Keep the highlight shapes small; they represent light reflecting off the shiny skin.
Step 10: Bringing Your Cherries to Life with Color
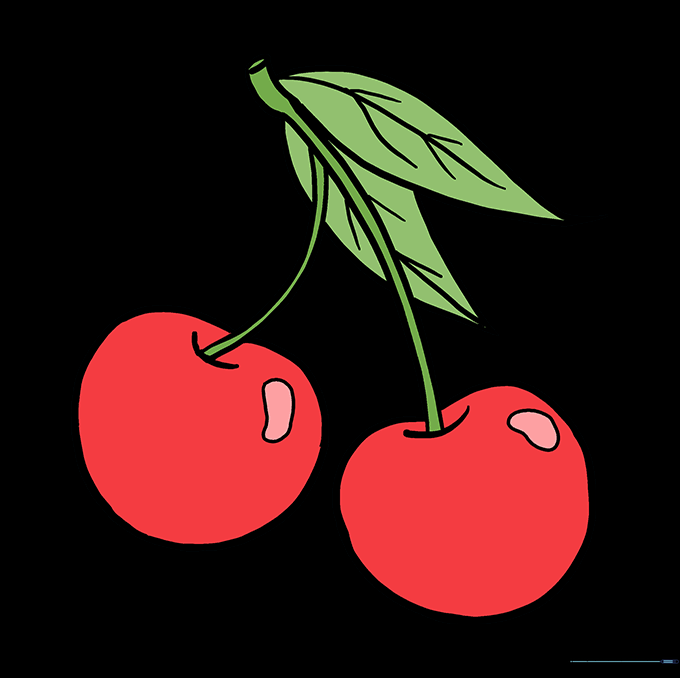
Time to color! Use bright reds for the fruit and vibrant greens for the leaves. Teacher's Tip: Use a darker red near the edges and a lighter red near the highlight to make your cherries look round and juicy.
More Tutorials


