How to Draw Captain America: Easy 10-Step Guide
Ready to draw the First Avenger? This tutorial is perfect for young artists ages 7+ who want to level up their character drawing skills. Grab a pencil, an eraser, and a piece of paper, and let's bring Captain America to life using simple shapes and confident lines.
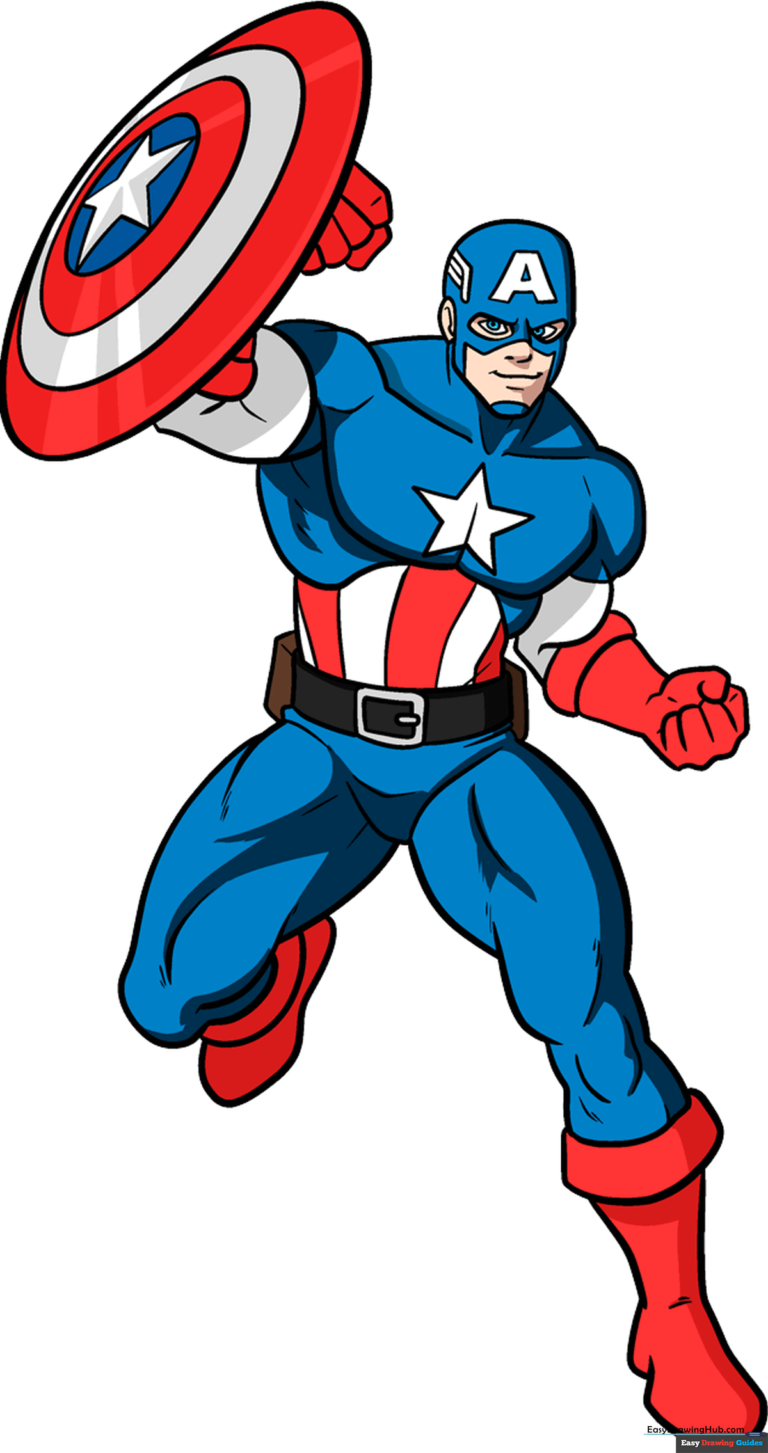
🎯 Final Result
Step-by-Step Instructions
Step 1: Sketching the Mask and Head

Start by drawing a rounded, irregular shape for the head. Add the ear and the eye openings within the mask. Teacher's Tip: Keep your pencil pressure light here; you'll want to refine these curves as you add the mask details later.
Step 2: Adding the Mask Details
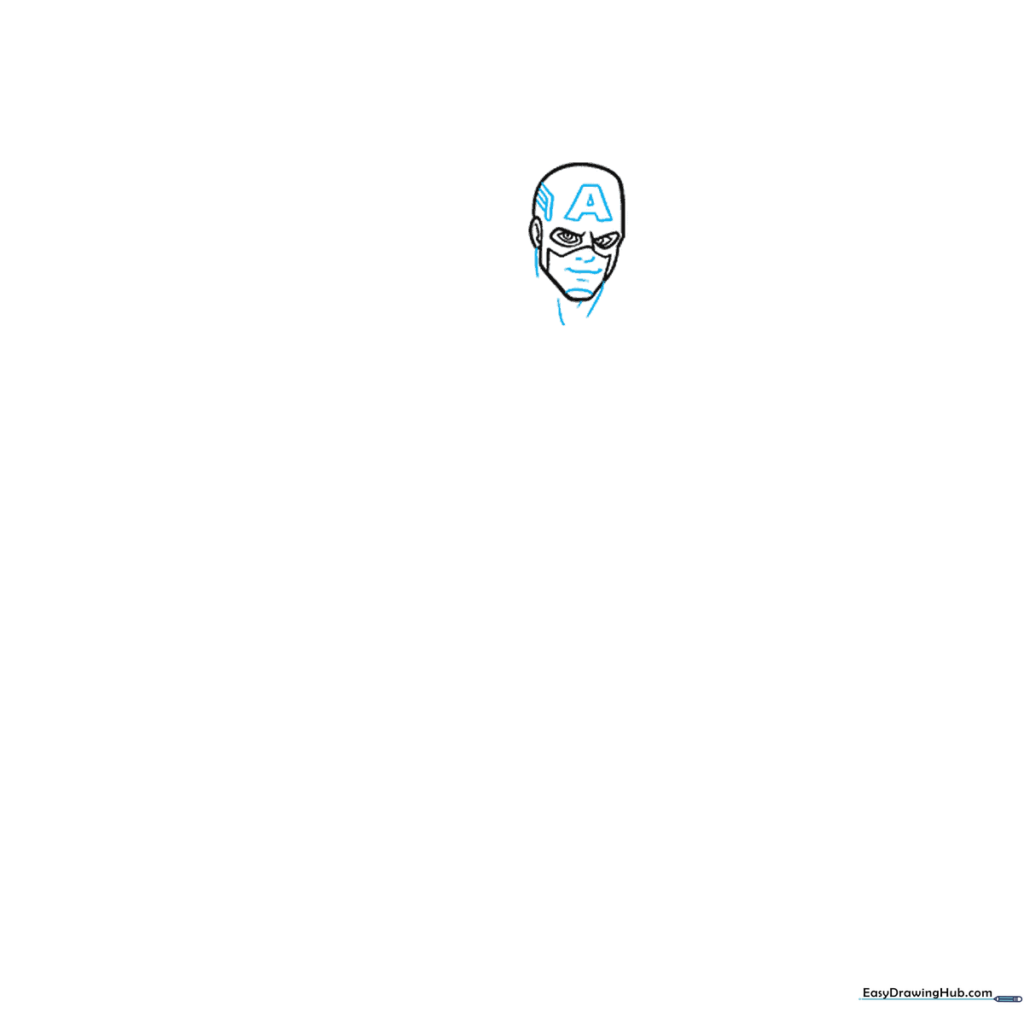
Draw a bold letter 'A' on the forehead and sketch the nose, mouth, and chin. Add the wing-like emblems on the sides of the mask. Teacher's Tip: Ensure the 'A' is centered so your hero looks balanced and heroic.
Step 3: Defining the Shoulders and Chest
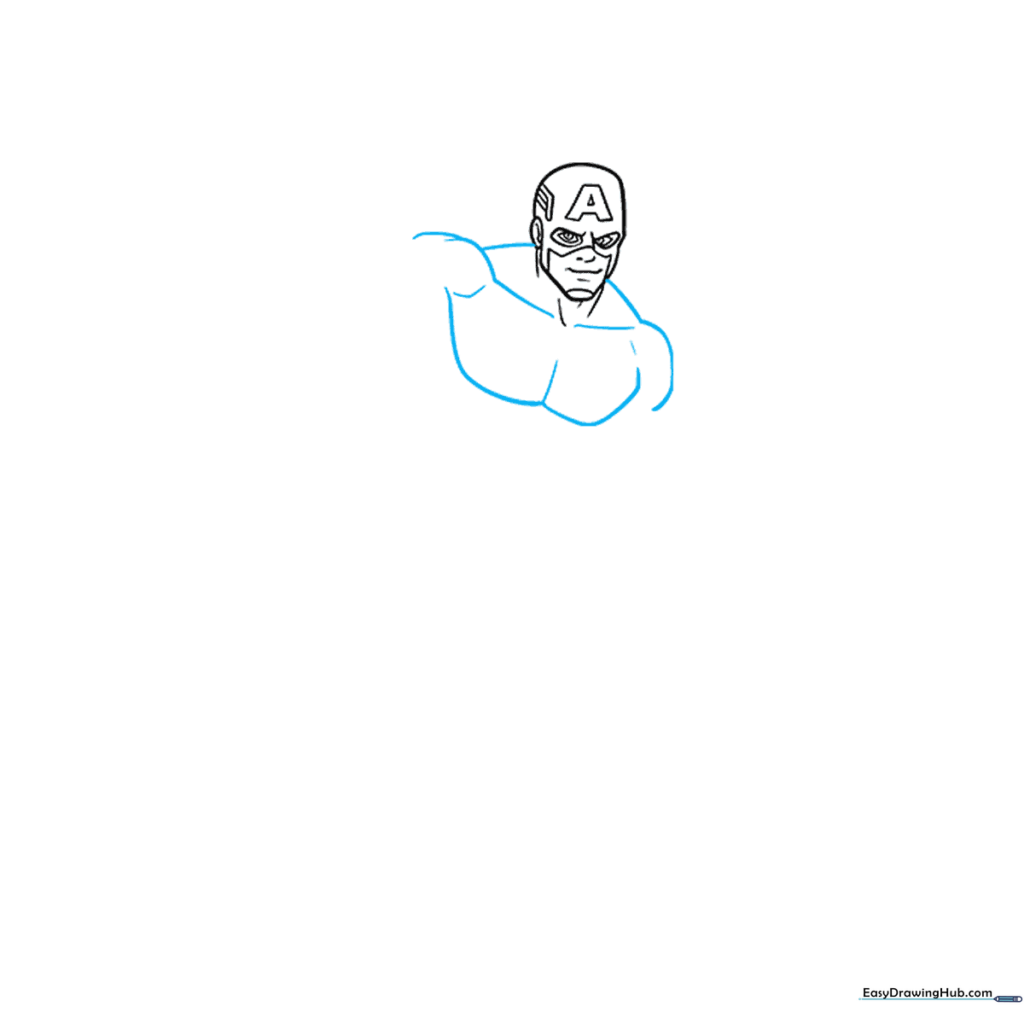
Sketch the broad shoulder and pectoral muscles using curved lines to show strength. Teacher's Tip: Use long, sweeping strokes to make the muscles look rounded rather than boxy.
Step 4: Sketching the Shield and Arm
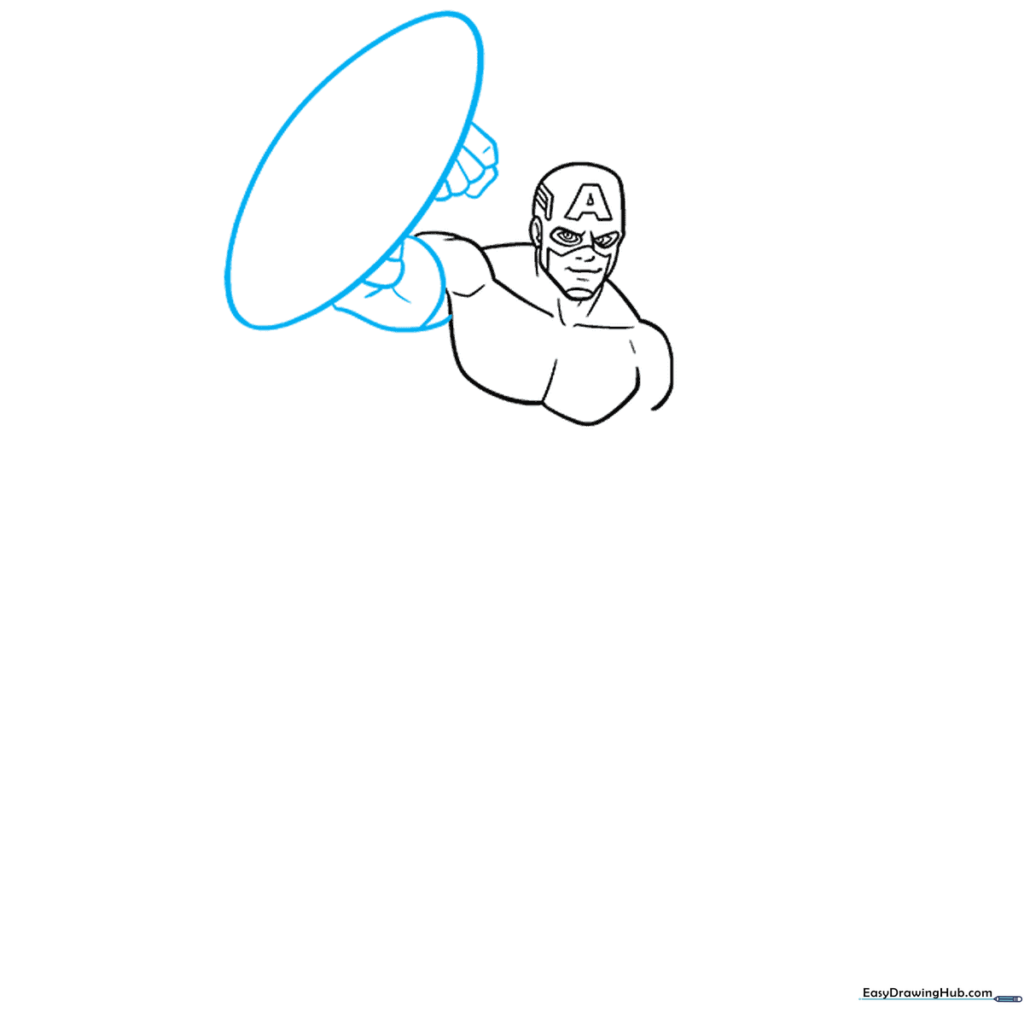
Draw an oval for the shield and connect it to the arm. Sketch the clenched fist. Teacher's Tip: The shield is a key focal point—draw it large to emphasize the hero's defensive stance.
Step 5: Adding Shield and Torso Details
Add the star to the shield and chest. Define the rib cage and abdominal stripes. Teacher's Tip: Use a ruler if you struggle with the star, or practice drawing it freehand to improve your hand-eye coordination.
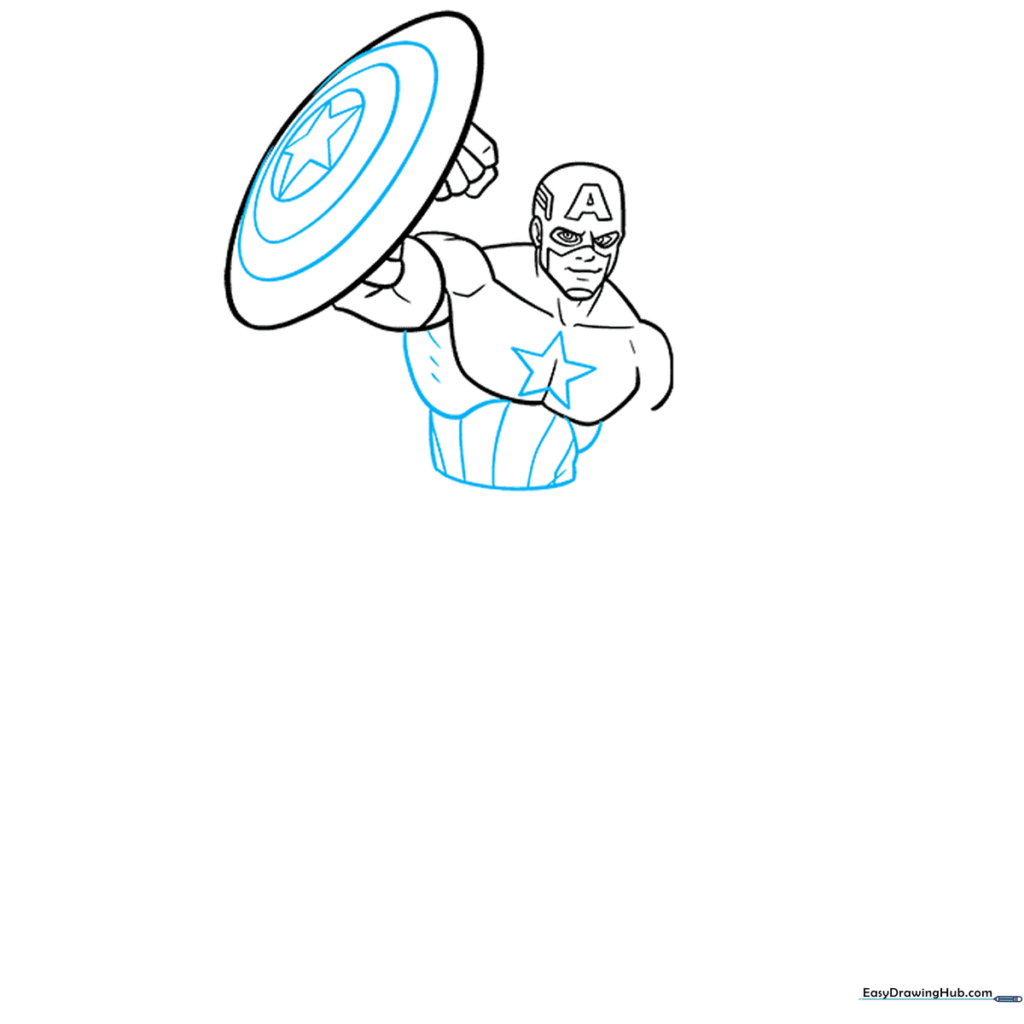
Step 6: Drawing the Belt and Uniform
Sketch the belt, buckle, and the base of the uniform. Teacher's Tip: Keep the belt lines parallel to ensure it looks like it's wrapping around his waist.
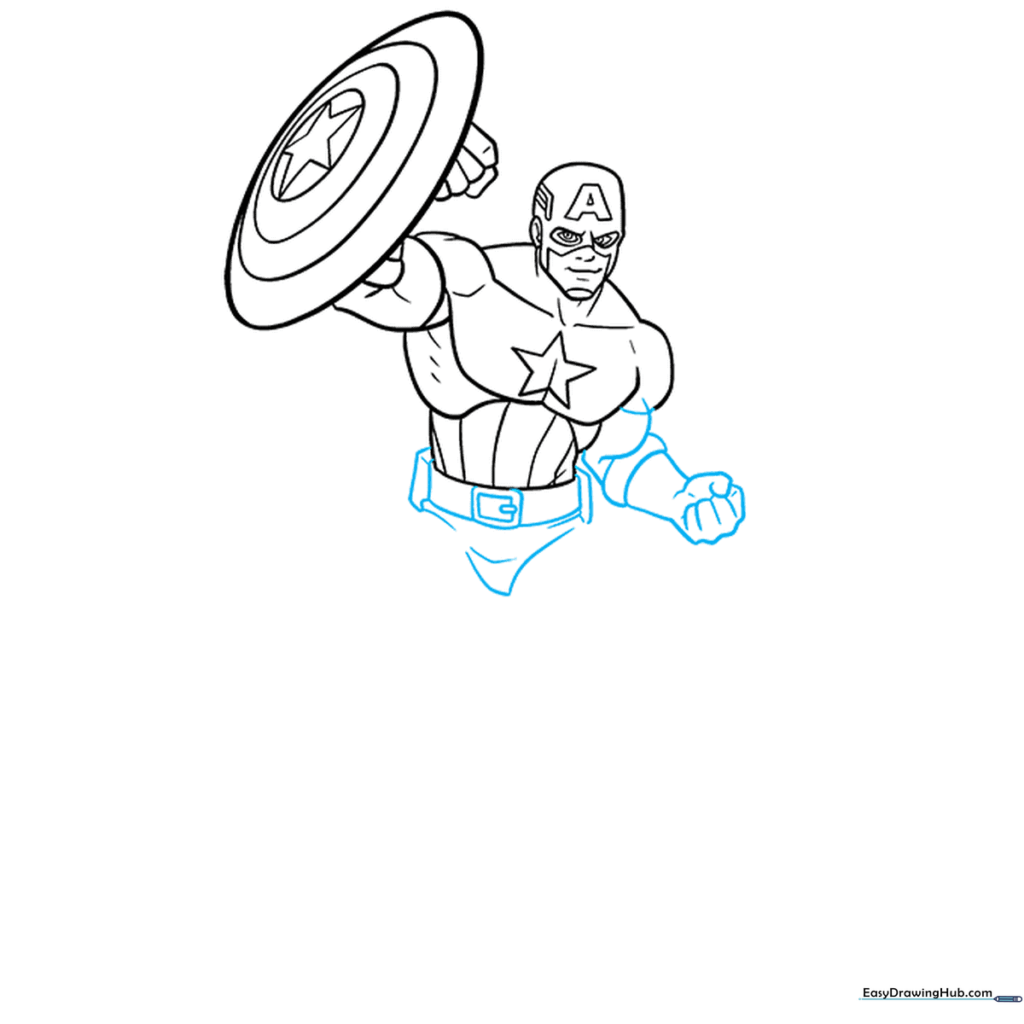
Step 7: Sketching the Legs
Use overlapping curved lines to draw the muscular legs. Teacher's Tip: Think of the leg muscles as two large, slightly bent shapes to give your character a dynamic, ready-for-action pose.
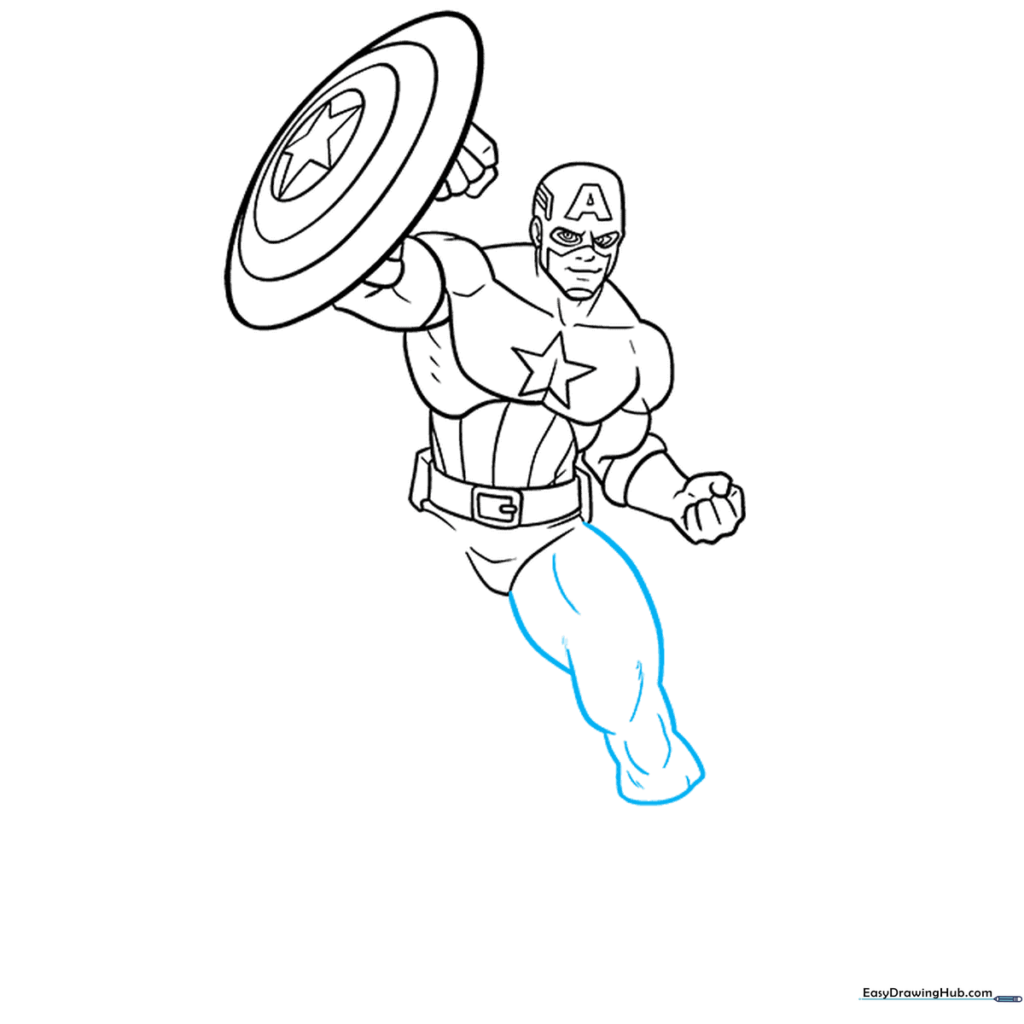
Step 8: Completing the Lower Body
Draw the remaining leg and the foot shape at the bottom. Teacher's Tip: Ensure the feet are grounded so the character doesn't look like he's floating.
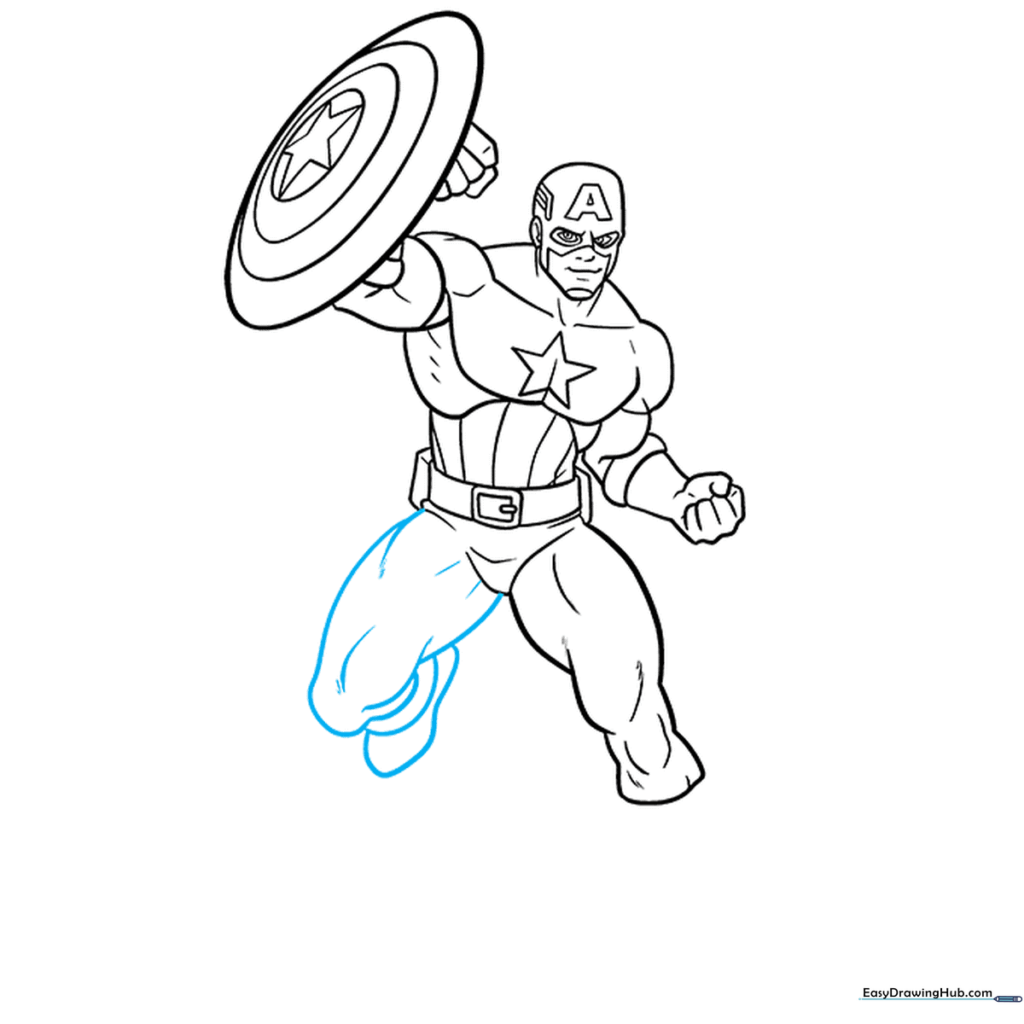
Step 9: Adding Boot Details
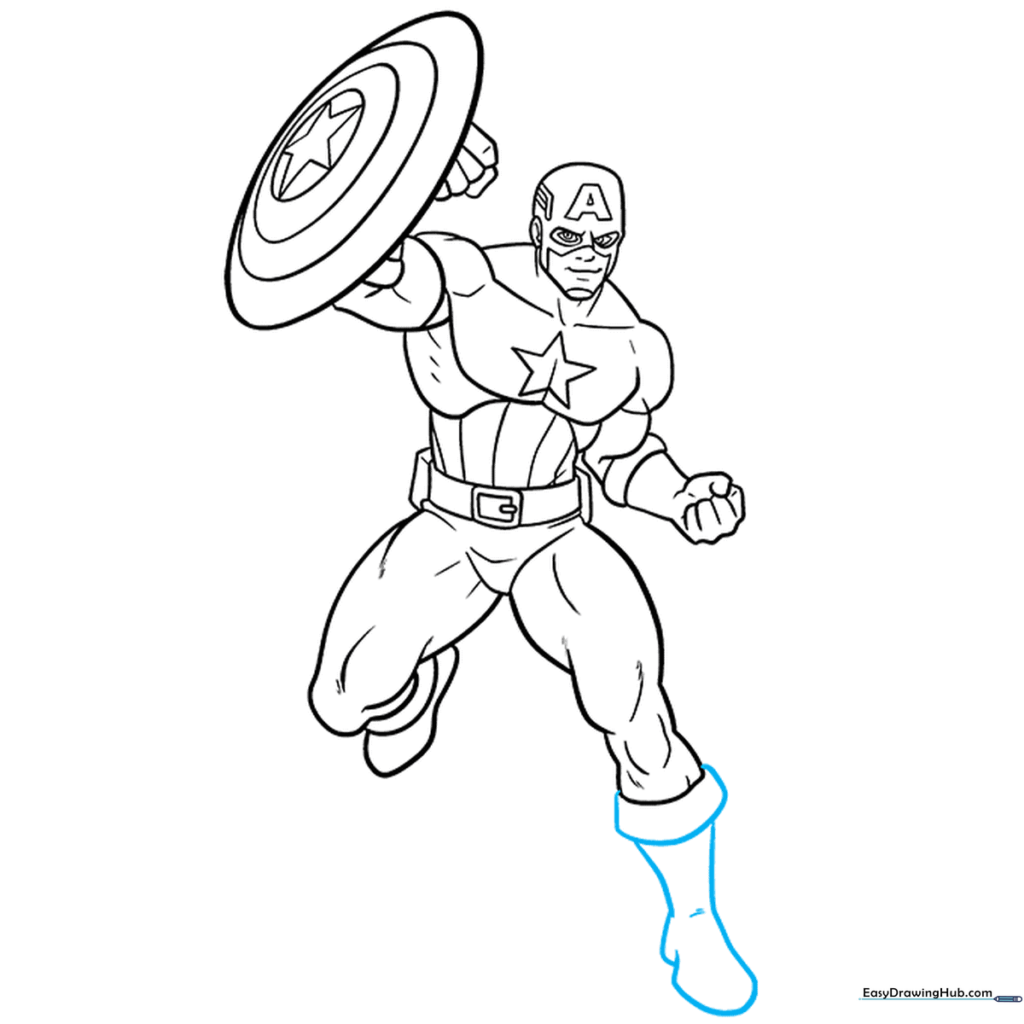
Draw the cuffs and contours of the boots. Teacher's Tip: Adding these small details makes the uniform look authentic and professional.
Step 10: Final Coloring
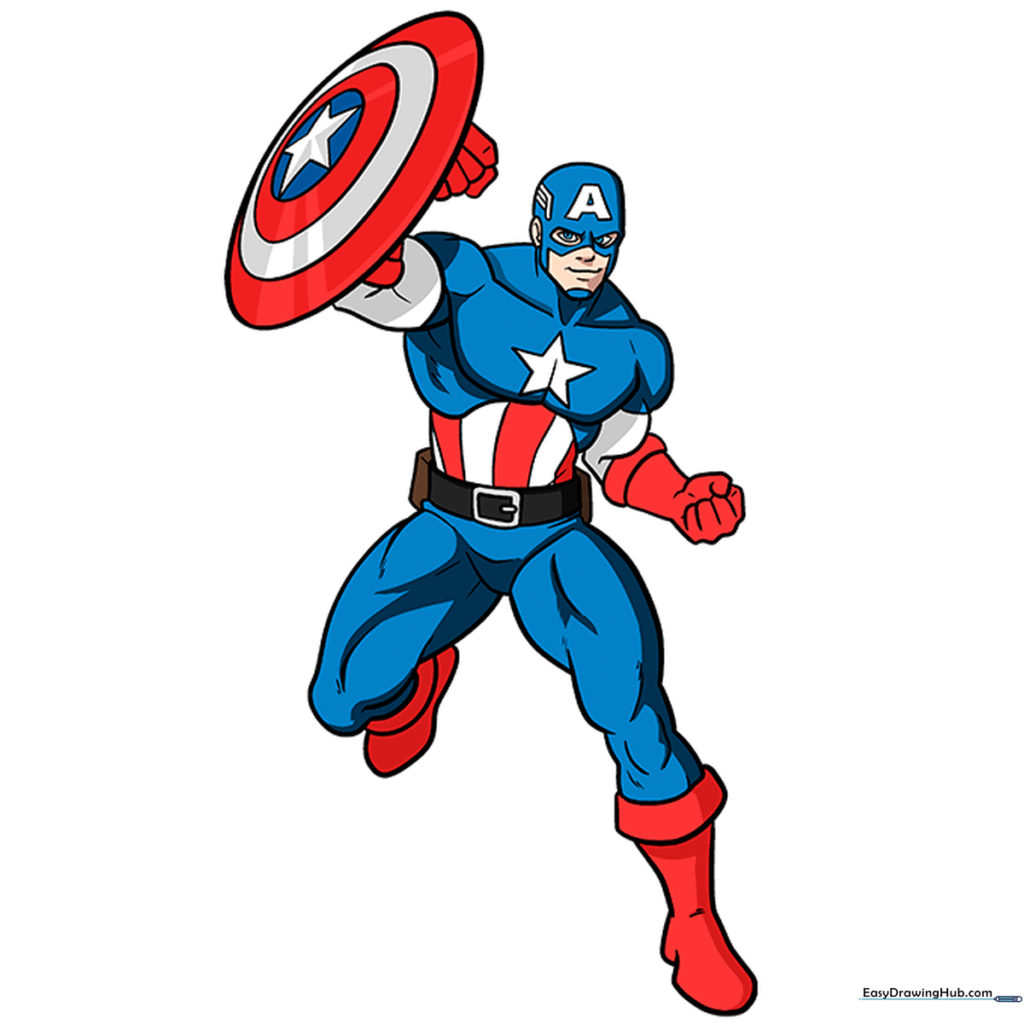
Erase your construction lines and color your masterpiece. Use bold reds, whites, and blues. Teacher's Tip: Use a darker shade of blue for the shadows to give your drawing a 3D effect.
More Tutorials


