How to Draw Buddha: Simple Step-by-Step Guide for Beginners
This guided drawing session is perfect for artists ages 7+ looking to practice symmetry and calm, deliberate line work. You will need a pencil, an eraser, and a sheet of paper to complete this portrait. Follow along to build your confidence in sketching balanced facial features and iconic cultural details.
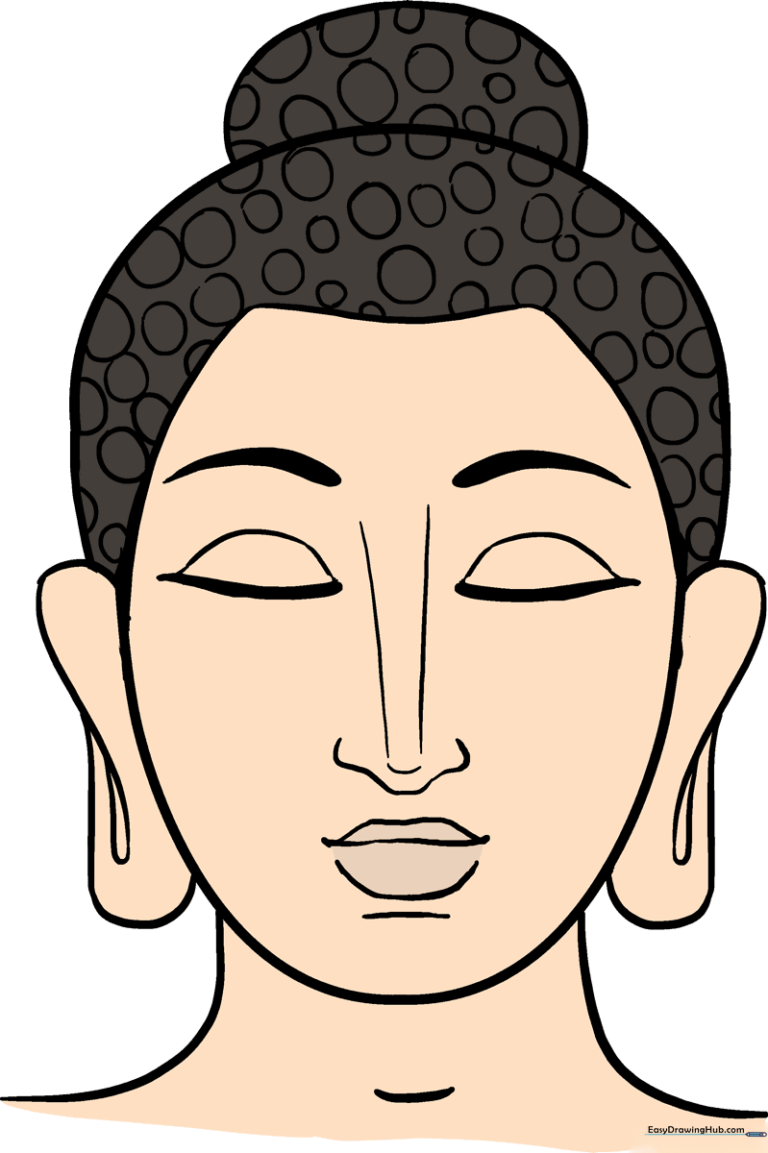
🎯 Final Result
Step-by-Step Instructions
Sketching the Cranium

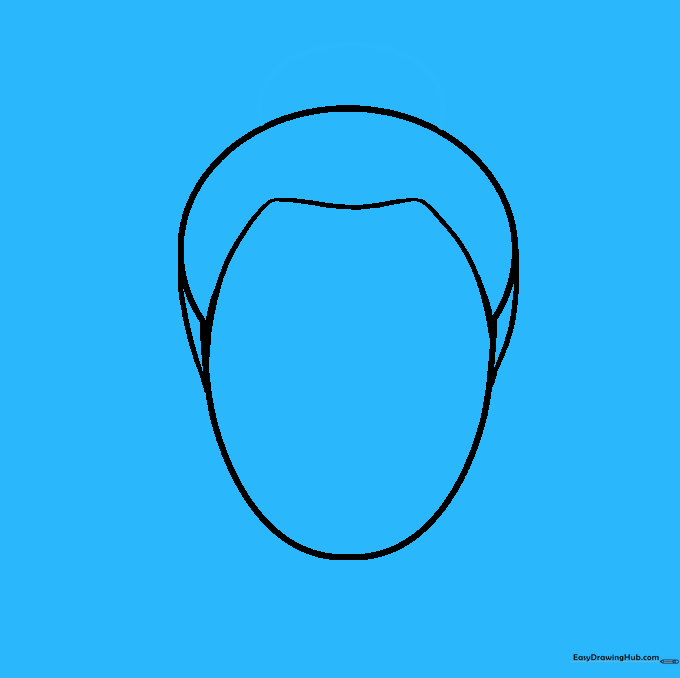
Start by drawing a light oval to serve as the top of the head. Teacher's Tip: Keep this shape loose and light; it’s just a guide for placement, not the final outline.
Defining the Jawline

Beneath the first oval, draw a second, slightly narrower curved shape to form the chin and jaw. Teacher's Tip: Ensure the two shapes overlap slightly so they look like one continuous head shape.
Cleaning the Outline

Gently erase the overlapping lines inside the head shape to create a clean, unified silhouette. Teacher's Tip: Use a soft eraser and brush away the crumbs so your paper stays clean for the details.
Drawing the Hairline

Sketch the hairline using short, curved strokes that form an 'M' shape across the forehead. Teacher's Tip: Keep your strokes rhythmic and consistent to give the hair a natural, textured look.
Adding the Hair Bun
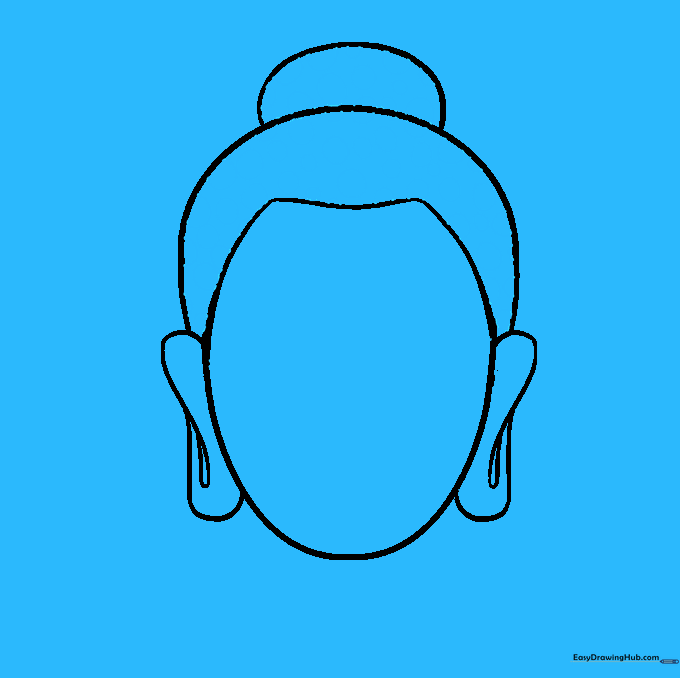
Draw a small, rounded oval on top of the head to represent the ushnisha (hair bun). Teacher's Tip: Imagine it sitting right on the crown of the head like a small cap.
Sketching the Ears
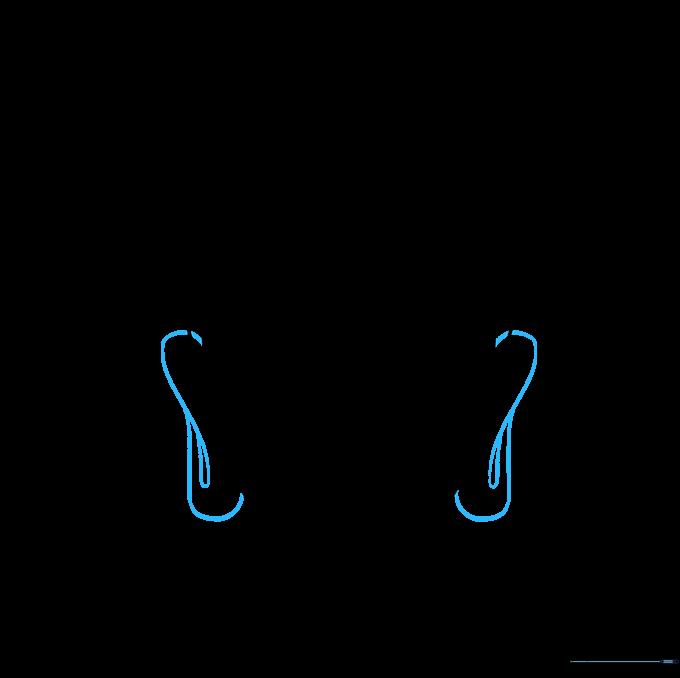
Draw long, curved ears on the sides of the head. Add a small teardrop shape inside each ear for detail. Teacher's Tip: Buddha's ears are traditionally long, symbolizing wisdom and the ability to hear the world's suffering.
Adding Hair Texture
Fill the hair area with small, uniform circles. Teacher's Tip: Legend says these are actually snails that protected Buddha from the sun! Take your time to make them even.
Defining the Neck
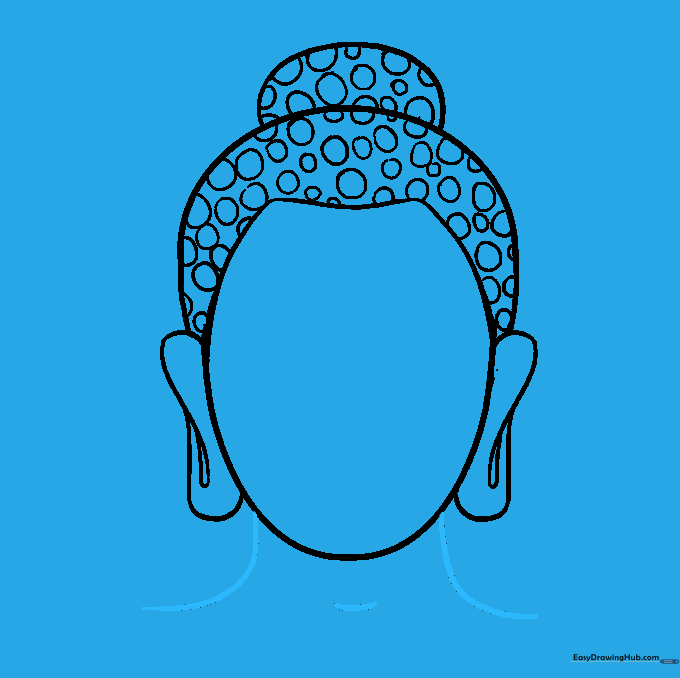
Draw two curved lines extending down from the jaw to form the neck. Add a small curve for the throat. Teacher's Tip: Keep the neck thick to support the head and maintain the statue's proportions.
Drawing the Facial Features
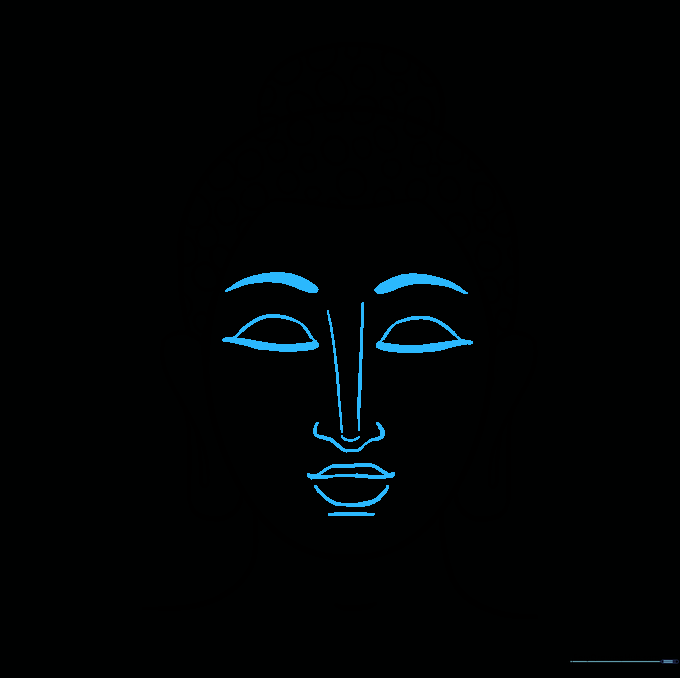
Draw the eyebrows, closed eyelids, nose, and a gentle, smiling mouth. Teacher's Tip: Focus on the curve of the eyelids to give the face a peaceful, meditative expression.
Final Touches and Coloring
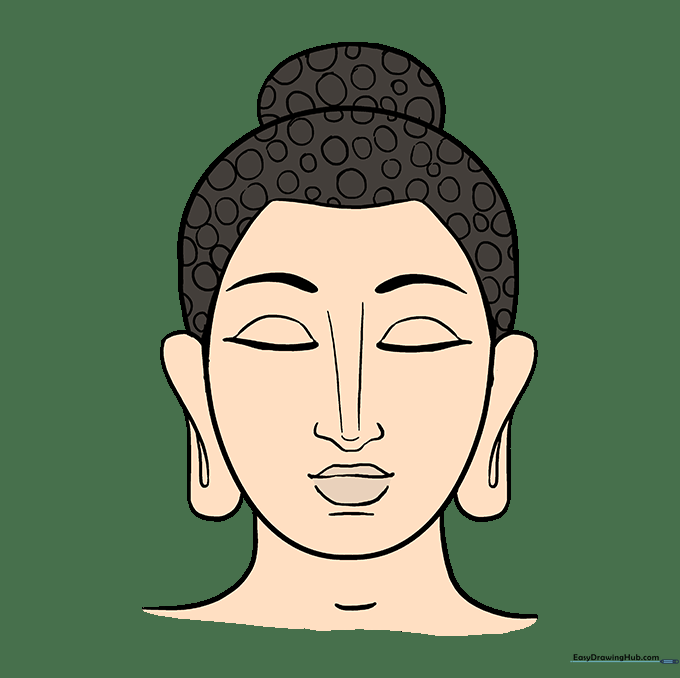
Add final details and color your drawing. Use gold for a statue look or earthy tones for a stone texture. Teacher's Tip: Use light pressure with your colored pencils to create smooth, even shading.
More Tutorials


