How to Draw Broly: Easy Step-by-Step Anime Guide
Ready to bring the Legendary Super Saiyan to life? This tutorial is designed for intermediate artists looking to master dynamic anime anatomy. You will need a pencil, eraser, and paper to capture Broly’s intense expression and muscular build.
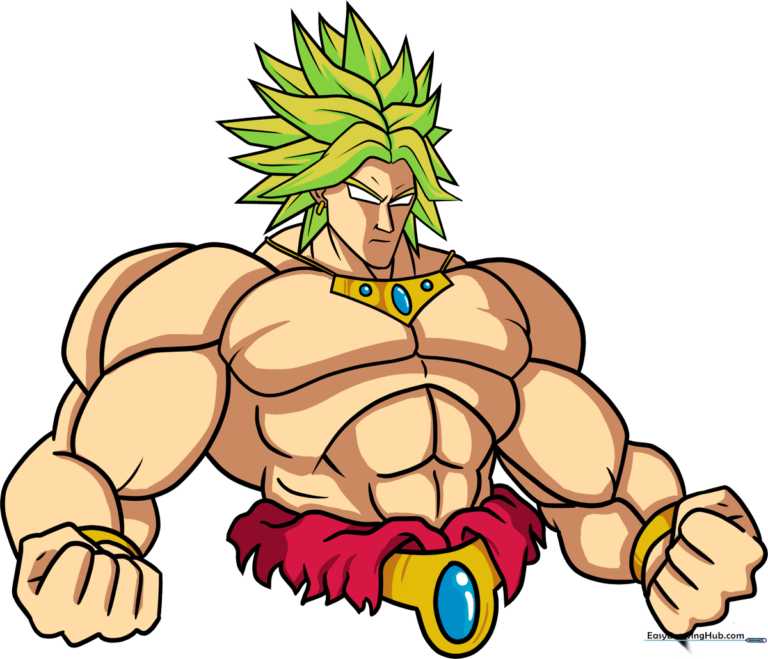
🎯 Final Result
Step-by-Step Instructions
Step 1: Sketching the Face and Hair Base

Start with Broly's iconic Super Saiyan hair using two large 'M' shaped lines that meet at sharp points. Outline the chin, cheeks, and ear, then add the triangular anime eyes and furrowed brows. Teacher's Tip: Keep your pencil lines light and loose here so you can easily adjust the proportions of his face before committing to the final outline.
Step 2: Defining the Spiky Hair

Continue building the wild Super Saiyan hair by adding pairs of curved lines that meet at sharp points. Tip: Think of these as flames or jagged leaves; varying the size of the spikes will make his hair look more natural and energetic.
Step 3: Adding Hair Tufts
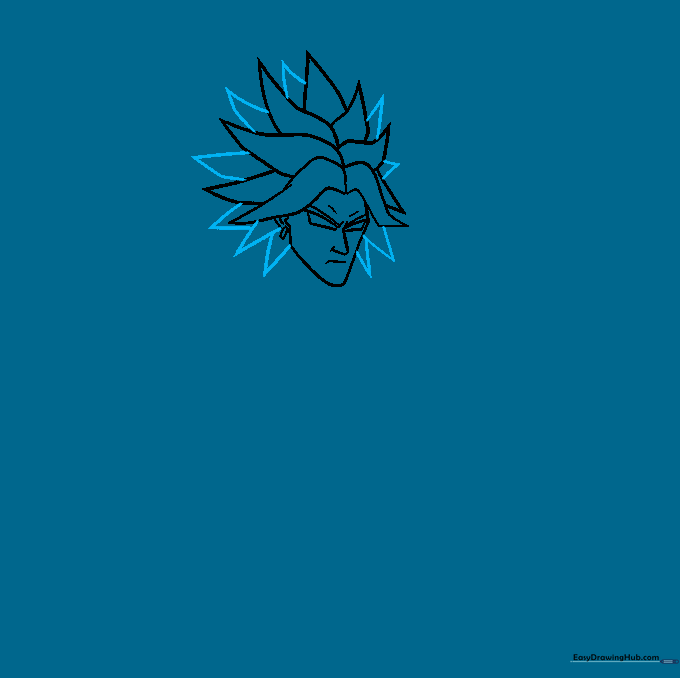
Add additional tufts of hair between the existing ones and along the sides of the face. Use a mix of straight and curved lines that meet at sharp points. Tip: Don't worry about perfect symmetry; Broly's hair is meant to look chaotic and wild.
Step 4: Shoulders and Power Ring
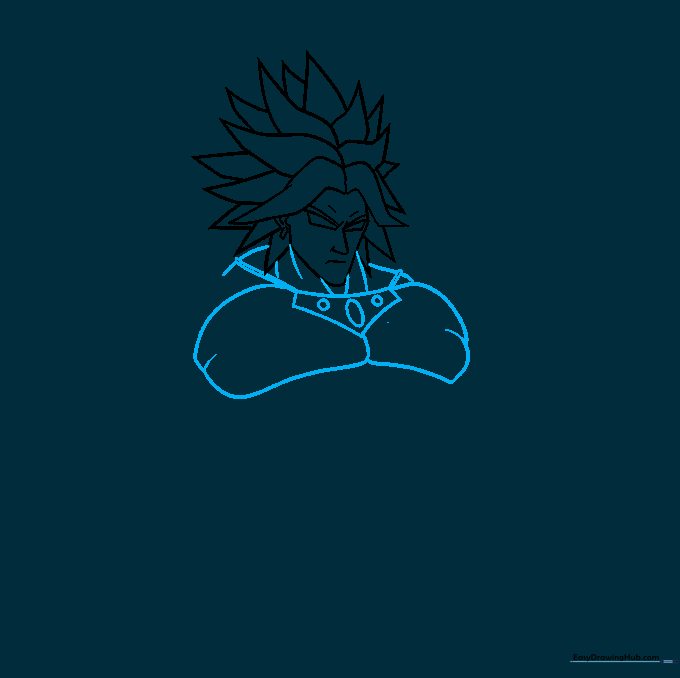
Outline the shoulders and define the neck muscles with curved lines. Draw the five-sided 'crown' shape across the chest, adding two small circles and an oval for his power-control device. Tip: Focus on the overlapping lines where the neck meets the shoulders to create a sense of depth and mass.
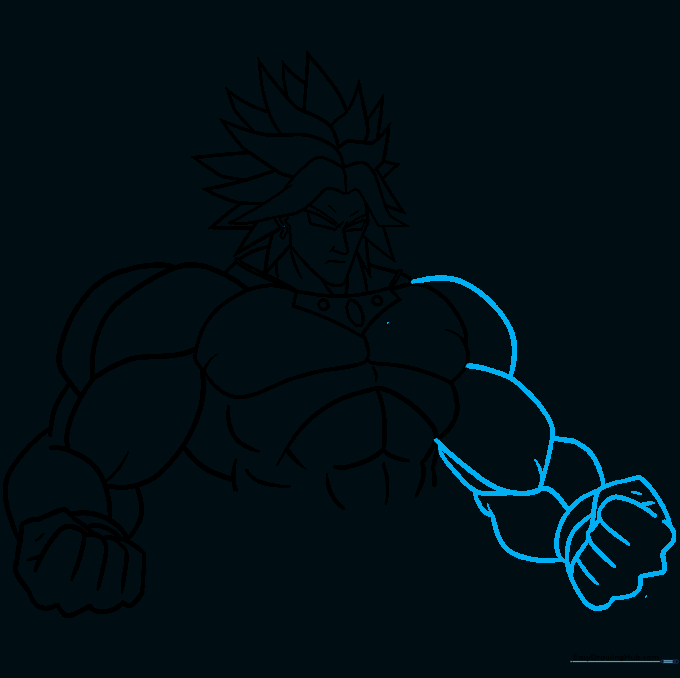
Step 5: Drawing the Bulging Arm

Draw the first arm, using curved lines to emphasize the bulging bicep and tricep muscles. Finish with a clenched fist. Tip: Use short, curved strokes to represent the muscle definition; this makes the character look stronger and more 'anime-accurate'.
Step 6: Detailing the Torso
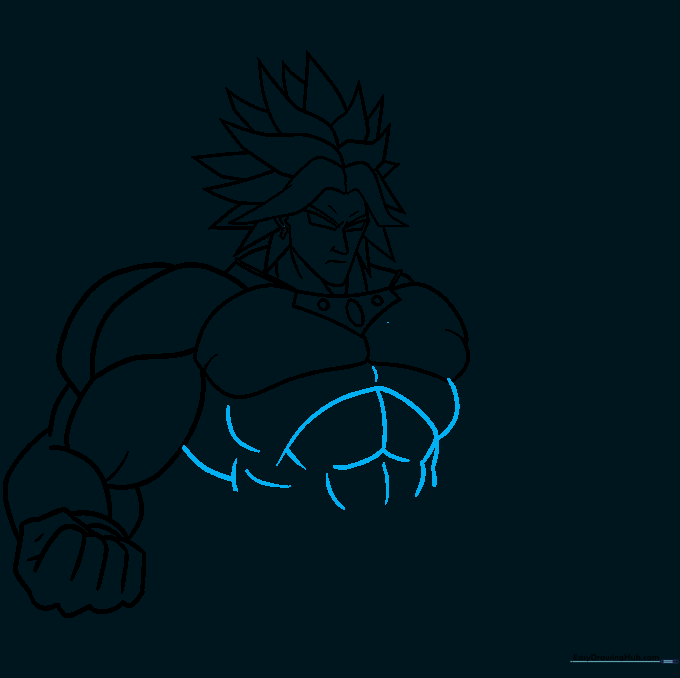
Outline the sides of the torso and use curved lines to detail the pectoral, abdominal, and oblique muscles. Tip: Keep these lines fluid. Think of the muscles as rounded shapes rather than flat blocks to give him a more realistic, powerful look.
Step 7: The Second Arm
Draw the remaining arm, mirroring the muscular style of the first. Ensure the fingers of the balled fist are clearly defined with overlapping curved lines. Tip: Check the scale of this arm against the first one to ensure his physique remains balanced.
Step 8: Clothing and Belt
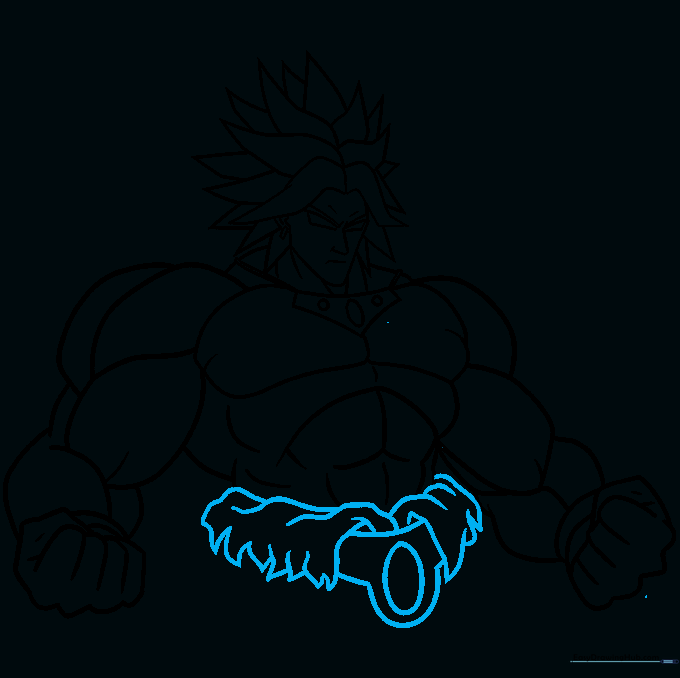
Sketch the top of his garment using overlapping curved lines. For the ragged bottom edge, use jagged, uneven points. Finally, draw the belt with a large central oval. Tip: The 'ragged' look adds to the intensity of the character—don't make the edges too smooth!
Step 9: Final Hair Texturing
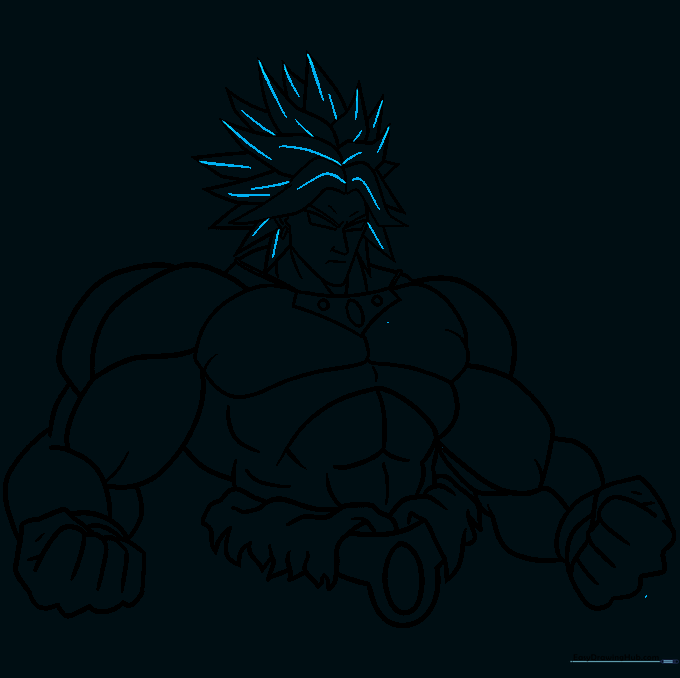
Add final texture lines to the hair, following the flow of each spike. Tip: Use long, sweeping strokes to give the hair a sense of movement and volume.
Step 10: Bringing Broly to Life with Color

Time to color! Use vibrant yellow for his Super Saiyan hair and deep reds for his garments. Tip: Try adding a slightly darker shade of red in the folds of the fabric to create a 3D effect.
More Tutorials


