How to Draw Boxing Gloves: Easy 10-Step Guide
Ready to step into the ring? This tutorial is perfect for young athletes and artists ages 6+. You only need a pencil, an eraser, and a piece of paper to get started. Follow these steps to master the shape and texture of professional boxing gloves.
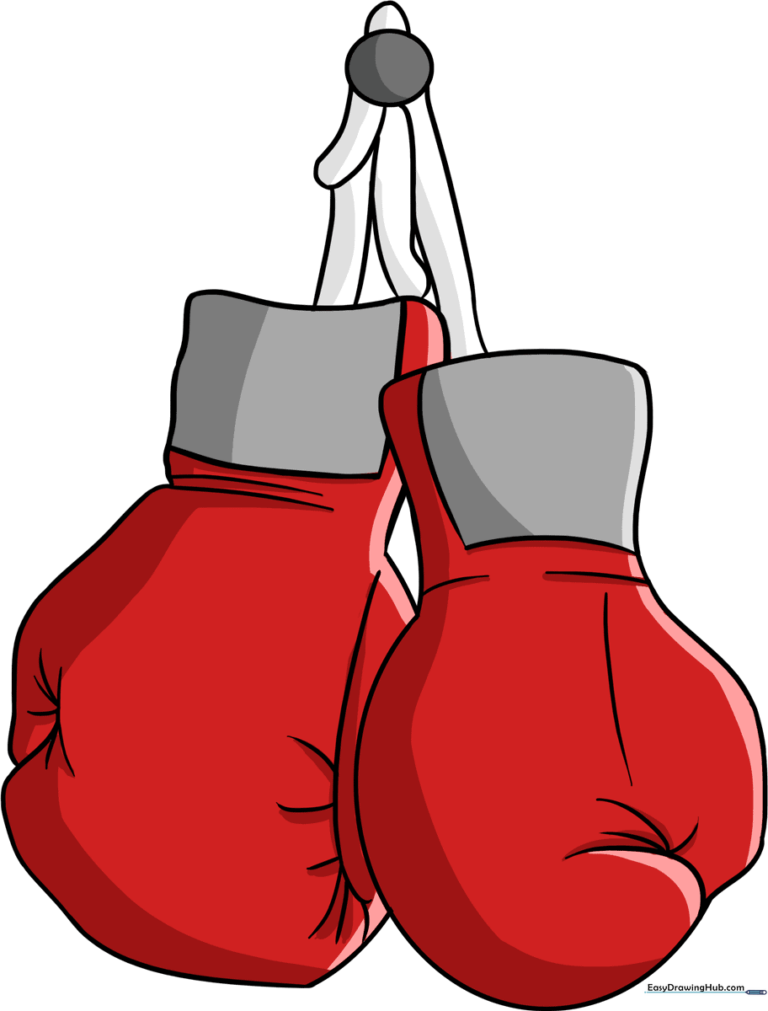
🎯 Final Result
Step-by-Step Instructions
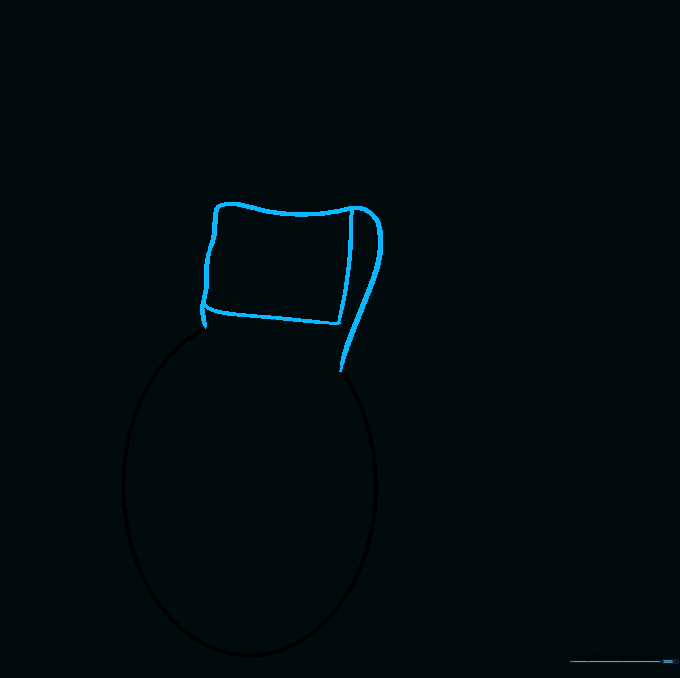
Step 1: Sketching the Base

Start by drawing a soft oval. Tip: Keep this shape light and loose; it acts as the foundation for the main glove body.
Step 2: Defining the Wrist
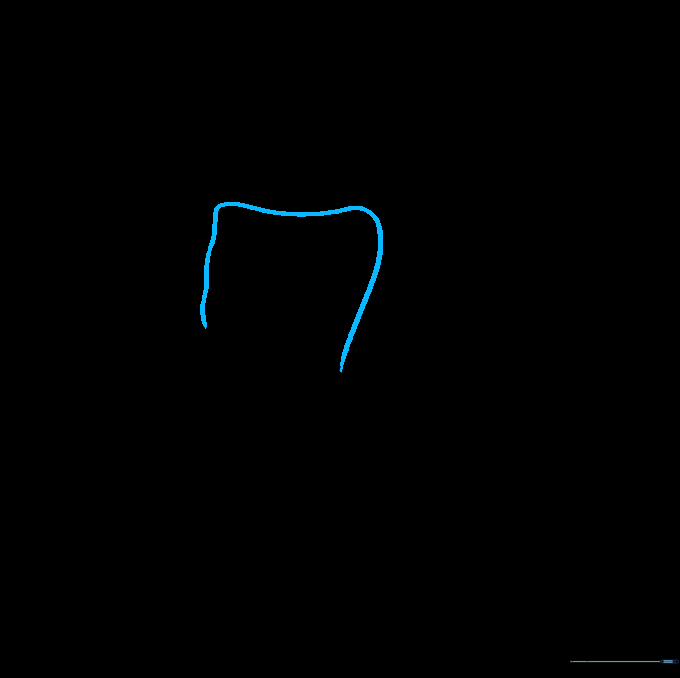
Draw a rounded rectangular shape on top of the oval. Tip: Imagine this as the cuff that protects the fighter's wrist.
Step 3: Cleaning the Structure
Erase the overlapping line inside the wrist area, then draw a clean rectangle across the cuff. Tip: Use a clean eraser to keep your paper smudge-free.
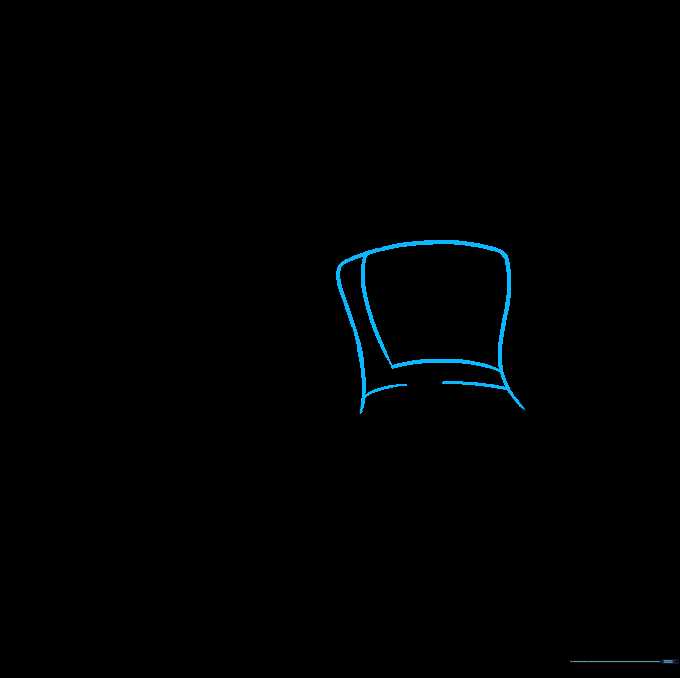
Step 4: Shaping the Thumb
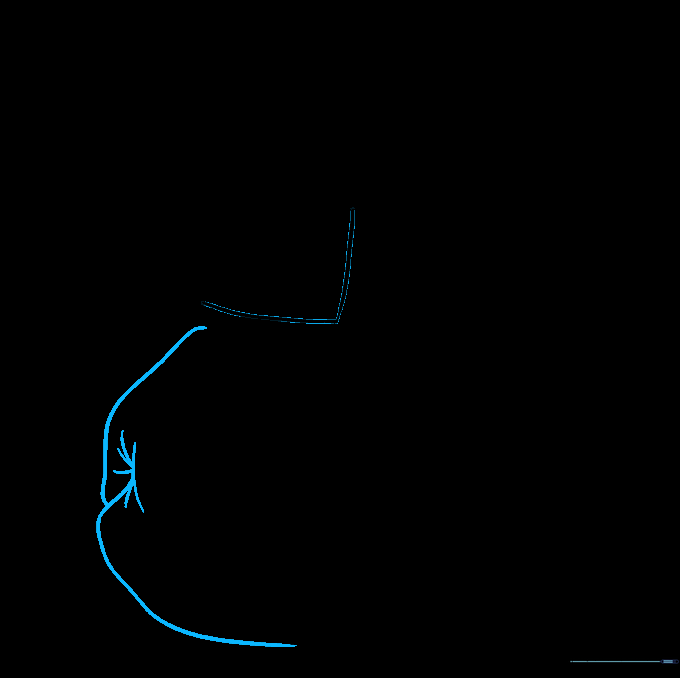
Erase the side of the oval and use curved lines to form the thumb and mitten shape. Add a small starburst pattern where the lines meet. Tip: The starburst adds a cool, comic-book style detail!
Step 5: Starting the Second Glove

Draw a second oval overlapping the first one. Tip: Don't worry if it looks messy; we will clean up the overlapping lines in the next step.
Step 6: Defining the Second Cuff
Erase the top of the second oval and add a rounded rectangular cuff. Add curved lines at the base to show the material's thickness. Tip: These curves make the glove look 3D and realistic.
Step 7: Completing the Second Glove

Outline the thumb and mitten for the second glove, adding the starburst detail and a seam line from the wrist. Tip: Keep your lines smooth to represent the leather surface.
Step 8: Adding the Hanging Hook
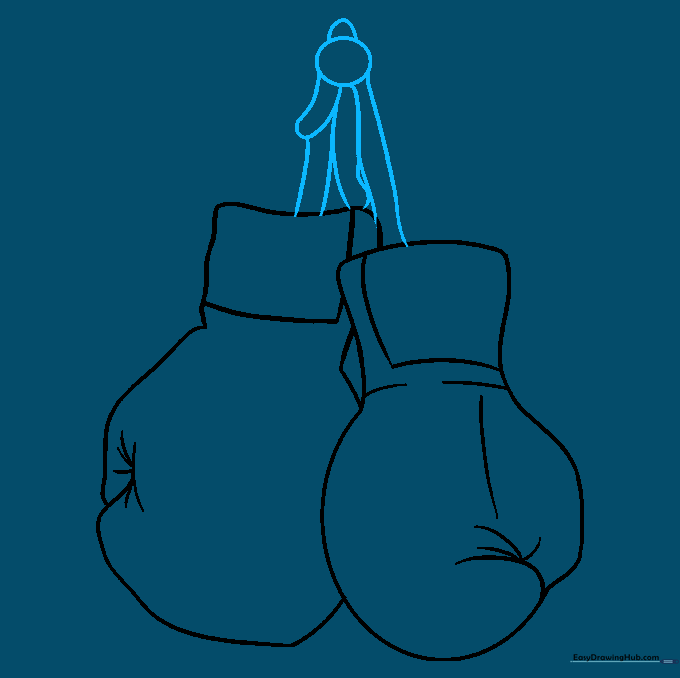
Draw a circle above the gloves with a 'U' shape to create a hook. Connect the gloves to the hook with pairs of lines. Tip: This makes it look like the gloves are hanging in a locker room.
Step 9: Adding Texture Details
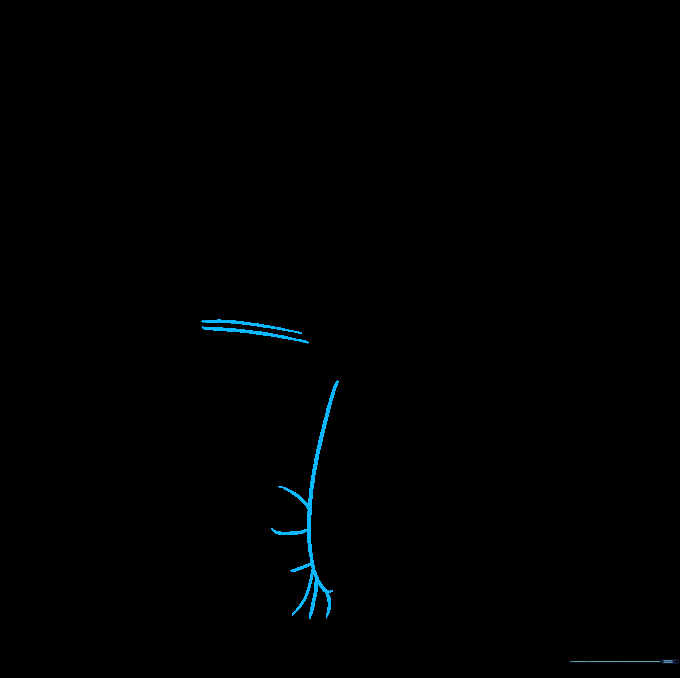
Add small curved lines across the wrists and sides to represent wrinkles in the leather. Tip: Less is more—a few strategic lines suggest texture better than too many.
Step 10: Bringing it to Life with Color
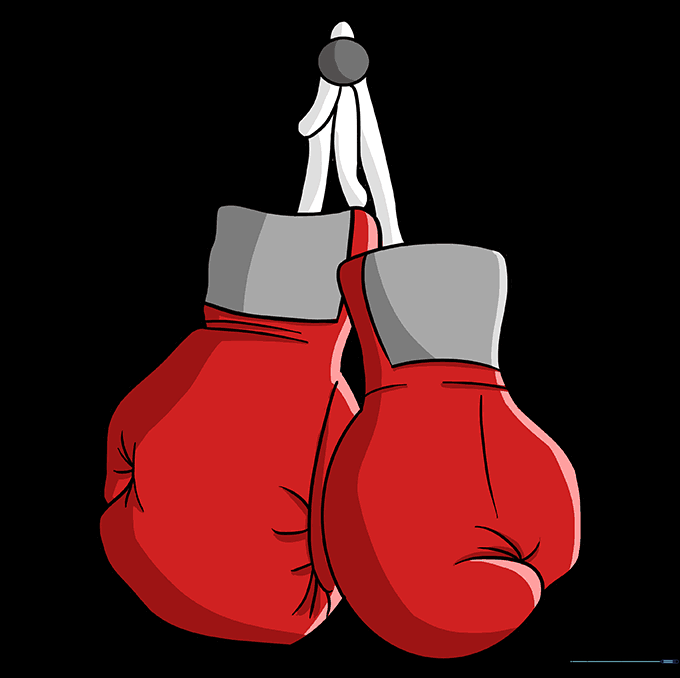
Time to color! Boxing gloves are traditionally bright red, but feel free to use your favorite colors. Tip: Use a darker shade of red on the edges to create a shadow effect.
More Tutorials


