How to Draw Bacteria: Easy Science Anatomy Guide
Bring biology to life with this easy, step-by-step guide to drawing a bacteria cell. Designed for students and young artists, this tutorial uses simple shapes to help you visualize complex anatomy. Grab your pencil and paper to create an accurate, labeled diagram for your next science project.
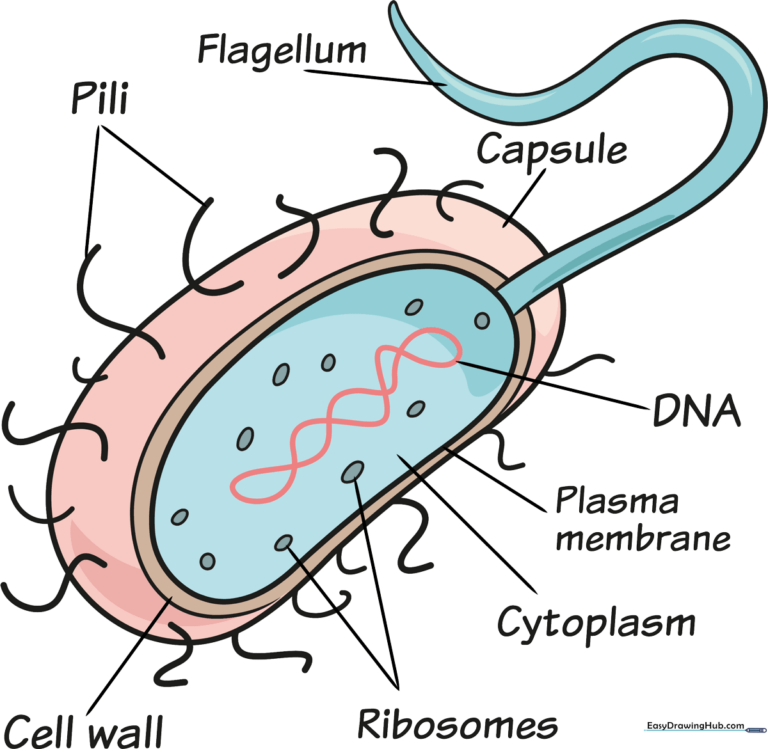
🎯 Final Result
Step-by-Step Instructions
Step 1: Sketching the Cell Body

Draw a long, curved bean shape to outline the main body of the bacterium. Then, sketch a smaller bean shape inside to create a 'cut-away' view. Teacher's Tip: Keep your pencil lines light so you can easily erase any overlapping marks later.
Step 2: Adding the Flagellum

Extend two long, parallel curved lines from the cell to form a point at the end. This is the flagellum, the tail-like structure bacteria use to swim. Tip: Make the tail slightly wavy to give it a more organic, natural look.
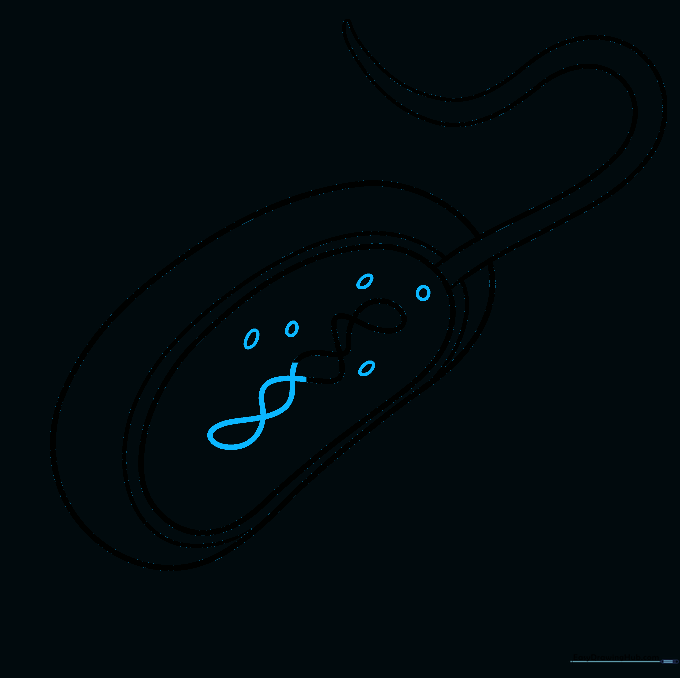
Step 3: Drawing the DNA

Draw a long, squiggly line that doubles back on itself inside the cell. This represents the bacterial DNA. Unlike animal cells, bacteria don't have a nucleus, so the DNA floats freely. Tip: Use a fluid, continuous motion to make the DNA look like a tangled thread.
Step 4: Adding Ribosomes
Complete the DNA outline and start drawing small, scattered ovals throughout the cell. These are ribosomes, the cell's energy factories. Tip: Vary the size and placement of the ovals to make the cytoplasm look busy and realistic.
Step 5: Sketching the Pili
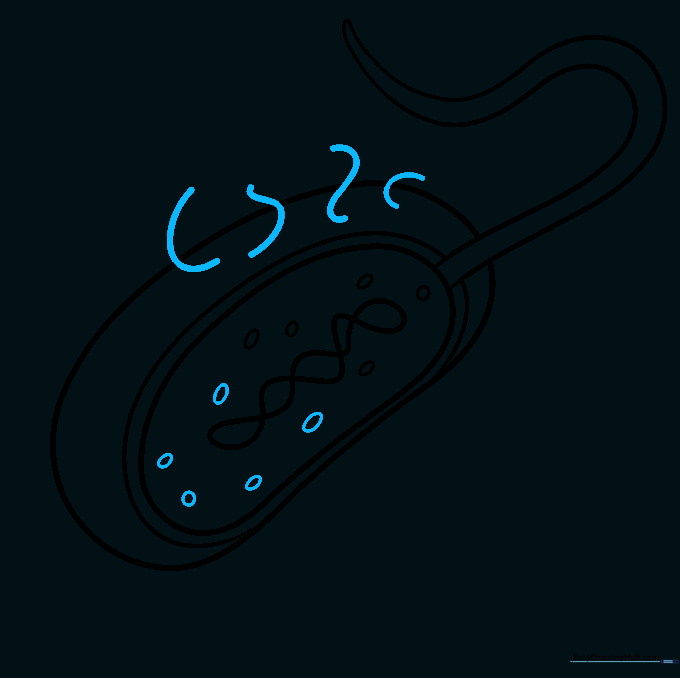
Continue adding ribosomes, then draw several short, curved lines sticking out from the cell wall. These are pili, which help the bacteria attach to surfaces. Tip: Think of these like tiny, fuzzy hairs covering the cell's exterior.
Step 6: Filling in the Pili
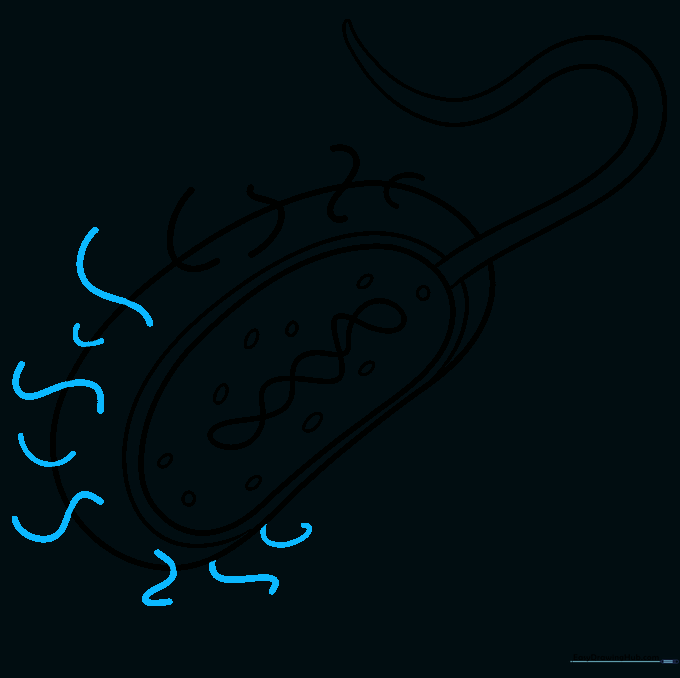
Add more pili of varying lengths all around the cell wall. Don't worry about making them perfect—bacteria are naturally irregular! Tip: Use quick, flicking motions with your pencil to get that sharp, hair-like appearance.
Step 7: Beginning the Labels
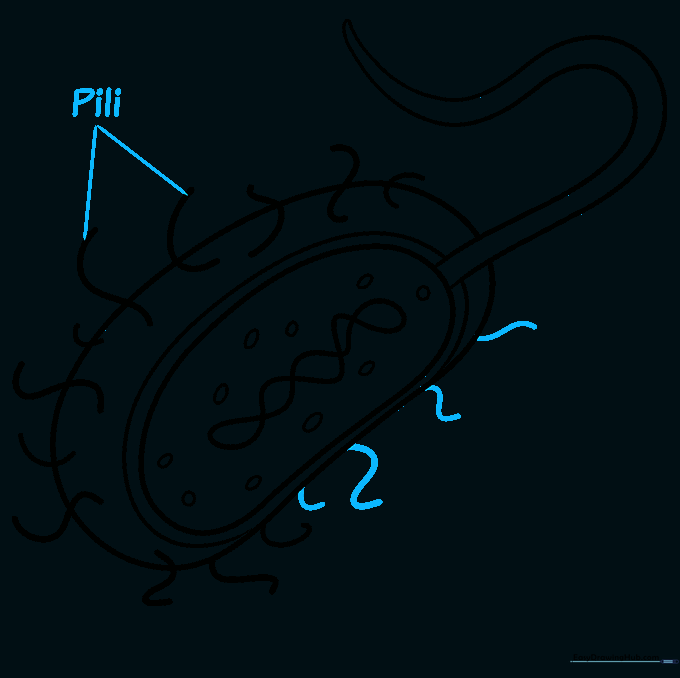
Finish the pili on the bottom side. Now, draw straight lines pointing to the different parts of your cell and write the labels. Start by labeling the 'pili'. Tip: Use a ruler to keep your label lines straight and professional-looking.
Step 8: Labeling Anatomy
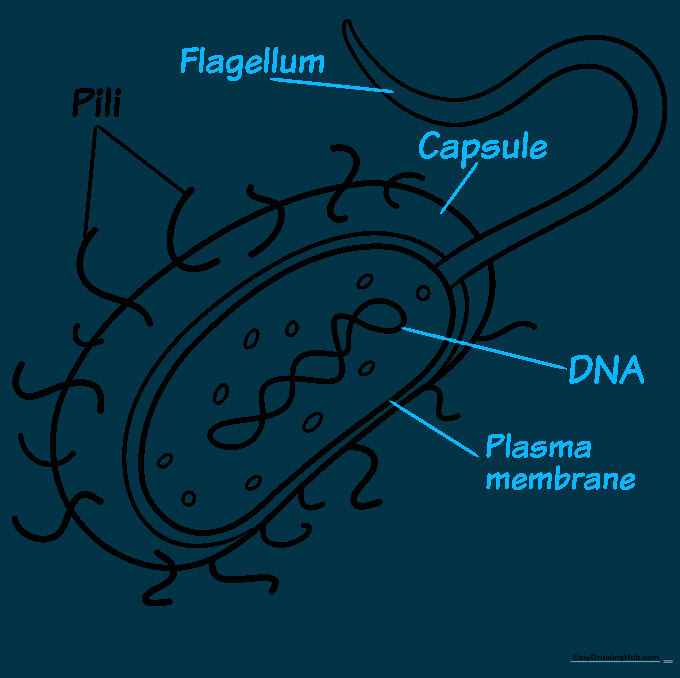
Continue labeling the remaining parts: 'flagellum' for the tail, 'capsule' for the outer shell, 'DNA' for the squiggly center, and 'plasma membrane' for the inner lining. Tip: Double-check your spelling to ensure your science diagram is accurate for class!
Step 9: Finalizing the Diagram
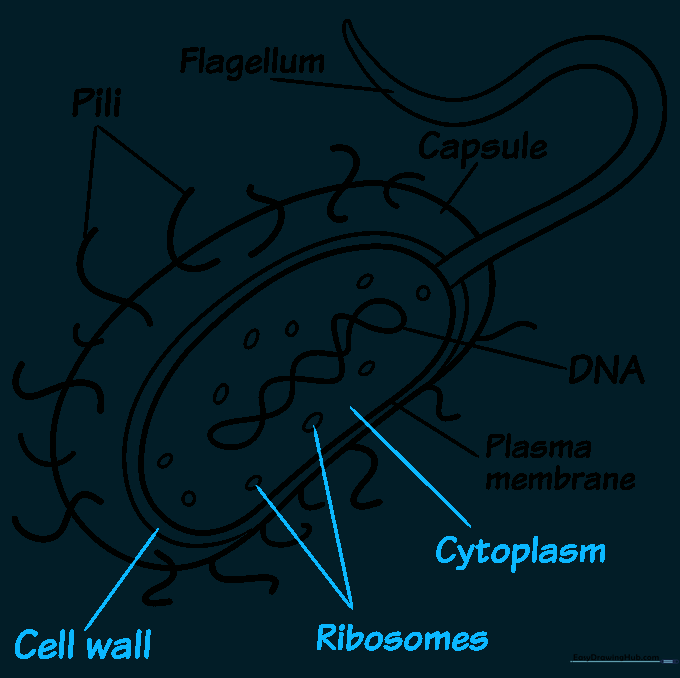
Add your final labels: 'cell wall', 'ribosomes', and 'cytoplasm'. Your scientific anatomy diagram is now complete! Tip: Ensure your text is clear and doesn't overlap with your drawing lines.
Step 10: Adding Color
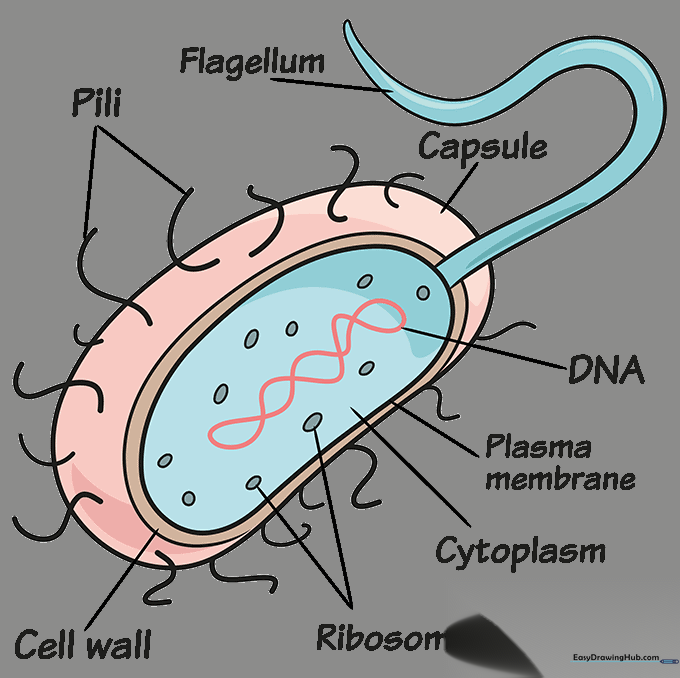
Bring your diagram to life with color. Use different shades to distinguish the cell wall from the cytoplasm and DNA. Tip: Use colored pencils for a clean, academic look that makes each part easy to identify.
More Tutorials


