How to Draw Bacon and Eggs: Easy 10-Step Guide
Ready to draw a tasty breakfast? This project is perfect for artists ages 5 and up to practice drawing organic, wavy shapes. All you need is a pencil, an eraser, and your favorite coloring supplies to bring this classic meal to life.
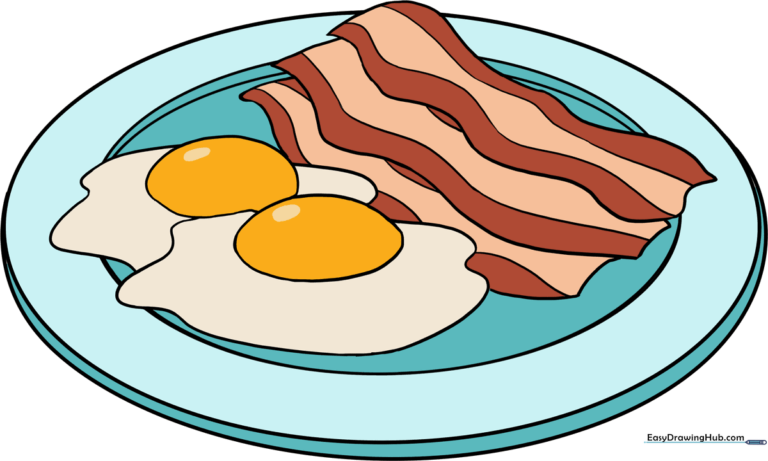
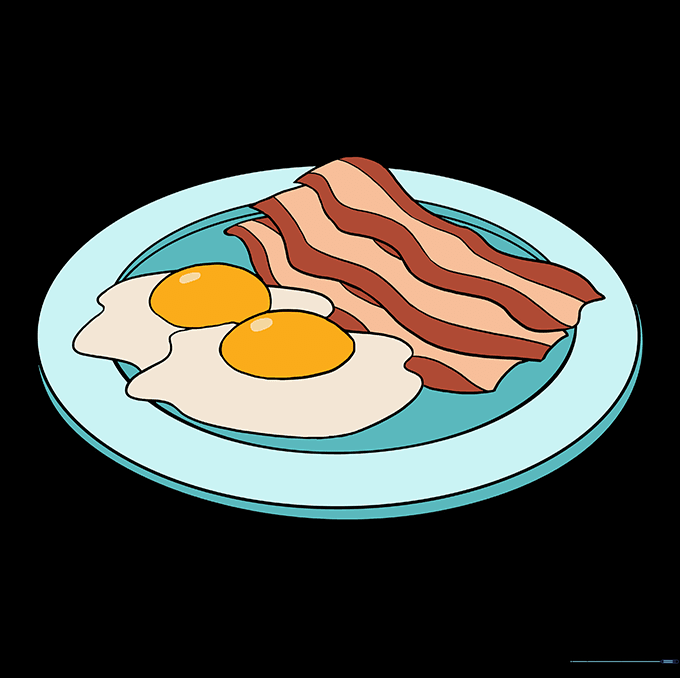
🎯 Final Result
Step-by-Step Instructions
Step 1: Sketching the Plate Base

Draw a large, wide oval to serve as the top of your plate. Add a curved line parallel to the bottom edge to create the rim. Teacher's Tip: Keep your pencil lines light so you can easily adjust the shape if it looks a bit wobbly!
Step 2: Adding Plate Depth

Draw a smaller oval inside the first to show the plate's surface. Add a curved line across the center to give it a realistic, rounded look. Tip: Think of this like drawing a shallow bowl.
Step 3: Outlining the Egg Whites

Draw two irregular, wavy shapes on the plate to represent the egg whites. Let them overlap slightly to make the drawing look natural. Tip: Don't worry about making them perfect—eggs are never perfectly round in real life!
Step 4: Cleaning Up

Carefully erase any overlapping lines inside the egg shapes to make them look like they are sitting on top of the plate. Tip: Use a clean eraser to keep your paper smudge-free.
Step 5: Adding the Yolks

Draw a small oval in the center of each egg white to create the yolks. Tip: Place them slightly off-center to make the eggs look more realistic and less like a cartoon.
Step 6: Refining the Yolks

Erase any lines that pass through your yolks so they appear solid. Tip: This is a great time to check your symmetry and make sure your yolks look round and plump.
Step 7: Drawing the Bacon

Draw strips of bacon using wavy, parallel lines. Connect them at the ends with short curves. Tip: Make the bacon overlap the eggs to create a sense of space on the plate.
Step 8: Final Cleanup

Erase any overlapping guide lines on the bacon strips. Tip: Take your time here; clean lines make your final drawing look much more professional.
Step 9: Adding Bacon Texture
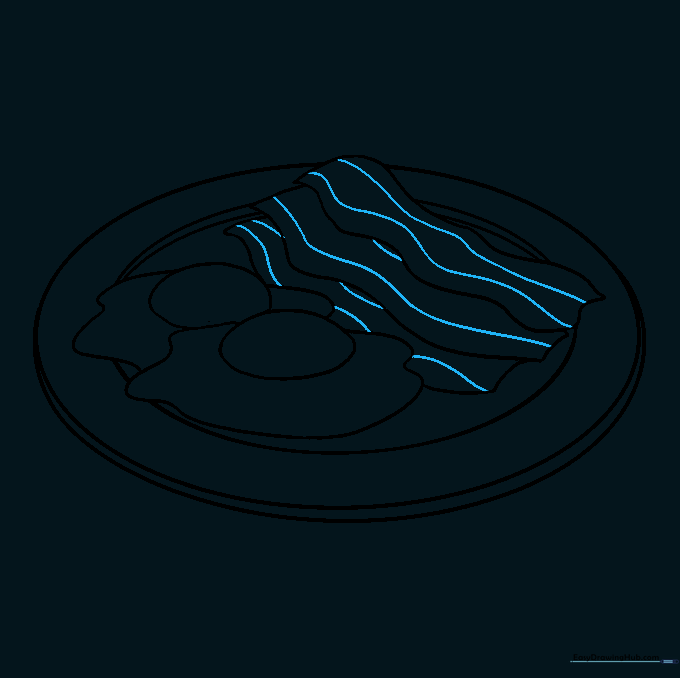
Draw small, wavy lines down the length of each bacon strip to show the texture of the meat and fat. Tip: Vary the length of these lines to make the bacon look crispy and cooked.
Step 10: Bringing It to Life with Color
Color your breakfast! Use bright yellow or orange for the yolks, white for the egg whites, and shades of pink, tan, and brown for the bacon. Tip: Use a darker brown for the edges of the bacon to make it look extra crispy!
More Tutorials


