How to Draw Baby Yoda: Easy Step-by-Step Guide
Bring 'The Child' to life with this simple, screen-free drawing lesson perfect for ages 5 and up. You will only need a pencil, an eraser, and a piece of paper to master this iconic character. Follow these clear steps to build confidence and improve your fine motor skills through fun, guided practice.
🎯 Final Result

Step-by-Step Instructions
Step 1: Sketching the Expressive Eyes

Start by drawing two large, wide-set ovals for the eyes. Inside each, add a circle, a tiny rectangle, and a curved triangle to create that signature wide-eyed look. Teacher's Tip: Keep your pencil strokes light so you can easily erase any overlapping lines later.
Step 2: Defining the Eye Contour

Carefully draw curved lines around the eyes to define the sockets. Add small vertical lines between the eyes to give the face depth. Teacher's Tip: Use a gentle touch here to ensure the lines look soft rather than harsh.
Step 3: Adding the Nose and Mouth

Sketch a small nose with two nostrils, followed by a wide, gentle smile. Add a few small lines inside the mouth to suggest teeth and define the chin below. Teacher's Tip: A tiny chin line helps ground the face and makes the character look more three-dimensional.
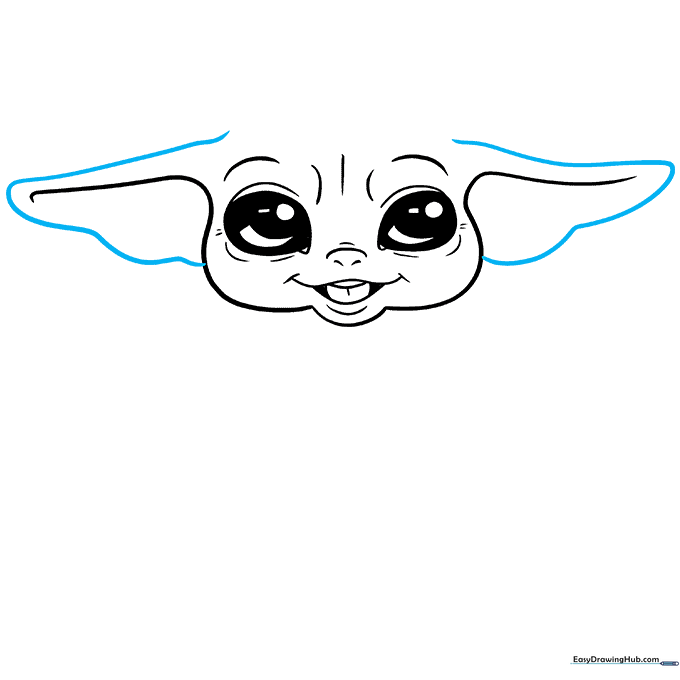
Step 4: Shaping the Cheeks and Ears

Extend long, sweeping curves from the chin to form the cheeks and the inner structure of the ears. Teacher's Tip: Focus on the flow of the line—keep it fluid to make the character look organic and soft.
Step 5: Defining the Ears
Use curved lines to outline the large, triangular shapes of the ears. Teacher's Tip: Don't worry if they aren't perfectly symmetrical; Baby Yoda's ears are naturally expressive and slightly irregular!
Step 6: Completing the Head
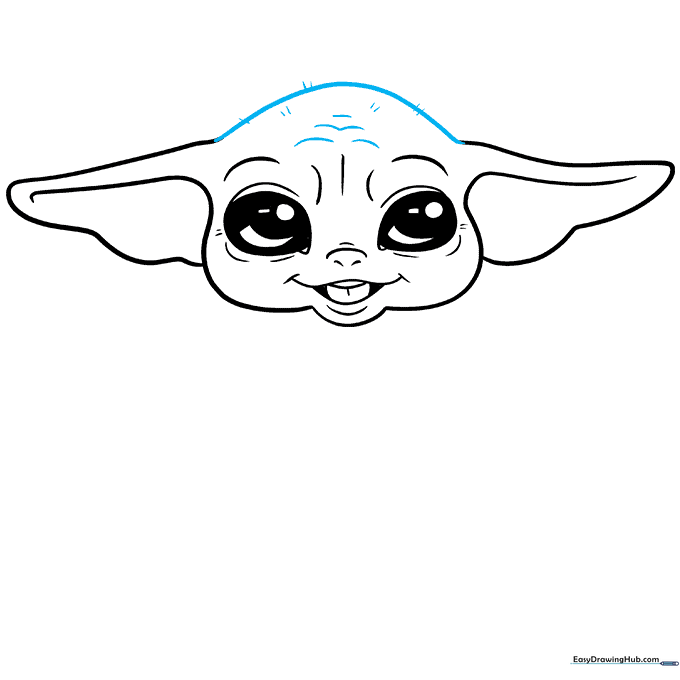
Connect the ears with a smooth, curved line across the top of the head. Add a few small, light lines on the forehead to suggest wrinkles. Teacher's Tip: Use short, flicking motions with your pencil to create natural-looking skin folds.
Step 7: Drawing the Robe
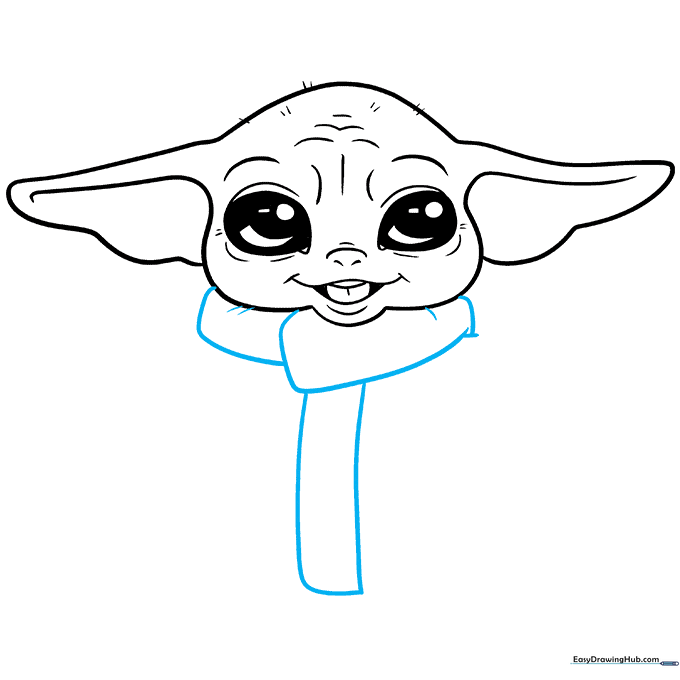
Draw the scarf-like collar and the front of the robe using overlapping rounded rectangles. Add short lines to suggest fabric texture. Teacher's Tip: Vary the length of your lines to make the fabric look like it has natural folds.
Step 8: Adding Hands and Sleeves
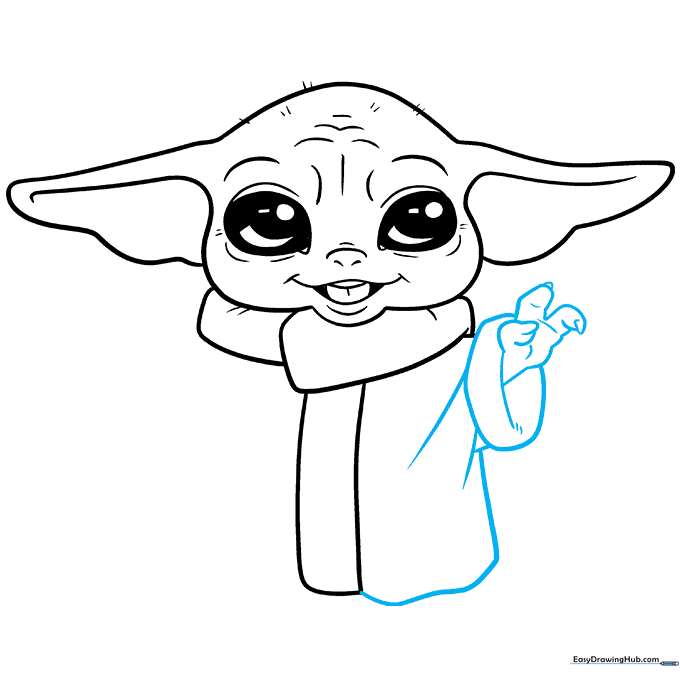
Draw the sleeve cuff and the three-fingered hand. Use small triangles for the fingernails. Teacher's Tip: Keep the fingers rounded and soft to maintain the character's cute, youthful appearance.
Step 9: Finalizing the Robe
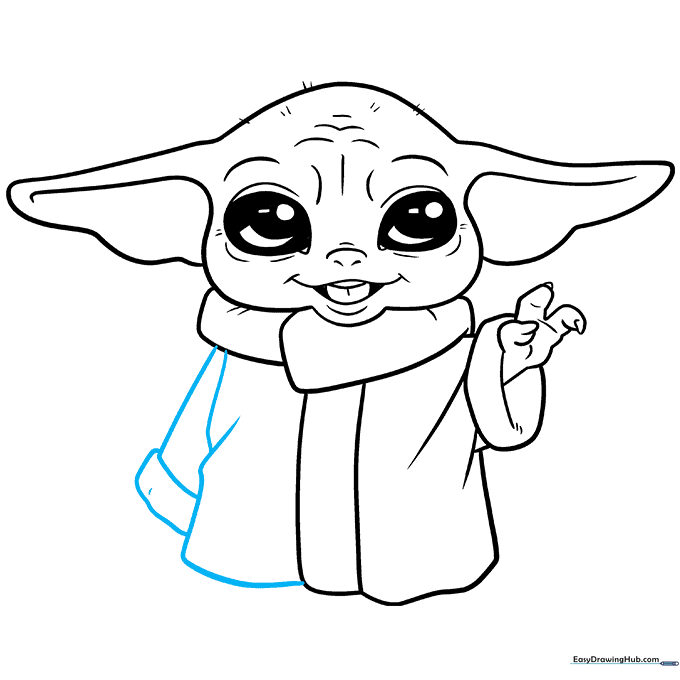
Finish the drawing by adding the opposite sleeve and cuff. Ensure the lines overlap slightly to create a sense of depth. Teacher's Tip: Step back and look at your drawing from a distance to check your proportions before finalizing your lines.
Coloring Your Masterpiece

Your outline is complete! You can keep it as a clean black-and-white sketch or add color. If coloring, use soft greens for the skin and warm browns for the robe. Teacher's Tip: Try using light shading around the edges to give your drawing a professional, finished look.
More Tutorials


