How to Draw Athena: Easy Step-by-Step Guide for Kids
Bring Greek mythology to life with this fun, guided drawing of Athena! Designed for young artists and beginners, this activity requires only a pencil, paper, and an eraser. Follow along to build confidence in character design while learning about the goddess of wisdom.
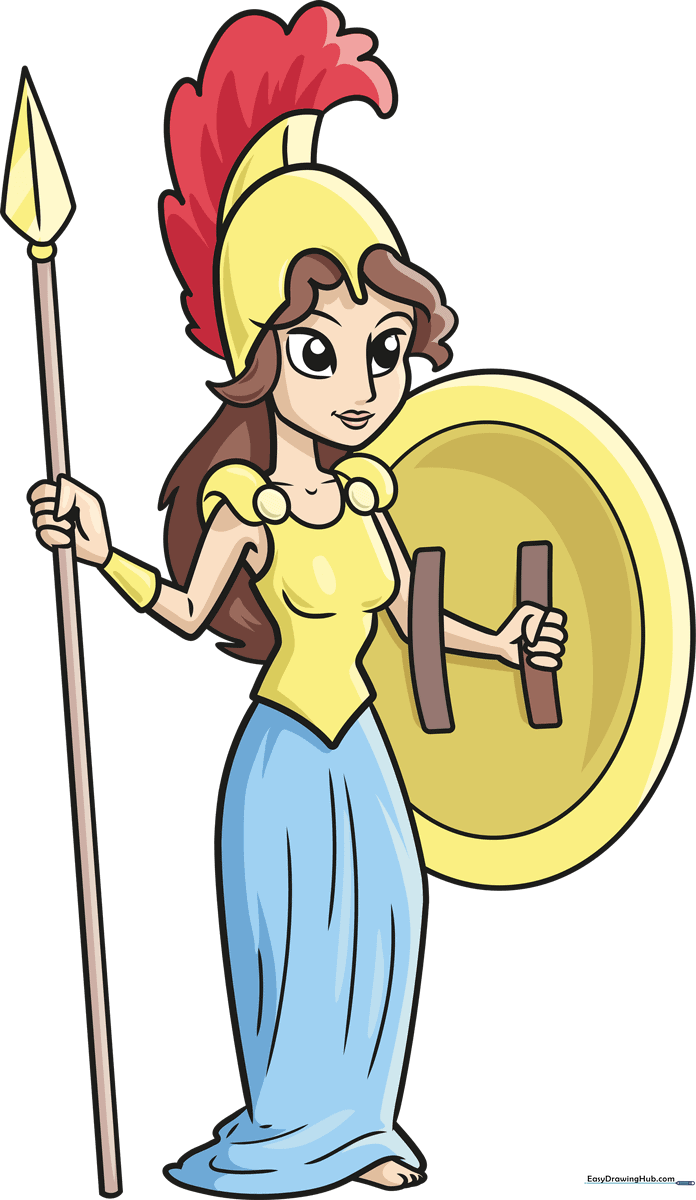
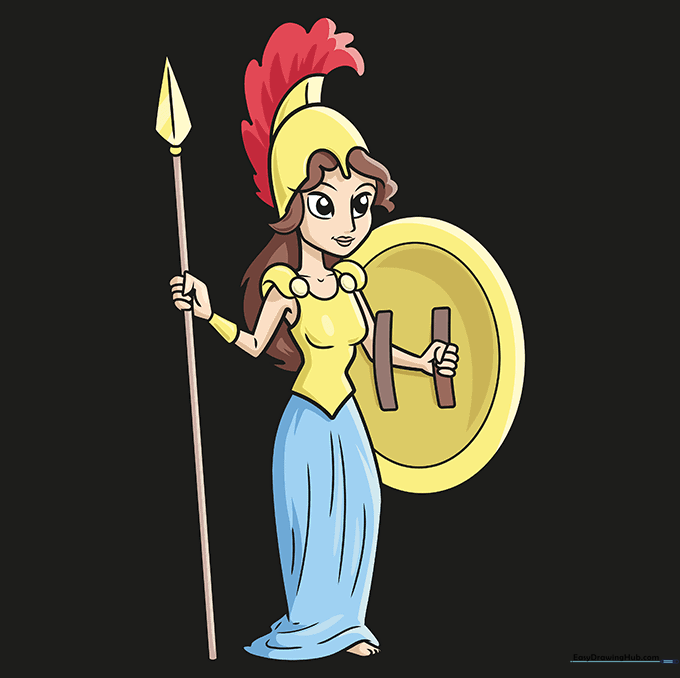
🎯 Final Result
Step-by-Step Instructions
Step 1: Sketching the Facial Features

Start by sketching the face shape. Use curved lines for the eyes, keeping the upper lids thicker to give her a bold look. Add two small circles inside each eye for the pupils. Teacher's Tip: Keep your pencil lines light so you can easily erase and adjust the symmetry of the eyes.
Step 2: Defining the Face and Hair

Outline the chin and cheeks with a smooth, curved line. Add 'U' shaped strokes to create her hair, letting them meet at sharp points for a stylized look. Draw two simple arches above the eyes for eyebrows. Teacher's Tip: Use short, quick strokes for the hair to make it look more natural.
Step 3: Adding the Crested Helmet

Draw a large 'U' shape over the head to form the base of the helmet. Add a triangular crest on top with a vertical line for texture, and finish with a series of 'U' shapes to represent the plume. Teacher's Tip: Imagine the helmet as a protective cap; keep the curves consistent to make it look sturdy.
Step 4: Drawing the Neck and Armor

Extend two lines down from the head to create the neck. Draw the collarbone and shoulder armor using 'U' shapes and small circles. Teacher's Tip: Adding the small circles on the shoulders helps define the armor plates and adds a professional touch to your character.
Step 5: Sketching the First Arm
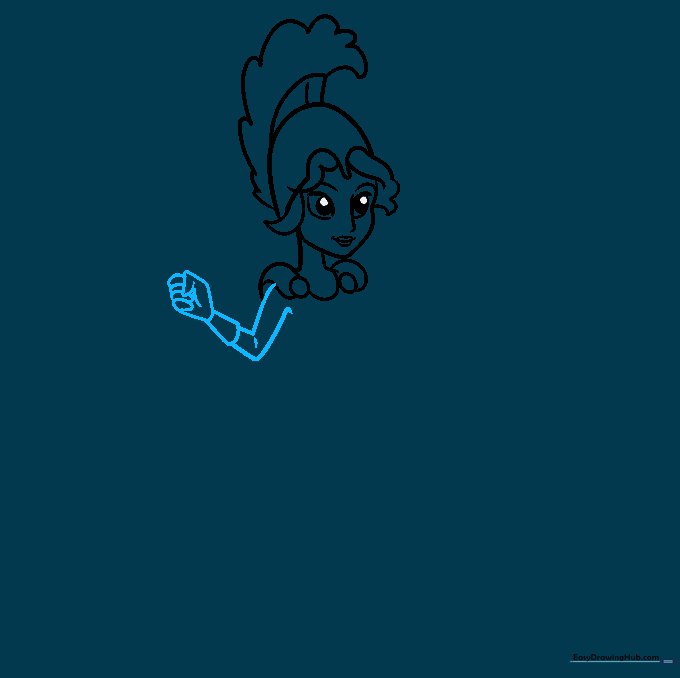
Use pairs of lines to form the upper and lower arm, ending in a gauntlet. Add the fingers using overlapping curved lines. Teacher's Tip: If the hand feels tricky, draw it as a simple mitten shape first, then add the finger lines afterward.
Step 6: Detailing the Torso and Hair
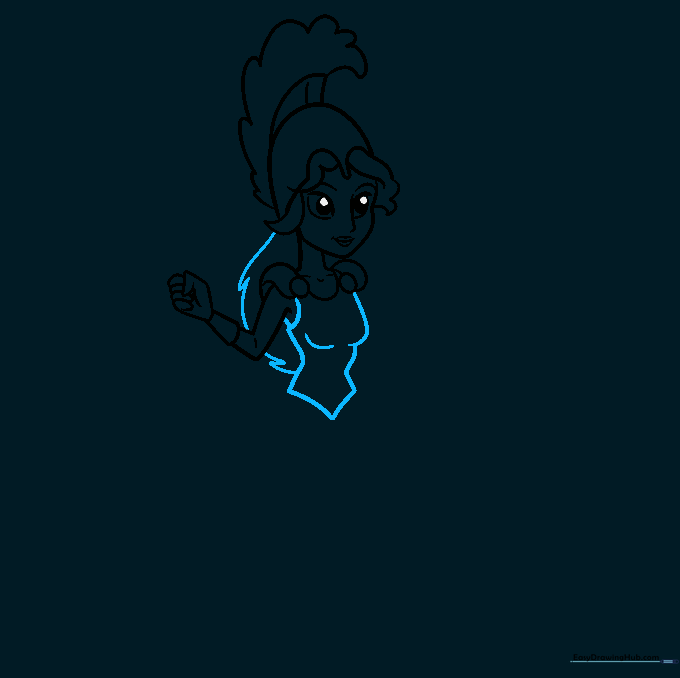
Draw the chest armor with curved lines, then add more hair strands around the shoulders using jagged, pointed lines. Teacher's Tip: Jagged lines create movement, making the hair look like it's flowing in the wind.
Step 7: Drawing the Second Arm
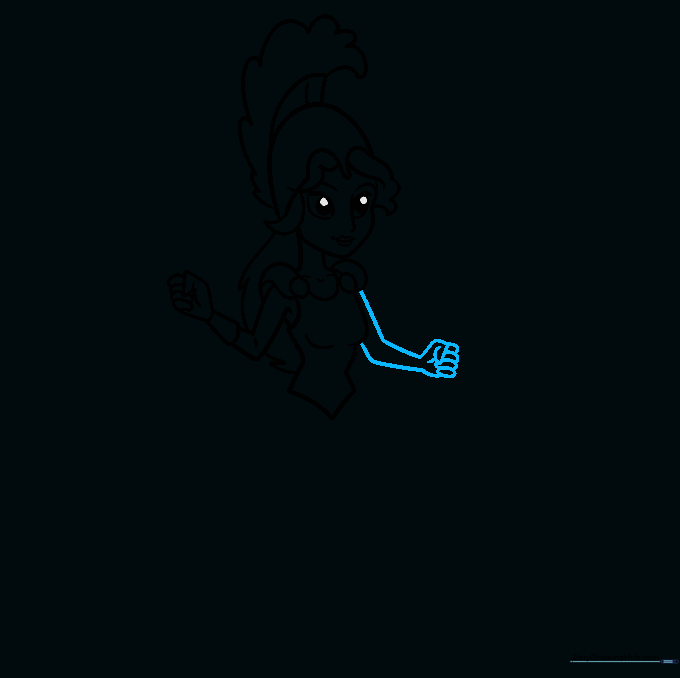
Repeat the process from Step 5 for the second arm. Use pairs of lines for the limb and overlapping ovals for the fingers. Teacher's Tip: Ensure the arms are roughly the same length to keep your character balanced.
Step 8: Adding the Skirt and Feet

Draw two long, curved lines for the skirt, adding smaller lines inside to show fabric folds. Sketch the rectangular feet at the bottom. Teacher's Tip: Use light pressure for the fabric folds so they don't overpower the main outline of the skirt.
Step 9: Adding Shield and Spear

Draw a spear with a diamond tip and a shield behind her body. Erase any overlapping lines to make the shield look like it's tucked behind her. Teacher's Tip: Use a ruler for the spear shaft if you want it to look perfectly straight!
Step 10: Final Coloring
Add your favorite colors to complete your Athena drawing! Use metallic shades for the armor and bold colors for the plume. Teacher's Tip: Try using gold or bronze for the helmet to give it a legendary, heroic feel.
More Tutorials


