How to Draw Ariana Grande: Easy 10-Step Portrait Guide
Capture the iconic style of Ariana Grande with this fun, step-by-step portrait tutorial. Designed for young artists and beginners, this lesson focuses on facial proportions and hair styling. Grab your pencil, eraser, and paper to start sketching your favorite pop star today.
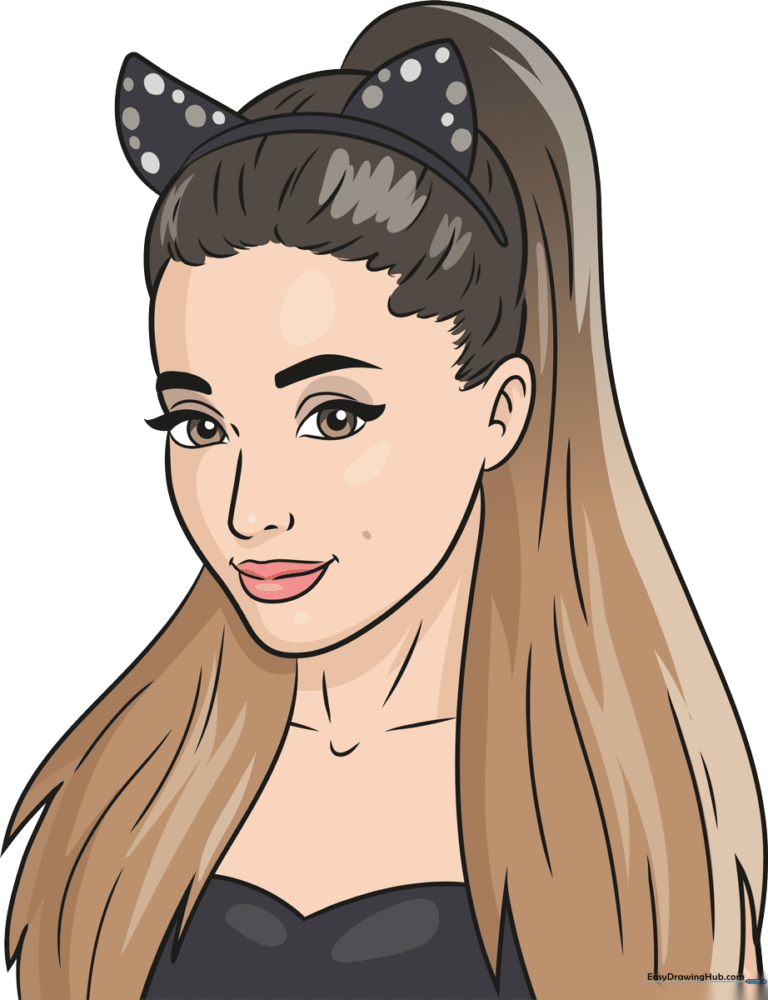
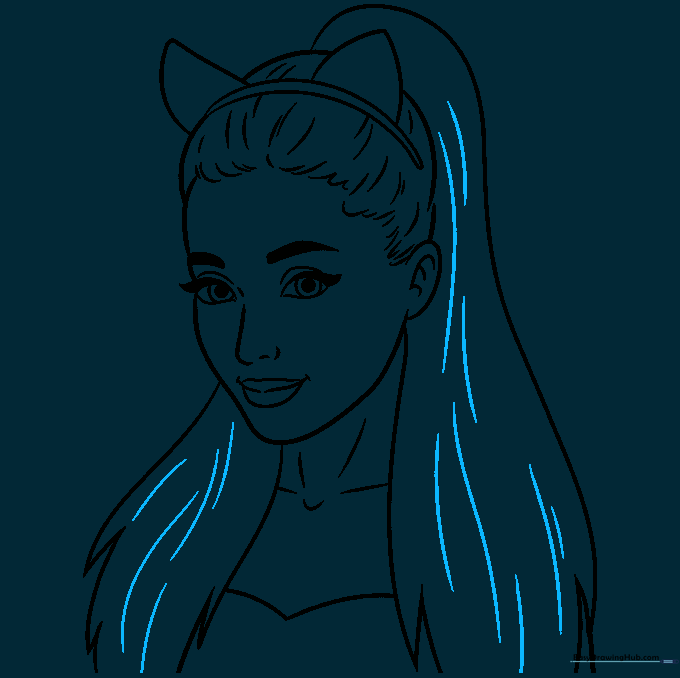
🎯 Final Result
Step-by-Step Instructions
Step 1: Sketching the Nose and First Eye
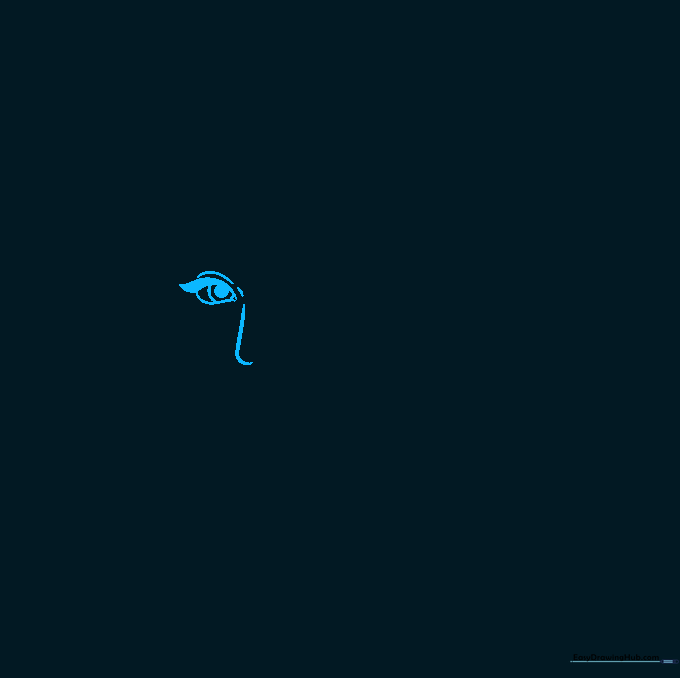
Start by drawing a soft, curved line for the nose. Then, outline the eye with a rounded point at each end. Tip: Draw the eyelashes as small, shaded triangles to give the eyes a pop of personality!
Step 2: Adding the Second Eye and Brows
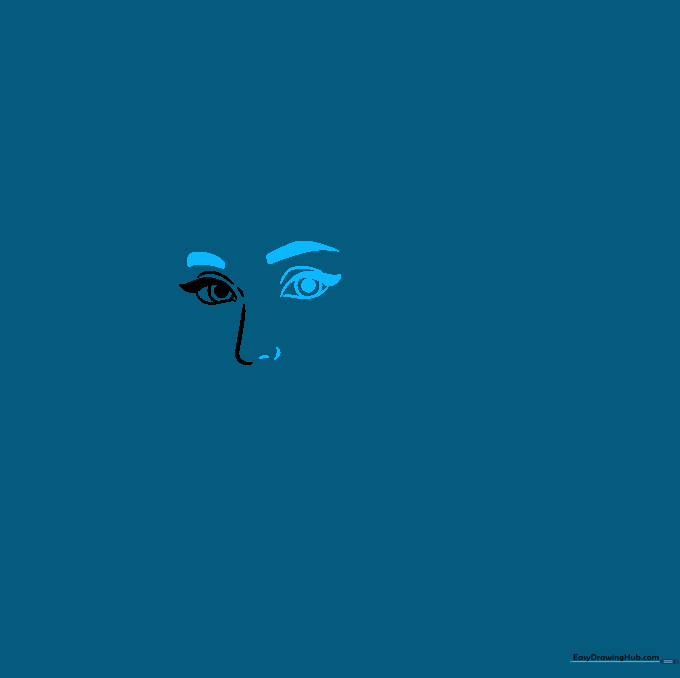
Mirror the first eye on the other side of the nose. Add a thick, arched line above each eye for the eyebrows. Tip: Keep the eyebrows slightly angled to give your portrait a friendly, alert expression.
Step 3: Defining the Face Shape and Smile
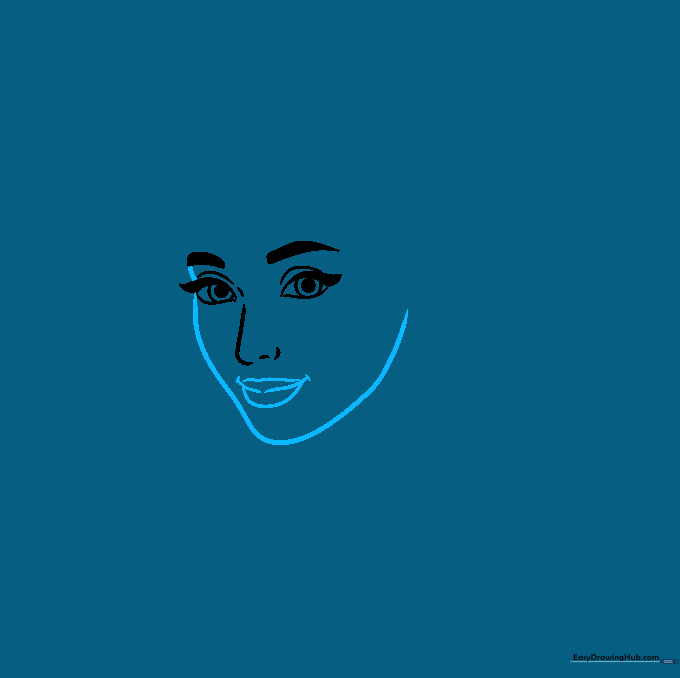
Use a long, smooth curved line to connect the cheeks and chin. Add a gentle, smiling mouth below the nose. Tip: Use a light touch for the chin to keep the face looking soft and youthful.
Step 4: Outlining the Hairline
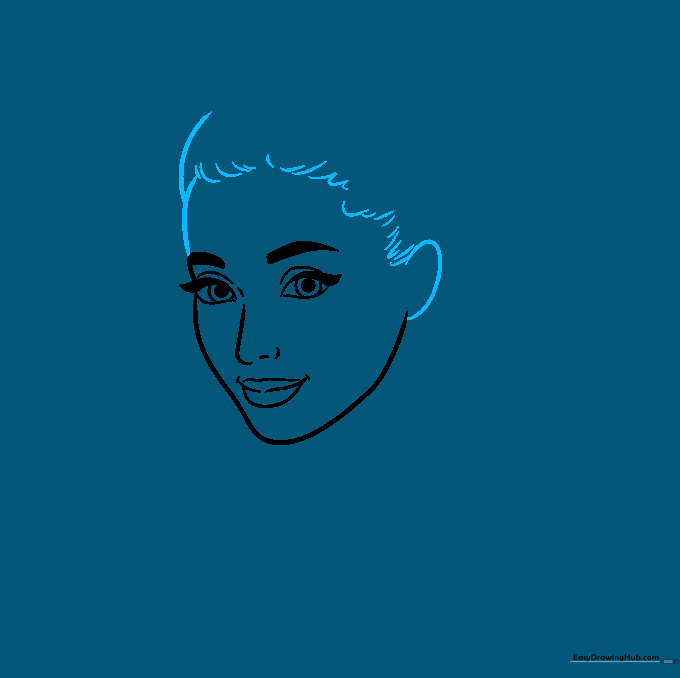
Draw the forehead and the top of the hair using overlapping curves. Use short, quick strokes to create the hairline near the ear. Tip: Think of the hair as large shapes rather than individual strands at this stage.
Step 5: Adding Ears and Head Accessories
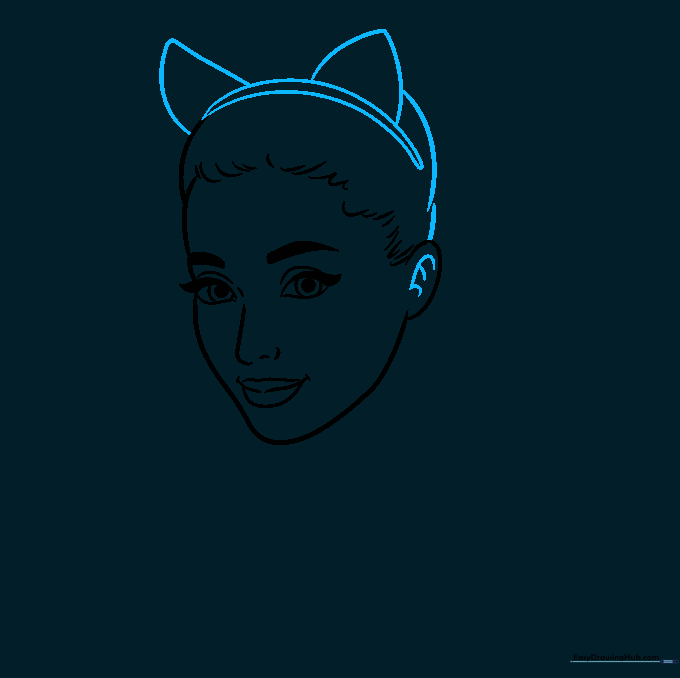
Detail the inner ear with small curved lines. Add the signature cat-ear headband shape on top of the head. Tip: Make sure the cat ears are symmetrical to keep the drawing balanced.
Step 6: Drawing the Ponytail
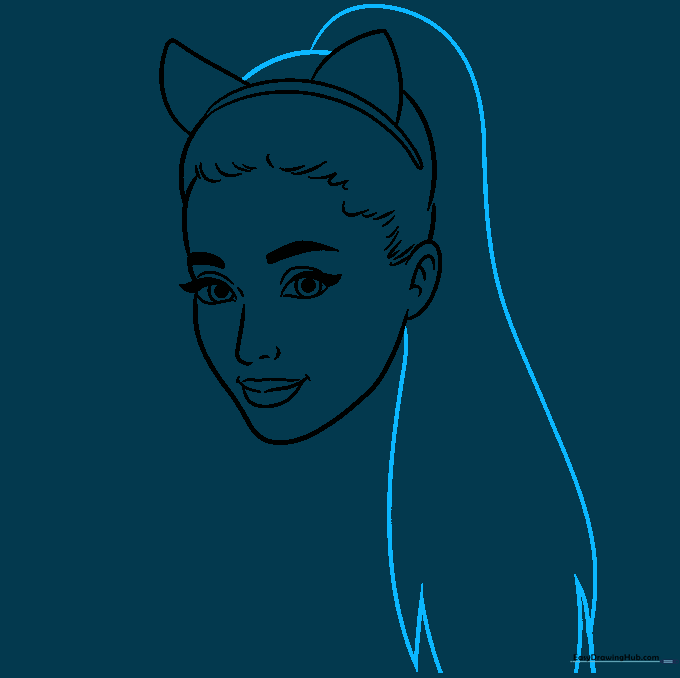
Use long, sweeping curved lines to outline the high ponytail. Add jagged points at the ends to represent loose locks. Tip: Vary the length of your lines to make the hair look natural and flowing.
Step 7: Adding Hair Over the Shoulders

Extend the hair down across the shoulders using long, flowing curves. Keep the edges slightly jagged to show texture. Tip: Don't worry about drawing every single hair; focus on the overall shape.
Step 8: Detailing the Neck and Blouse
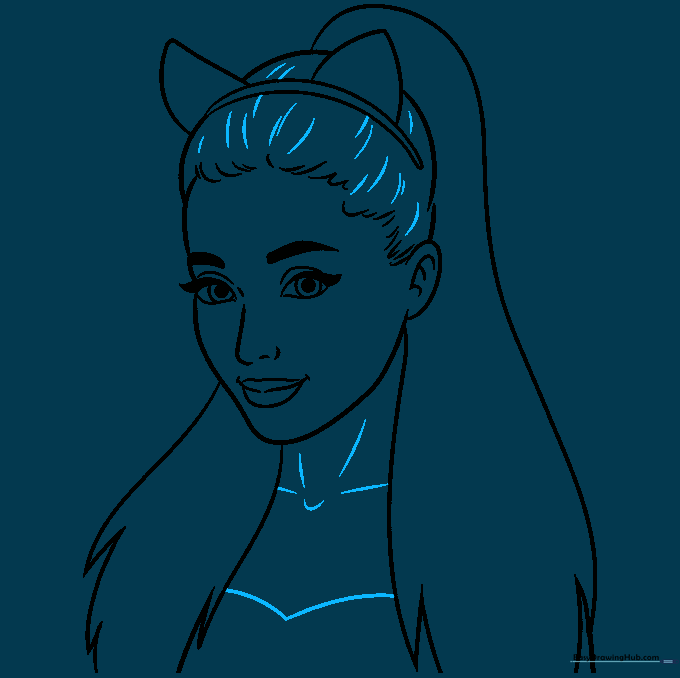
Add short lines to the hair for texture, then draw the neck and the neckline of the blouse. Tip: Keep the neck lines light to ensure the head doesn't look too heavy.
Step 9: Final Hair Texturing
Add long, flowing lines throughout the hair to give it depth and movement. Tip: Follow the direction of the hair flow to make it look realistic.
Step 10: Adding Color

Bring your portrait to life with color! Use warm skin tones and rich browns for the hair. Add a pop of color to the lips and eyes. Tip: Use a darker shade of brown in the shadowed areas of the hair to create a 3D effect.
More Tutorials


