How to Draw Anime Shoes: Easy 10-Step Guide for Beginners
Ready to bring your anime characters to life from the ground up? This tutorial is perfect for artists ages 8+ looking to master footwear proportions. Grab a pencil, an eraser, and some paper, and let’s build your character's style one step at a time.
🎯 Final Result
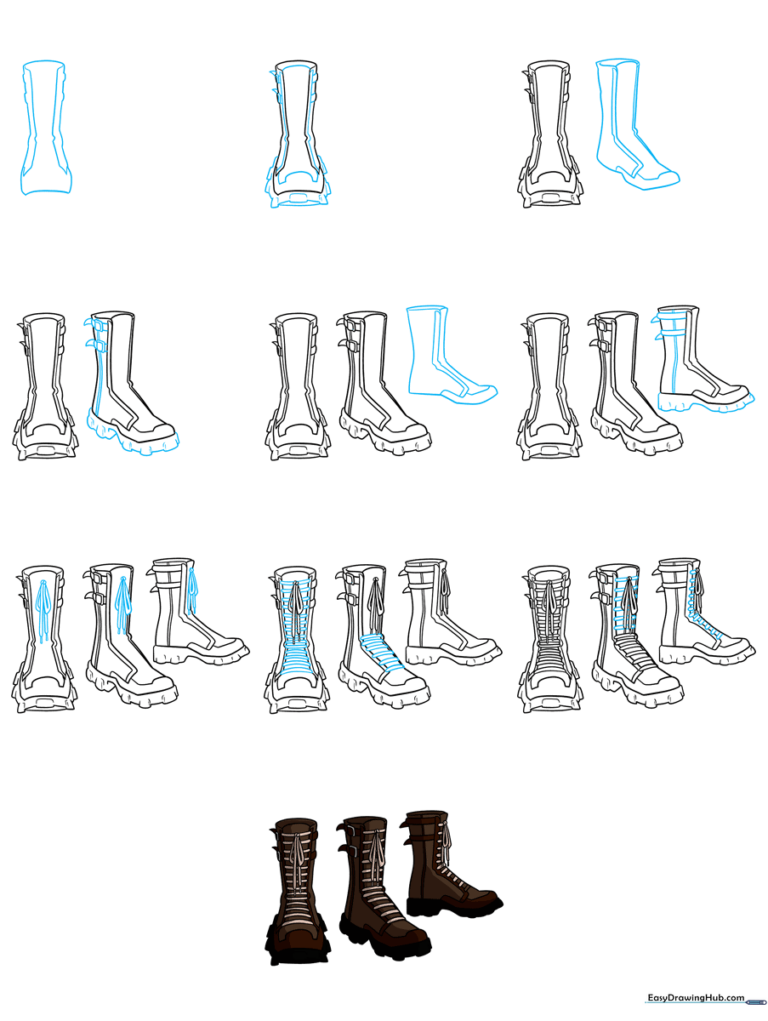
Step-by-Step Instructions
Step 1: Establishing the Boot Shape
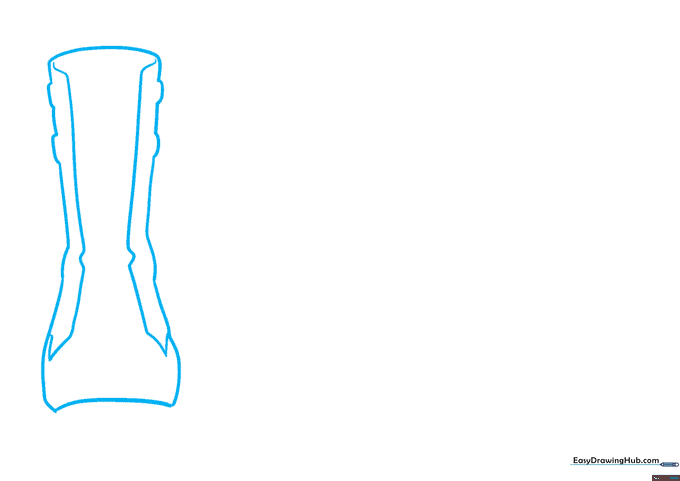
Start by sketching the upper part of the combat boot from a front-facing view. Use gentle, curved lines to define the tall shaft. Teacher's Tip: Keep your pencil pressure light here so you can easily adjust the shape if the boot looks too wide.
Step 2: Adding the Sole and Toe Cap

Draw the thick, rectangular tread at the base and add a curved line for the safety toe cap. Tip: Think of the sole as a sturdy platform; make sure it looks thick enough to support the boot's weight.
Step 3: Sketching the 3/4 Perspective
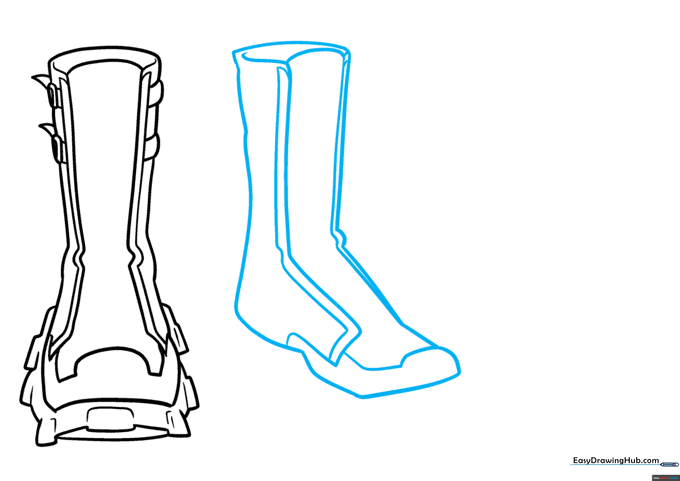
Now, draw a second boot outline shifted to a 3/4 angle. This adds depth to your drawing. Tip: Imagine the boot is a cylinder; turning it slightly reveals more of the side panel.
Step 4: Detailing the 3/4 Boot
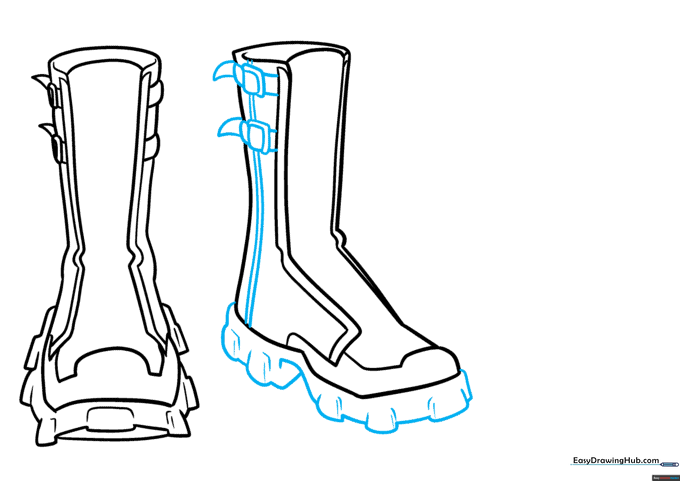
Add the sole tread and side buckles to your 3/4 view boot. Tip: Keep your lines clean and consistent with the first boot to maintain a unified style.
Step 5: Starting the Side View
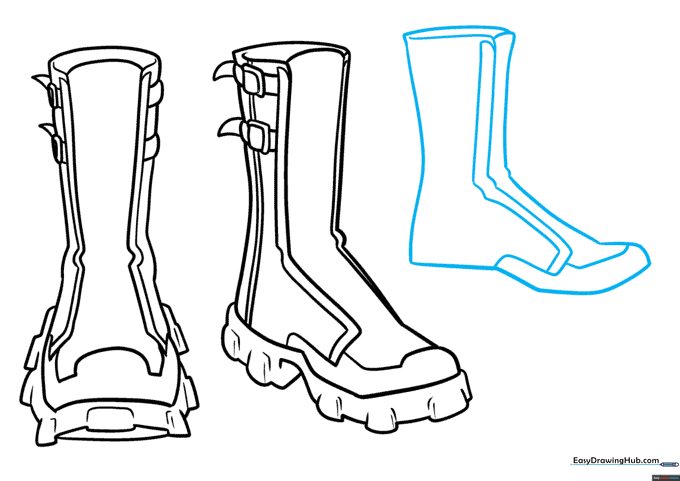
Draw the final boot from a direct side profile. Focus on the curve of the heel and the arch of the foot. Tip: Use a smooth, continuous line for the back of the boot to make it look realistic.
Step 6: Adding Side Details
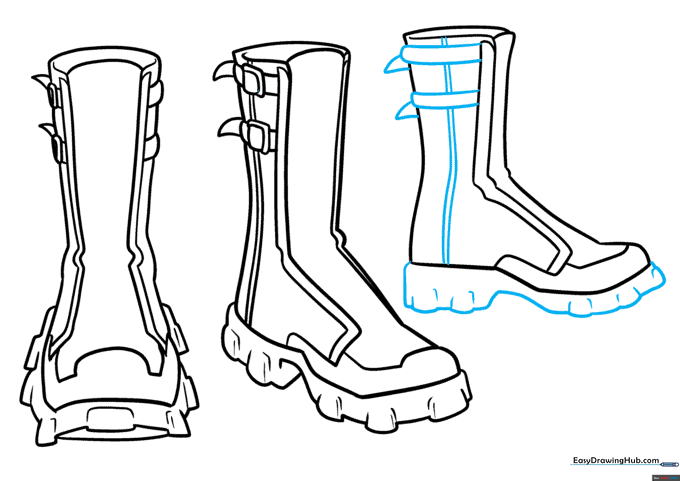
Complete the side view by adding the sole and side buckles. Tip: Ensure the buckles align horizontally across the boot's surface.
Step 7: Drawing the Laces
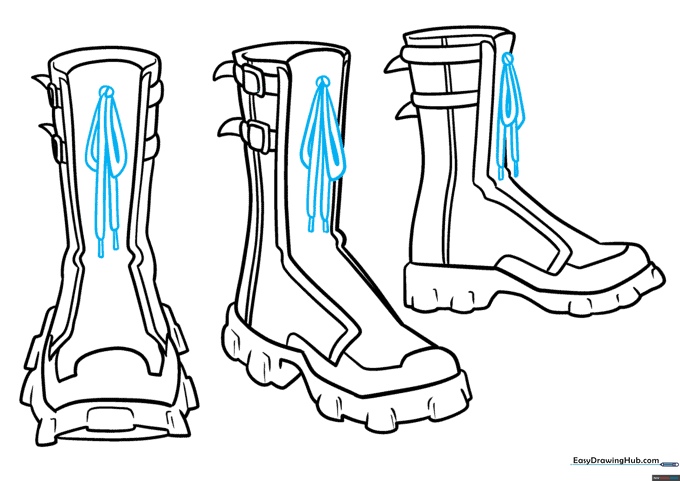
Sketch the laces dangling from the tongue of each boot. Tip: Draw them with a slight 'S' curve to make them look like they are hanging naturally due to gravity.
Step 8: Crisscrossing the Laces
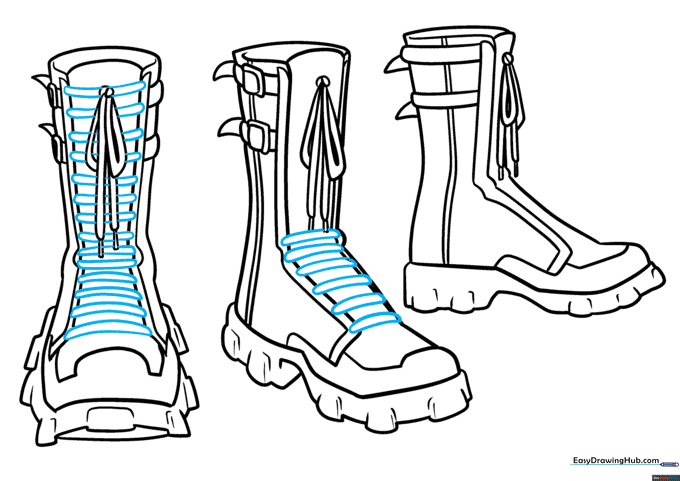
Draw the laces crisscrossing across the tongue. Tip: Keep the spacing between the 'X' shapes even so the lacing looks neat and professional.
Step 9: Refining the Laces
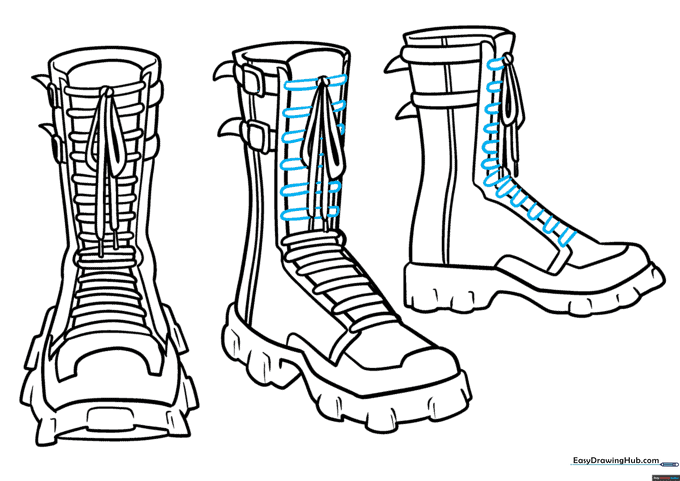
Use pairs of straight lines to thicken the laces. Tip: This gives the laces a 'real' thickness, making the drawing pop off the page.
Step 10: Adding Color
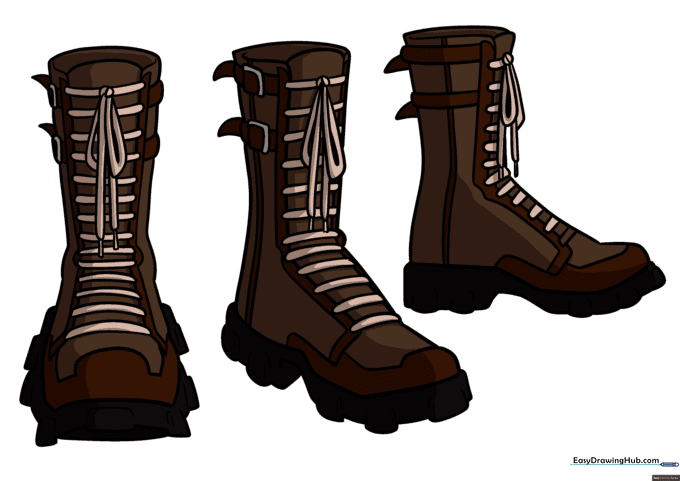
Bring your boots to life with color! Earth tones like brown, tan, or olive green work great for combat boots. Tip: Use a darker shade of your color to add a small shadow under the sole to ground your drawing.
More Tutorials


