How to Draw Anime Mouths: Easy 7-Step Guide
Perfect for aspiring manga artists, this guide breaks down the anatomy of an anime smile into simple, manageable shapes. You will need a pencil, eraser, and paper to follow along. By mastering these foundational curves, you'll gain the confidence to draw any emotion for your original characters.
🎯 Final Result
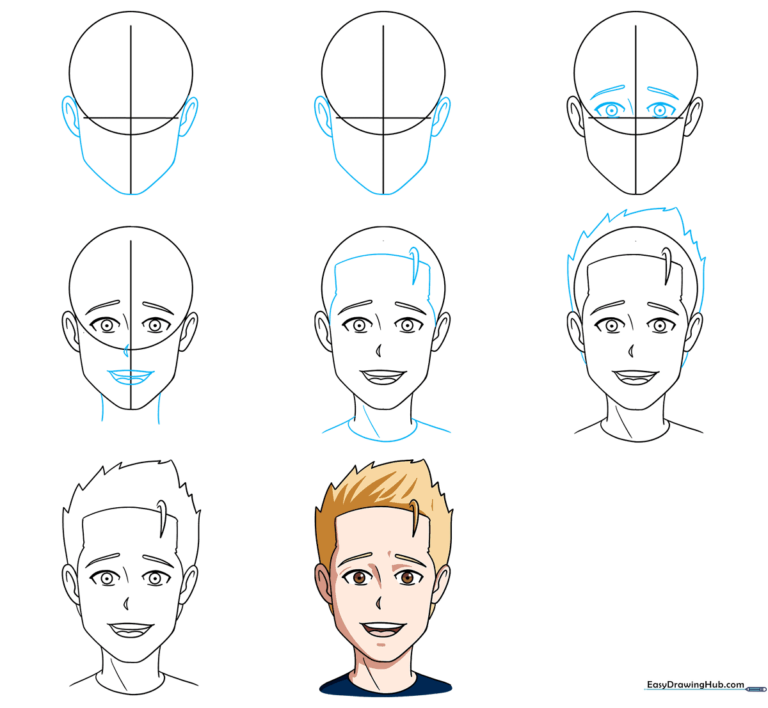
Step-by-Step Instructions
Step 1: Establishing the Facial Grid
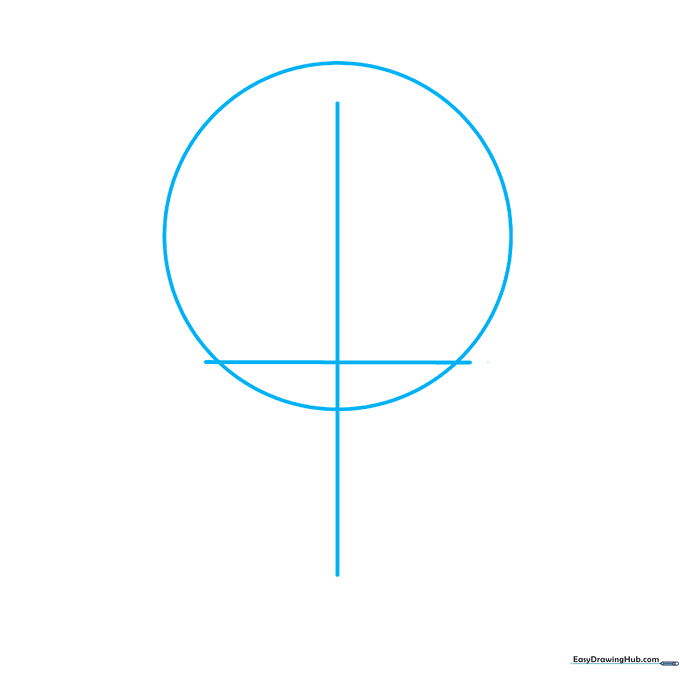
Start by sketching a light vertical line and a horizontal line that cross at a perpendicular angle. Add a circle for the head, letting the horizontal line sit near the bottom. Teacher's Tip: Keep your pencil strokes very faint here; these are just structural guides that we will erase later to keep your drawing clean.
Step 2: Shaping the Jaw and Ears
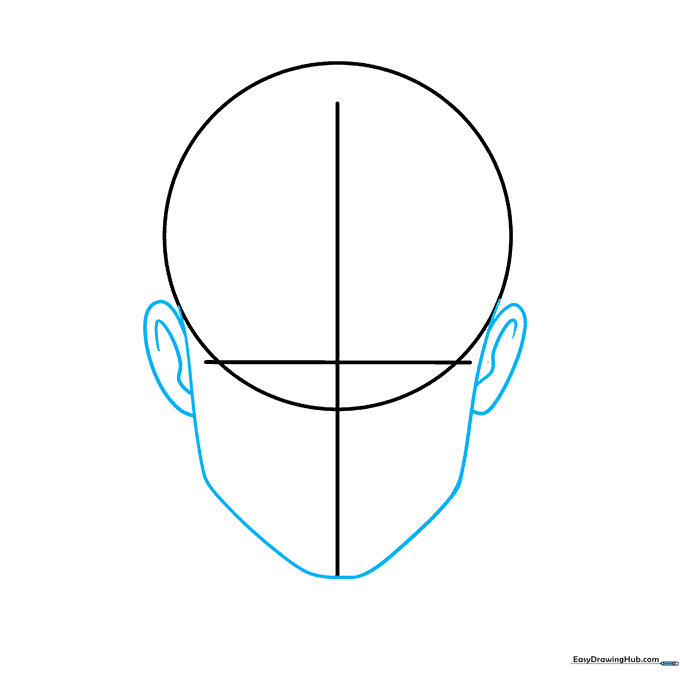
Extend a curved line from the circle to form the chin, meeting at the vertical center line. Add two small curves on the sides for the ears, aligning them with your horizontal guide. Teacher's Tip: Aim for a smooth, continuous motion when drawing the jawline to avoid 'scratchy' lines.
Step 3: Sketching the Eyes and Brows
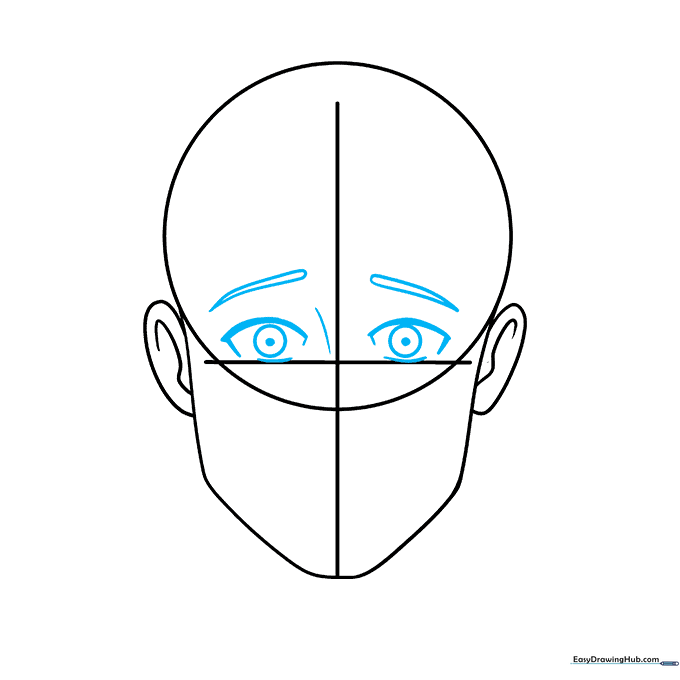
Place the eyes along the horizontal line, then add the pupils and eyebrows above them. Use a small curve for the nose bridge. Teacher's Tip: Give the eyebrows different angles to add personality—one slightly higher creates a more dynamic, curious expression.
Step 4: Drawing the Smiling Mouth
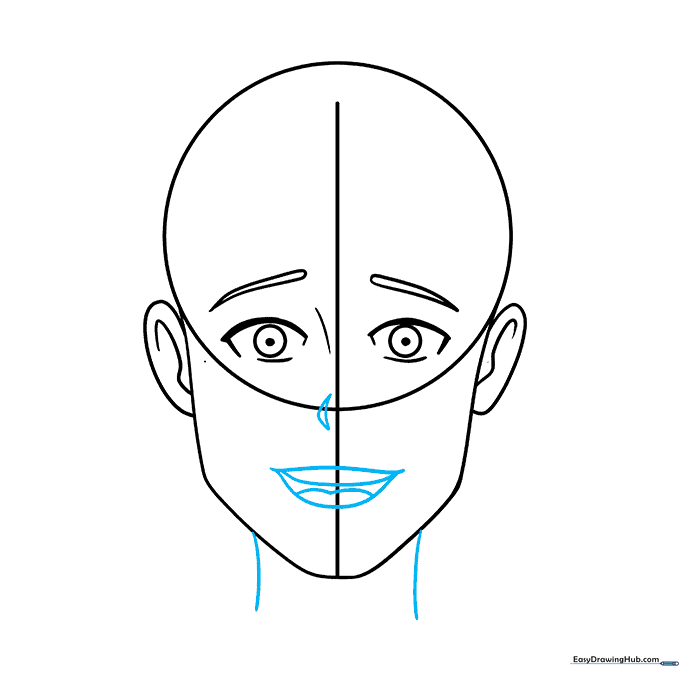
Draw a small triangle for the nose, then sketch an open, smiling mouth centered below it. Include the teeth and tongue for detail. Teacher's Tip: Keep the mouth shape soft and rounded; sharp corners can make the character look angry instead of happy.
Step 5: Refining the Hairline and Neck
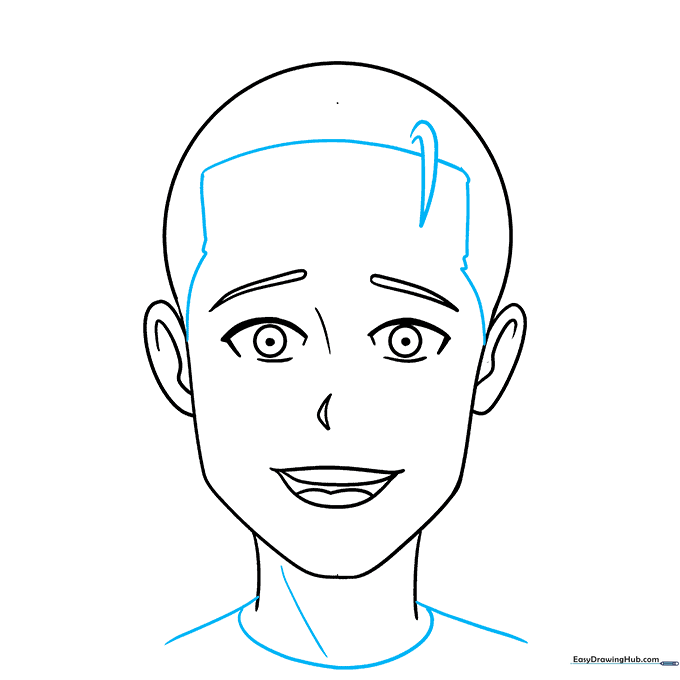
Erase your initial guidelines. Sketch the hairline, neck, and shoulders using clean, confident strokes. Teacher's Tip: Use short, quick strokes for the hair to give it a natural, layered look rather than a single solid block.
Step 6: Adding Anime Hair Details

Add volume to the hair by drawing jagged, pointed locks that frame the face. Teacher's Tip: Think of anime hair as 'clumps' rather than individual strands—this makes it much easier to draw and color later.
Step 7: Final Coloring and Shading
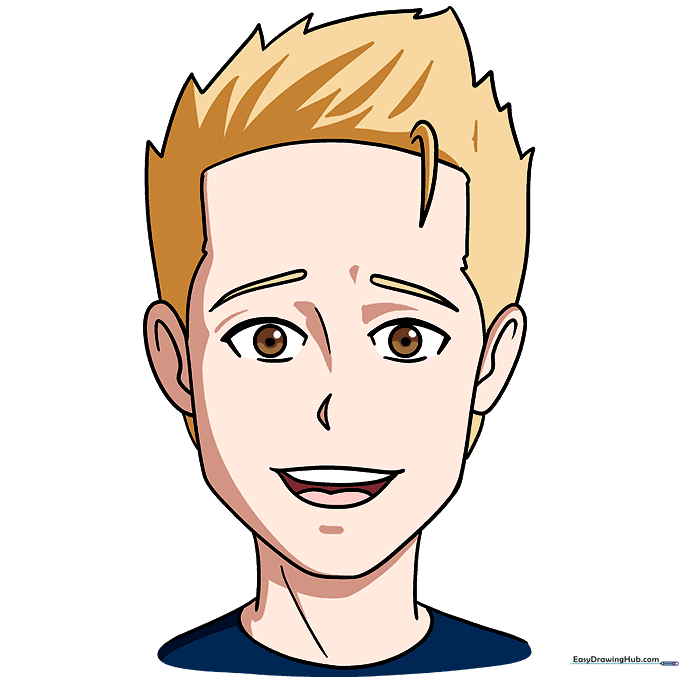
Bring your character to life with color. Use darker shades under the chin and hair to create depth. Teacher's Tip: When coloring, use a consistent light source to decide where your shadows go—this makes your drawing look professional and three-dimensional.
More Tutorials


