How to Draw Anime Male Hair: Simple 6-Step Guide
Ready to level up your character designs? This guide is perfect for artists ages 8+ looking to master the flow and structure of anime-style hair. Grab a pencil, an eraser, and a piece of paper to start building your character's unique look today.
🎯 Final Result
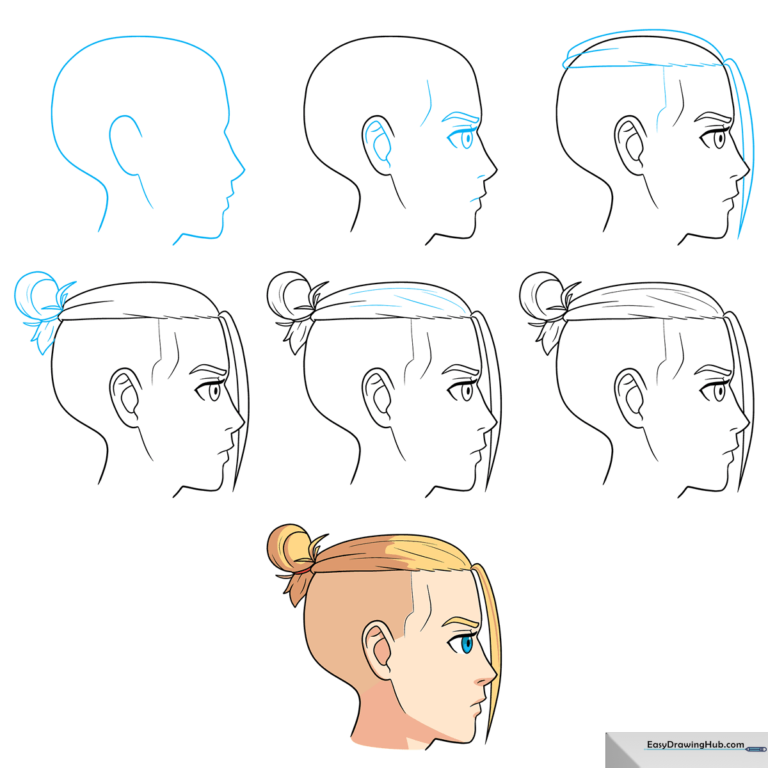
Step-by-Step Instructions
Step 1: Establishing the Profile
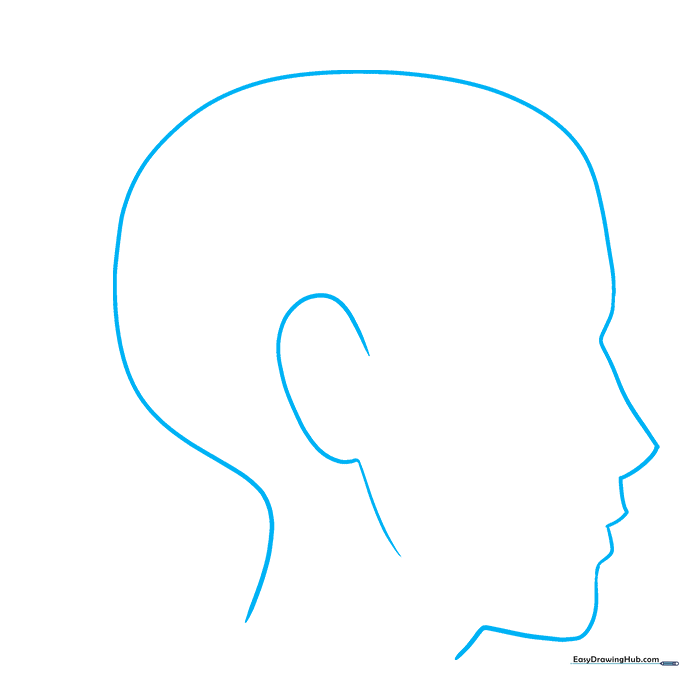
Draw a smooth, curved line to outline the side profile of the face and the ear. Teacher's Tip: Keep your pencil pressure light here; you'll want to erase these guidelines later once the hair is in place.
Step 2: Adding Facial Details
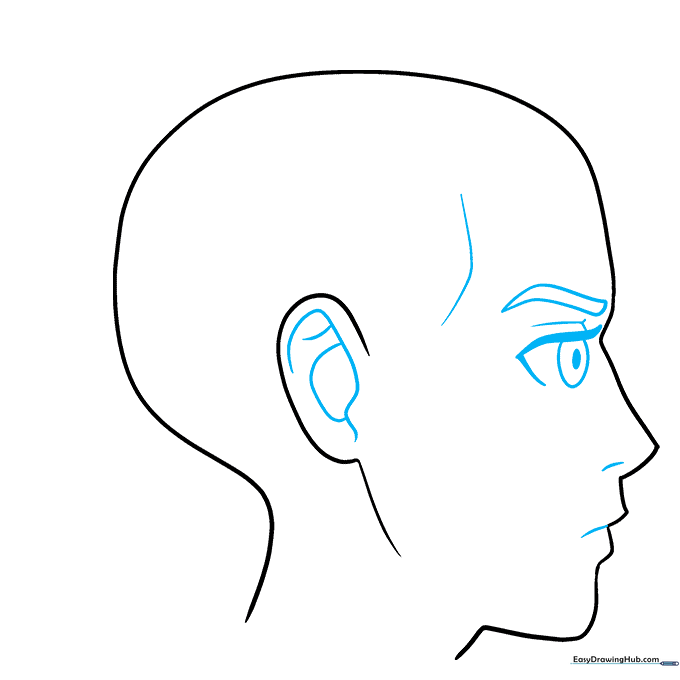
Add the eye, eyebrow, nose, and mouth using the profile outline as your map. Teacher's Tip: Align the eye with the indentation below the brow bone to give your character a natural, expressive look.
Step 3: Sketching the Hairline and Bangs
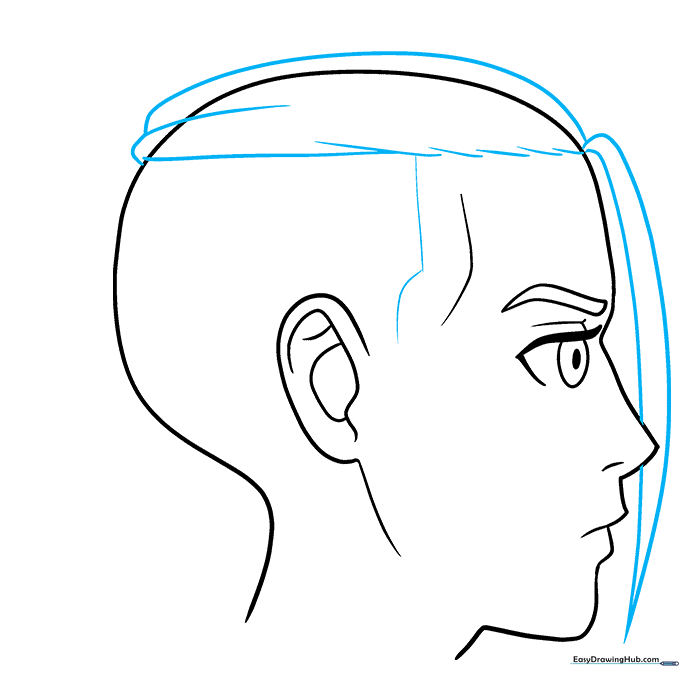
Define the hairline and sketch the top of the hair using overlapping curved lines. Extend two lines from the forehead to create a sharp, pointed bang. Teacher's Tip: Think of hair as 'clumps' or 'ribbons' rather than individual strands to keep the anime aesthetic clean.
Step 4: Drawing the Hair Bun
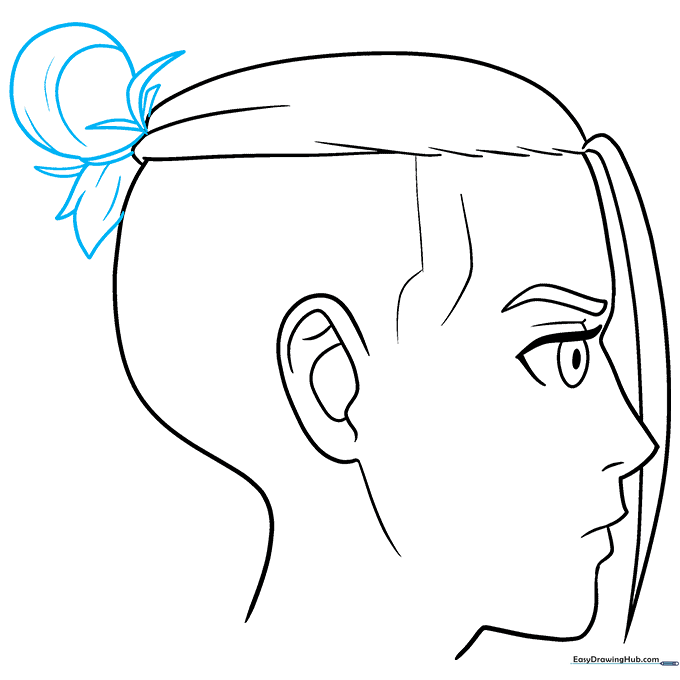
Draw a rounded shape at the back of the head for the bun, adding small tufts of hair near the tie. Teacher's Tip: Use varied line lengths to show texture and make the hair look voluminous.
Step 5: Adding Texture Details
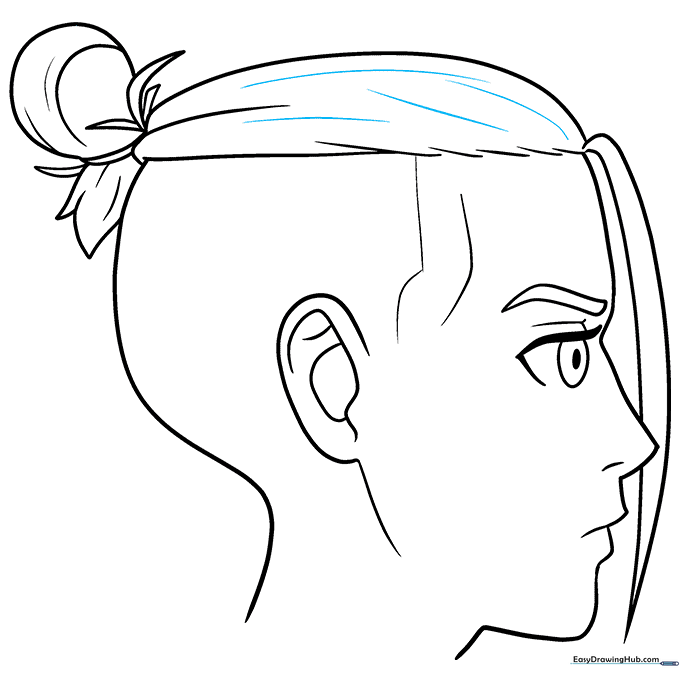
Add curved lines across the top of the head to define the hair's direction and volume. Teacher's Tip: Follow the curve of the skull to make the hair look like it is growing naturally from the scalp.
Step 6: Final Touches and Color
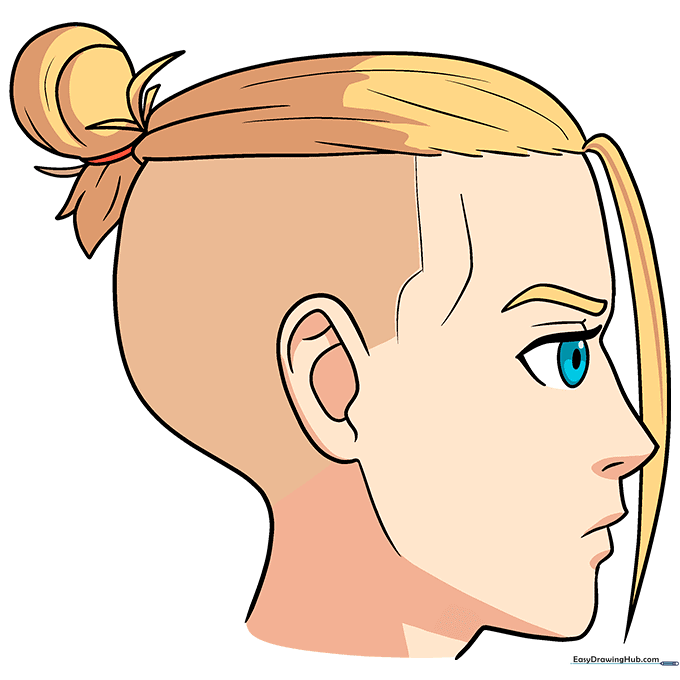
Erase your guidelines and add your favorite colors! Teacher's Tip: Anime hair is famously vibrant—don't be afraid to use bold, unconventional colors like blue, pink, or silver to make your character pop.
More Tutorials


