How to Draw an Ornithomimus: Easy 9-Step Dinosaur Guide
Ready to bring a prehistoric bird-mimic dinosaur to life? This guide is perfect for young artists ages 7+ looking to master dinosaur anatomy. Grab a pencil, an eraser, and some paper to start building your own Ornithomimus, focusing on its signature long neck and swift, bird-like posture.
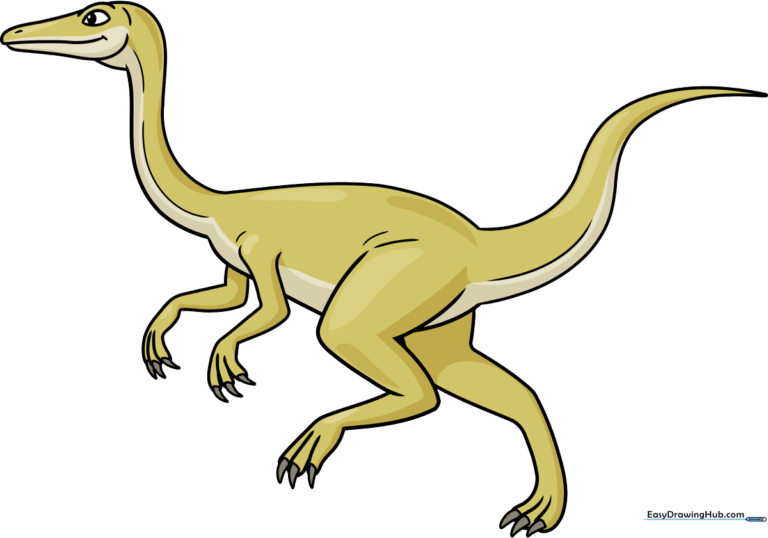
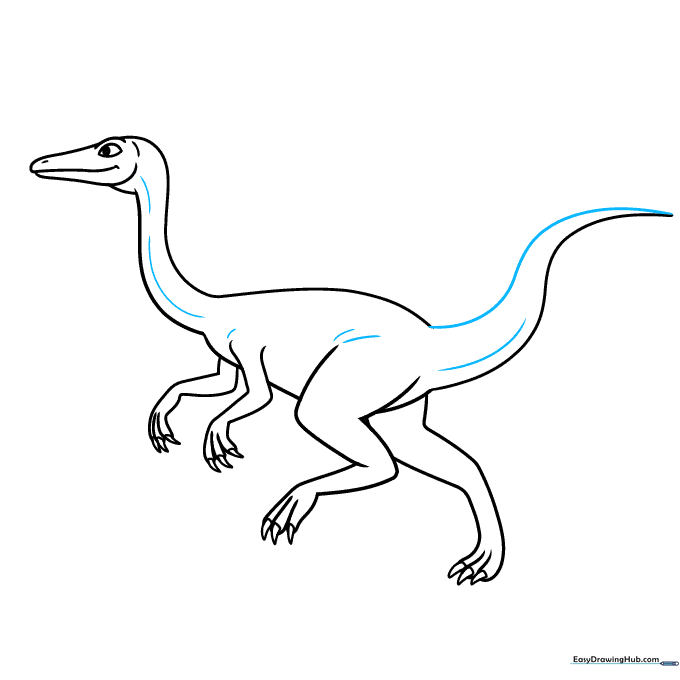
🎯 Final Result
Step-by-Step Instructions
Step 1: Sketching the Snout and Eye
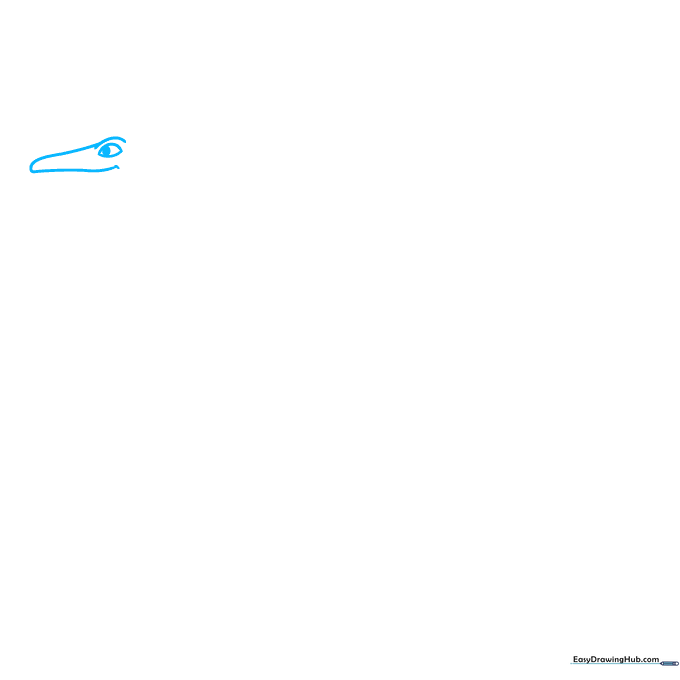
Begin by sketching the dinosaur’s face. Use a long, curved line that doubles back on itself to form the beak-like snout. Add an almond-shaped eye with a small, shaded pupil. Teacher's Tip: Keep your pencil pressure light here so you can easily adjust the shape of the beak later if needed.
Step 2: Defining the Neck and Jaw
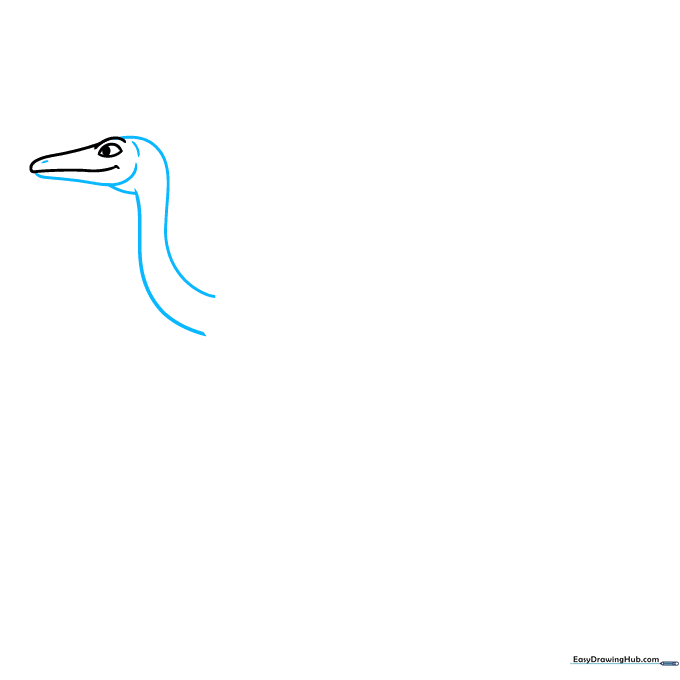
Use overlapping curved lines to define the lower jaw and the long, elegant neck. Add small contour lines for the nostril and the back of the skull. Teacher's Tip: Think of the neck as a flexible 'S' curve to give your dinosaur a natural, alert posture.
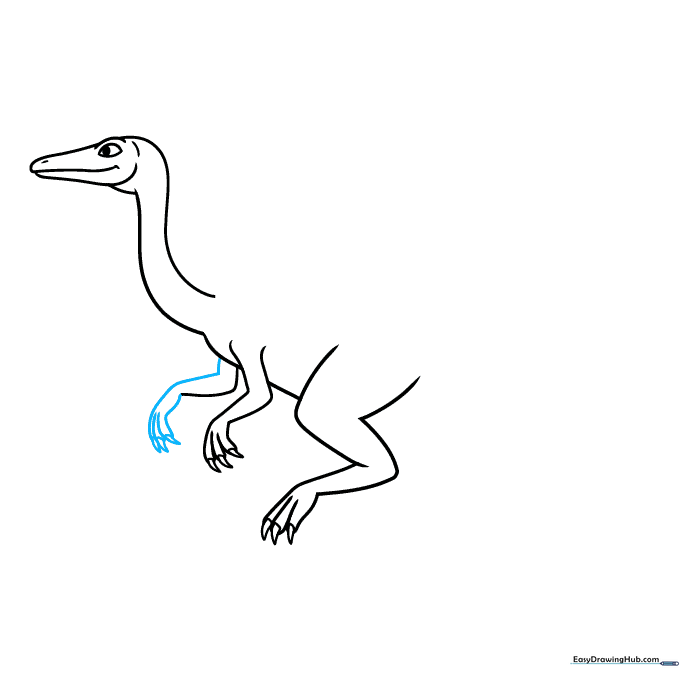
Step 3: Sketching the Chest and Forelimbs
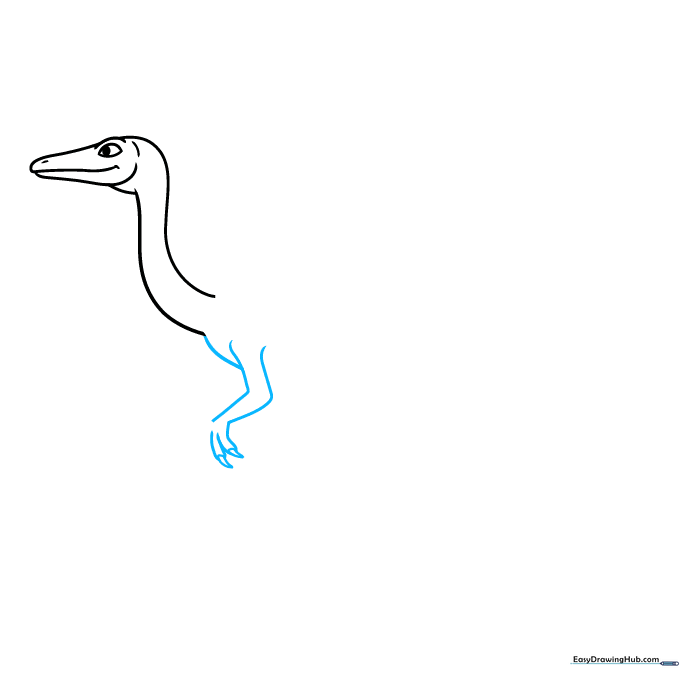
Draw the chest area using overlapping curves, then sketch the forearm and fingers. Finish each finger with a sharp, triangular claw. Teacher's Tip: Ornithomimus had delicate hands; keep these lines thin and precise.
Step 4: Outlining the Belly and Leg
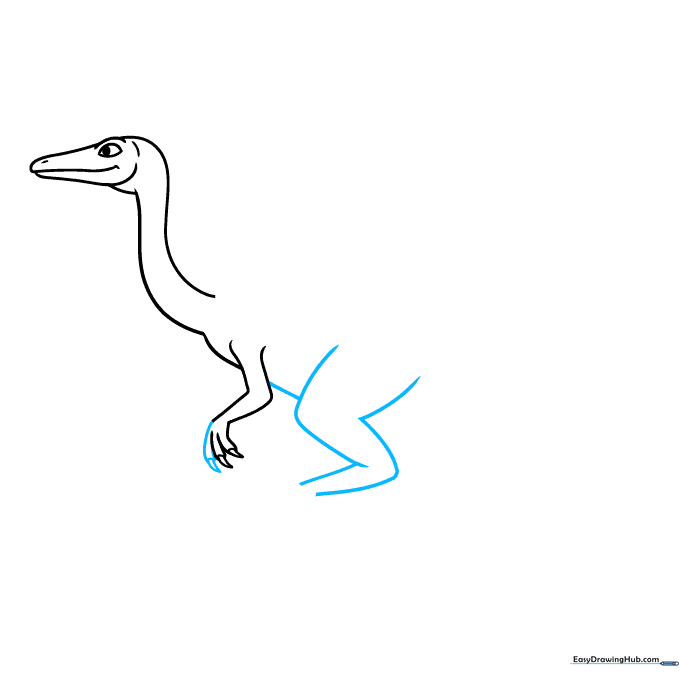
Complete the hand, then extend a line from the arm to form the belly. Connect this to the 'Z' shaped structure of the rear leg. Teacher's Tip: The 'Z' shape is key to showing the dinosaur is ready to run!
Step 5: Adding the Rear Foot
Use small, overlapping triangles to sketch the toes of the rear foot. Begin the second forearm with a smooth, curved line. Teacher's Tip: Make sure the foot looks sturdy to support the dinosaur's weight.
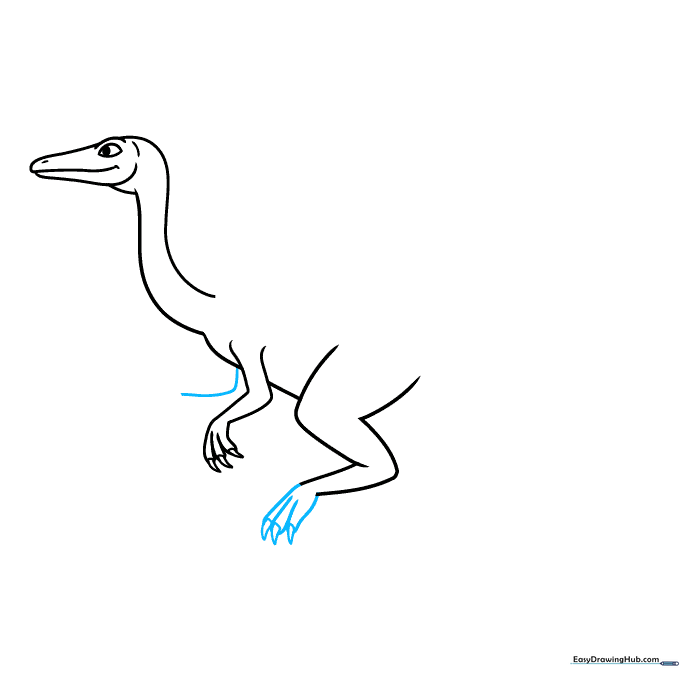
Step 6: Completing the Second Arm
Finish the second forearm, adding fingers and small triangular claws. Teacher's Tip: Ensure the fingers on this arm align with the perspective of the first arm to keep the drawing balanced.
Step 7: Drawing the Tail Base
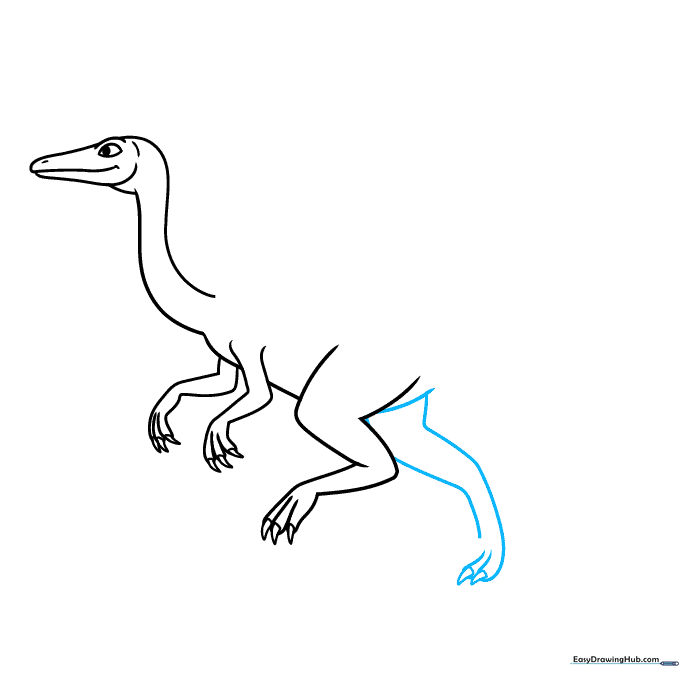
Use overlapping curves to draw the rear leg and the base of the tail. Each toe should end in a sharp claw. Teacher's Tip: The tail acts as a counterbalance, so draw it long and sweeping.
Step 8: Defining the Back and Tail

Extend a long curved line from the neck to the back, and another from the tail base to form the bottom of the tail. Finish the rear toes. Teacher's Tip: Use smooth, continuous strokes for the back to show the dinosaur's sleek shape.
Step 9: Final Touches
Draw the top of the tail and add subtle contour lines to the body to indicate muscle definition. Teacher's Tip: A few extra lines on the legs can make your dinosaur look more realistic and active.
Step 10: Bring It to Life with Color

Your outline is ready! We chose a light green to help our dinosaur blend into the forest, but feel free to experiment with earthy browns or vibrant patterns. Teacher's Tip: Use light, circular motions when coloring to keep the texture smooth.
More Tutorials


