How to Draw an Old Man: Easy 10-Step Cartoon Guide
Bring a friendly character to life with this step-by-step drawing guide, perfect for artists ages 6 and up. You will only need a pencil, an eraser, and a piece of paper to master this expressive cartoon style. Follow along to develop your fine motor skills and learn how to construct a character using simple geometric shapes.
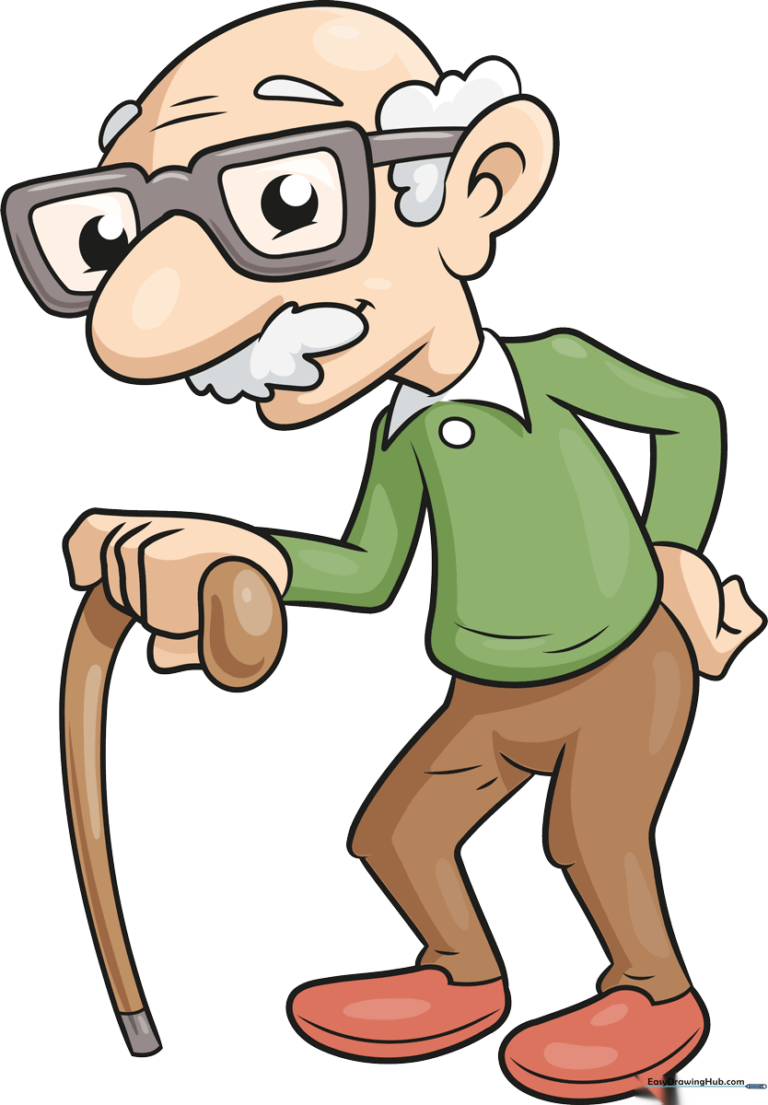
🎯 Final Result
Step-by-Step Instructions
Step 1: Sketching the Nose and Glasses

Start by drawing a soft 'U' shape for the nose. Position the glasses directly above it using two rectangles for the lenses and a small bridge. Teacher's Tip: Keep your pencil lines very light here; you'll want to erase any overlapping lines later to keep the drawing clean.
Step 2: Adding Eyes and Mustache

Draw small circles inside the lenses for pupils and add a curved line below each to show a friendly expression. Use 'U' shaped lines to create a bushy mustache. Teacher's Tip: Vary the size of your 'U' shapes to make the mustache look fluffy and natural.
Step 3: Defining the Head and Wrinkles

Outline the top of the head with a long, smooth curve. Add teardrop shapes for eyebrows and small lines on the forehead to suggest character. Teacher's Tip: A few simple lines on the forehead go a long way in showing age and personality!
Step 4: Drawing the Ears and Jawline

Add the ears on the sides of the head and connect them to the chin with a curved jawline. Teacher's Tip: Think of the ear as a 'C' shape; adding a small squiggle inside makes it look much more realistic.
Step 5: Sketching the Torso and Shoulders
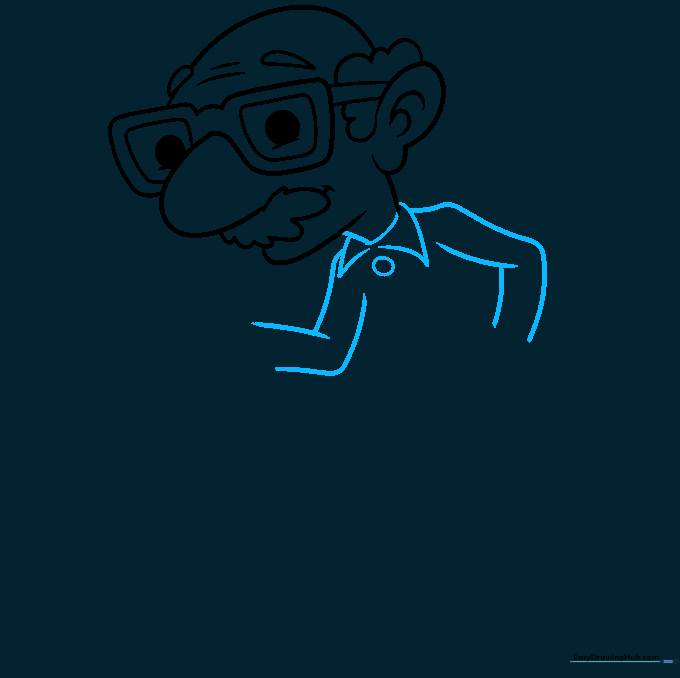
Draw the collar of the shirt and a small circle for a button. Use parallel lines to sketch the arms. Teacher's Tip: Keep the shoulders rounded to give the character a relaxed, gentle posture.
Step 6: Adding the Cane
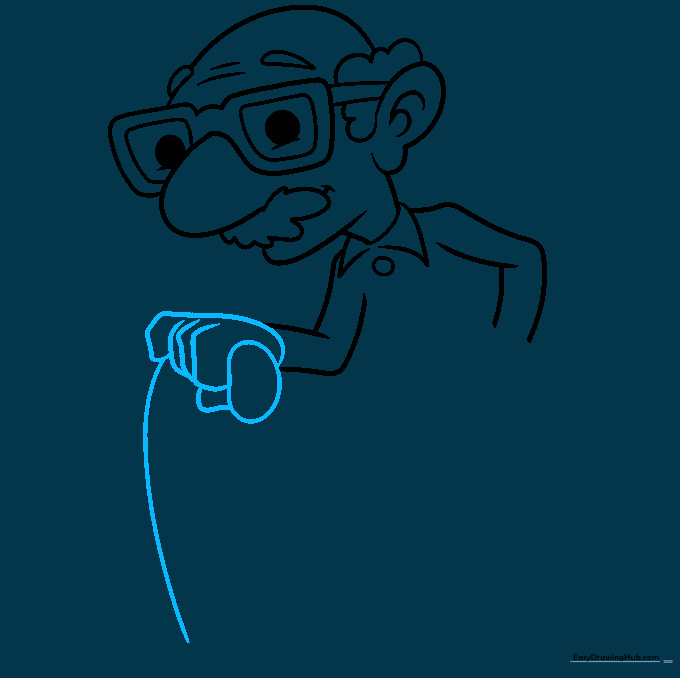
Draw a bean-shaped handle for the cane and sketch the hand gripping it. Teacher's Tip: Focus on the curve of the fingers to make the grip look natural.
Step 7: Completing the Cane and Torso
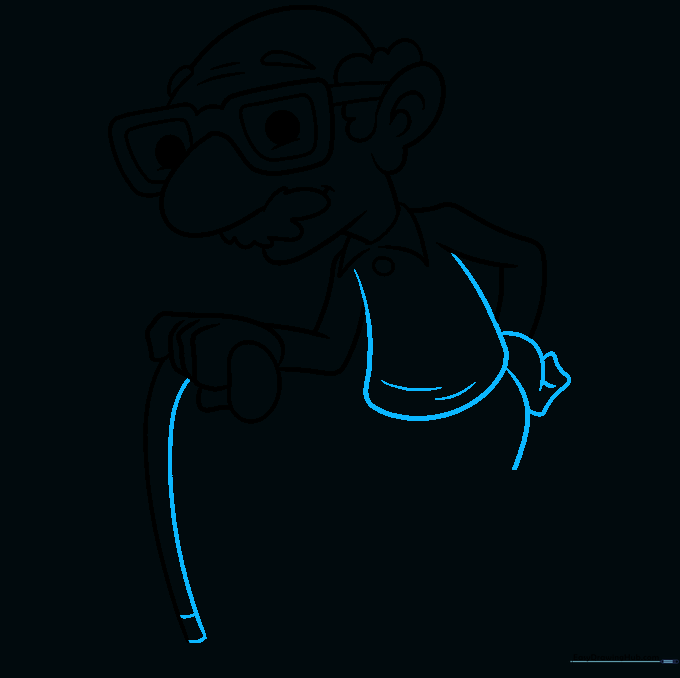
Extend the cane down to the ground and add a rubber tip at the bottom. Sketch the rest of the shirt and the hand resting on the hip. Teacher's Tip: Use long, steady strokes for the cane to keep it straight.
Step 8: Drawing the Legs and Shoe
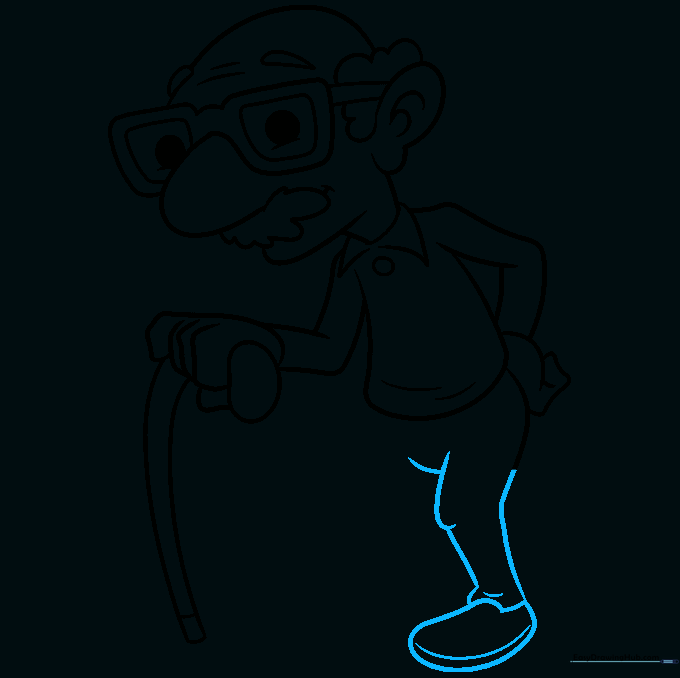
Sketch the pant leg with a slight bend at the knee and add a shoe at the bottom. Teacher's Tip: Add a small line parallel to the sole to give the shoe a realistic thickness.
Step 9: Finishing the Legs
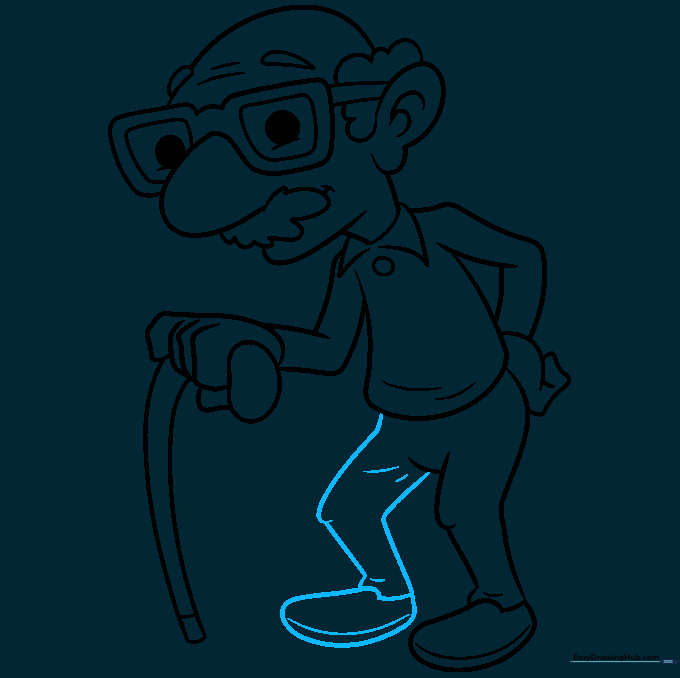
Draw the second pant leg and shoe to complete the character's stance. Teacher's Tip: Ensure the feet are level so your character looks like they are standing firmly on the ground.
Step 10: Adding Color

Bring your drawing to life with your favorite colors! Teacher's Tip: Use soft, muted tones for the clothing to give the character a classic, cozy look.
More Tutorials


