How to Draw an Impossible Cube: Easy 10-Step Optical Illusion
Ready to trick your eyes? This impossible cube tutorial is a fantastic way for artists ages 8 and up to explore geometry and perspective. You only need a pencil, an eraser, and a ruler to create this classic optical illusion that looks like it defies the laws of physics.
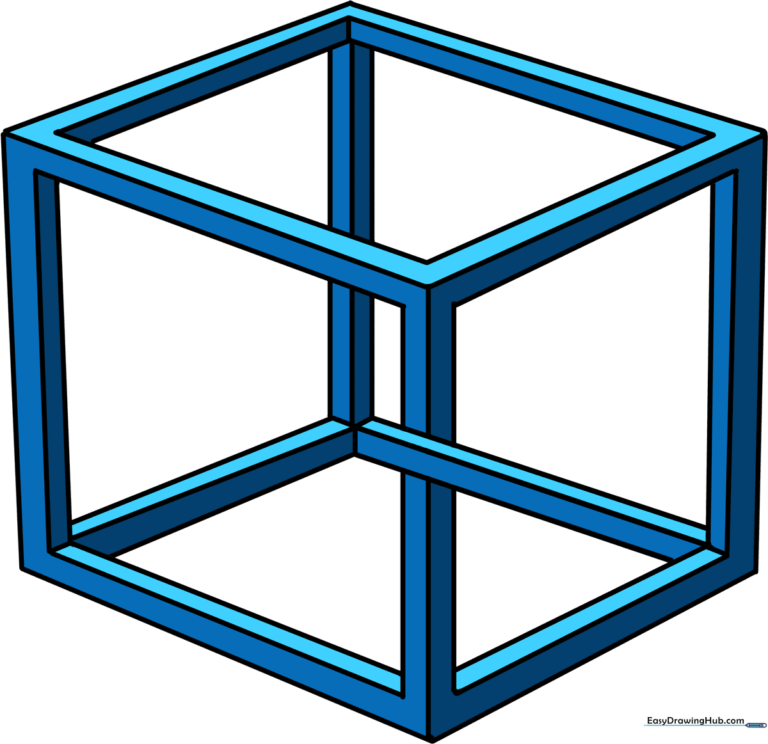
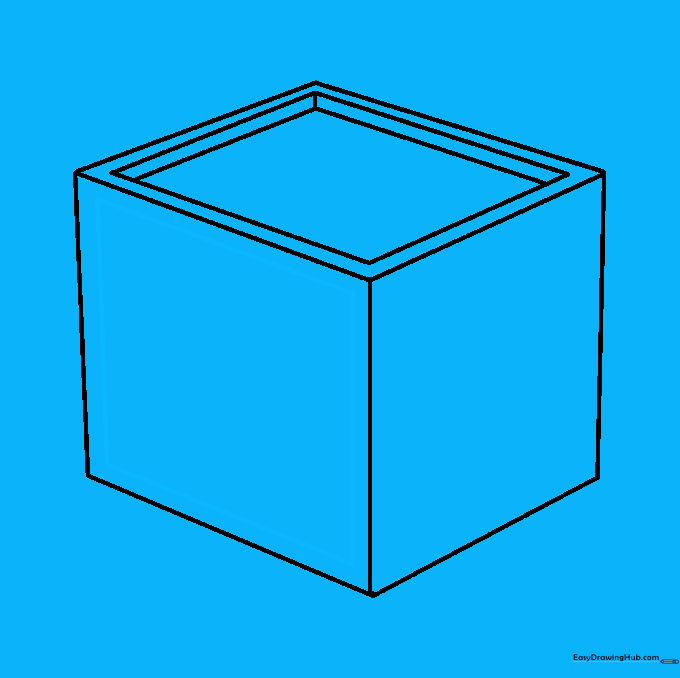
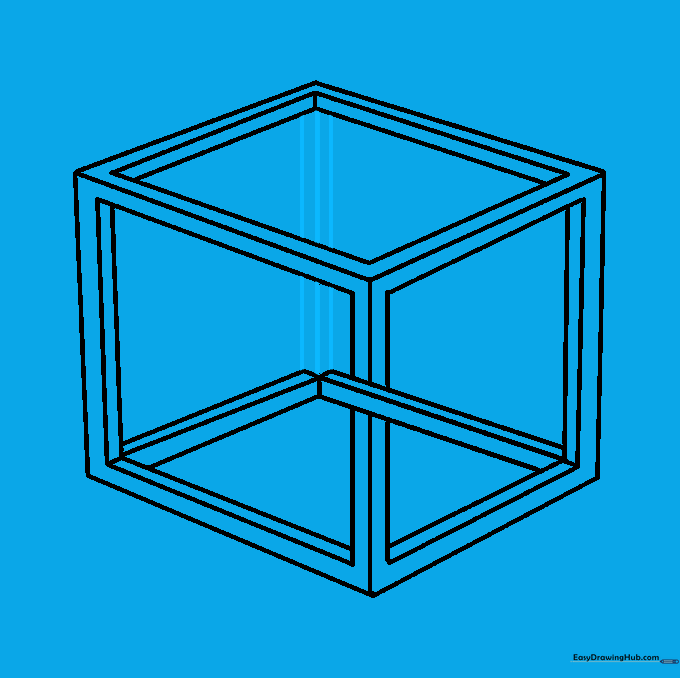
🎯 Final Result
Step-by-Step Instructions
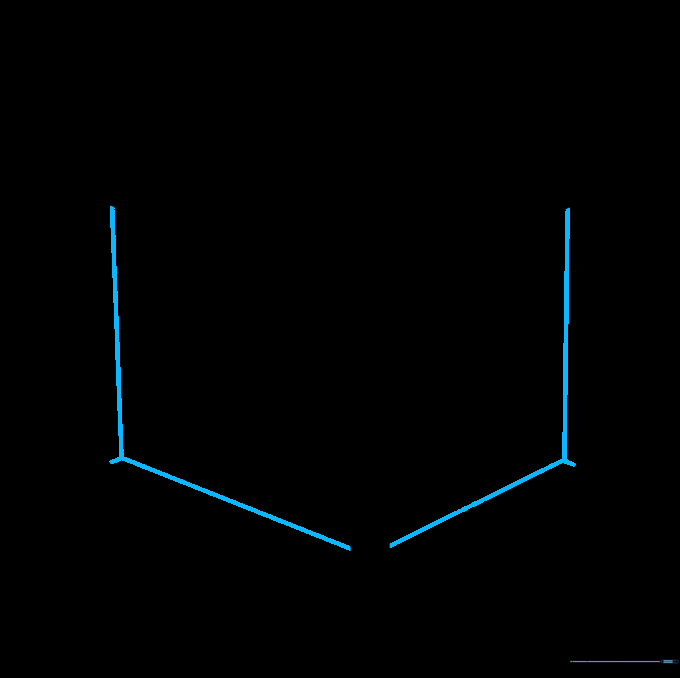
Step 1: Establishing the Vertical Framework
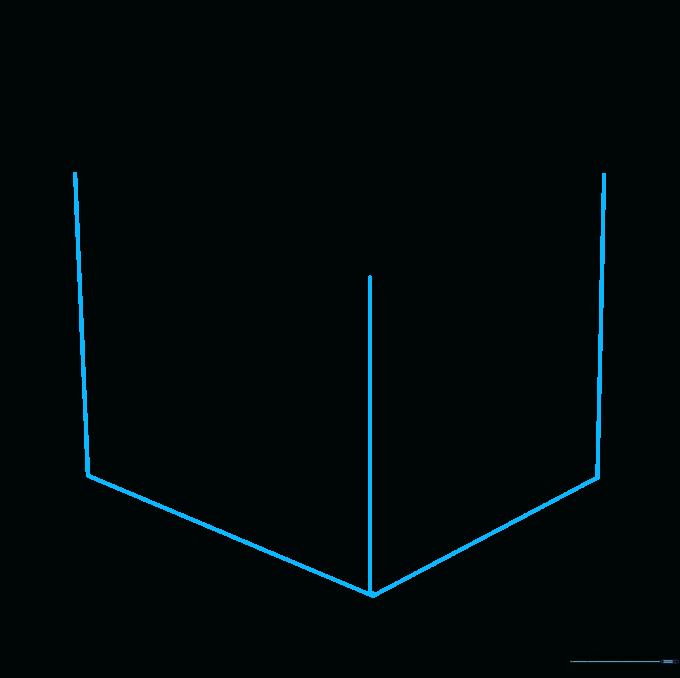
Draw three vertical lines of equal length. Place the middle line slightly lower than the two outer ones. Connect them at the bottom with straight horizontal lines. Teacher's Tip: Use a ruler to ensure these lines are perfectly parallel; precision is key to making the illusion work.
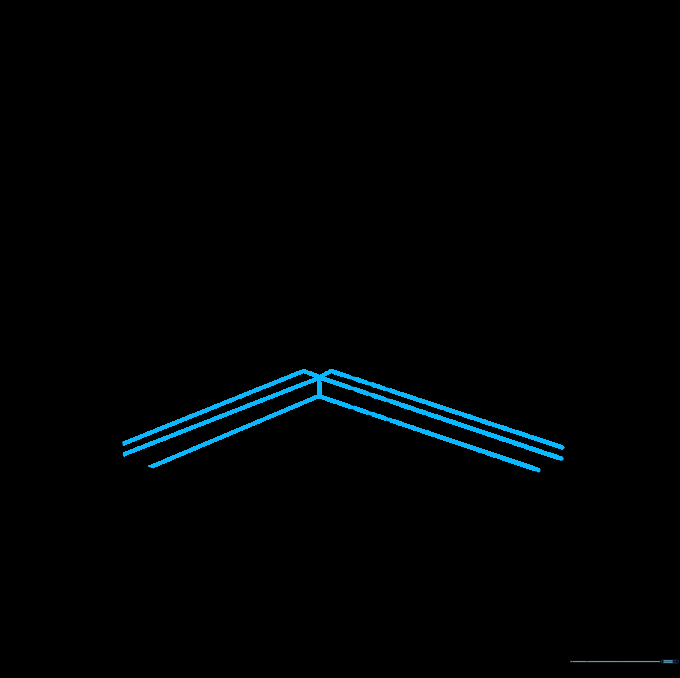
Step 2: Defining the Top Plane
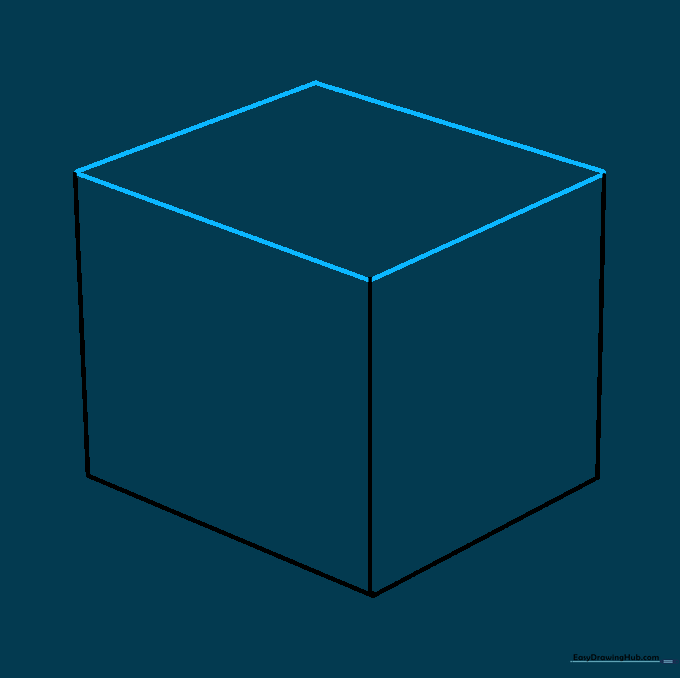
Draw a quadrilateral shape connecting the tops of your vertical lines. This creates the 'roof' of your cube. Tip: Keep your pencil strokes light, as you will be adding more detail inside this shape shortly.
Step 3: Detailing the Top Surface
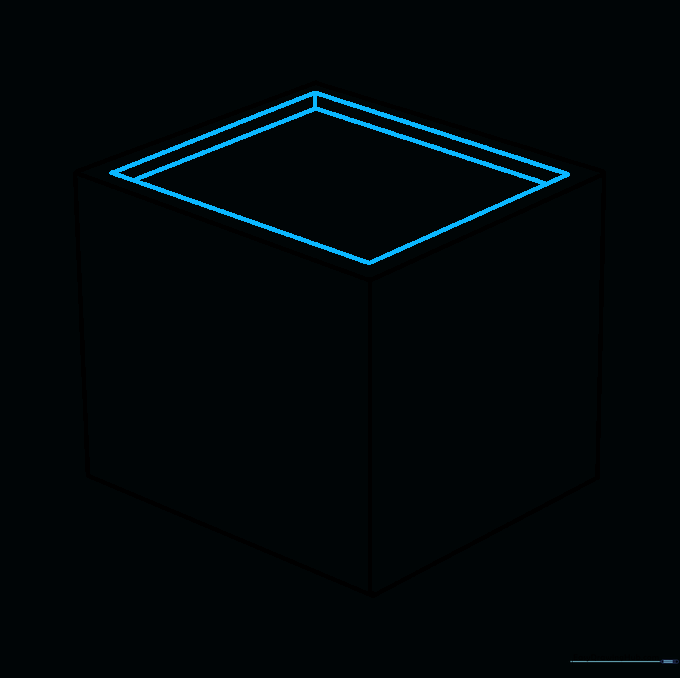
Sketch a smaller square inside the top panel. Extend a short line from the top corner, then draw two parallel lines extending from it. Tip: Imagine you are drawing a smaller box sitting on top of the first one.
Step 4: Adding Side Panel Detail
Draw a square within one of the side panels. This square will eventually help create the 'impossible' twist in the perspective. Ensure the lines are parallel to the outer edges of the cube.
Step 5: Balancing the Side Panels
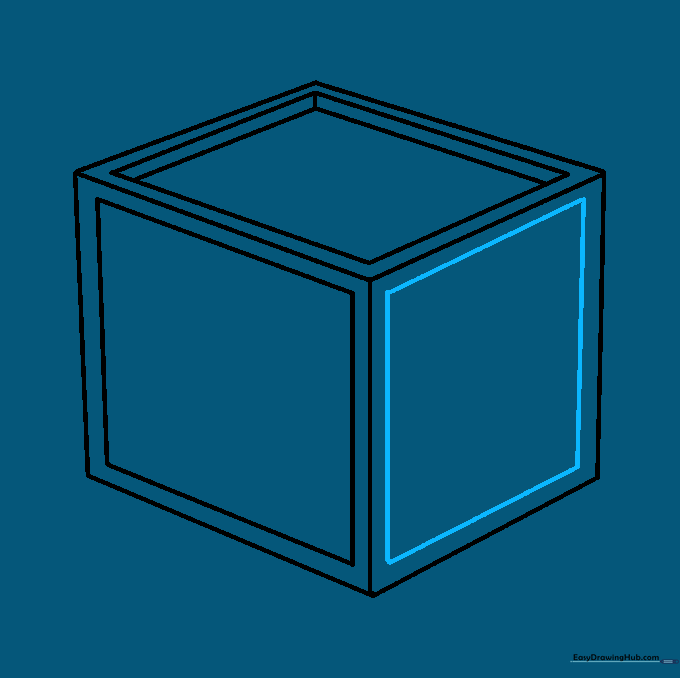
Repeat the process by drawing a corresponding square within the remaining side panel. Tip: Check that your squares are roughly the same size to keep the cube looking symmetrical.
Step 6: Connecting the Corners
Extend short lines from the opposite corners of your squares, then draw parallel lines to connect them. This is where the 'impossible' geometry starts to take shape. Take your time—this is the trickiest part!
Step 7: Forming the Base Rectangles
Extend three lines from the bottom corners on both sides. Allow the middle and bottom lines to meet, forming rectangles. This creates the base of the cube that appears to twist.
Step 8: Cleaning Up the Illusion

Carefully erase the extra guide lines that overlap inside your shapes. Tip: Use a kneaded eraser if you have one; it’s perfect for lifting graphite without smudging your clean lines.
Step 9: Finalizing the Outline
Draw the final side by connecting three parallel lines between the upper and lower back corners. This locks the perspective in place. Your cube should now look like a solid, impossible object.
Step 10: Adding Color and Depth
Bring your cube to life with color! Use different shades for each face to emphasize the illusion. Tip: Try using a darker shade on the 'inner' faces to make the cube look like it has depth.
More Tutorials


