How to Draw an Elephant Trunk: Simple 10-Step Guide
Ready to bring a majestic elephant to life? This tutorial is perfect for young artists ages 5 and up. All you need is a pencil, an eraser, and a sheet of paper to start practicing these expressive, curved lines.
🎯 Final Result

Step-by-Step Instructions
Step 1: Sketching the Eye

Start by drawing the elephant's eye using two curved lines that meet at the points. Add a small, shaded circle for the pupil. Teacher's Tip: Keep the eye small to leave plenty of room for the rest of the face.
Step 2: Forming the Tusk
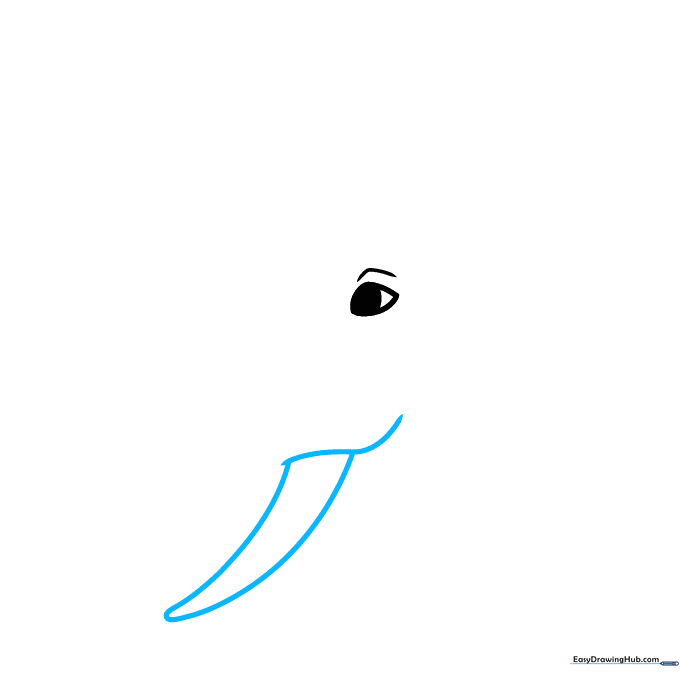
Draw a curved line for the base of the tusk, then extend a long, tapering line that doubles back to create a sharp point. Tip: Think of this shape like a long, slightly bent carrot.
Step 3: Defining the Head
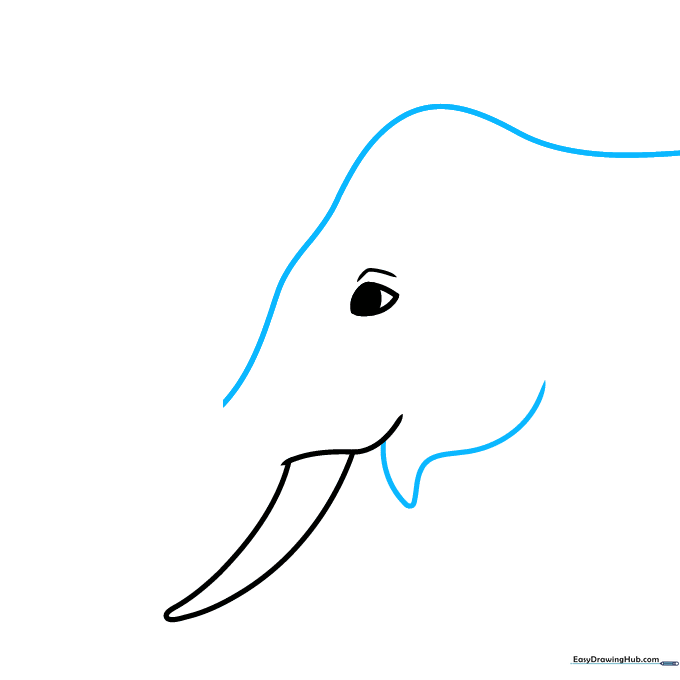
Use a long, sweeping curved line to map out the top of the head and a shorter line for the lower jaw. Tip: Keep your wrist loose to get a nice, natural-looking curve.
Step 4: Drawing the Trunk
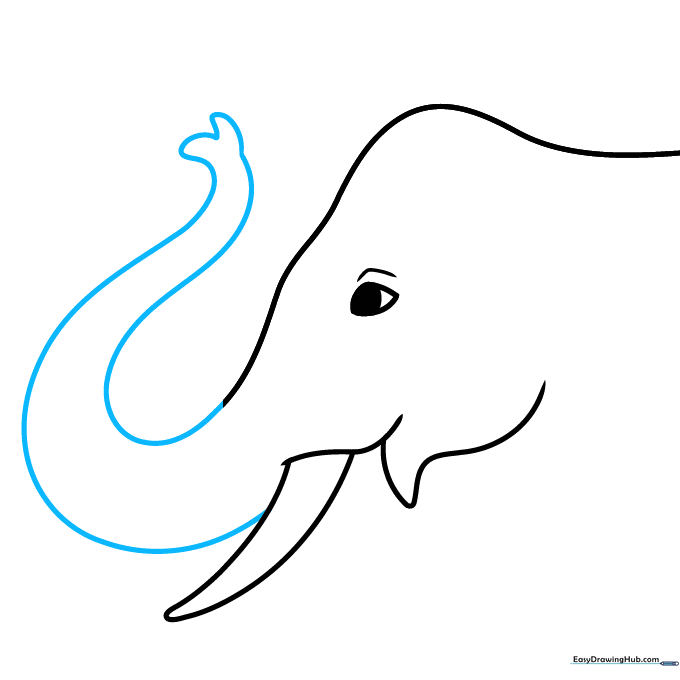
Extend two long lines from the face and tusk, connecting them at the end with a wavy 'M' shape. Tip: The 'M' shape creates the nostril opening, giving your trunk a realistic touch.
Step 5: Adding the Ear
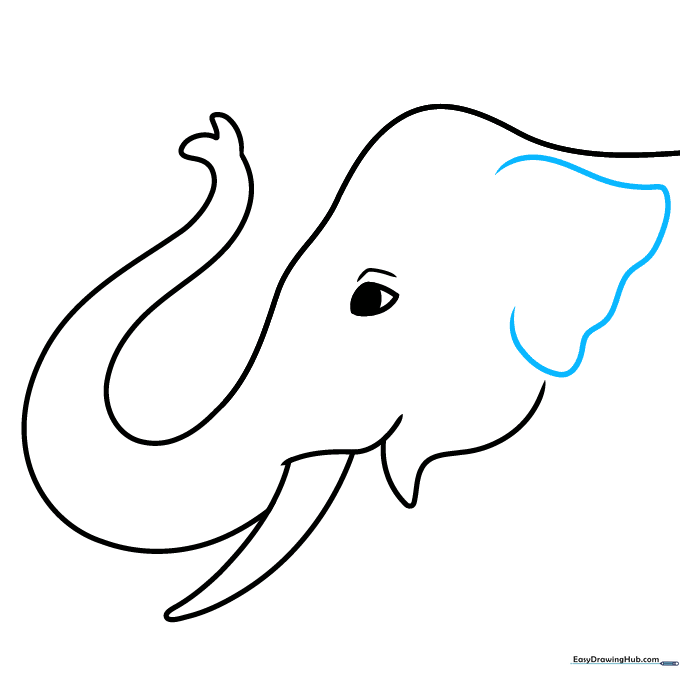
Sketch a large, curved line to form the ear. A smaller ear suggests an Asian elephant! Tip: Don't worry about making it perfect; elephant ears are naturally floppy and irregular.
Step 6: Neck and Chest
Add contour lines inside the ear, then sketch the neck and chest using two overlapping curves. Tip: Overlapping lines help create the illusion of depth and bulk.
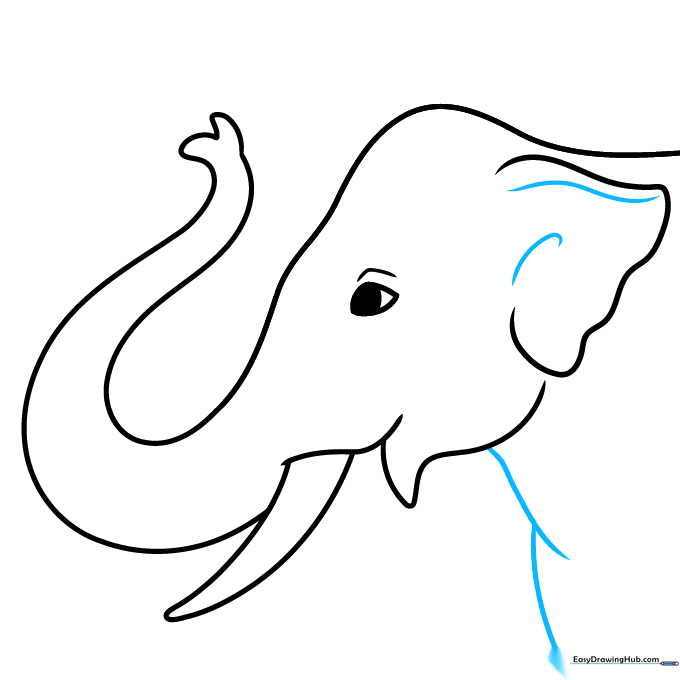
Step 7: Refining the Face
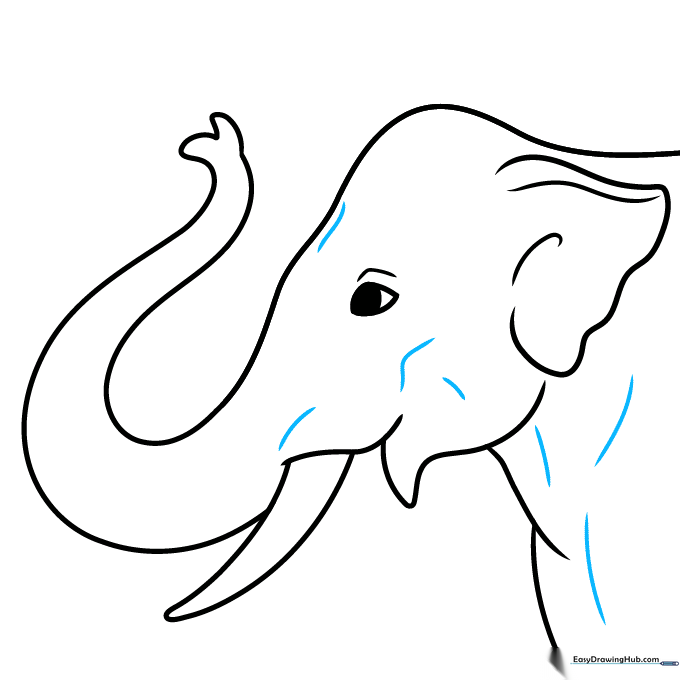
Add subtle contour lines along the face and neck to define the elephant's structure. Tip: Use light pressure here to keep the lines soft and natural.
Step 8: Final Facial Details
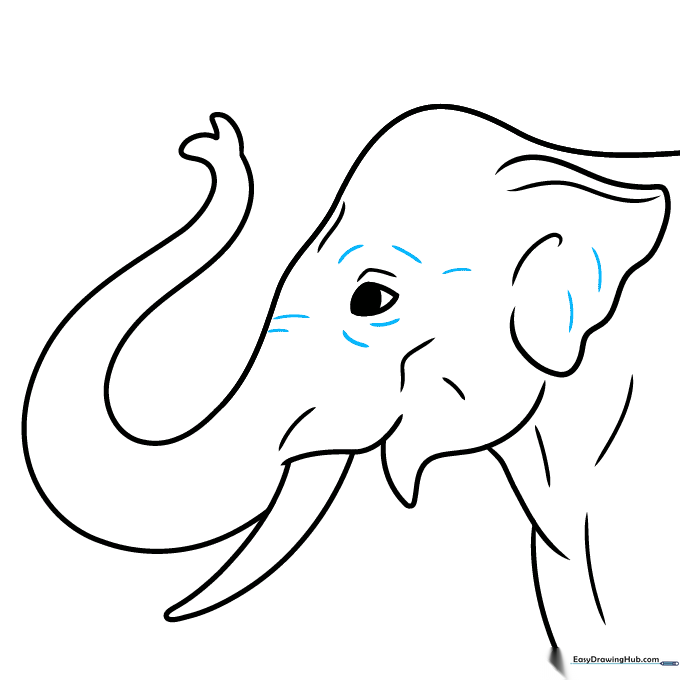
Add more contour lines around the eye and ear to emphasize the folds in the elephant's skin. Tip: These small lines make your drawing look much more professional.
Step 9: Adding Trunk Wrinkles
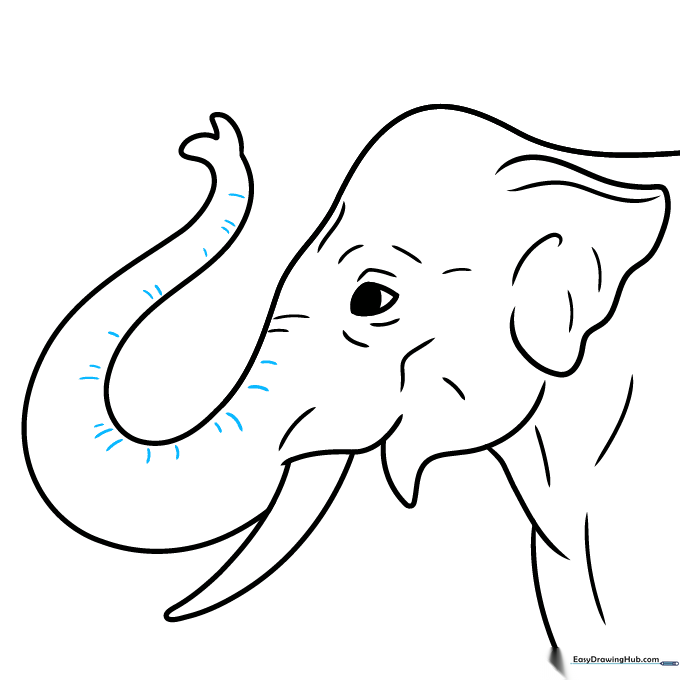
Draw a series of short, horizontal curved lines along the trunk to represent wrinkles. Tip: Vary the spacing between the lines to make the trunk look flexible.
Step 10: Coloring Your Masterpiece

Time to color! Use gray, but don't be afraid to add hints of brown or reddish-tan to show the dust from their baths. Tip: Use a darker gray for the shadows under the ear to give it a 3D look.
More Tutorials


