How to Draw an Elephant: Easy 10-Step Guide for Kids
Ready to bring a majestic elephant to life? This tutorial is designed for young artists ages 5 and up, using only a pencil, paper, and an eraser. Follow these simple steps to master basic shapes and build confidence in your drawing skills.
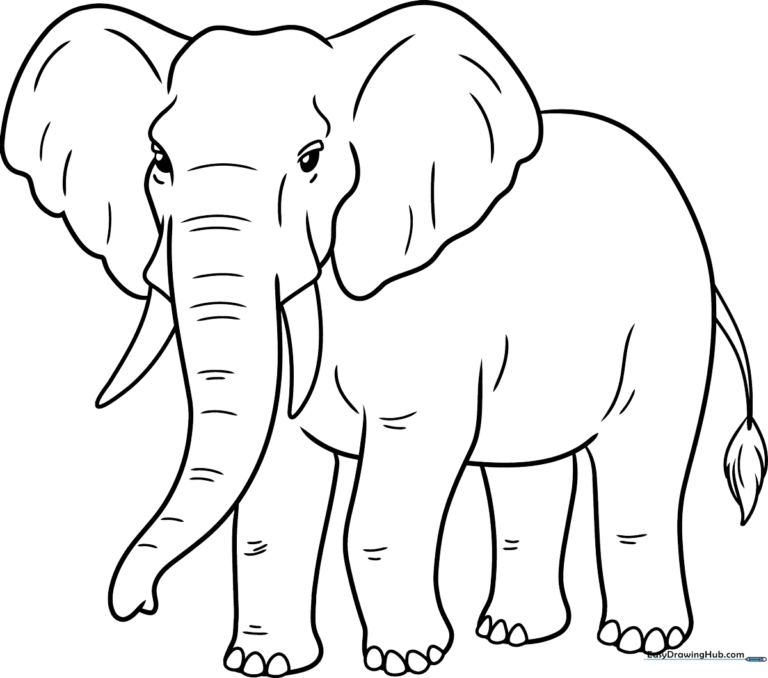
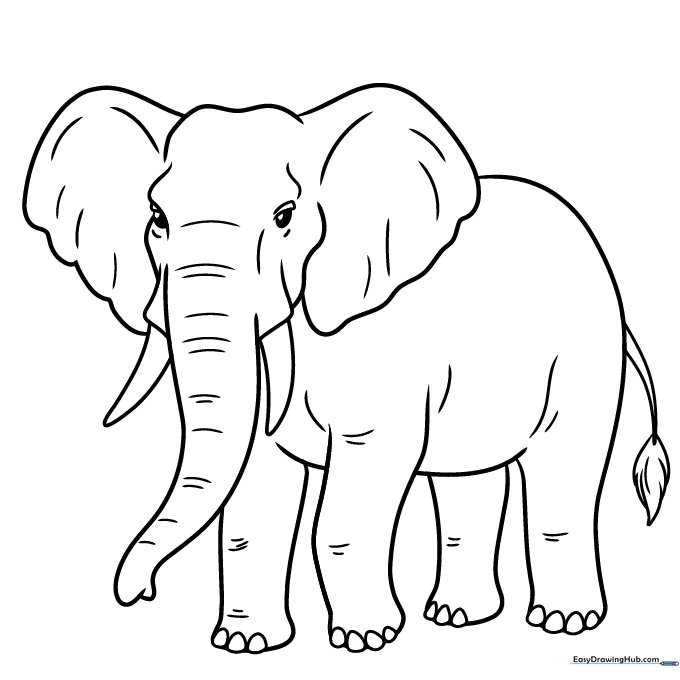
🎯 Final Result
Step-by-Step Instructions
Step 1: Sketching the Head and Eyes
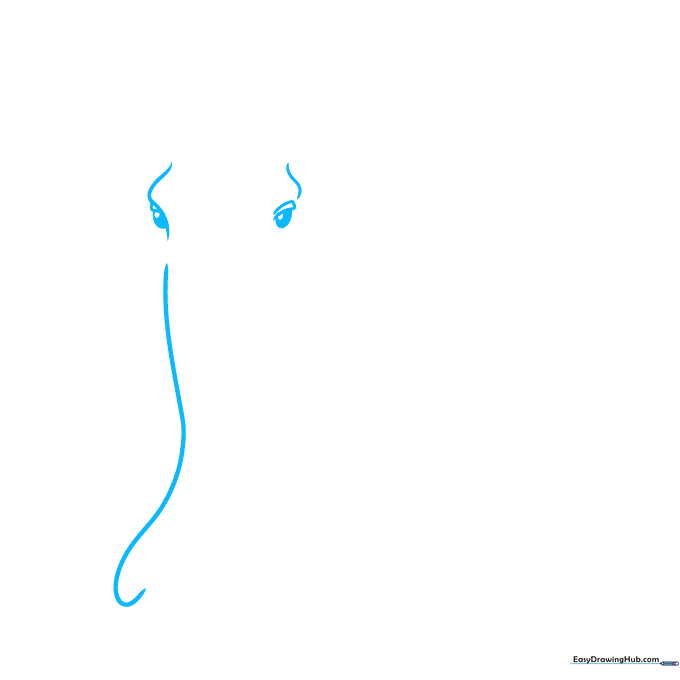
Start by drawing the elephant's brow ridges and the side of the trunk using soft, curved lines. For the eyes, draw a small oval inside a larger one. Tip: Keep the eyes centered on the face to give your elephant a friendly, approachable expression.
Step 2: Defining the Face and Trunk
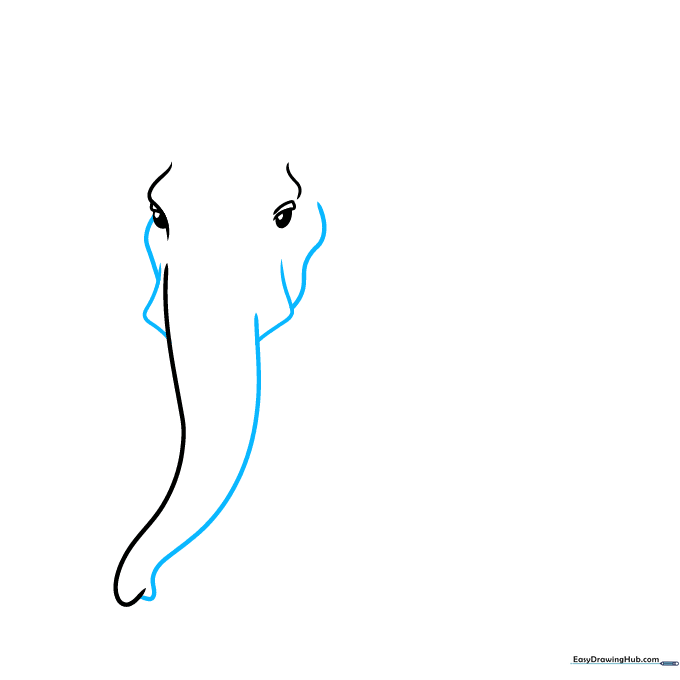
Use overlapping curved lines to connect the sides of the face to the trunk. Tip: Imagine the trunk as a gentle 'S' curve; keeping it fluid makes the elephant look more natural.
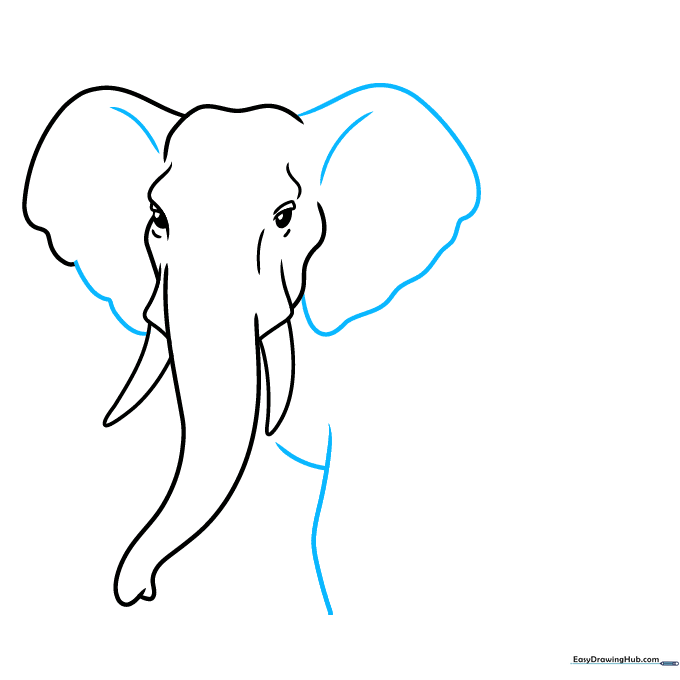
Step 3: Adding Tusks and Ears

Extend curved lines from the trunk to form the tusks, then draw a large, sweeping curve for the ear. Tip: Make the ear large—elephants use them to stay cool, so don't be afraid to make them nice and wide!
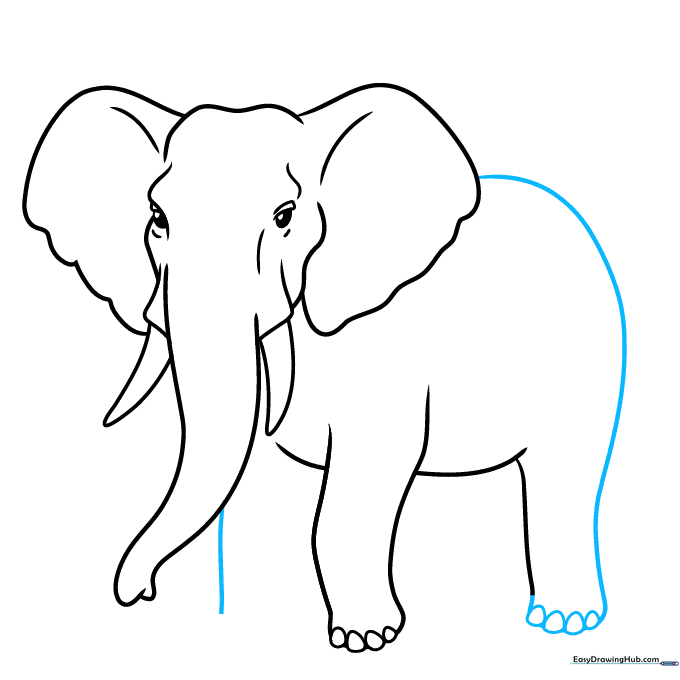
Step 4: Shaping the Body
Draw a 'Y' shaped line below the head to establish the chest and the start of the front leg. Tip: This is the anchor point for the rest of the body, so keep your lines steady.
Step 5: Drawing the Legs and Belly

Outline the belly and the rear leg using long, sweeping curves. Add small, irregular circles at the bottom for the toenails. Tip: Elephants have thick, sturdy legs—draw them slightly wider at the bottom.
Step 6: Completing the Back and Rump
Connect the back and rump with a long, smooth curve. This helps define the elephant's large, rounded silhouette. Tip: Try to draw this in one continuous motion for a cleaner look.
Step 7: Adding the Remaining Legs
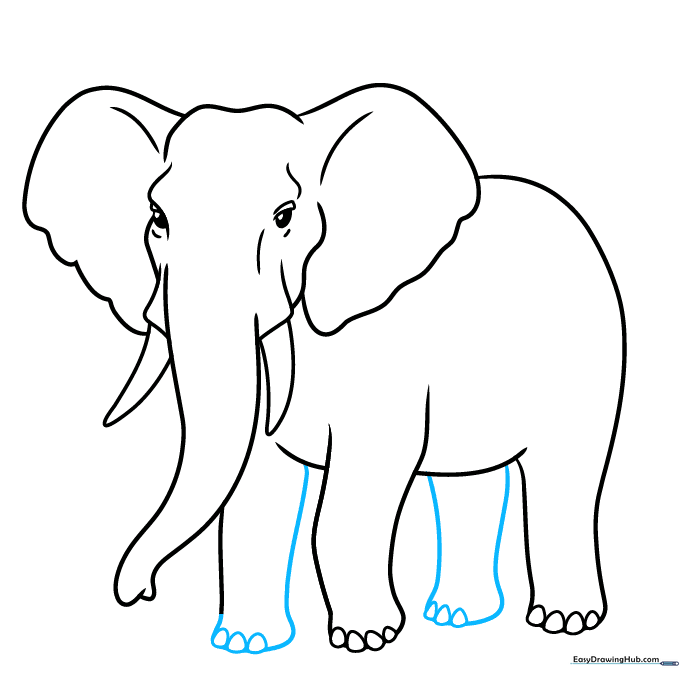
Draw the far-side legs using similar curved shapes to give your elephant depth. Tip: Keep these slightly smaller than the front legs to show perspective.
Step 8: Adding the Tail
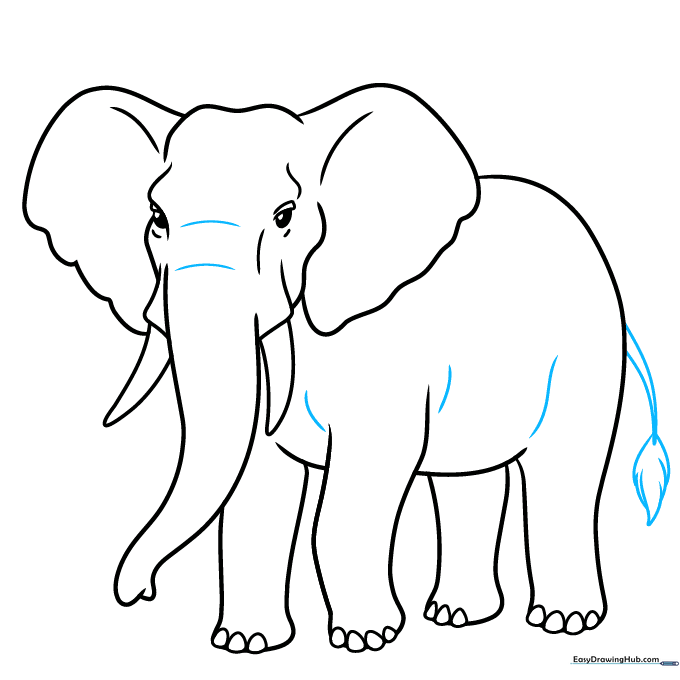
Draw a thin tail with a tuft of hair at the end using jagged, short lines. Tip: Use quick, flicking motions with your pencil to make the hair look realistic and textured.
Step 9: Refining the Details
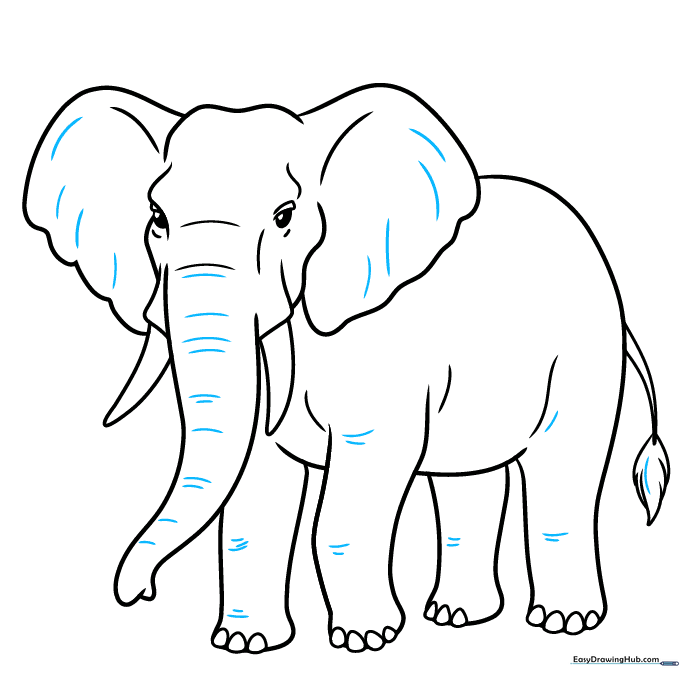
Add small wrinkles to the trunk, knees, and ears using short, curved lines. Tip: Less is more! A few well-placed lines suggest texture without cluttering your drawing.
Step 10: Final Coloring
Your outline is complete! Color your elephant in shades of gray or brown. Tip: Use a darker gray for the shadows under the belly and ears to make your elephant look 3D.
More Tutorials


