How to Draw a Wedding Dress: Simple 9-Step Guide
This tutorial is perfect for young artists and beginners who want to practice drawing elegant clothing. All you need is a pencil, an eraser, and a piece of paper to get started. Follow these steps to master the flowy, layered look of a classic bridal gown.
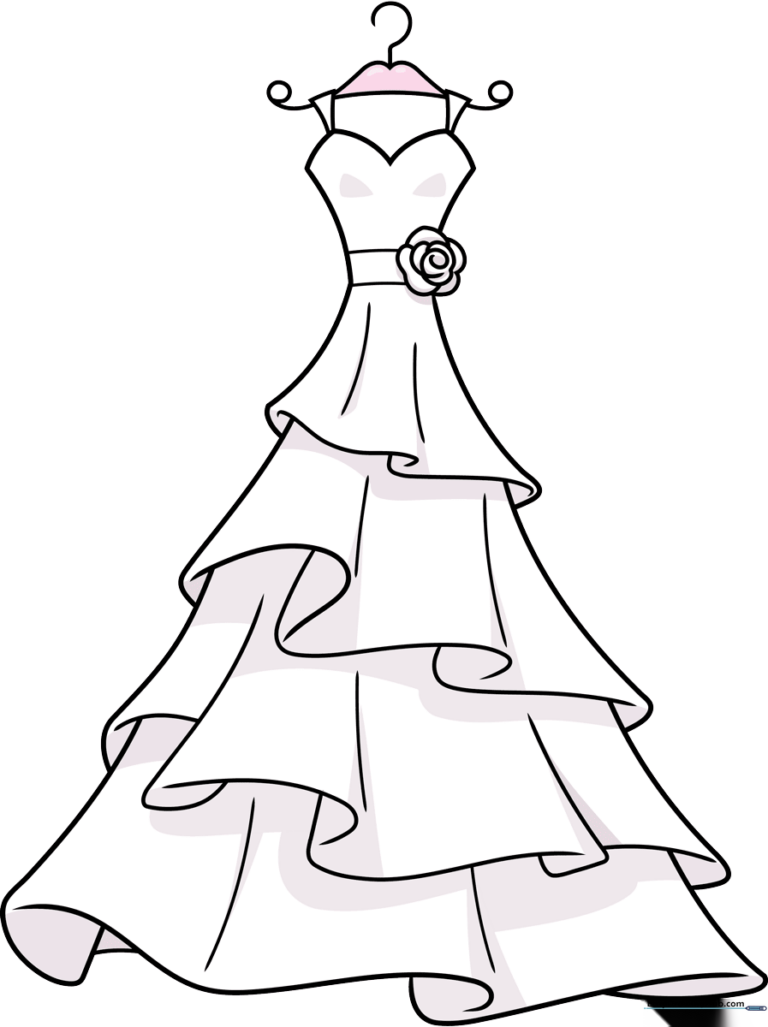
🎯 Final Result
Step-by-Step Instructions
Sketching the Bodice
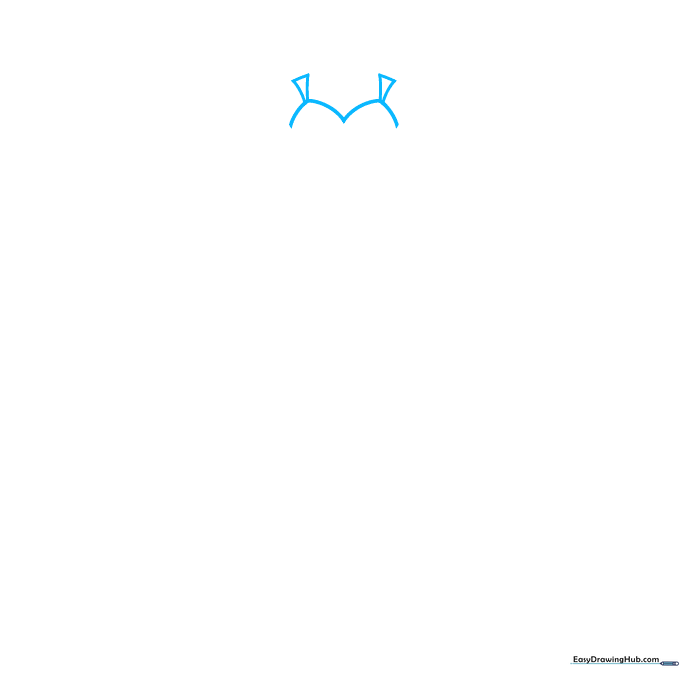
Start by drawing the sweetheart neckline using two gentle curves that meet in the middle like a heart. Add two small inverted triangles at the top for the straps. Teacher's Tip: Keep these lines soft and rounded to make the fabric look delicate.
Defining the Bodice and Adding Floral Accents
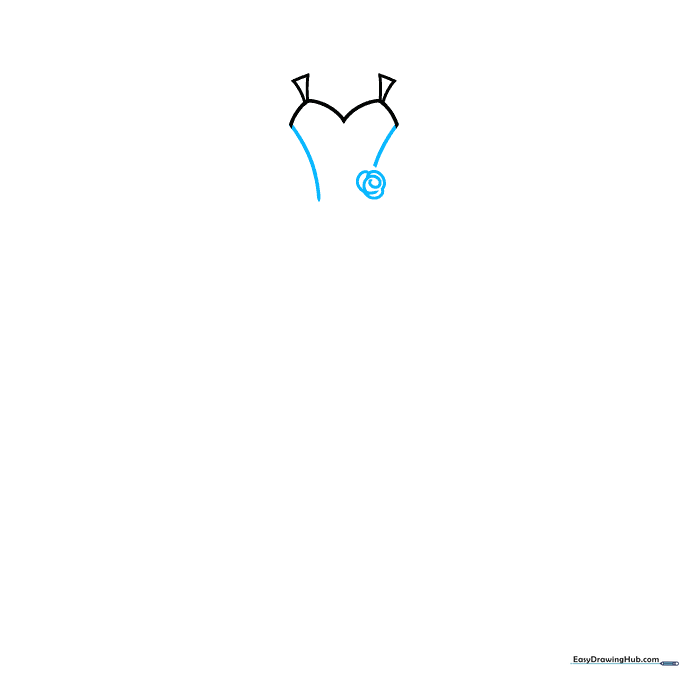
Draw the sides of the bodice with smooth, downward-curving lines. Near the waist, start sketching a rose by using overlapping, circular curved lines. Tip: Don't worry about perfect circles; petals are naturally irregular and organic.
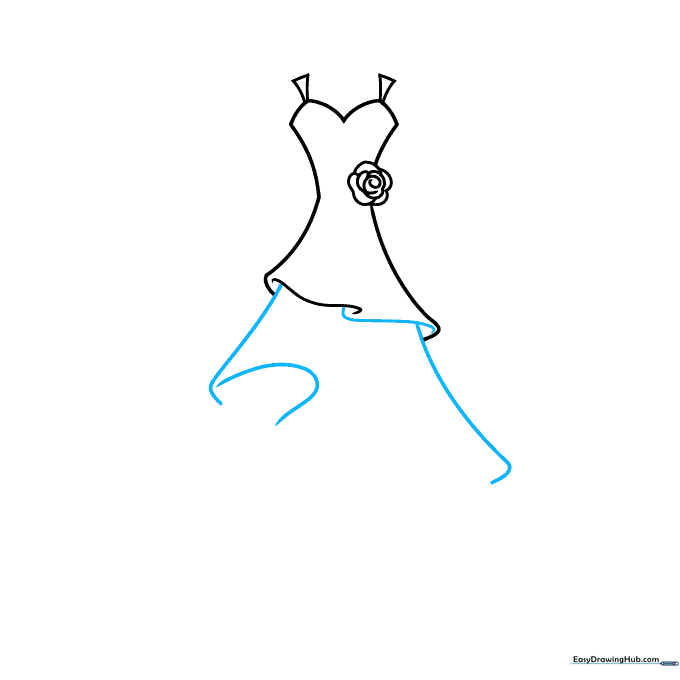
Creating the First Tier
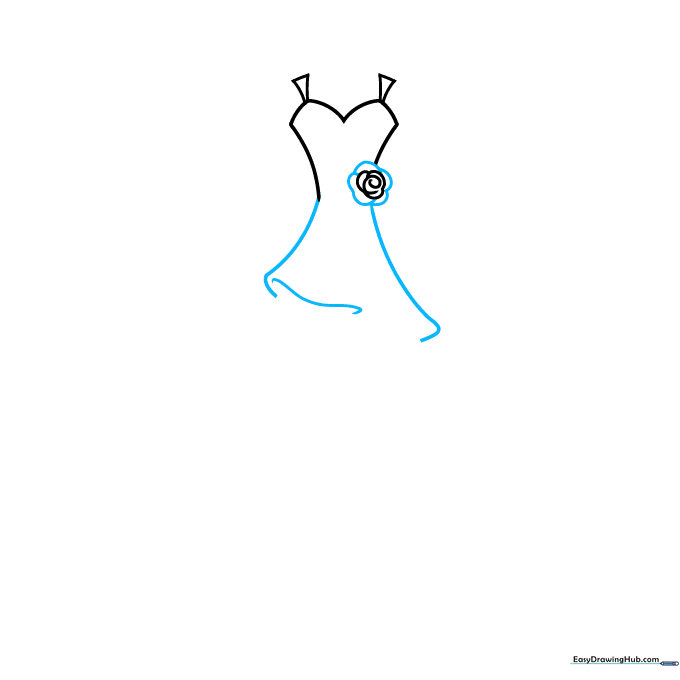
Add more petals around your rose to make it pop. Extend curved lines from the bodice that taper inward at the bottom, then draw a diagonal line to establish the first tier of the skirt. Tip: Leave a small gap between the lines to suggest the movement of fabric.
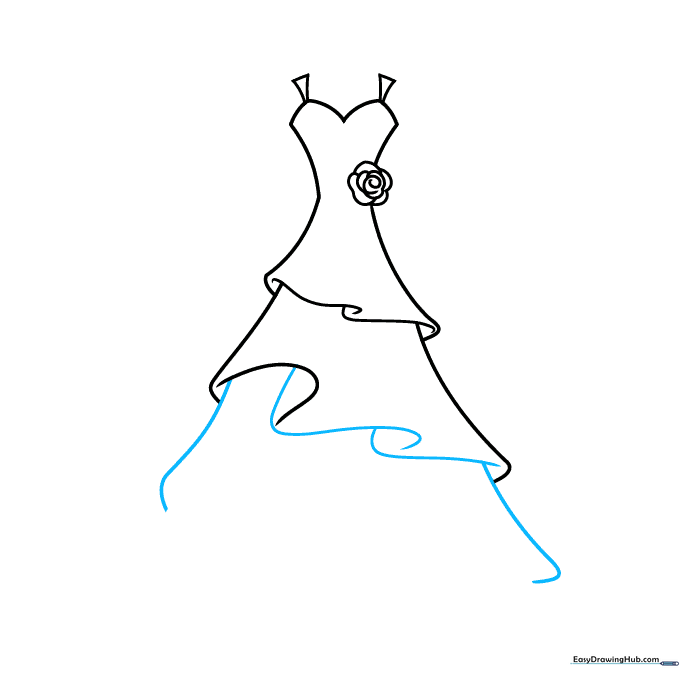
Adding Volume to the Skirt
Draw an 'S' shaped curve from the diagonal line to the edge of the dress. Extend two long, sweeping lines downward to form the second tier. Add a 'U' shaped line near the top to show folds. Tip: Think of these as waves in the ocean to get the right flow.
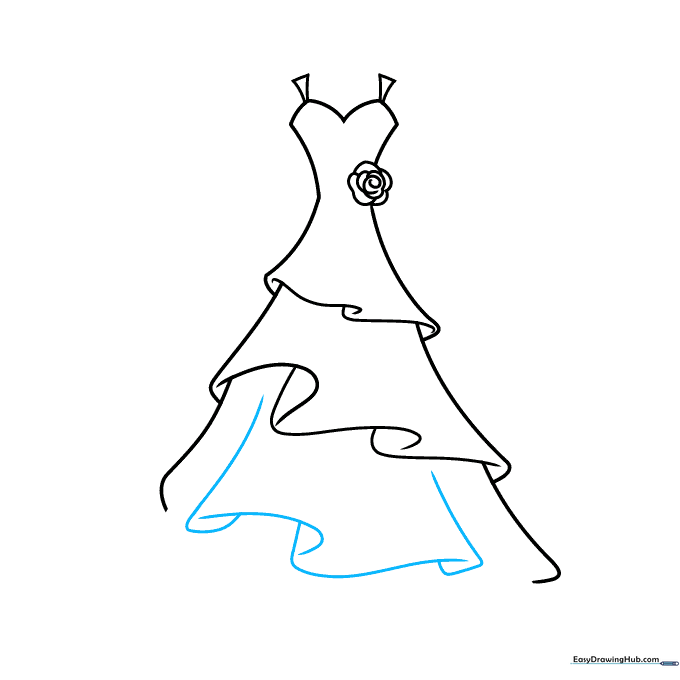
Developing the Second Tier
Use intersecting curved lines to define the bottom of the second tier. Then, extend two more curved lines to start the third tier. Tip: Intersecting lines create the illusion of overlapping fabric layers.
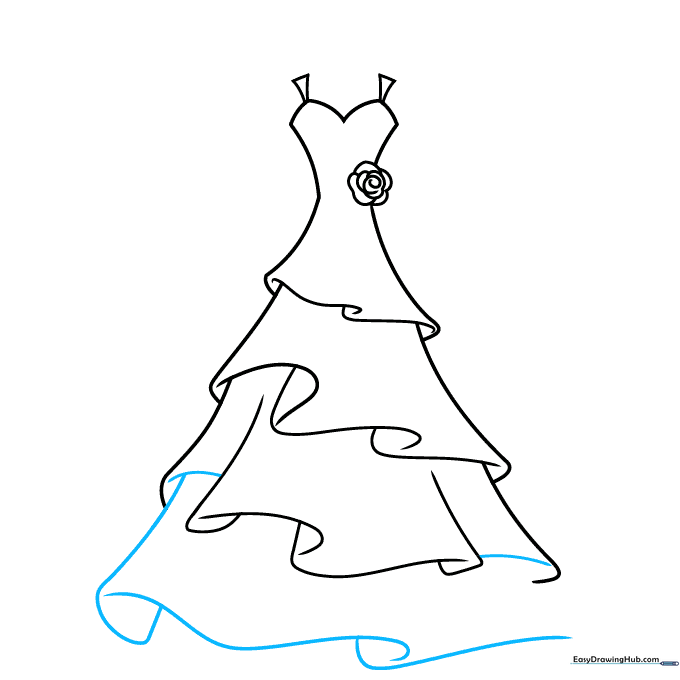
Adding Detail to the Third Tier
Sketch a smaller, inner tier within the third section using more intersecting curves. This adds depth and makes the dress look fuller. Tip: Keep your pencil pressure light here to maintain the 'airy' look of bridal tulle.
Finalizing the Skirt Layers
Enclose the bottom of the third tier with a smooth curve. Then, draw the final, longest tier at the base using overlapping curves. Tip: Ensure the bottom tier is the widest to give the dress a realistic 'A-line' shape.
Adding Texture and Belt
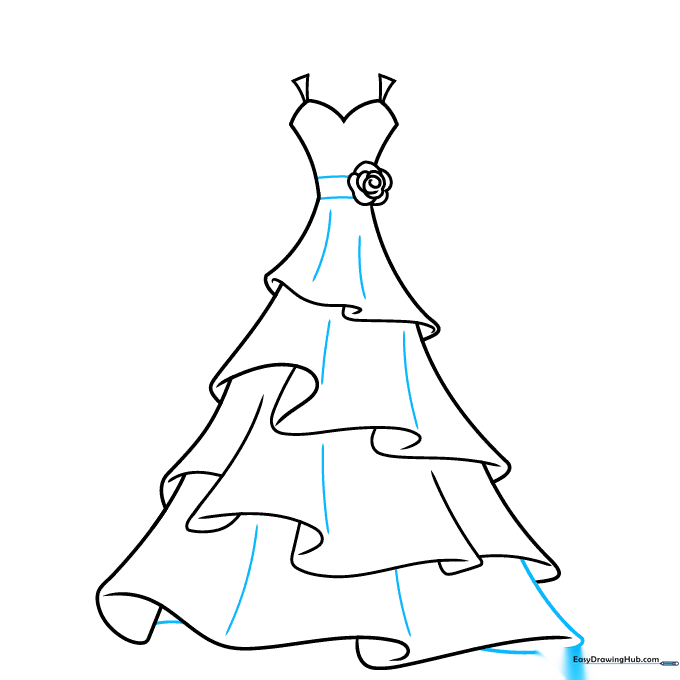
Close the bottom tier. Add horizontal lines at the waist to create a belt, and add vertical curved lines down the skirt to represent folds in the fabric. Tip: These vertical lines are key to making the dress look like it's made of real cloth.
Drawing the Hanger
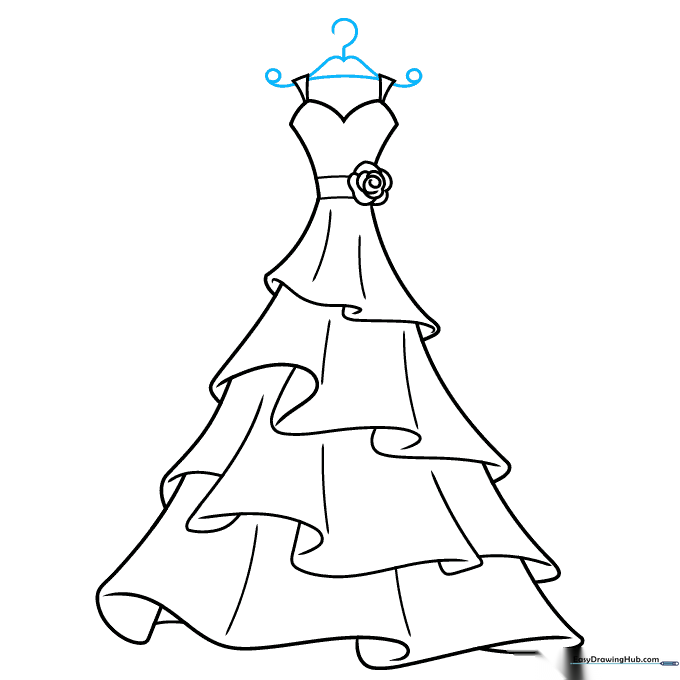
Draw an 'M' shape and a question-mark-like curve above the dress to create a hanger. Add small circles at the ends of the straps to show where it hangs. Tip: Drawing the dress on a hanger is a great way to practice symmetry!
Coloring Your Masterpiece
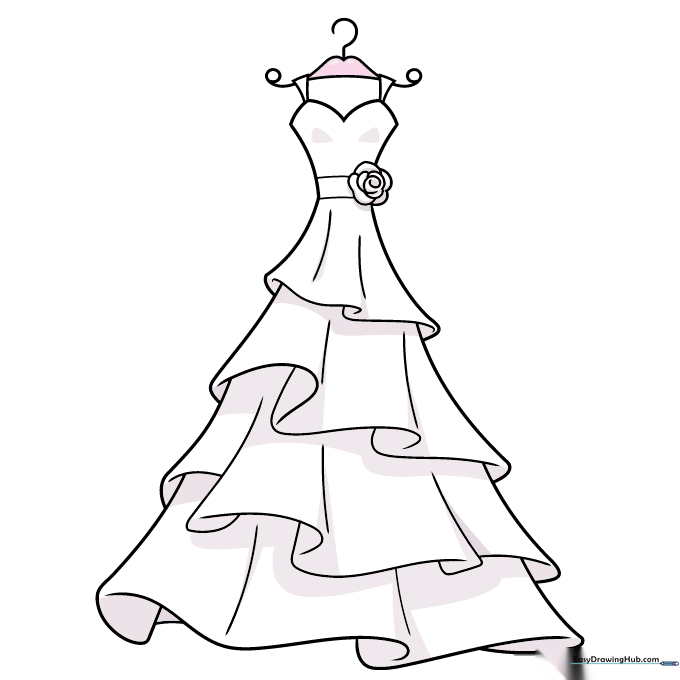
Your outline is complete! Use white or off-white for the dress, and add soft pink or gold accents for the belt and rose. Tip: Use a light grey pencil to shade the folds to give your dress a 3D effect.
More Tutorials


