How to Draw Superman: Easy 9-Step Guide for Kids
Ready to bring the Man of Steel to life? This tutorial is perfect for young artists ages 6+ who want to master superhero proportions. You only need a pencil, an eraser, and some paper to get started on this heroic masterpiece.
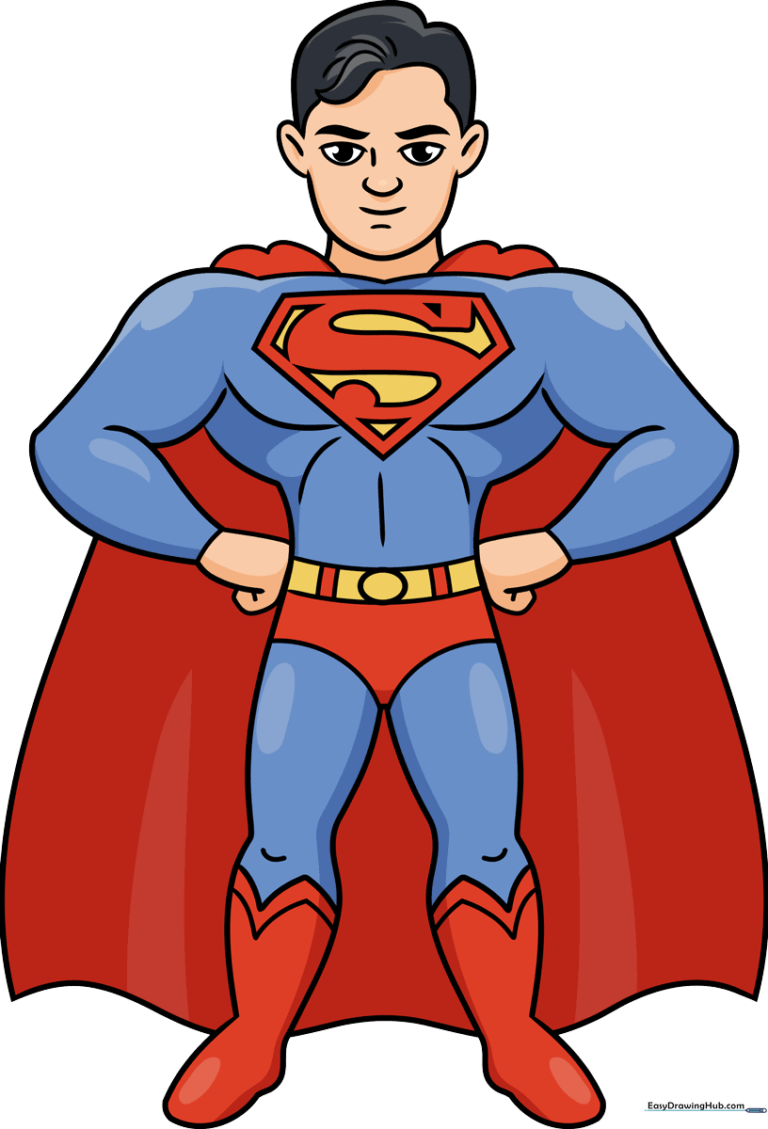
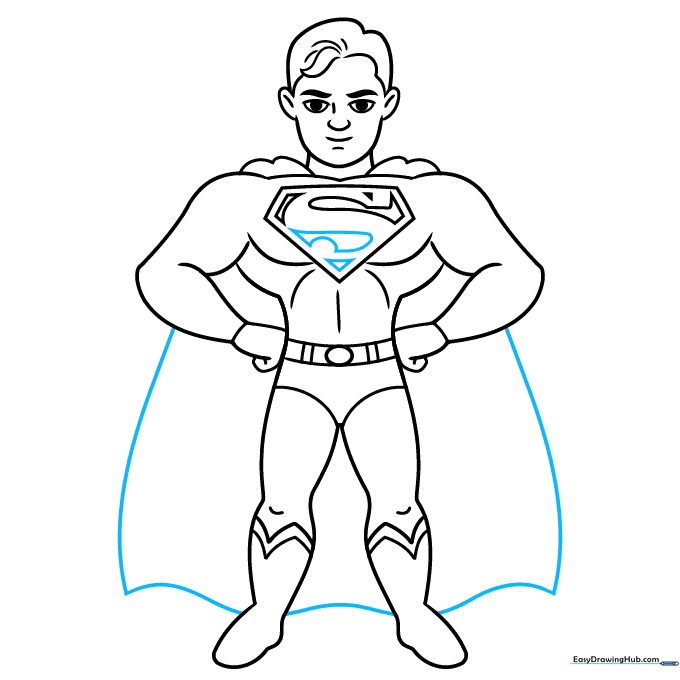
🎯 Final Result
Step-by-Step Instructions
Step 1: Sketching the Face

Draw two almond-shaped eyes and add round pupils inside. Add thick, bold eyebrows above the eyes and a simple curved line for the nose. Teacher's Tip: Keep the eyes symmetrical to give your hero a focused, heroic expression.
Step 2: Defining the Head Shape
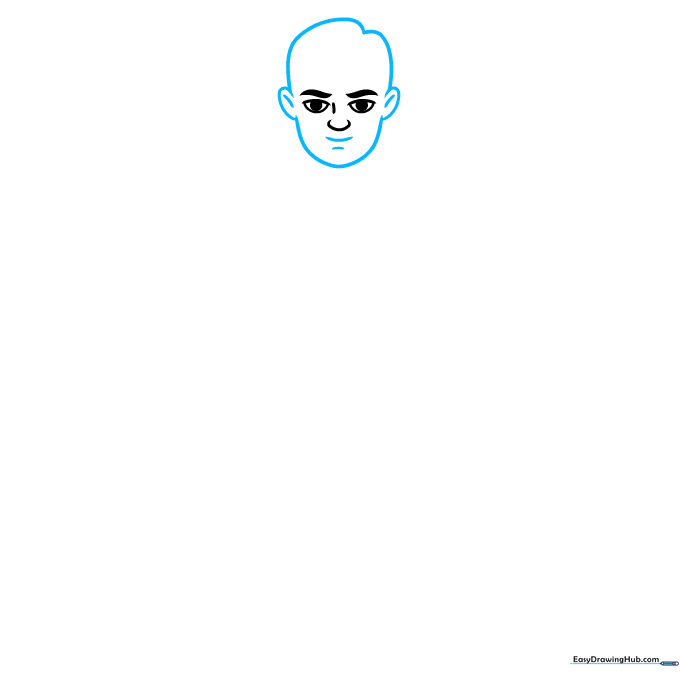
Outline the head and ears using smooth, curved lines. Don't forget the small 'dent' at the top of the forehead—this is the base for his iconic hair. Teacher's Tip: Use a light touch; you'll be adding hair over this later.
Step 3: The Iconic Hair and Shoulders
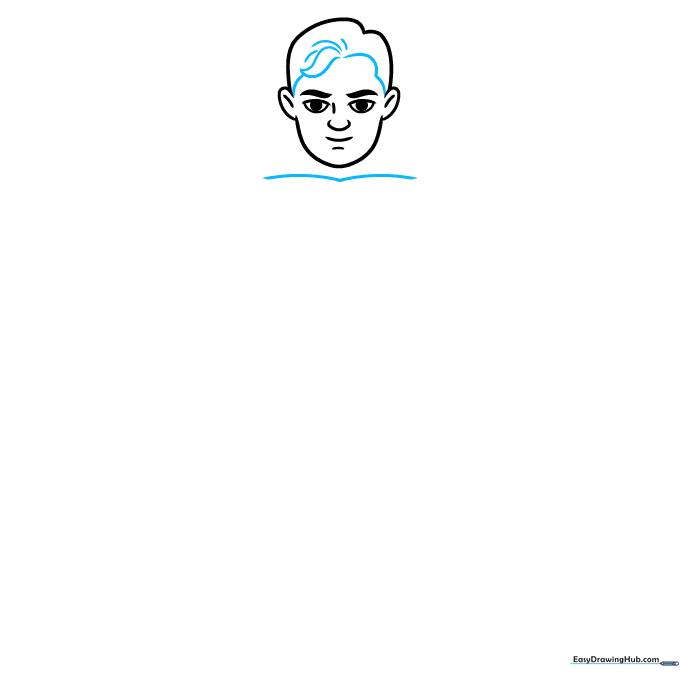
Draw the famous 'S' curl in the center of the forehead, then add the hairline. Below the chin, draw a wide 'M' shape to create the top of his chest and shoulders. Teacher's Tip: Make the 'M' wide to give him that strong, heroic posture.
Step 4: Arms and Cape Base
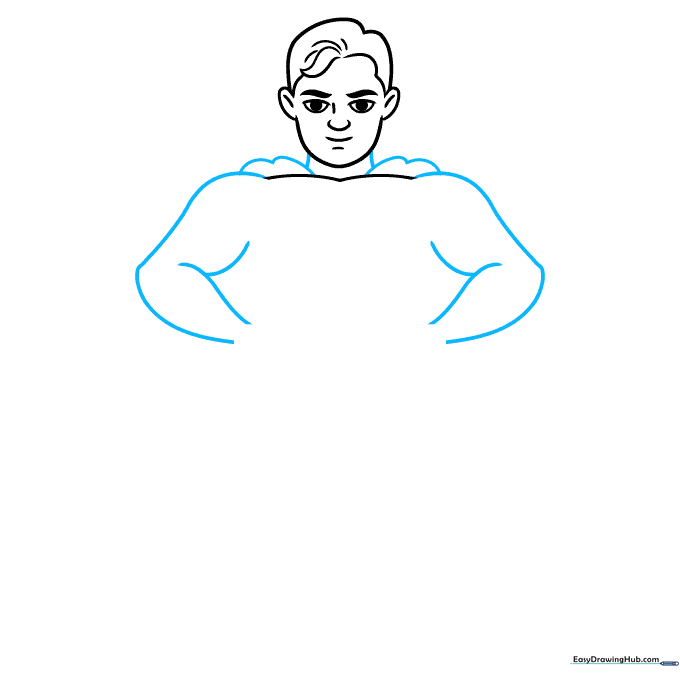
Extend curved lines from the shoulders to form the arms, using 'Y' shapes for the arm contours. Add a rounded 'M' shape behind the neck for the cape. Teacher's Tip: Keep the arms slightly bent to make him look ready for action.
Step 5: Defining the Torso
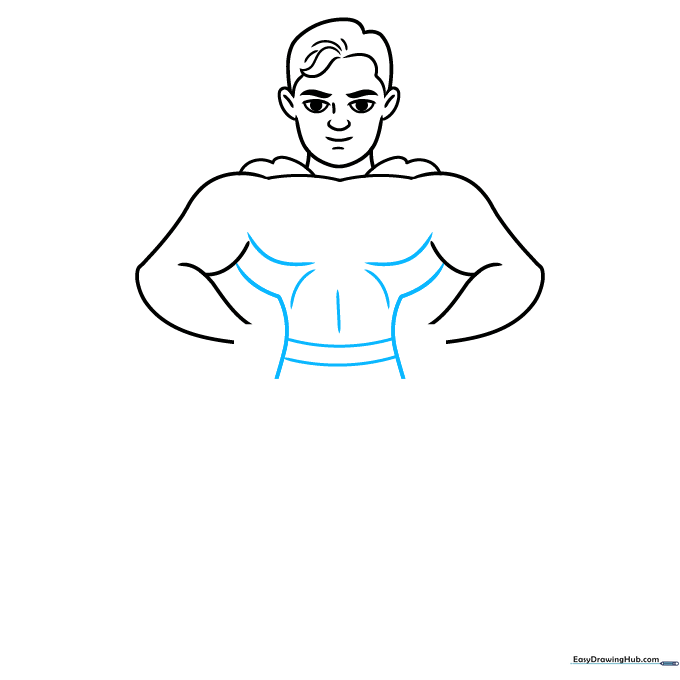
Draw curved lines down from the arms to create the torso. Add smaller curved lines to suggest pectoral and abdominal muscles. Teacher's Tip: Don't press too hard; these muscle lines should be subtle, not harsh.
Step 6: Fists and Legs
Draw small, overlapping curved lines at the hips to show his fists. Extend the torso lines downward to start the legs. Teacher's Tip: Think of the fists as small, rounded shapes tucked against his waist.
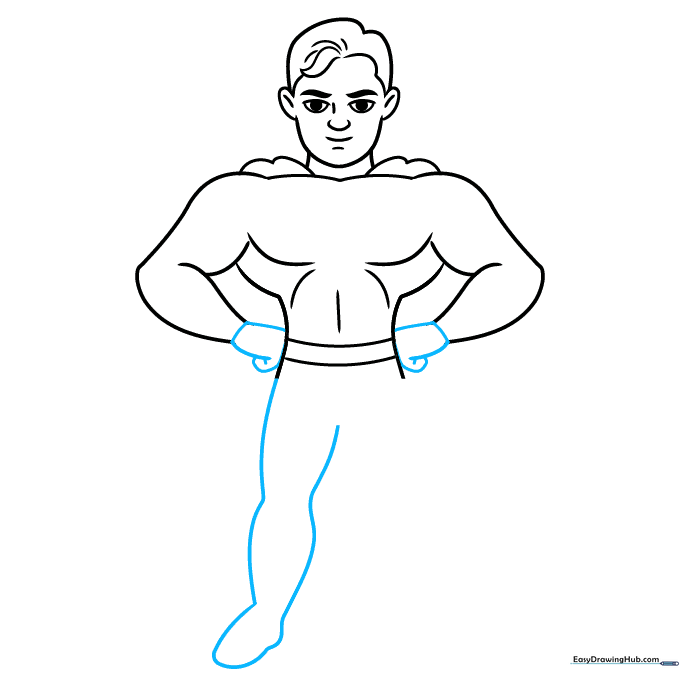
Step 7: Legs and Boots
Complete the legs and add 'M' shaped lines across the calves to define the tops of his boots. Teacher's Tip: Make the boots look sturdy by ensuring the lines are parallel to each other.
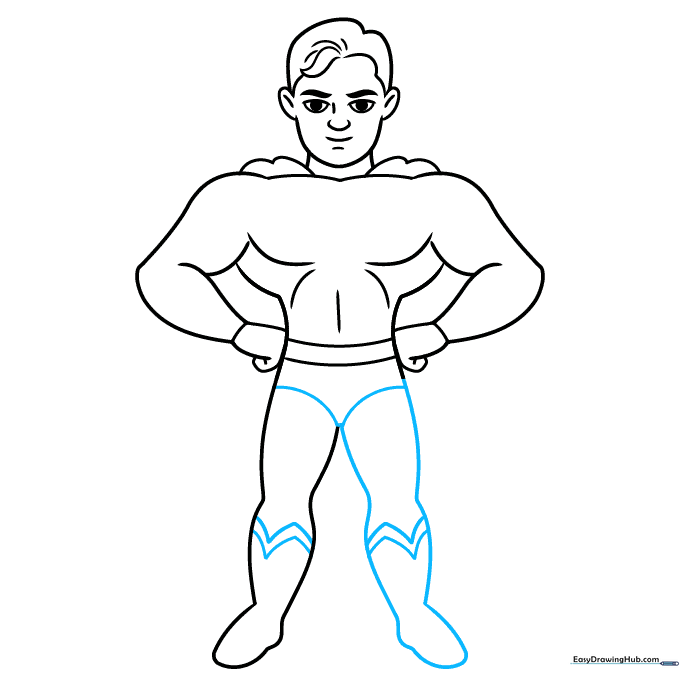
Step 8: The Chest Emblem and Belt
Draw a pentagon on the chest for the logo and add an oval with lines on the belt. Add small curves at the knees. Teacher's Tip: Use a ruler if you struggle with the straight lines of the pentagon!
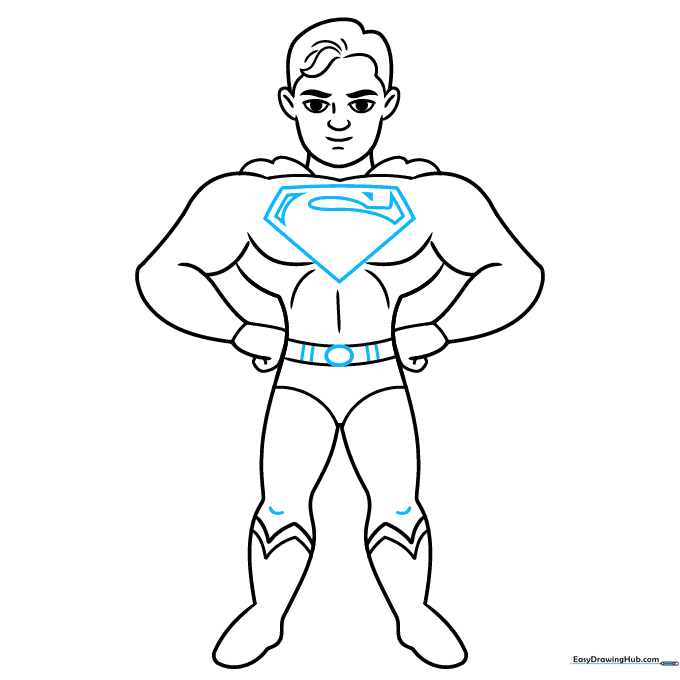
Step 9: Final Touches and Cape
Draw the iconic 'S' inside the pentagon and use long, wavy lines to finish the rectangular cape. Teacher's Tip: Wavy lines make the cape look like it's blowing in the wind!
Step 10: Coloring Your Hero
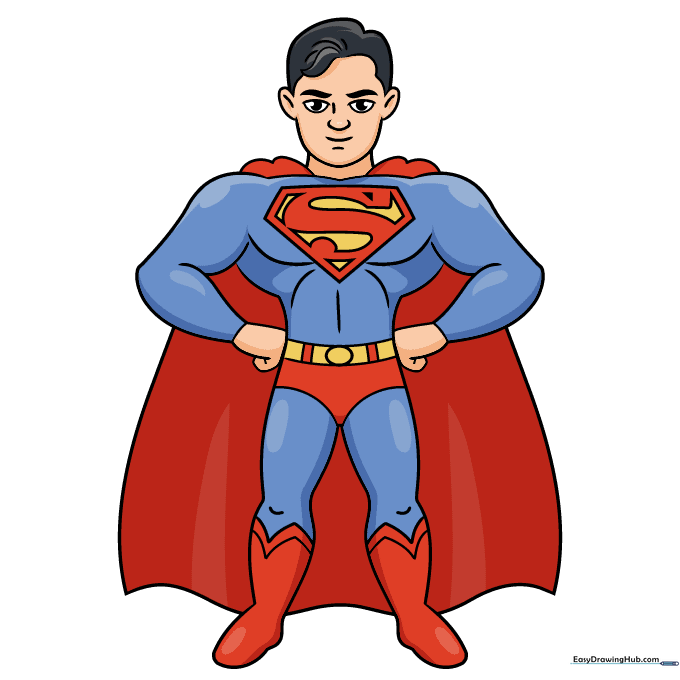
Bring your drawing to life! Use black for the hair, and the classic blue, red, and yellow for the suit. Teacher's Tip: Color in one direction to keep your work looking neat and professional.
More Tutorials


