How to Draw Sonic the Hedgehog: Easy 10-Step Face Guide
Bring the world's fastest hedgehog to life with this beginner-friendly drawing tutorial. Designed for ages 5 and up, this activity requires only a pencil, eraser, and paper to help young artists practice symmetry and curved line control. Follow along to create your very own Sonic masterpiece in minutes.
🎯 Final Result

Step-by-Step Instructions
Sketching the Nose and Snout
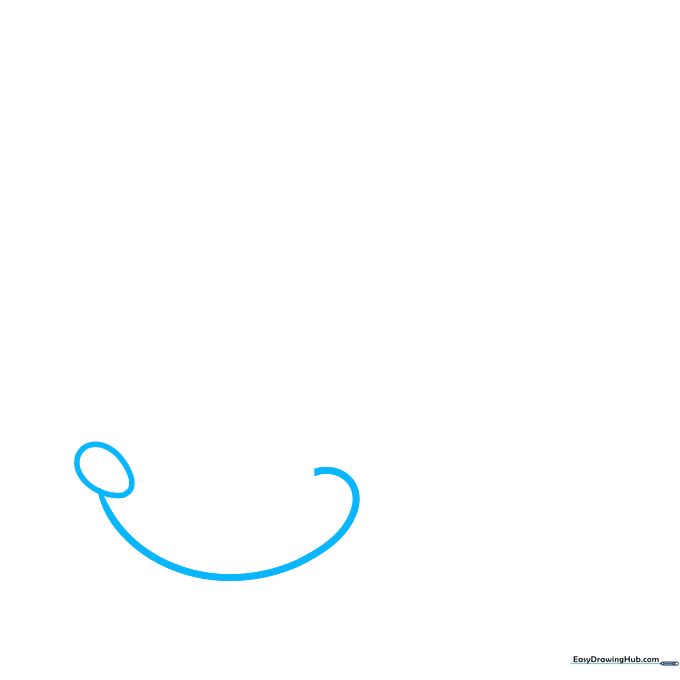
Start by drawing a small, egg-shaped oval for the nose. From the bottom of the nose, draw a long, sweeping curved line that loops back to form the snout. Teacher's Tip: Keep the curve soft and rounded to give Sonic his friendly, classic look.
Defining the First Eye
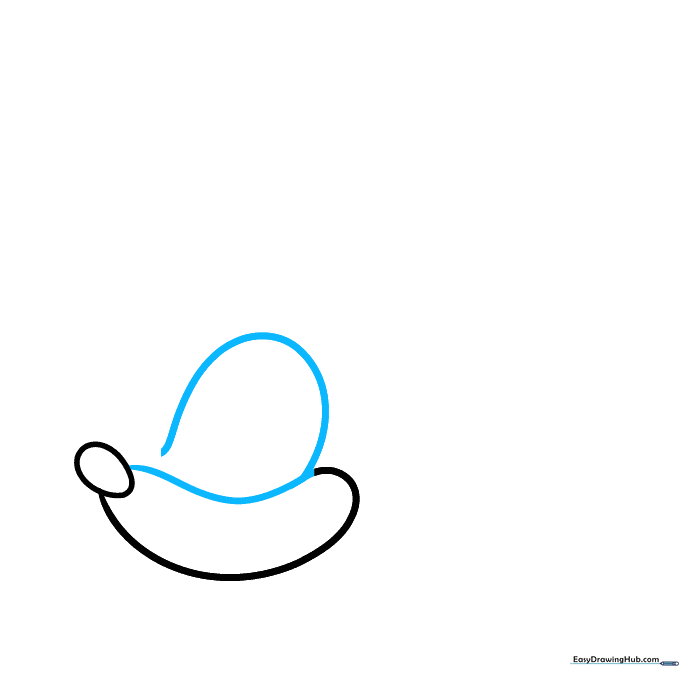
Bring the line back toward the nose, then draw a large, rounded shape above the snout to form the first eye. Teacher's Tip: Make sure the eye is large enough to take up a good portion of the face—Sonic's expressive eyes are his most important feature!
Outlining the Second Eye
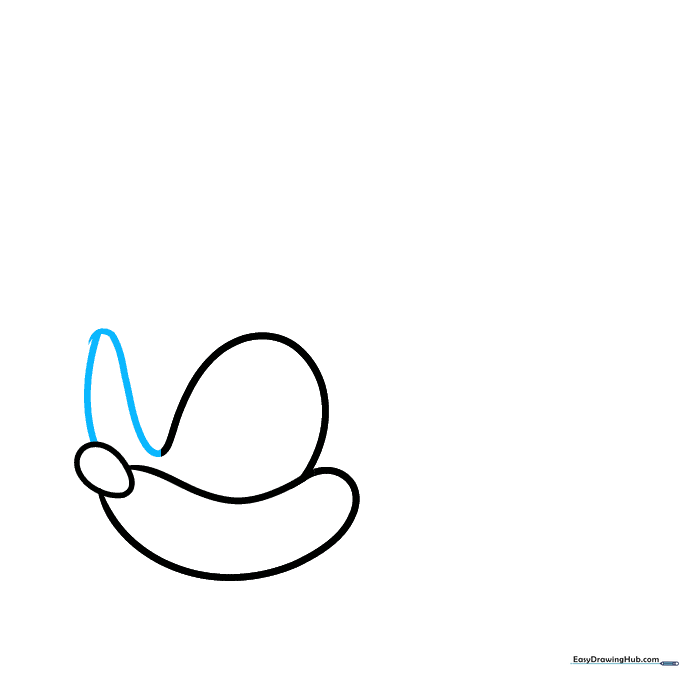
Continue the line from the first eye to outline the second eye, connecting it back to the nose area. Teacher's Tip: Try to keep the two eye shapes symmetrical so Sonic looks balanced.
Adding Pupils and Brows
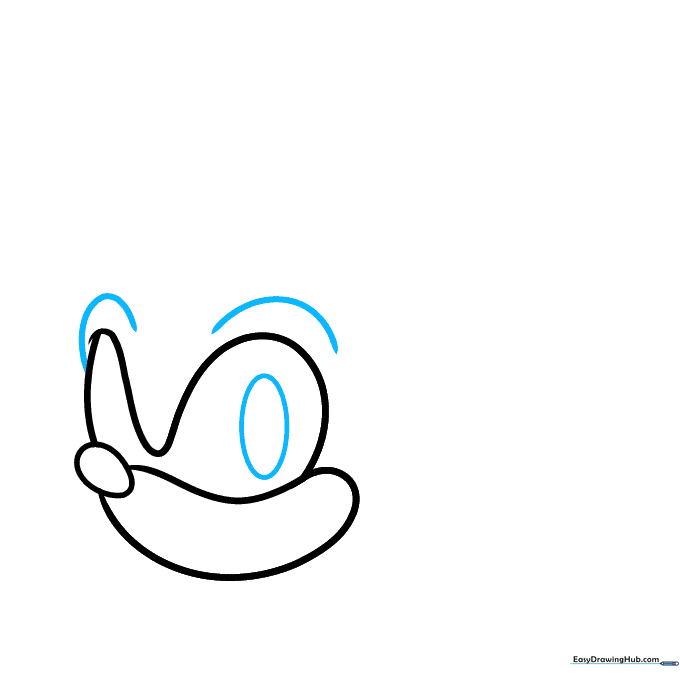
Draw a small oval inside each eye for the pupils. Add curved lines above the eyes to create his signature determined brows. Teacher's Tip: The angle of the brows changes his mood—slanted down makes him look ready for action!
Refining the Eyes
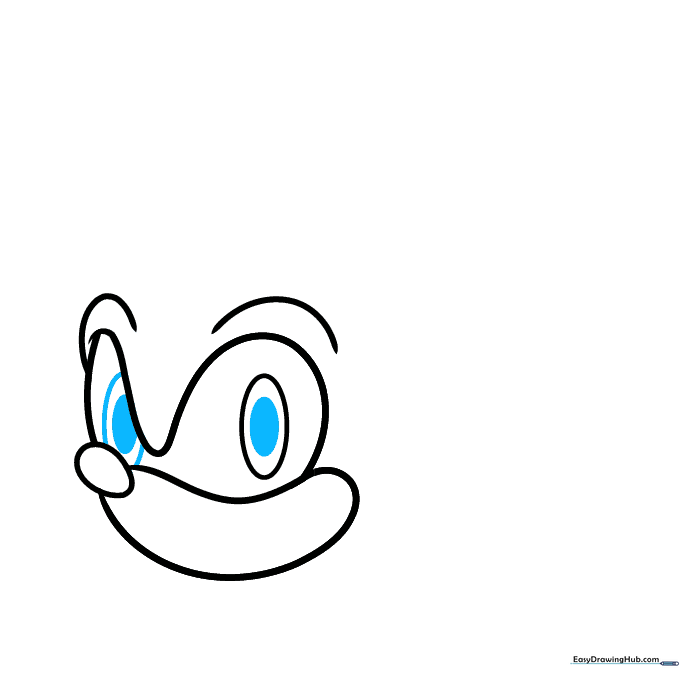
Add a smaller highlight oval inside the pupil and shade it in. Add partial ovals in the eye area to create depth. Teacher's Tip: Leaving a tiny white space inside the pupil makes the eyes look shiny and alive.
Drawing the Mouth and First Quill
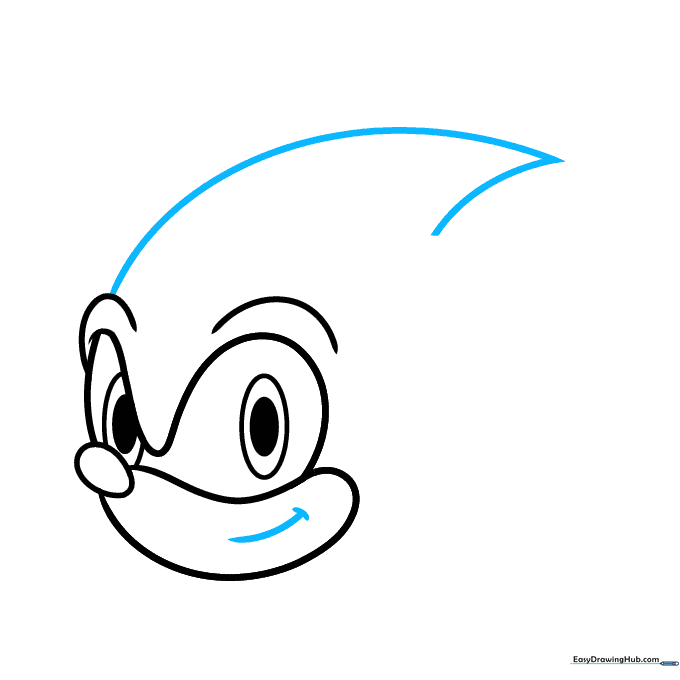
Draw a curved line for a smiling mouth. Then, extend a long, sharp curved line from the brow to start the first quill. Teacher's Tip: Use a quick, flicking motion with your pencil to make the quill look sharp at the tip.
Adding More Quills
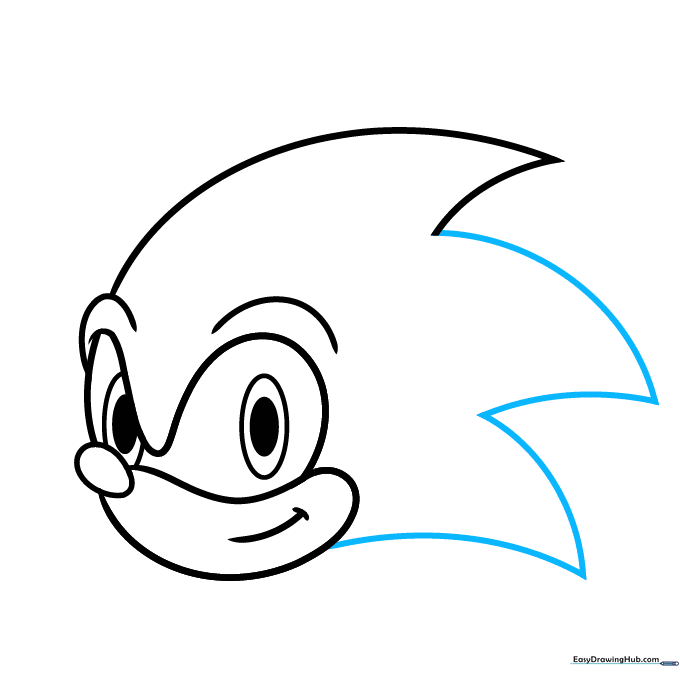
Continue adding more spikes using curved lines that meet at points. Connect the final spike to the jawline. Teacher's Tip: Vary the size of the quills slightly to make them look more natural.
Drawing the Ears
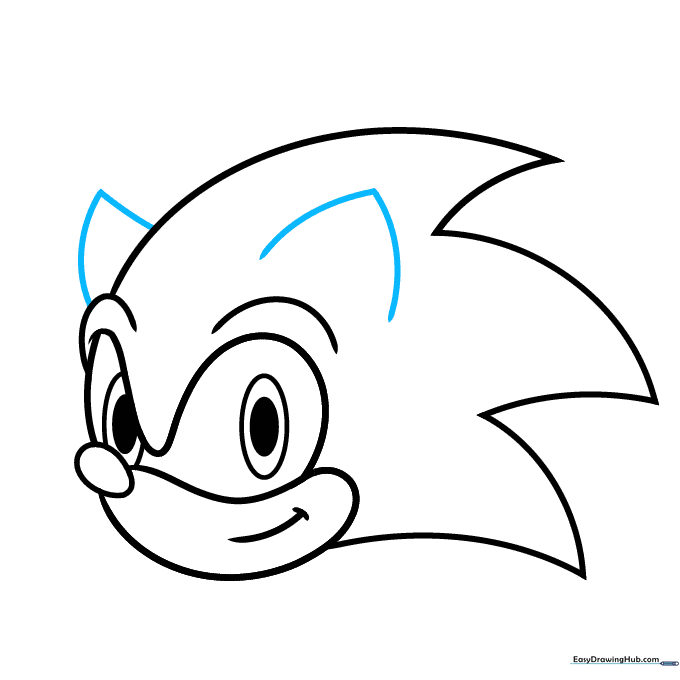
Draw two 'V' shaped lines on top of the head to form the ears. Teacher's Tip: Keep them tall and pointed—they should look like little triangles sitting on top of his quills.
Finalizing Ear Details
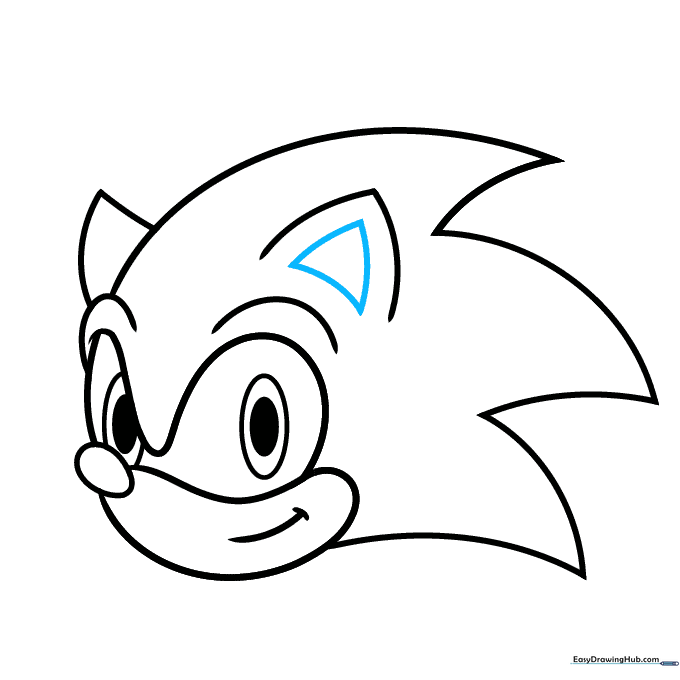
Draw a smaller curved triangle inside the ear to add dimension. Teacher's Tip: This small detail makes the ears look 3D rather than flat.
Coloring Your Sonic

Your outline is ready! Fill in his fur with bright blue, use tan for the snout, and green for his eyes. Teacher's Tip: Use a light blue colored pencil to add a little shading on the edges of the quills to make them pop.
More Tutorials


