How to Draw a Realistic Spider: Simple 10-Step Guide
Looking for a fun, screen-free way to practice your observational drawing skills? This tutorial is perfect for young artists ages 7+ who want to capture the anatomy of a spider. Grab a pencil, an eraser, and a piece of paper to start building your arachnid masterpiece today.
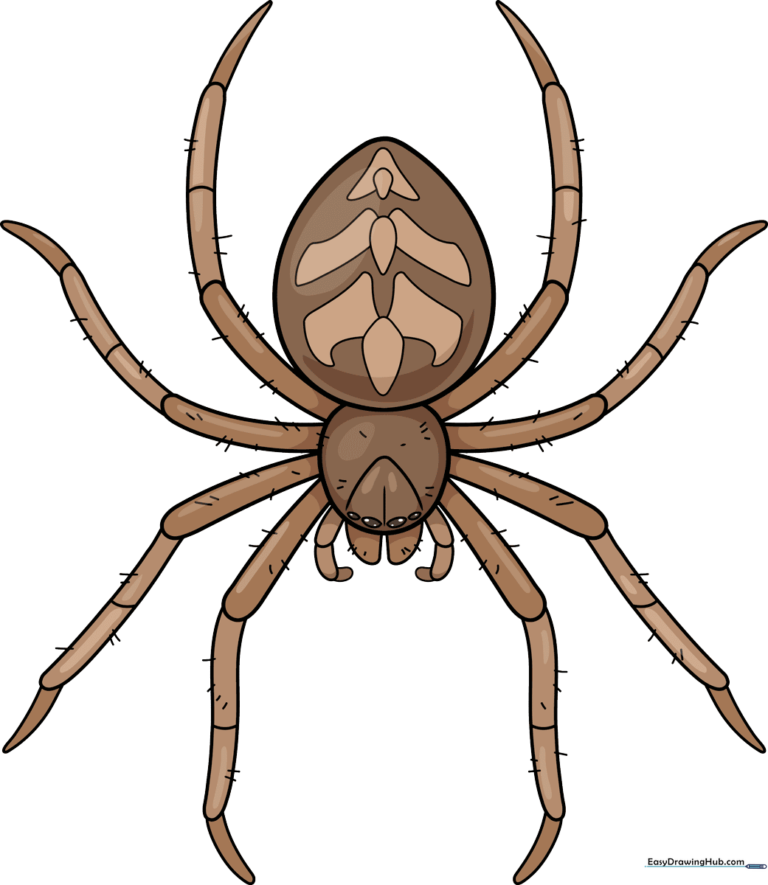
🎯 Final Result
Step-by-Step Instructions
Step 1: Sketching the Body Segments
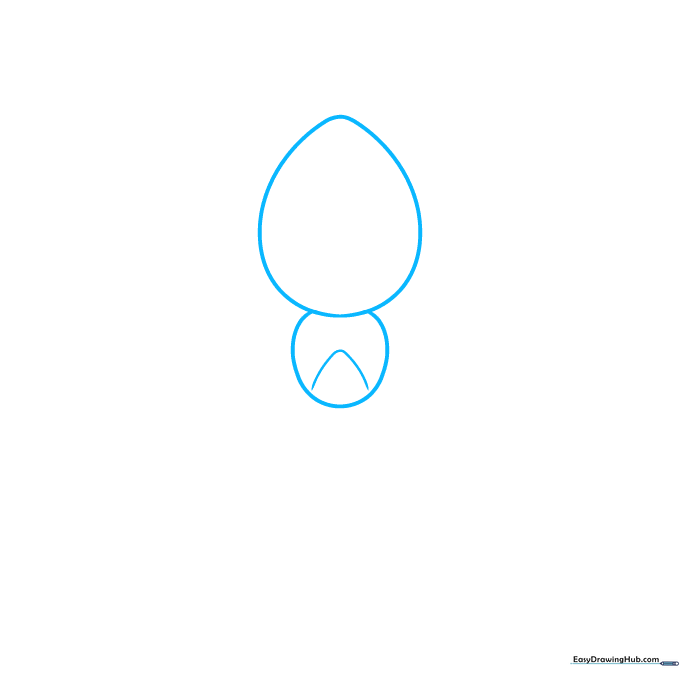
Start by drawing the two main body parts: a large, egg-shaped abdomen and a smaller, rounded thorax. Add a soft 'V' shape across the thorax to define the head region. Teacher's Tip: Keep your pencil pressure light so you can easily adjust the shapes if they look a bit lopsided.
Step 2: Adding Eyes and Mouthparts
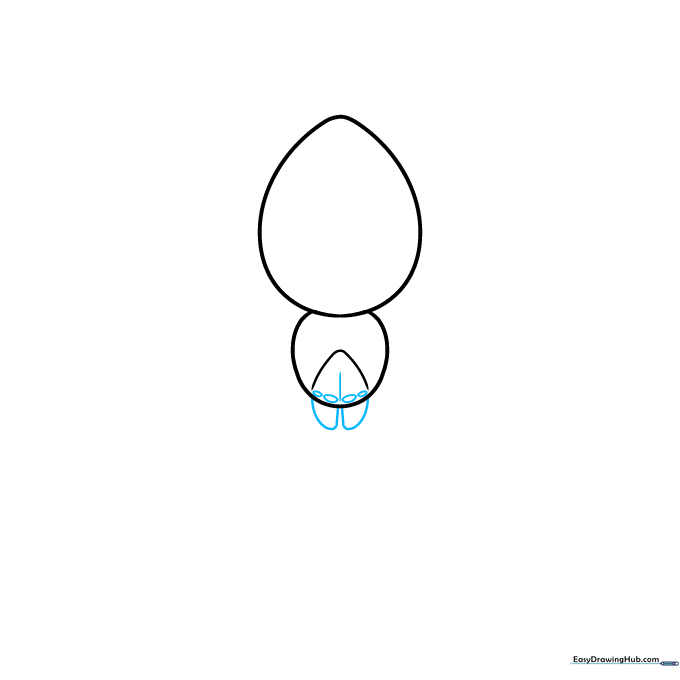
Inside the 'V' shape, draw four small half-circles for the eyes. Below them, add two small rounded shapes for the chelicerae (mouthparts). Teacher's Tip: Spiders have unique eye patterns; keeping these small and clustered makes the spider look more realistic.
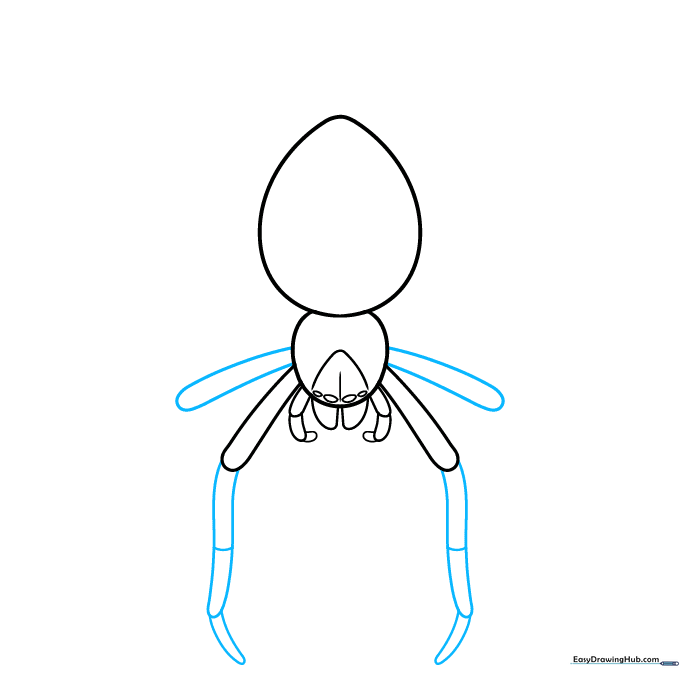
Step 3: Sketching the Pedipalps and First Legs
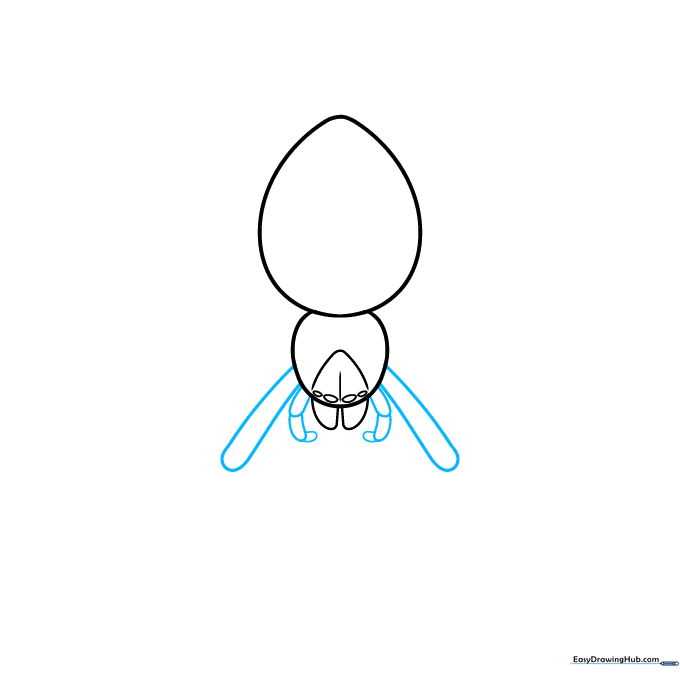
Draw the pedipalps using three small, curved segments near the mouth. Then, extend long, doubled-back lines from the sides of the thorax to form the first set of legs. Teacher's Tip: Think of these as 'arms' for the spider—they should look slightly jointed, not like straight sticks.
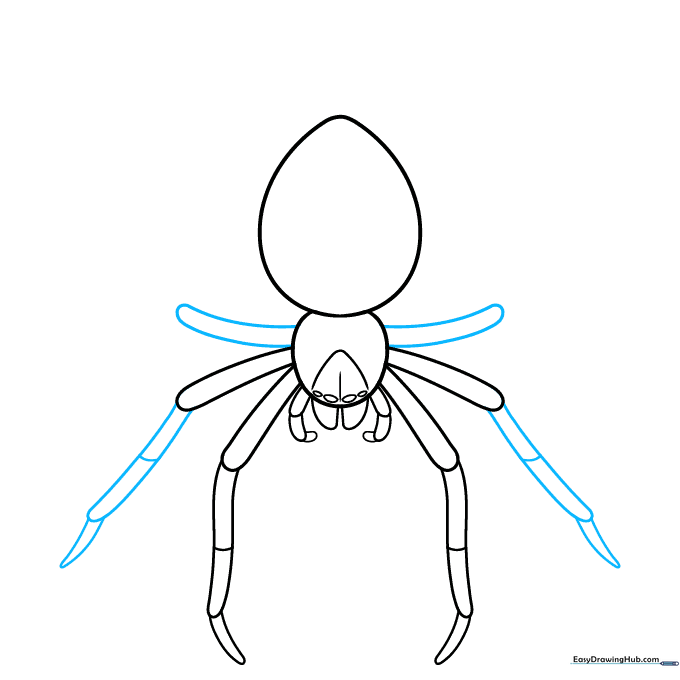
Step 4: Developing the Leg Segments
Continue the legs by drawing longer, curved segments. Add small horizontal lines to represent the joints. Teacher's Tip: Vary the length of your lines to give the legs a natural, organic curve rather than a robotic look.
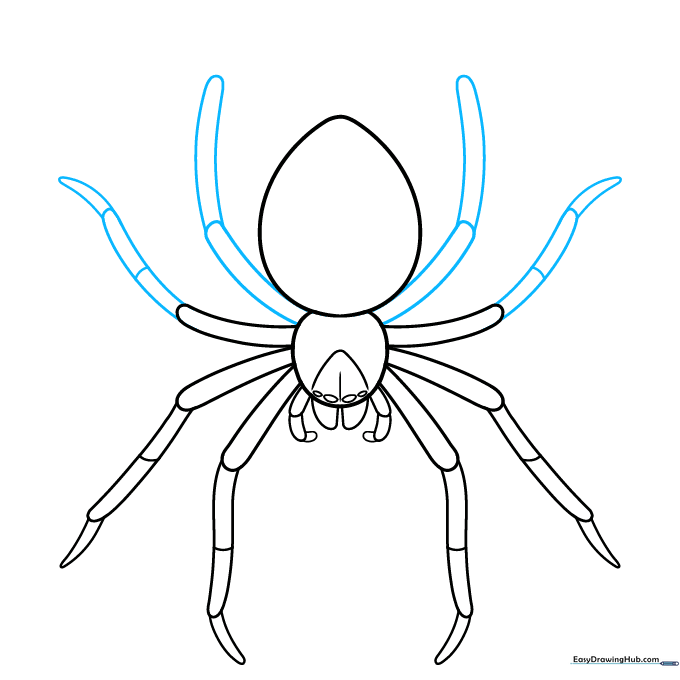
Step 5: Adding the Third Pair of Legs
Extend another pair of curved, doubled-back lines from the thorax to create the third set of legs. Teacher's Tip: Remember that spiders have eight legs total; keep your spacing even so the drawing doesn't look too crowded.
Step 6: Completing the Leg Structure
Finish the final pair of legs by drawing the segments and adding joint bands. Teacher's Tip: If the legs look too long, don't worry—spiders have very spindly limbs, so long lines actually add to the realism!
Step 7: Adding Abdomen Patterns
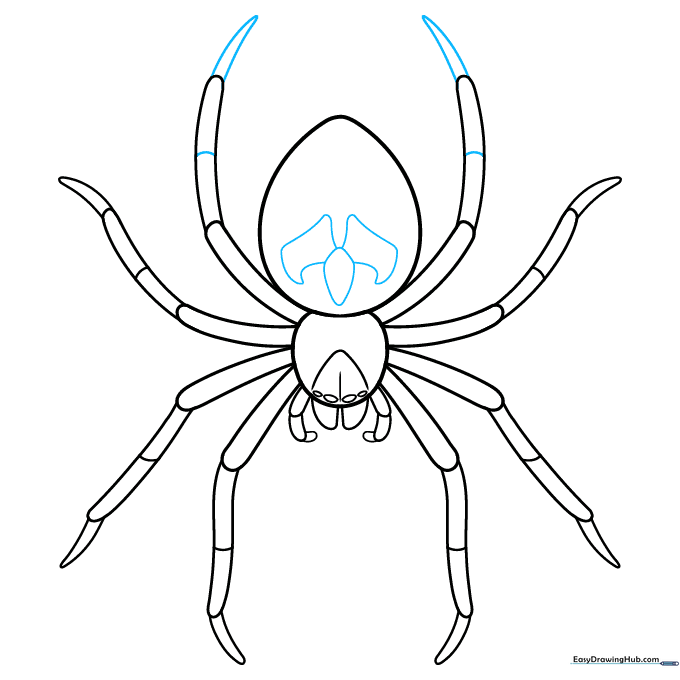
Use soft, curved lines to start a pattern on the spider's abdomen. Teacher's Tip: You don't need to be perfect here; nature is rarely symmetrical, so let your lines flow naturally.
Step 8: Refining the Abdomen
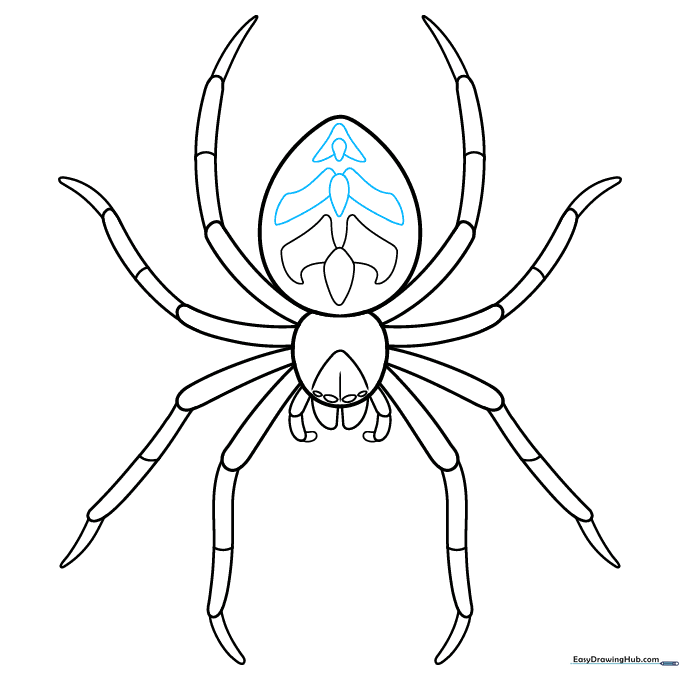
Continue the pattern down the length of the abdomen to give it texture. Teacher's Tip: Use varying line weights—thicker lines for the main pattern and thinner lines for subtle details.
Step 9: Adding Texture (Hairs)
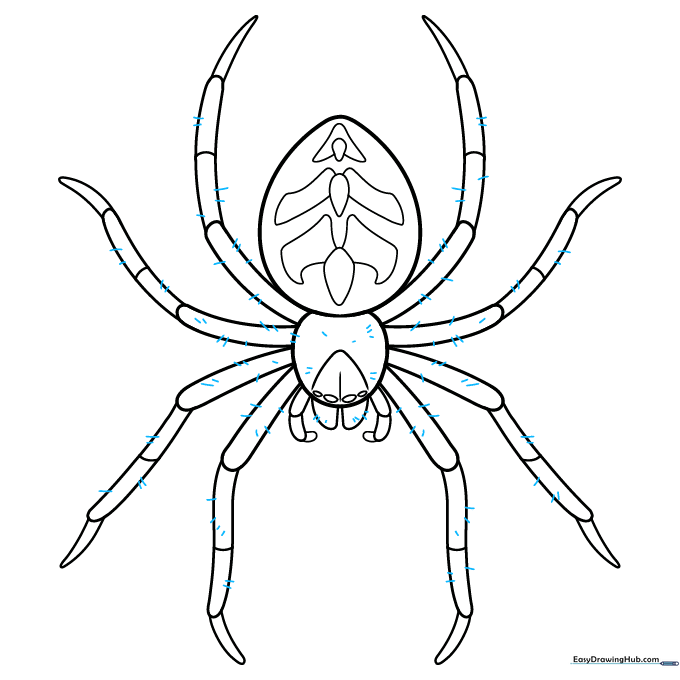
Add small, short lines all over the legs and body to represent the spider's fine hairs. Teacher's Tip: Keep these 'hairs' short and flick your pencil quickly to make them look sharp and realistic.
Step 10: Final Coloring
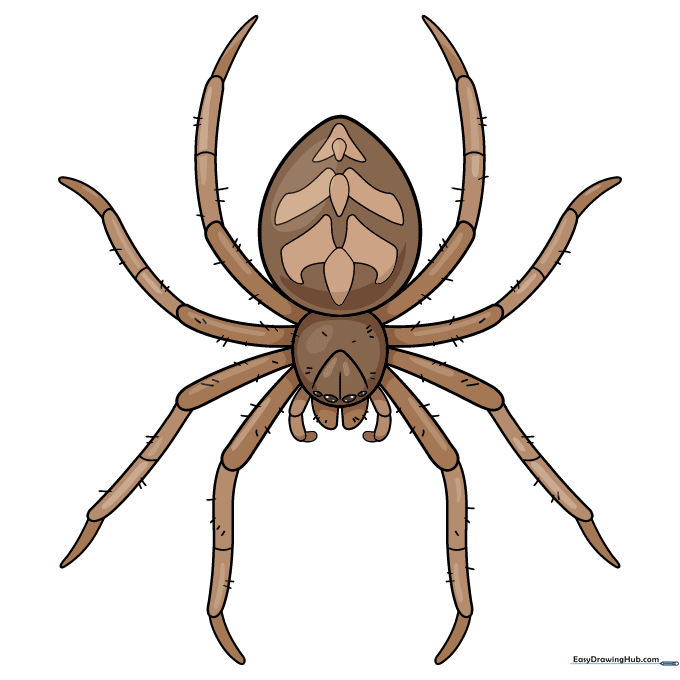
Your outline is complete! Now, bring it to life with color. We used shades of brown for a classic house spider look, but feel free to experiment with bold patterns or bright colors. Teacher's Tip: Use light shading under the legs to create a 'shadow' effect, making your spider look like it's sitting on the paper.
More Tutorials


