How to Draw a Mother and Son Hugging: Easy Step-by-Step Guide
Celebrate the bond between a mother and son with this heartwarming drawing activity. Designed for children ages 5 and up, this tutorial uses basic shapes to build confidence in character drawing. All you need is a pencil, an eraser, and a piece of paper to start creating your own masterpiece.
🎯 Final Result

Step-by-Step Instructions
Step 1: Sketching the Mother's Face

Start by sketching the mother's face using a gentle curve for the chin. Add rectangular shapes for the eyes with small ovals inside for pupils. Teacher's Tip: Keep your pencil pressure light here; if the eyes aren't perfectly symmetrical, don't worry—it adds character!
Step 2: Adding Hair and Ear Details

Outline the mother's hair with long, flowing curved lines that frame her face. Add a small teardrop shape for an earring and define the eyebrows. Teacher's Tip: Use smooth, continuous strokes for the hair to make it look soft and natural.
Step 3: Beginning the Son's Features

Draw the mother's neck, then begin the son's face next to her. Use rounded triangular shapes for his eyes. Teacher's Tip: Position the son's head slightly lower than the mother's to show the height difference.
Step 4: Defining the Son's Expression

Outline the son's chin and add a big, happy smile showing his teeth. Don't forget the dimple! Teacher's Tip: A wide, open mouth creates a joyful expression—make sure the teeth are slightly curved to match the mouth's shape.
Step 5: Adding Hair and Shoulders
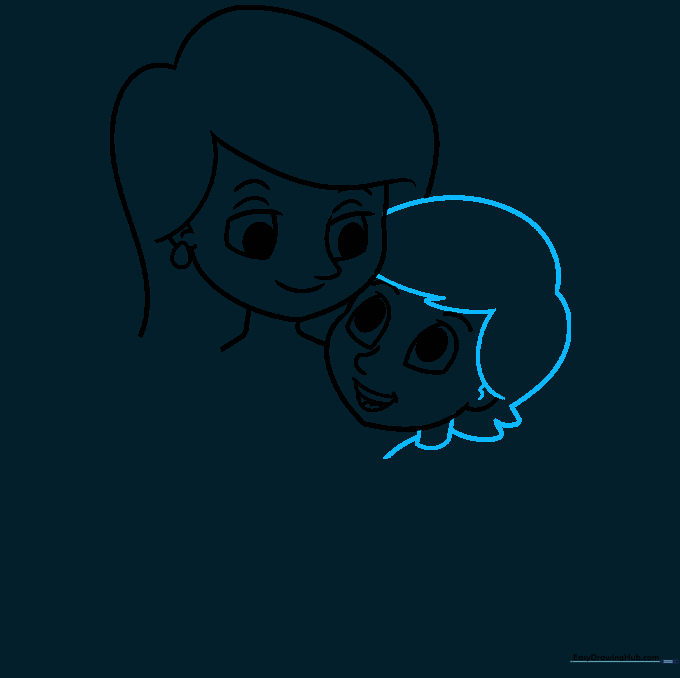
Draw the son's hair with short, choppy lines to give it texture. Extend lines down from his head to form his neck and shoulders. Teacher's Tip: Use quick, flicking motions with your pencil to make the hair look realistic.
Step 6: Drawing the Hugging Arms

Draw the mother's neckline and the son's sleeve. Use overlapping 'U' shapes to create the fingers wrapping around each other. Teacher's Tip: Fingers are just small, rounded tubes—don't worry about perfect anatomy, just focus on the overlapping shapes.
Step 7: Completing the Embrace
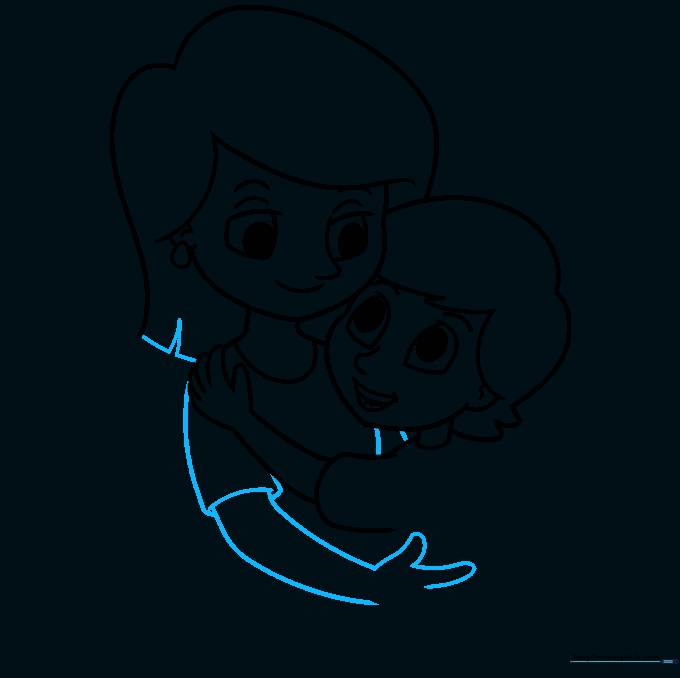
Outline the mother's torso and finish her hair with a 'V' shape for added texture. Ensure the arms look connected to show the hug. Teacher's Tip: The 'V' shape in the hair helps show where the hair parts, adding depth to your drawing.
Step 8: Adding Hand Details

Refine the hands by adding more 'U' shaped lines for the fingers. Make sure the mother's hand rests naturally on the son's shoulder. Teacher's Tip: If the fingers look too long, just erase the tips and round them off.
Step 9: Finalizing the Outlines
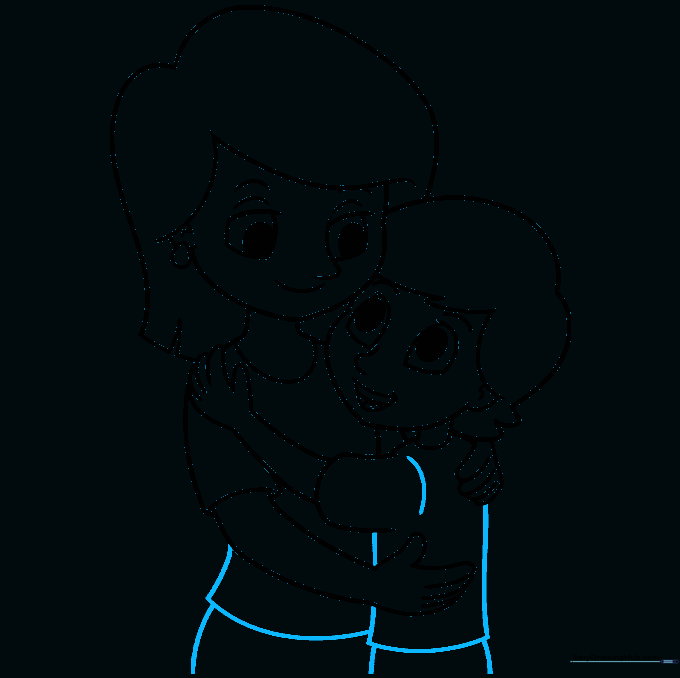
Finish the clothing by drawing the shirts and pants. Use clean, confident lines to finalize the entire outline. Teacher's Tip: Now is the time to go over your light sketch lines with a darker pencil to make the drawing pop.
Step 10: Adding Color

Bring your drawing to life with your favorite colors! Use soft tones for skin and bright colors for their clothes. Teacher's Tip: Try using two shades of the same color on the clothes to create a simple shadow effect.
More Tutorials


