How to Draw a Mother and Daughter: Easy 10-Step Guide
Celebrate the bond between mother and child with this simple drawing activity. Designed for artists ages 5 and up, this project requires only a pencil, paper, and an eraser. Follow these steps to build confidence in character drawing while creating a beautiful, personalized keepsake.
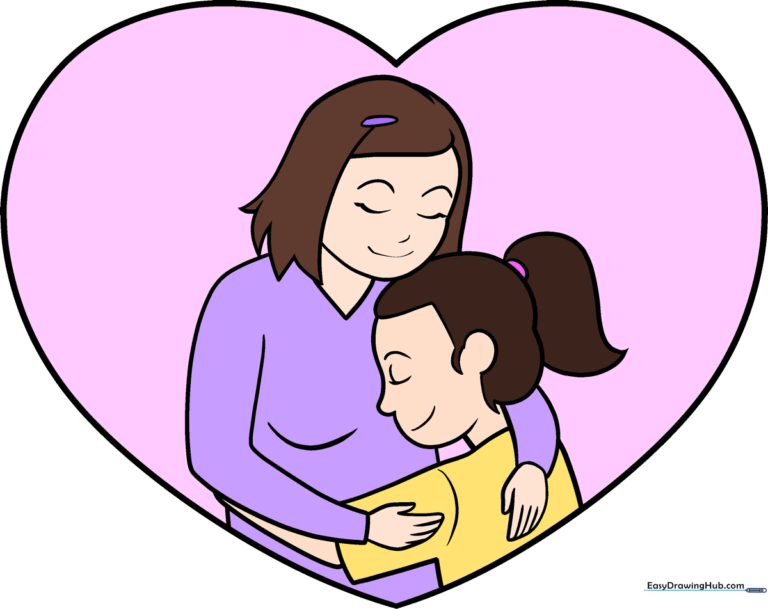
🎯 Final Result
Step-by-Step Instructions
Step 1: Sketching the Heart Frame

Start by drawing one side of a heart shape using a long, smooth curved line. Teacher's Tip: Keep your pencil pressure light so you can easily adjust the shape if it feels lopsided.
Step 2: Closing the Heart

Mirror your first line to complete the heart outline. Tip: Try to make both sides symmetrical, but don't worry if they aren't perfect—it adds character to your drawing!
Step 3: Drawing the Mother's Face
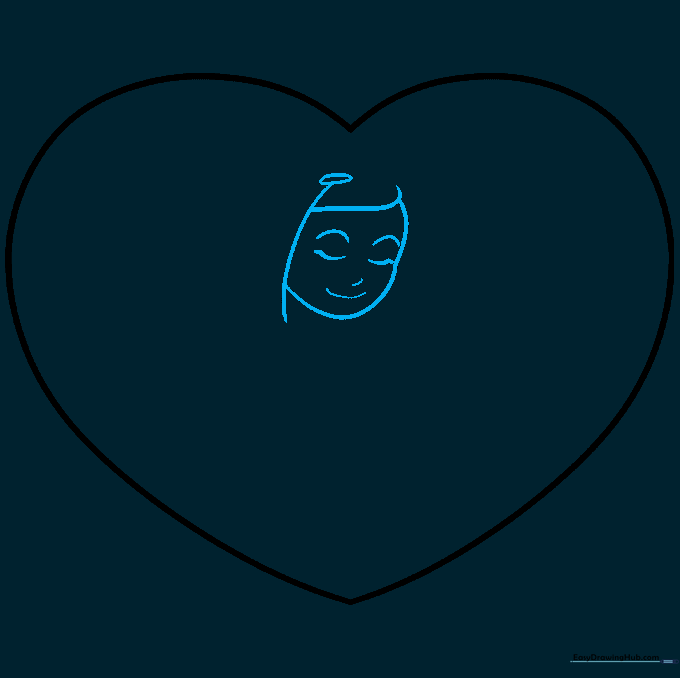
Draw the mother's hair and face profile using soft, curved lines. Add closed eyes, a small nose, and a gentle smile. Tip: Keep the eyes simple—just a small downward curve—to give the character a peaceful expression.
Step 4: Outlining the Child's Face

Sketch the child's profile next to the mother. Use a 'C' shape for the ear and short, jagged lines around it to represent hair locks. Tip: Make the child's face slightly smaller than the mother's to show the difference in age.
Step 5: Detailing the Child
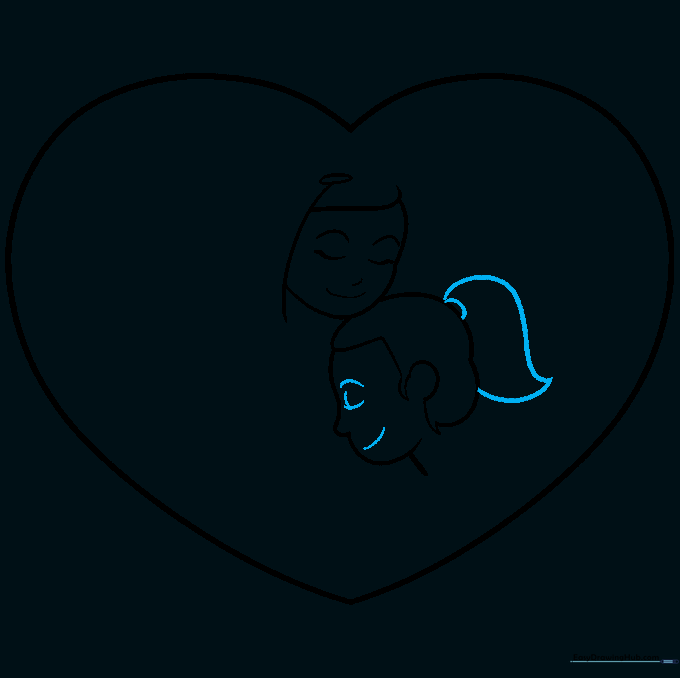
Add the child's closed eye, eyebrow, and mouth. Draw a ponytail using two curved lines that meet at a point. Tip: Adding a small semicircle for a hairband makes the ponytail look more realistic.
Step 6: Adding Hair and Necklines
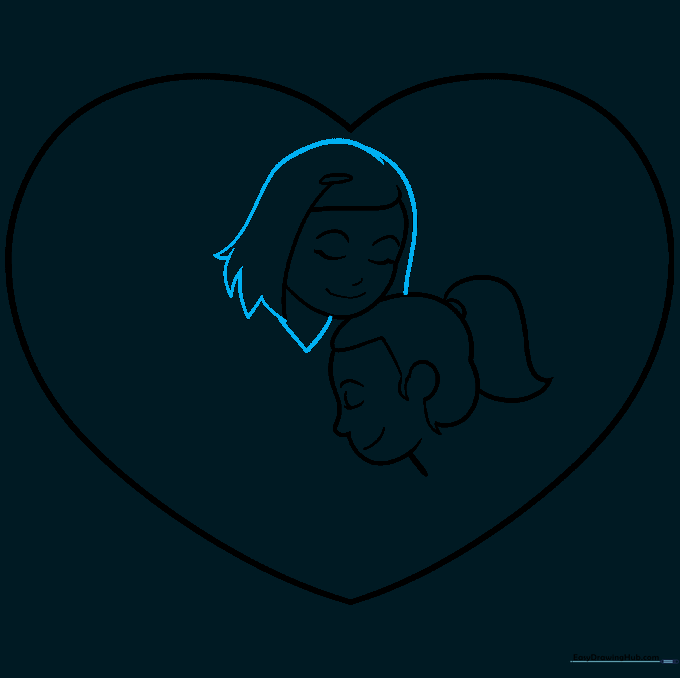
Draw the mother's neckline with a 'V' shape and refine her hair with overlapping curved lines. Tip: Use short, flicking motions with your pencil to create the look of hair ends.
Step 7: Drawing the First Arm
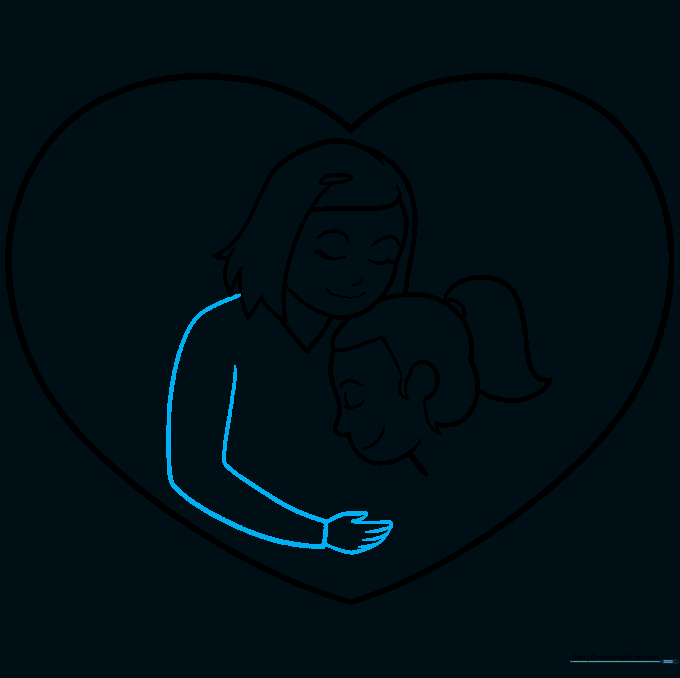
Sketch the mother's arm using long, flowing curved lines. Add the hand and fingers with simple overlapping strokes. Tip: Keep the arm relaxed to match the peaceful theme of the drawing.
Step 8: Adding the Second Arm and Shirt
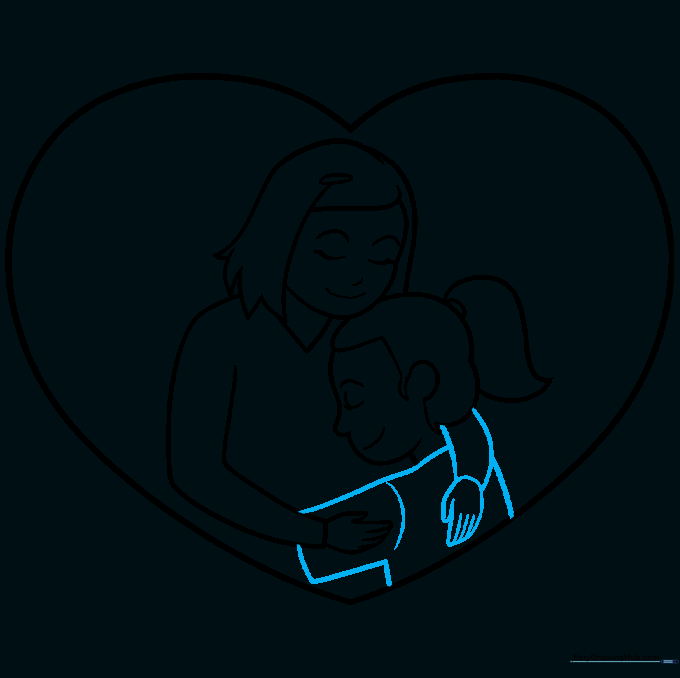
Draw the mother's other arm and the child's shirt. Tip: Use gentle curves to show the fabric of the shirts, which makes the drawing look more natural.
Step 9: Finalizing the Outline
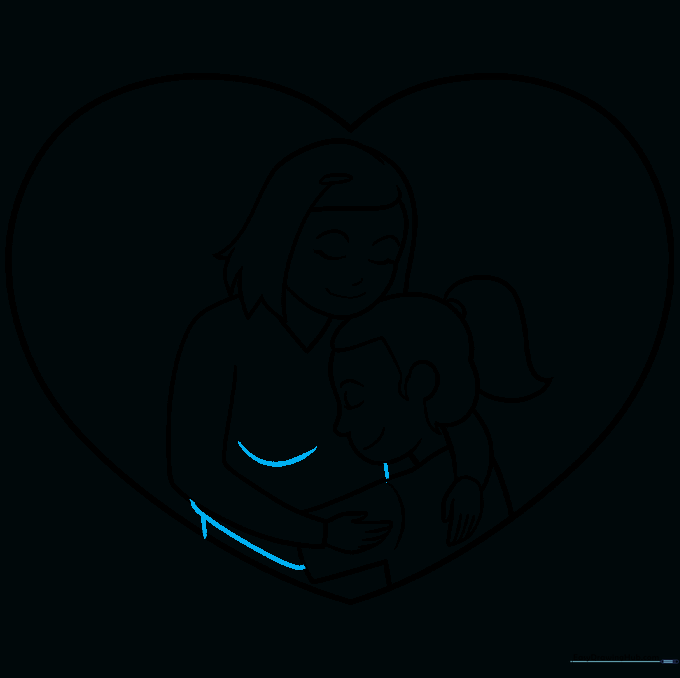
Complete the child's arm and the mother's torso. Ensure all lines are connected and clean. Tip: Before coloring, use an eraser to remove any stray pencil marks inside the figures.
Step 10: Adding Color
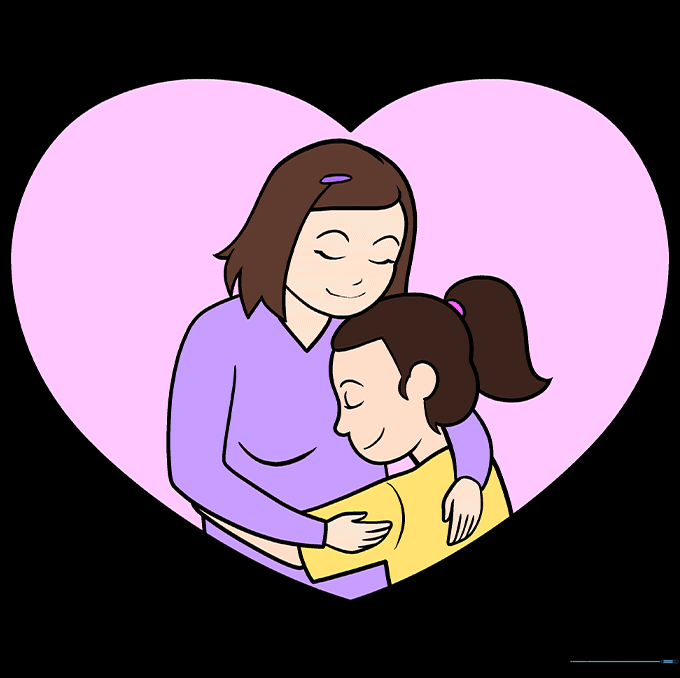
Bring your drawing to life with color! We chose warm pinks and soft tones to represent love and warmth. Tip: Use light pressure with your colored pencils to create soft gradients.
More Tutorials


