How to Draw a 1-Point Perspective Hallway: Easy Step-by-Step
Ready to make your drawings pop off the page? This tutorial is perfect for young artists ages 8+ looking to master the illusion of depth. All you need is a pencil, an eraser, and a ruler to transform a flat sheet of paper into a realistic 3D hallway.
🎯 Final Result

Step-by-Step Instructions
Step 1: Setting the Vanishing Point
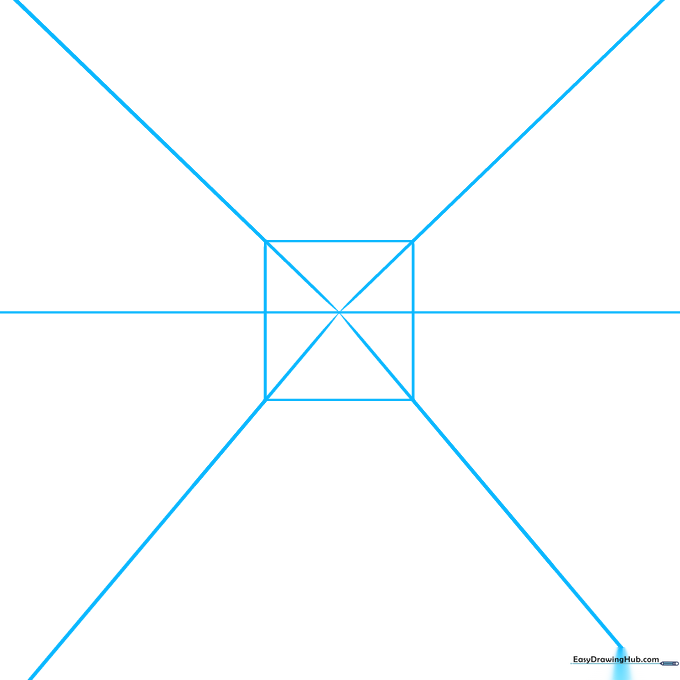
Draw a horizontal horizon line and two diagonal lines that intersect at a central point. Place a square around this center. Teacher's Tip: Use your ruler to ensure the diagonal lines are perfectly straight, as these are the 'tracks' that guide your perspective.
Step 2: Mapping the Floor and Walls
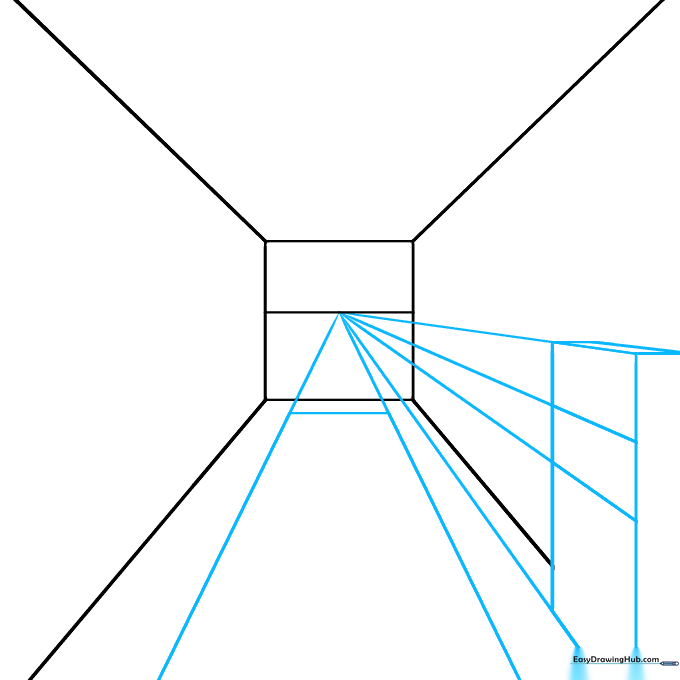
Erase the extra lines outside your square. Now, draw diagonal lines from the vanishing point to create the floor and walls. Teacher's Tip: Keep your pencil pressure light here; these are guide lines that we will refine into furniture later.
Step 3: Building the Bookcase

Clear away your construction lines. Use your ruler to draw vertical and horizontal lines to form the shelves and cabinet doors of a bookcase. Teacher's Tip: Add small cylinders on the top shelf to practice drawing round objects in a 3D space.
Step 4: Adding Furniture Details
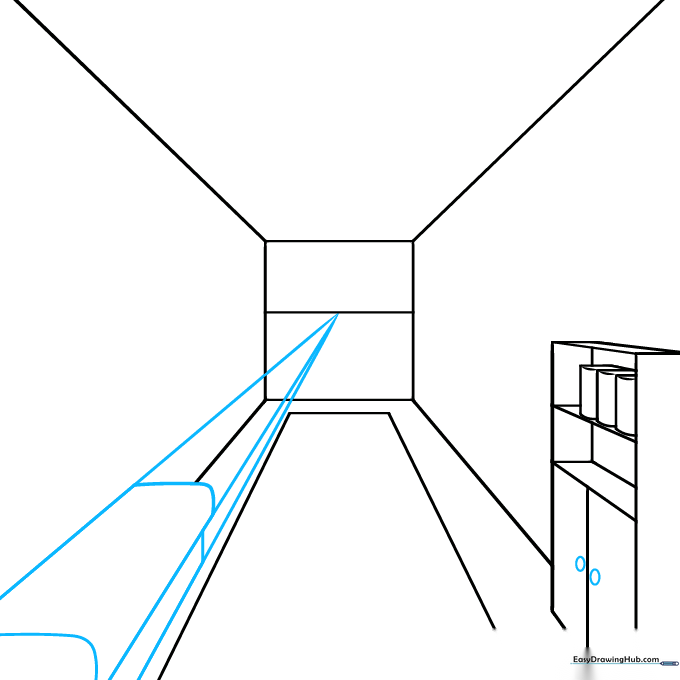
Add knobs to your cabinet using small ovals. Then, draw new diagonal lines from the vanishing point to outline the sofa. Teacher's Tip: The closer the lines are to the vanishing point, the smaller the furniture will look—this is the secret to creating distance!
Step 5: Sketching the Door
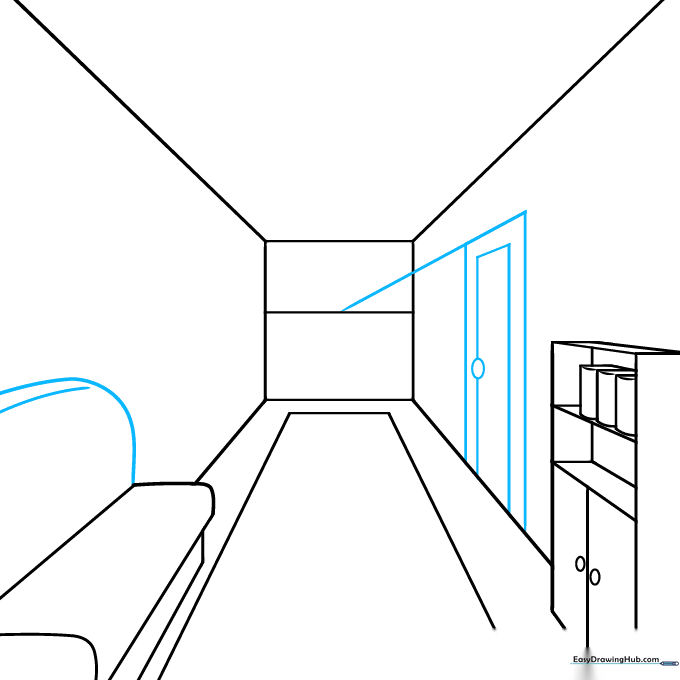
Erase your guide lines and define the sofa's back with smooth, curved lines. Draw a new diagonal line to create the top of a door frame. Teacher's Tip: Use a rectangle for the door and an oval for the handle to keep the geometry simple but effective.
Step 6: Decorating the Walls
Draw two more diagonal lines to frame a wall picture. Add a clock next to it using two nested ovals. Teacher's Tip: Make sure the top and bottom of your picture frame align with your diagonal perspective lines so it doesn't look 'tilted'.
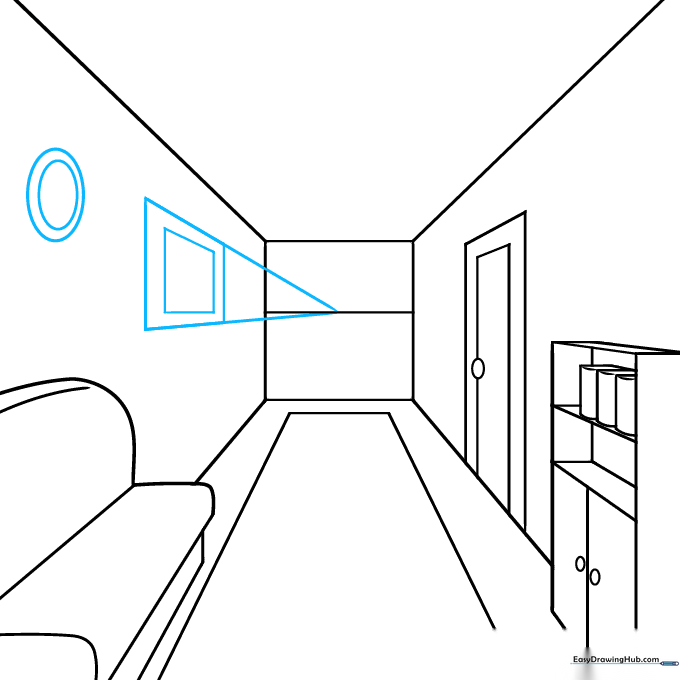
Step 7: Adding Depth to the Doorway

Clean up your lines. On the back wall, draw a smaller rectangle inside a larger one to create a door frame, then add a trapezoid to show the door is open. Teacher's Tip: The trapezoid shape is a great way to show a door swinging inward!
Step 8: Final Touches
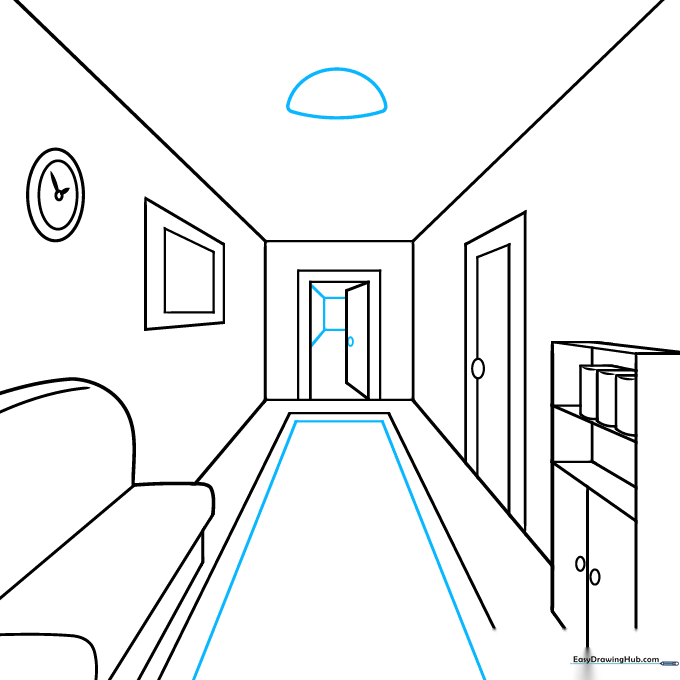
Draw a half-circle on the ceiling for a light fixture and an oval on the rug. Through the open door, sketch a small square to show the room beyond. Teacher's Tip: Adding these small details makes your drawing look much more professional and lived-in.
Step 9: Finalizing the Details
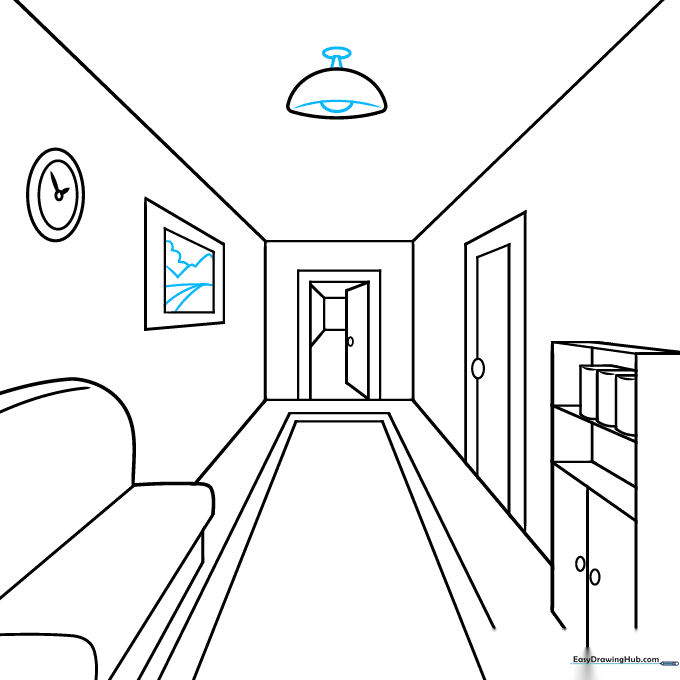
Add final details to your light fixture and sketch a simple mountain road inside your picture frame. Teacher's Tip: Don't worry about perfection; the goal is to understand how lines converge at the vanishing point.
Step 10: Bring It to Life with Color
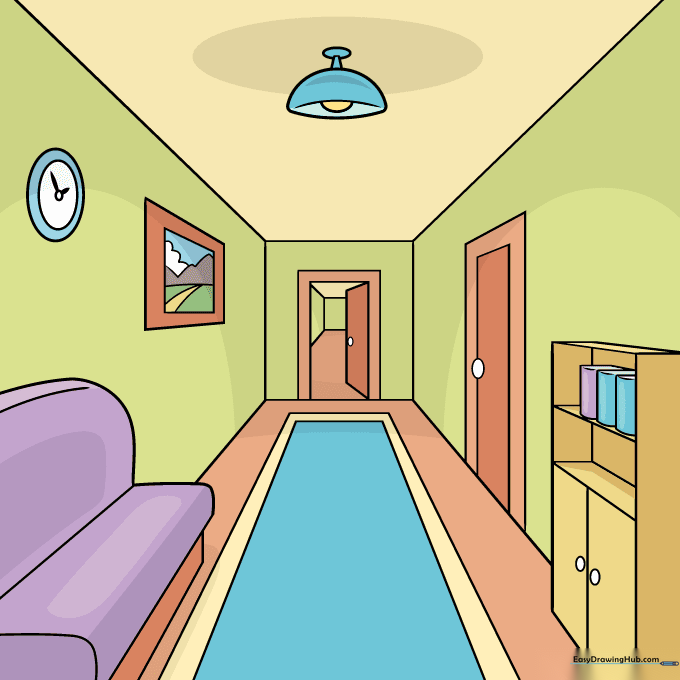
Your structural outline is complete! Now, grab your markers or colored pencils. Teacher's Tip: Use darker colors for the floor and lighter colors for the walls to create even more contrast and depth.
More Tutorials


