How to Draw a Cute Cow: Easy 10-Step Guide for Kids
Looking for a fun, screen-free activity? This step-by-step guide is perfect for young artists ages 5 and up to practice basic shapes and line work. All you need is a pencil, an eraser, and a piece of paper to bring your own friendly farm animal to life.
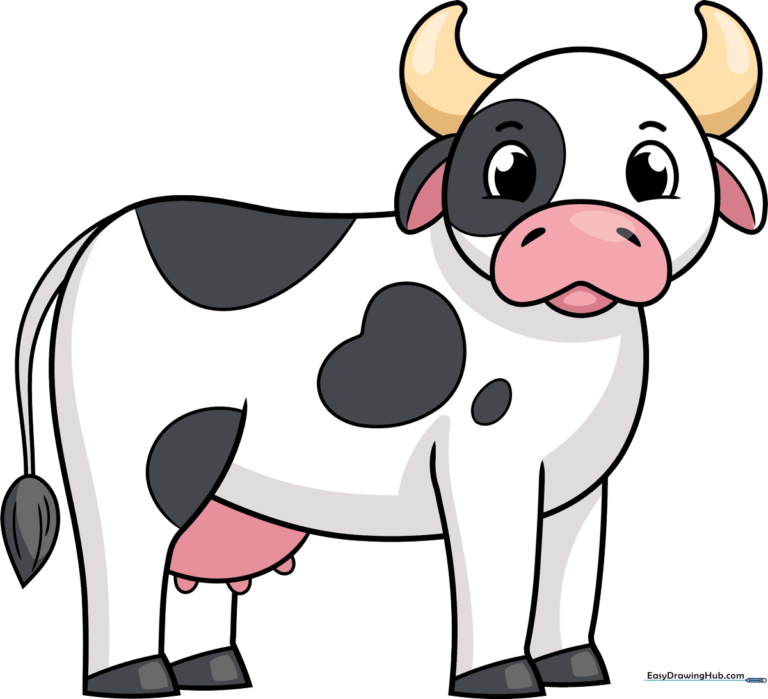
🎯 Final Result
Step-by-Step Instructions
Step 1: Sketching the Expressive Eyes

Start by drawing two small, curved lines for the bottom of the eyes, then add partial ovals on top. Shade in a large, dark pupil in each. Teacher's Tip: Keep your pencil lines light here so you can easily adjust the expression if the eyes look a bit lopsided!
Step 2: Defining the Snout and Head

Draw a bean-shaped snout below the eyes, adding two small teardrop shapes for nostrils. Finish the head by drawing a large, rounded shape around the face. Teacher's Tip: Think of the snout as a soft, rounded rectangle—don't worry about making it perfectly symmetrical!
Step 3: Adding Ears and Horns
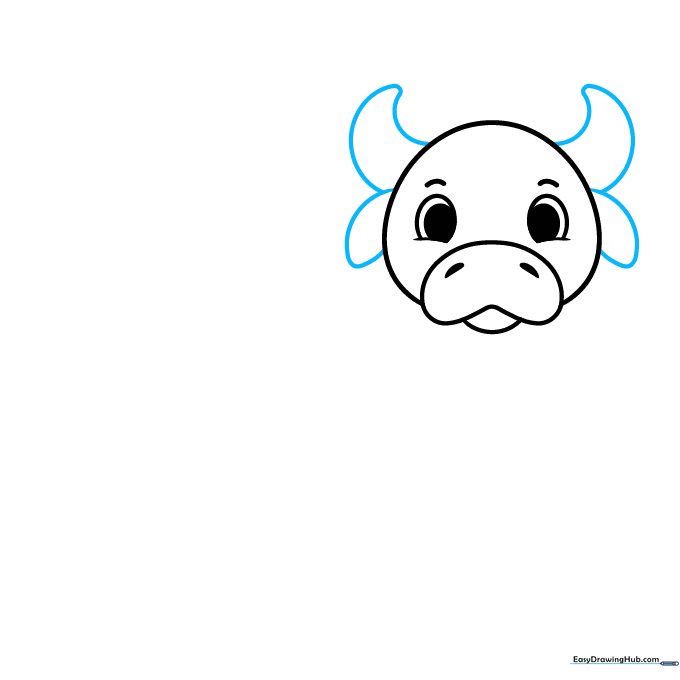
Add floppy ears on the sides of the head and two small, curved triangles for the horns. Teacher's Tip: Make the ears droop slightly to give your cow a gentle, friendly personality.
Step 4: Starting the Front Leg
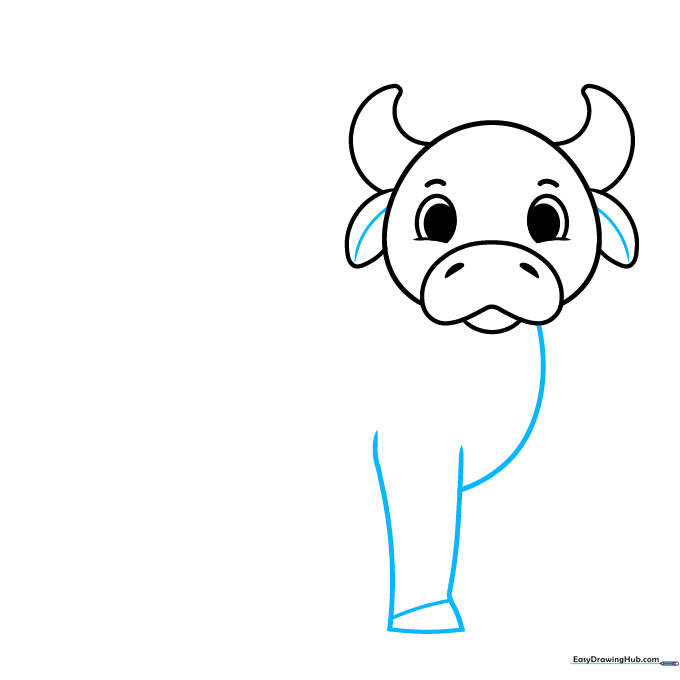
Draw a line down the center of each ear for detail. Below the head, sketch two long, parallel curved lines for the front leg, adding a small horizontal band at the bottom for the hoof. Teacher's Tip: Connect the head to the leg with a smooth curve to create the chest area.
Step 5: Building the Body
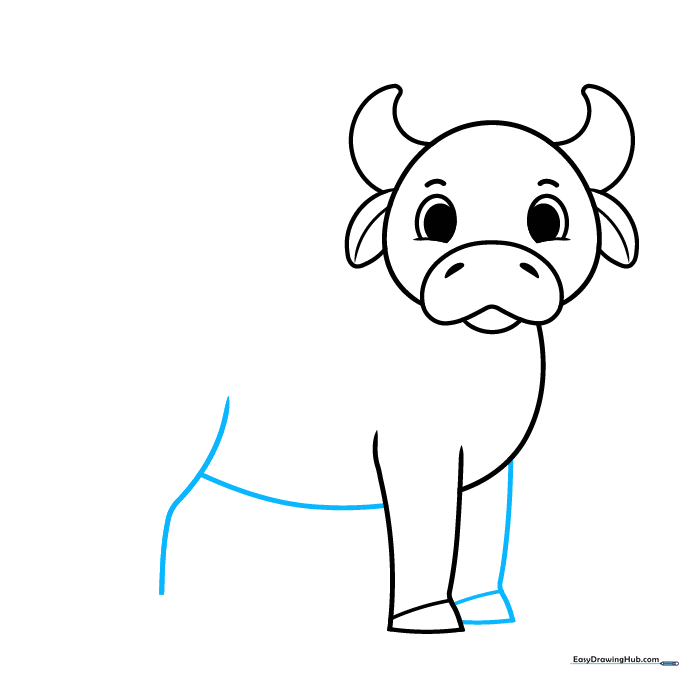
Sketch the second front leg and begin the rear leg. Connect them with a curved line to form the belly. Teacher's Tip: Keep the belly line slightly rounded to make your cow look nice and sturdy.
Step 6: Adding the Back and Udder
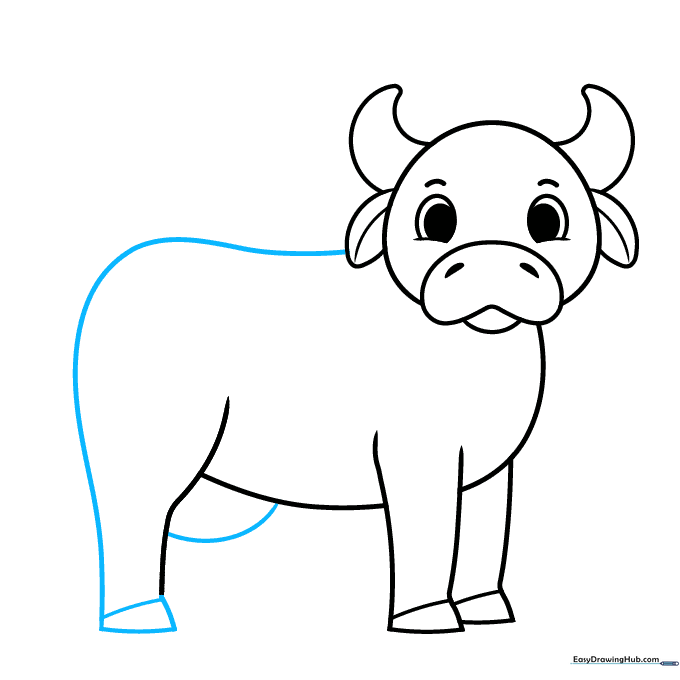
Draw a long, sweeping curve for the back and the rear leg. Add a horizontal band for the hoof and a small curve near the belly for the udder. Teacher's Tip: Use a fluid motion with your wrist to get that long back line smooth.
Step 7: Details and Tail
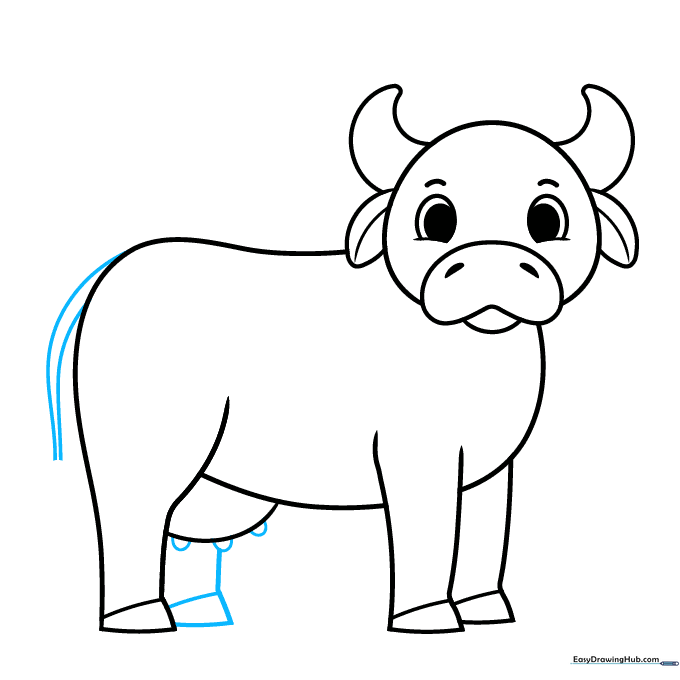
Add three small half-circles to the udder for teats, draw the final rear leg, and add two parallel lines for the tail. Teacher's Tip: Keep the tail lines close together so it looks like a single, slender tail.
Step 8: Finishing Touches

Draw a teardrop-shaped tuft of fur at the end of the tail and add a circle around the eye to define the face. Teacher's Tip: Use short, quick strokes for the fur tuft to give it a realistic, fluffy texture.
Step 9: Adding Cow Spots
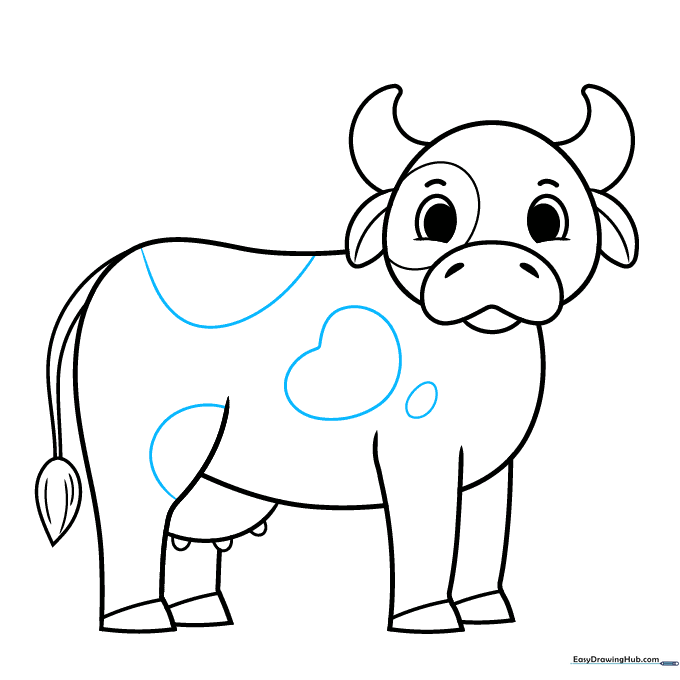
Add rounded, irregular shapes all over the body to create the cow's spots. Teacher's Tip: Vary the size of your spots—some big, some small—to make the pattern look natural.
Step 10: Bring Your Cow to Life with Color
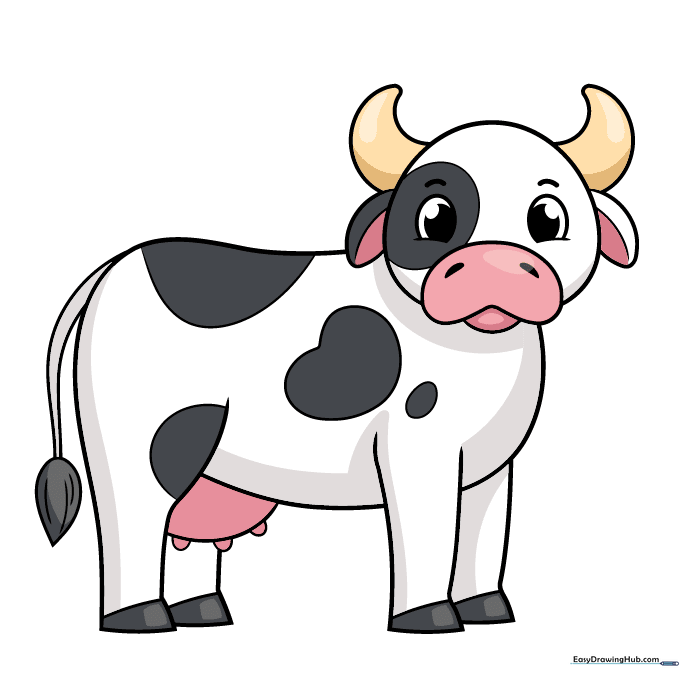
Your outline is complete! Now, color your cow. Try classic black and white for a Holstein look, or get creative with brown and white patches. Teacher's Tip: Use light pressure with your crayons to blend colors smoothly.
More Tutorials


