How to Draw a City in One-Point Perspective: Easy Guide
Ready to bring depth to your drawings? This one-point perspective city tutorial is perfect for students ages 8+ looking to master 3D space. You will need a pencil, a ruler, and an eraser to create a professional-looking cityscape that pops off the page.
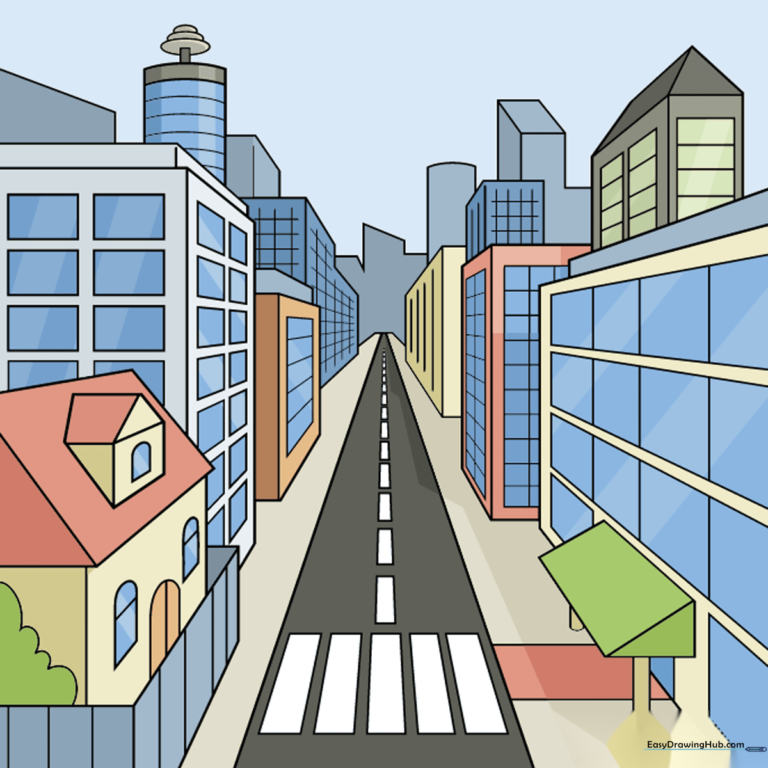
🎯 Final Result
Step-by-Step Instructions
Step 1: Setting the Vanishing Point
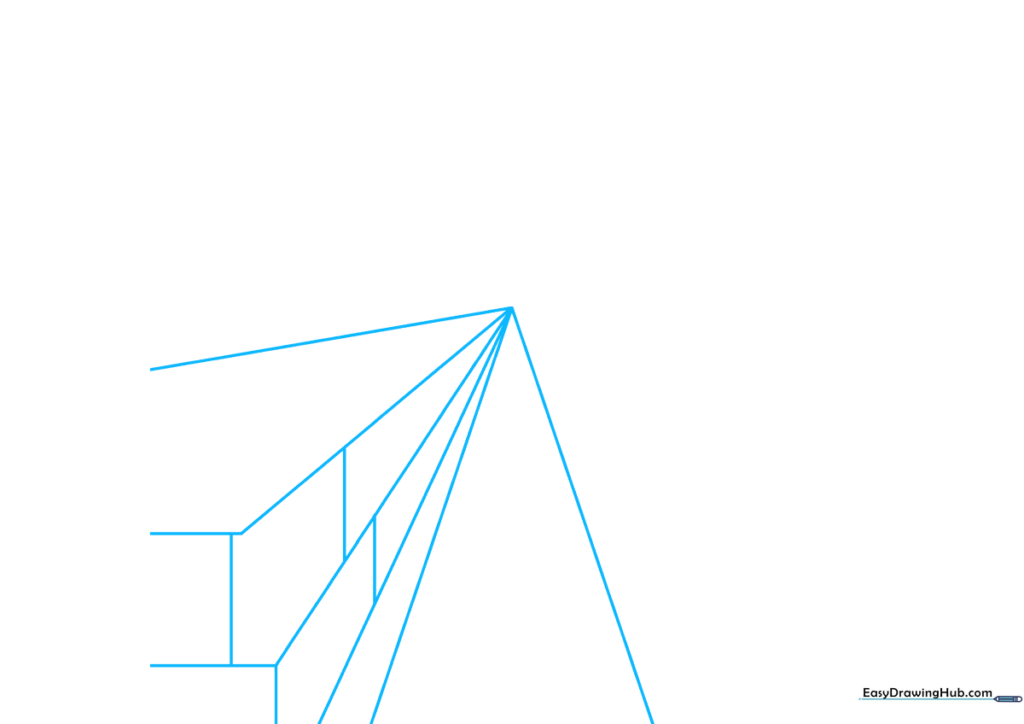
Place a small dot in the center of your paper—this is your 'vanishing point.' Use a ruler to draw six straight lines radiating outward from this point toward the bottom left. Teacher's Tip: Keep your pencil pressure light so you can easily erase these guide lines later!
Step 2: Shaping the First Building
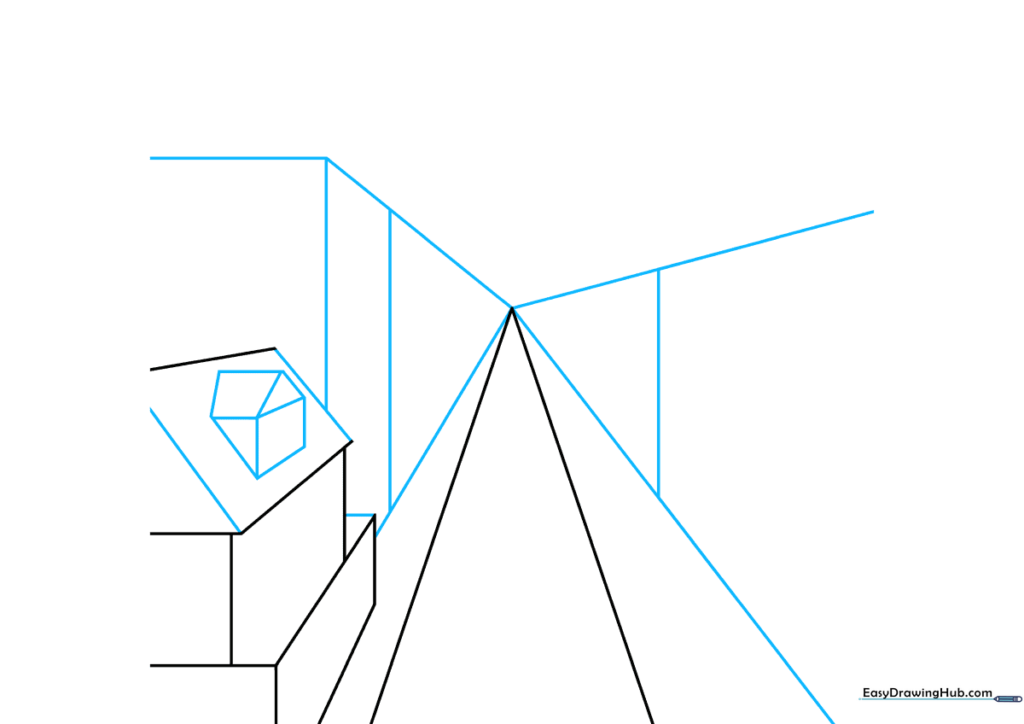
Erase the excess guide lines on the left to reveal the footprint of a house. Connect the ends with horizontal and diagonal lines to create walls and a roof. Add a small dormer window using a triangle and rectangle. Teacher's Tip: Ensure your horizontal lines are perfectly parallel to the top of your paper to keep the perspective accurate.
Step 3: Building the Skyline

Clean up your sketch by erasing lines between the buildings and the vanishing point. Add rectangular prisms to create taller buildings. Teacher's Tip: Vary the heights of your rectangles to make the city look more realistic and dynamic.
Step 4: Adding Architectural Details
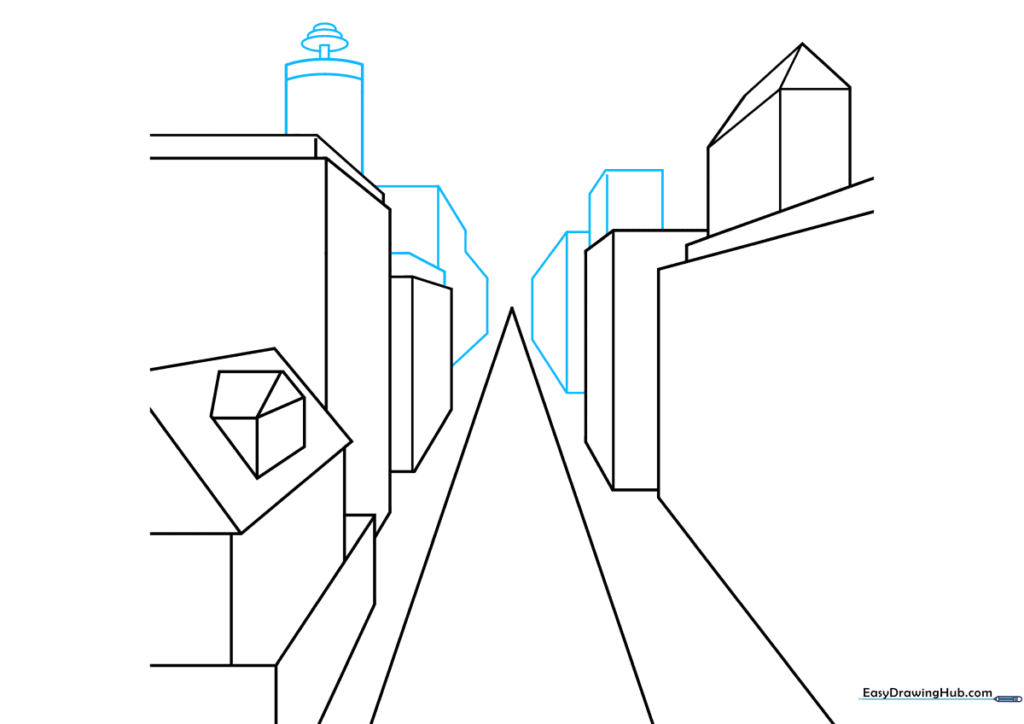
Draw more buildings further down the street. Add a chimney using overlapping ovals and a curved top. Teacher's Tip: Use your ruler for the building edges, but feel free to draw the chimney freehand to give it a more organic, 'cartoon' feel.
Step 5: Foreground Elements
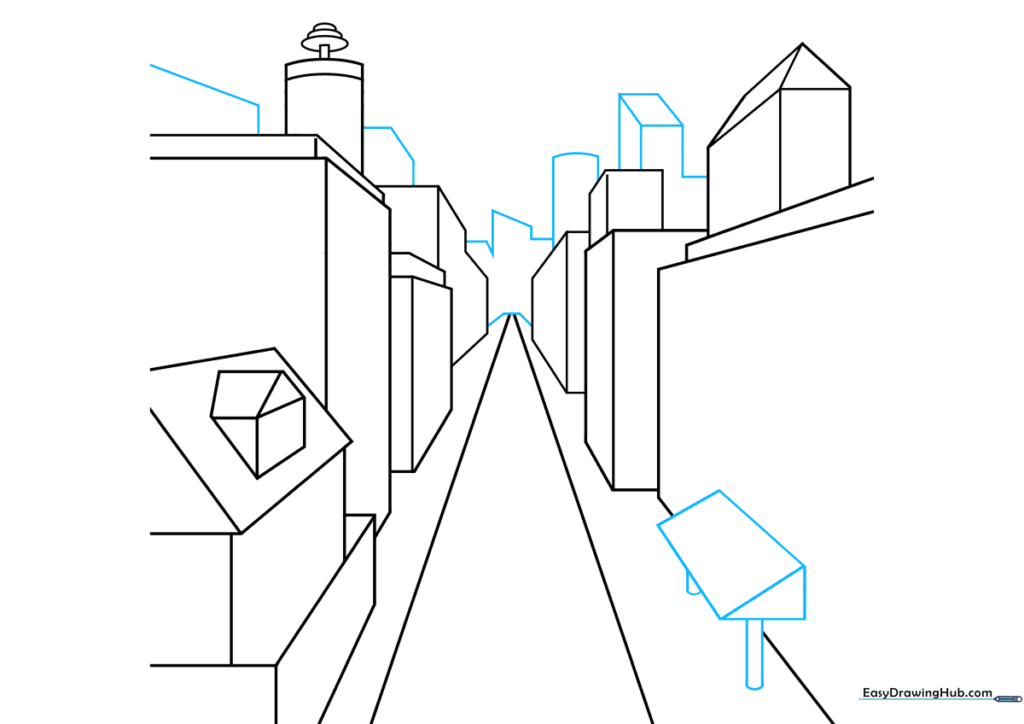
Add a prism-shaped structure in the foreground to create depth. Use parallel lines connected by curves to suggest street details. Teacher's Tip: Objects closer to the viewer should be larger and have more detail than those near the vanishing point.
Step 6: Doors and Windows
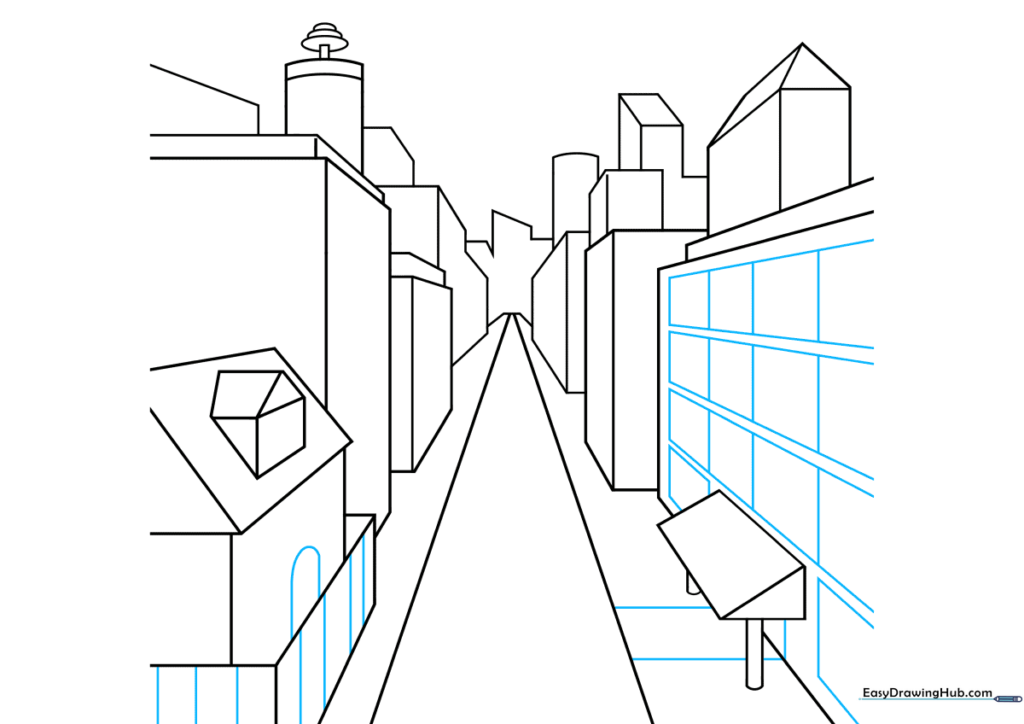
Draw an arched doorway and rectangular window banks. Use your ruler to ensure the windows follow the perspective lines toward the vanishing point. Teacher's Tip: Consistency is key—if the window lines don't point to the center, the perspective will look 'off'.
Step 7: Adding Nature
Add a bush or tree using soft, curved lines to break up the hard geometric shapes of the buildings. Teacher's Tip: Nature is rarely perfectly straight, so don't worry about using a ruler for the tree—let your hand be loose!
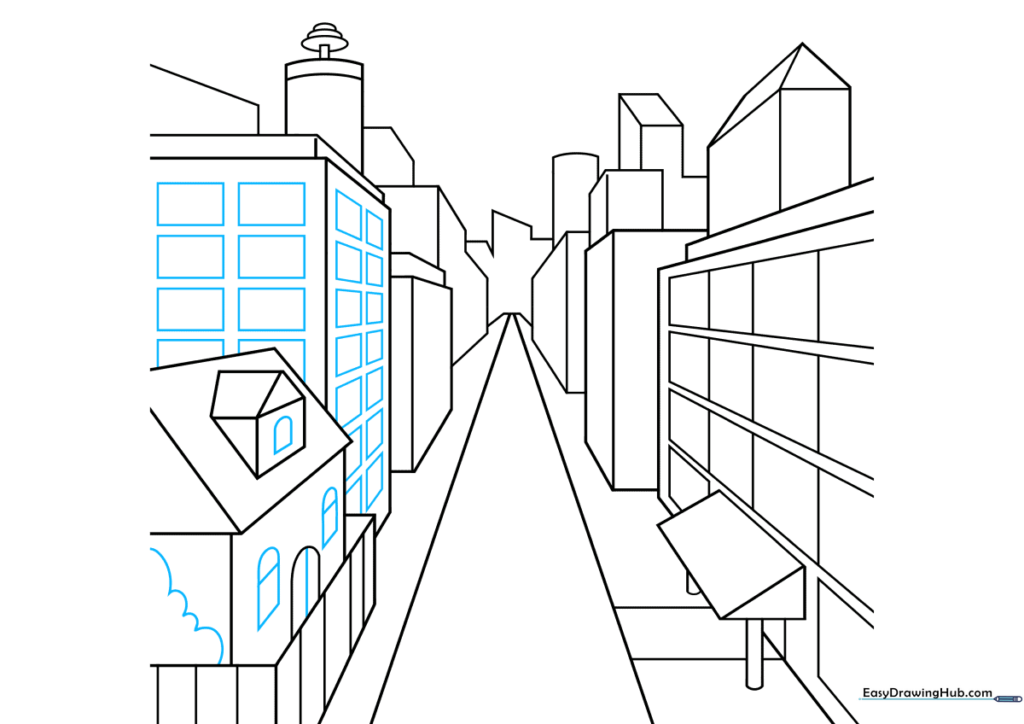
Step 8: Texture and Detail
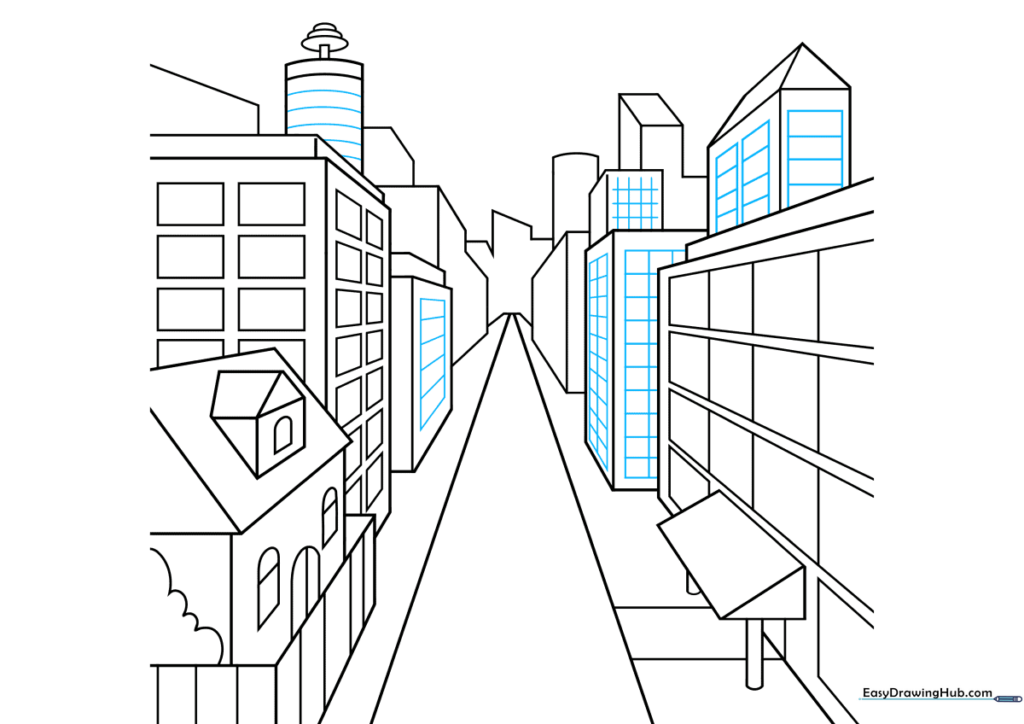
Add texture to your buildings using cross-hatching or simple rectangles for windows. This adds visual interest. Teacher's Tip: Use a darker pencil for these final details to make them stand out against the lighter structure lines.
Step 9: Street Markings
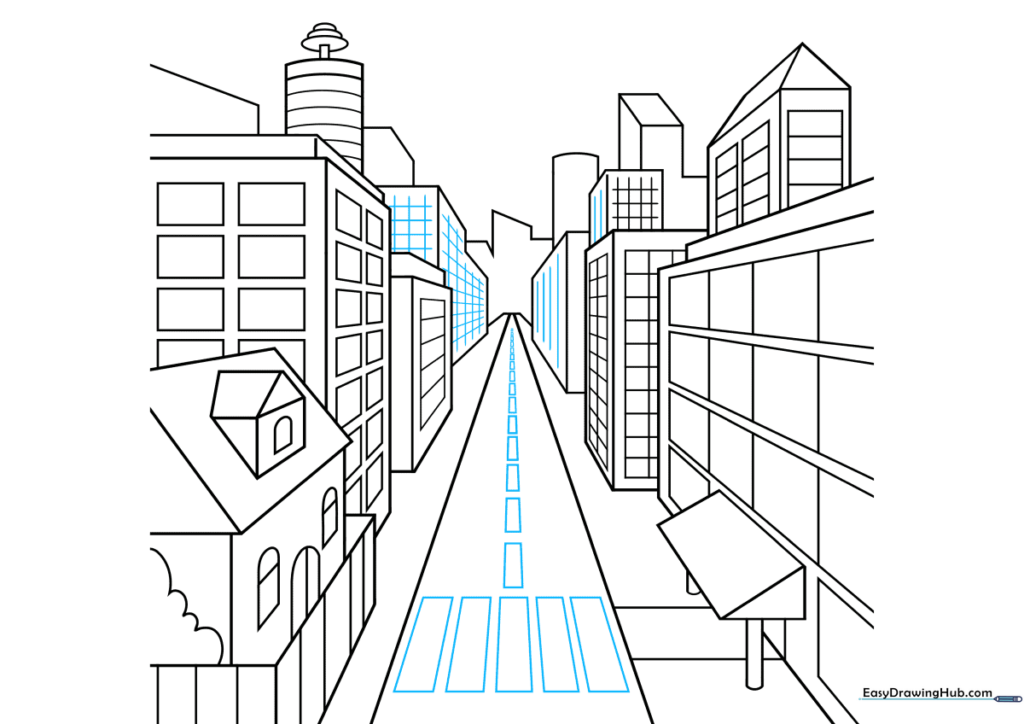
Draw a crosswalk using rectangles that get smaller as they approach the vanishing point. This is the secret to perfect perspective! Teacher's Tip: The closer the rectangles are to the bottom of the page, the wider they should be.
Step 10: Bring It to Life with Color
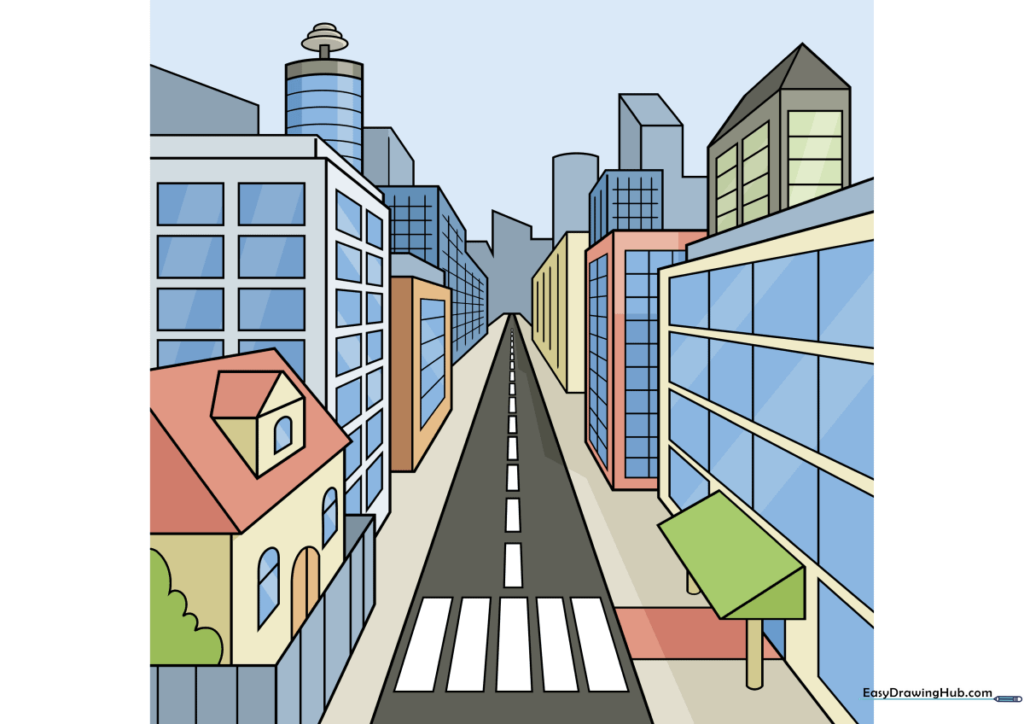
Your outline is complete! Now, use markers or colored pencils to fill in your city. Teacher's Tip: Use warmer, brighter colors for buildings in the foreground and cooler, lighter colors for those in the distance to enhance the atmospheric perspective.
More Tutorials


