How to Draw a Cute Cartoon Turkey: Easy 9-Step Guide
Looking for a fun, screen-free activity? This tutorial is perfect for children ages 5 and up to practice basic shapes and line work. All you need is a pencil, an eraser, and some paper to bring this cheerful turkey to life.
🎯 Final Result

Step-by-Step Instructions
Step 1: Sketching the Expressive Eyes

Start by drawing two curved lines for the upper eyelids, then add small ovals beneath them. Shade the pupils to give your turkey personality. Teacher's Tip: Keep your pencil pressure light so you can easily adjust the spacing if the eyes look a bit lopsided.
Step 2: Adding the Beak and Wattle
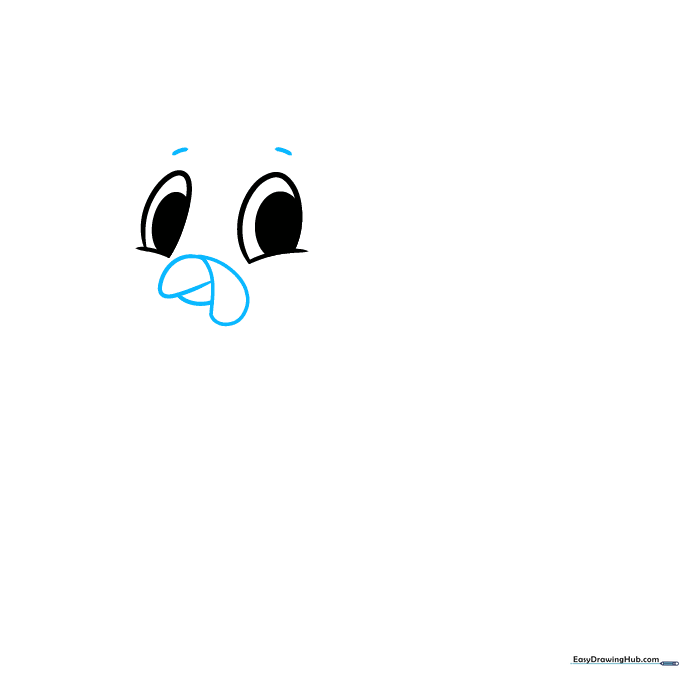
Draw two small arches for eyebrows, then place a teardrop shape between the eyes for the wattle. Frame it with a triangular beak. Teacher's Tip: The wattle is a unique turkey feature—don't worry if it looks a bit wobbly; nature isn't perfectly symmetrical!
Step 3: Defining the Head and Neck
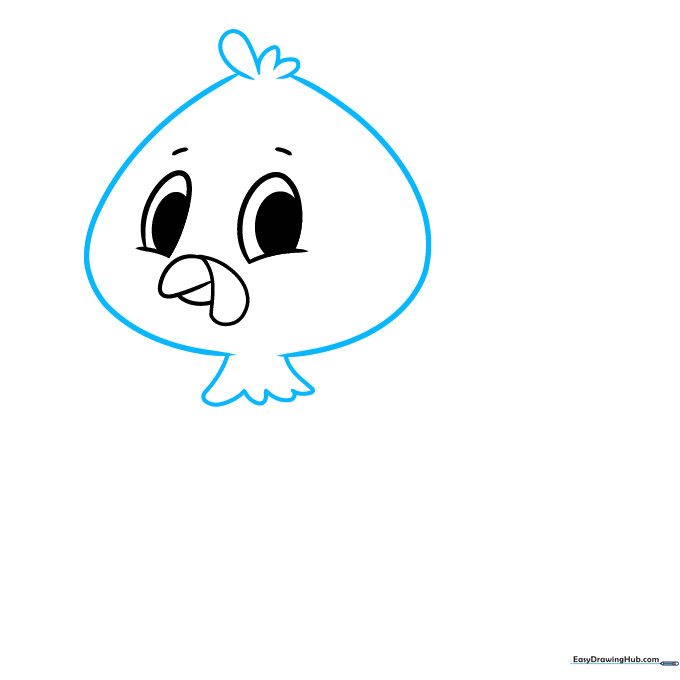
Add three small 'U' shapes on top of the head for a feathery tuft. Then, draw the sides of the head and extend two lines downward to form the neck. Teacher's Tip: Use smooth, fluid motions for the neck lines to make the turkey look friendly rather than stiff.
Step 4: Outlining the Body

Use overlapping curved lines to create the round body and a small wing on the side. Teacher's Tip: Think of the body as a large, soft oval. Don't press too hard, as we will add texture in later steps.
Step 5: Adding Wing Feathers and Drumsticks
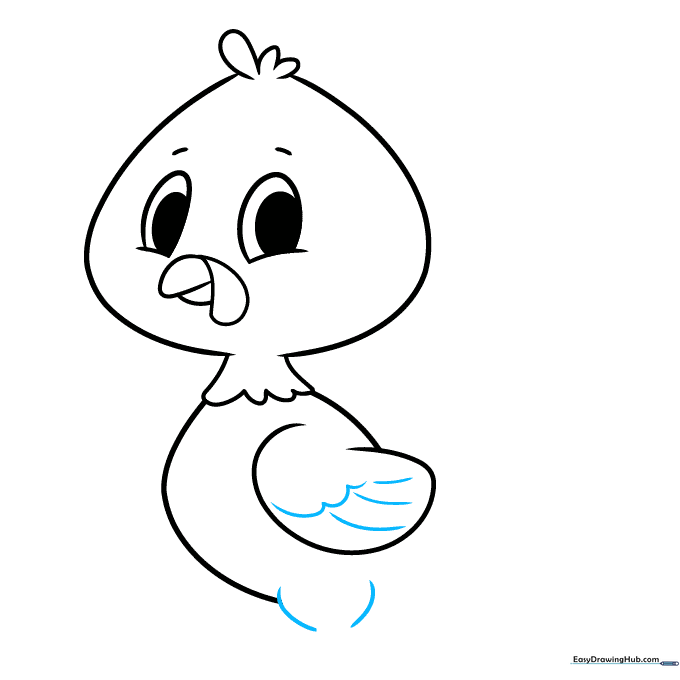
Add small curved lines to the wing to suggest feathers, and draw two curved lines for the upper leg. Teacher's Tip: Keep the leg lines parallel to give the turkey a sturdy, cartoonish look.
Step 6: Drawing the Feet
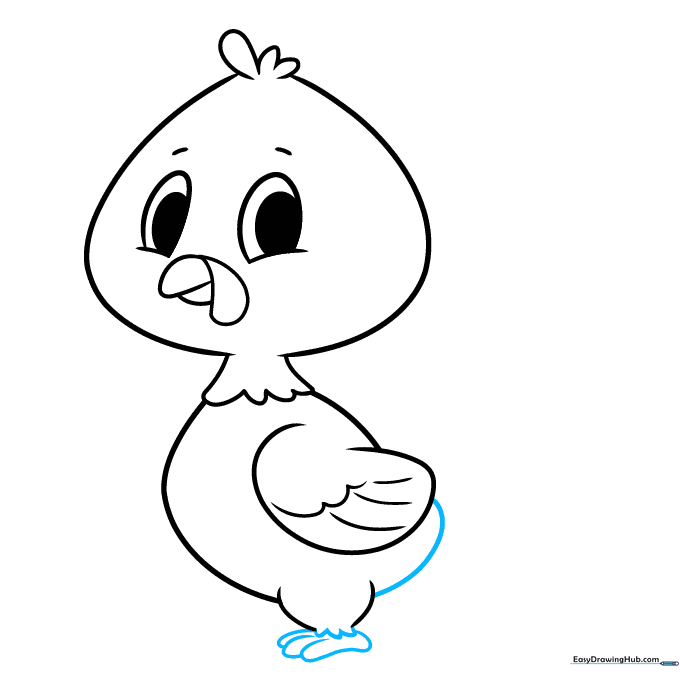
Connect the wing to the body with a smooth curve. Add the lower leg and three small toes using overlapping curved lines. Teacher's Tip: Turkeys have strong feet—make the toes look slightly rounded to keep the 'cute' aesthetic.
Step 7: The Second Leg and Tail Base
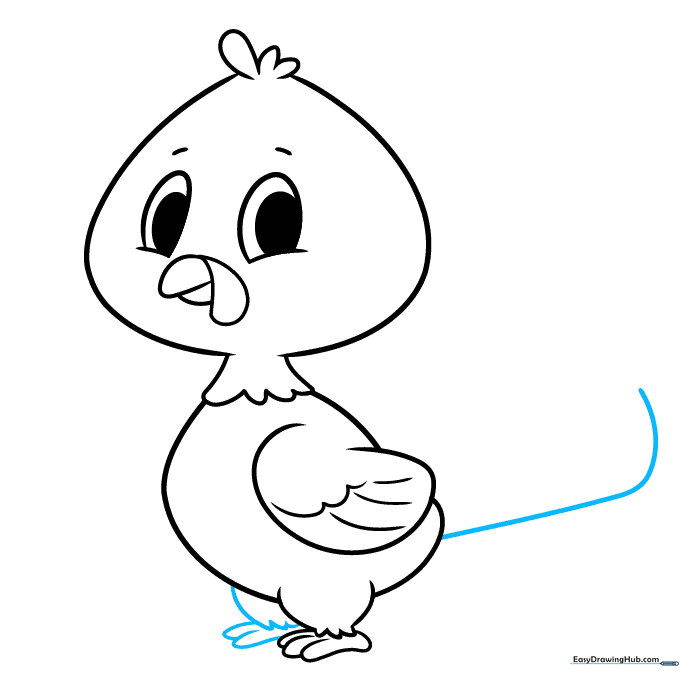
Draw the second leg behind the first, then sketch a long, sweeping line from the back to start the tail. Teacher's Tip: Drawing the second leg slightly higher creates a sense of depth, making your drawing look more professional.
Step 8: Creating the Fan Tail
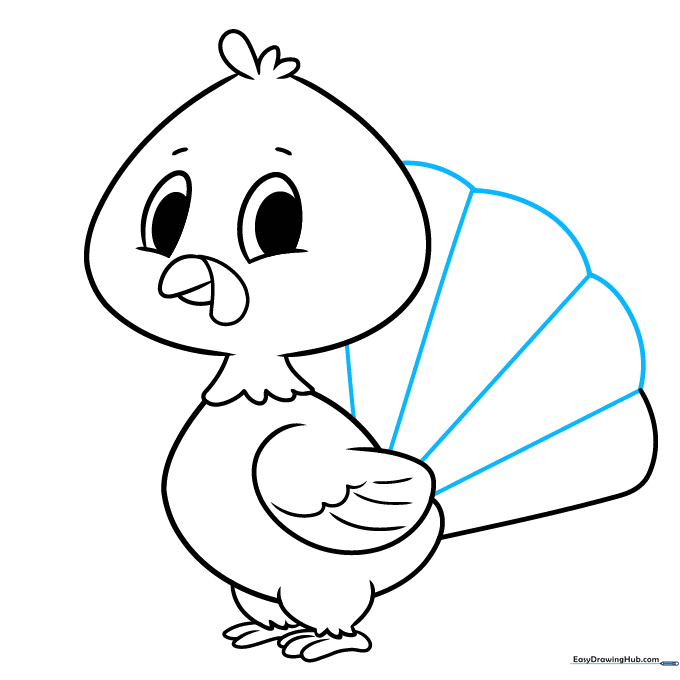
Use a scalloped pattern to outline the top of the tail, then draw straight lines connecting the body to the edge of the fan. Teacher's Tip: Take your time with the scallops; they don't have to be perfect, but keeping them consistent makes the tail look full and fluffy.
Step 9: Adding Final Texture
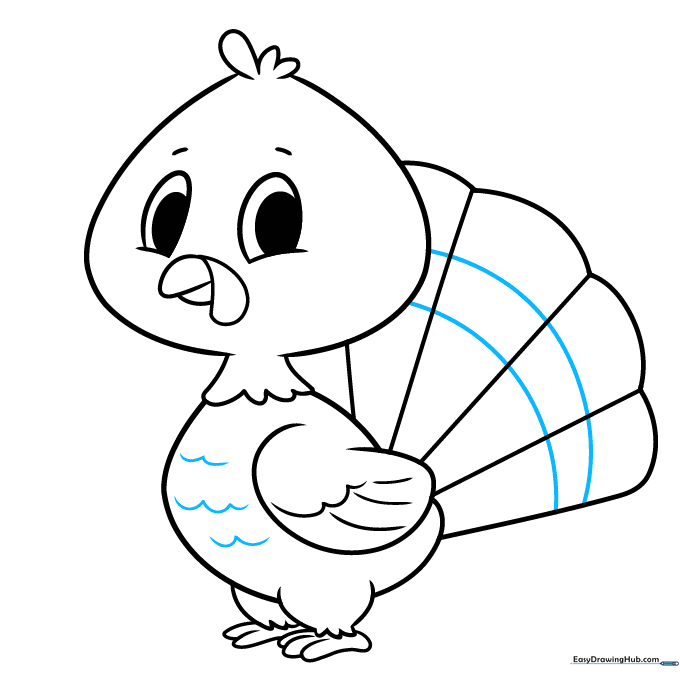
Add a curved band across the tail and small 'V' shapes on the chest to mimic feathers. Teacher's Tip: These small details add character! Use a fine-liner or a sharp pencil to make these marks stand out.
Step 10: Bring Your Turkey to Life with Color
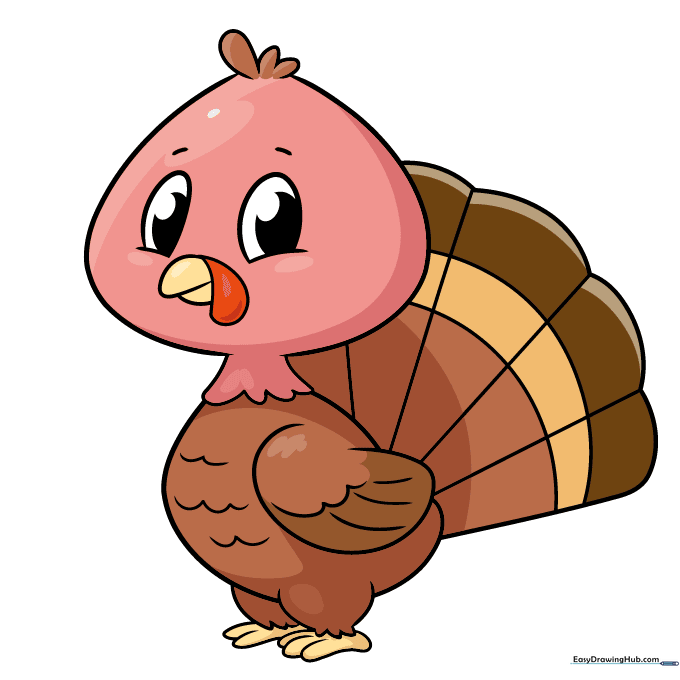
Time to color! Use warm browns for the body, a bright red for the wattle, and perhaps some orange or yellow for the tail feathers. Teacher's Tip: Try using light, circular strokes with your colored pencils to create a soft, feathery look.
More Tutorials


