How to Draw Spider-Man: Easy 9-Step Cartoon Guide
Bring your favorite web-slinger to life with this beginner-friendly drawing guide, perfect for ages 5 and up. You only need a pencil, an eraser, and a piece of paper to get started. Follow these simple steps to master the proportions of a classic cartoon superhero while developing your hand-eye coordination.
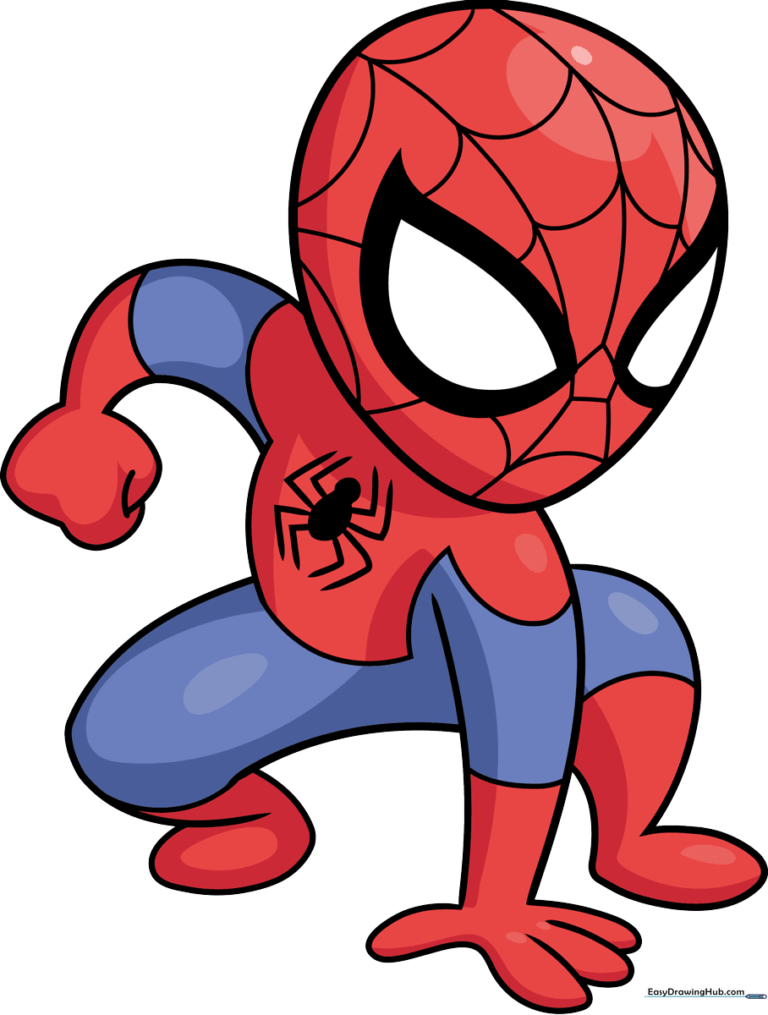
🎯 Final Result
Step-by-Step Instructions
Step 1: Sketching the Mask Shape
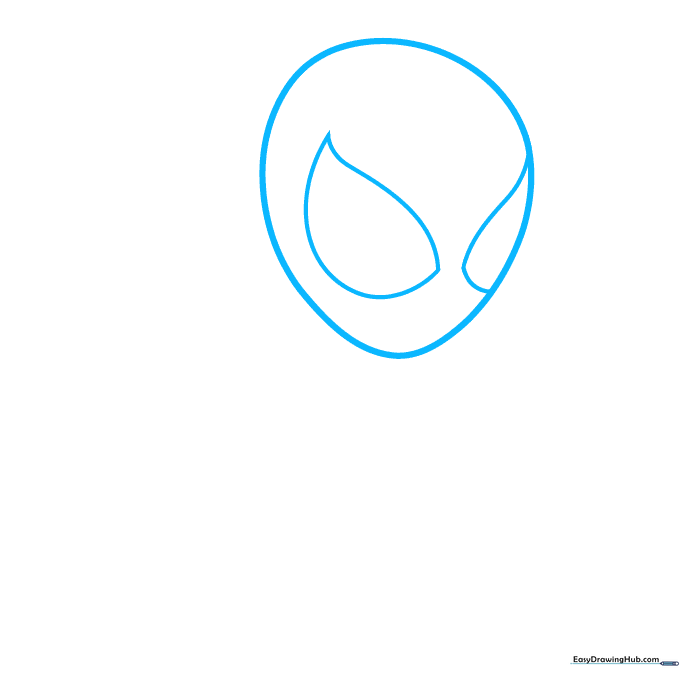
Draw an inverted egg shape to serve as the head. Inside, sketch two teardrop shapes for the eyes. Teacher's Tip: Keep your pencil strokes light and airy so you can easily erase any overlapping lines later.
Step 2: Defining the Eyes and First Arm
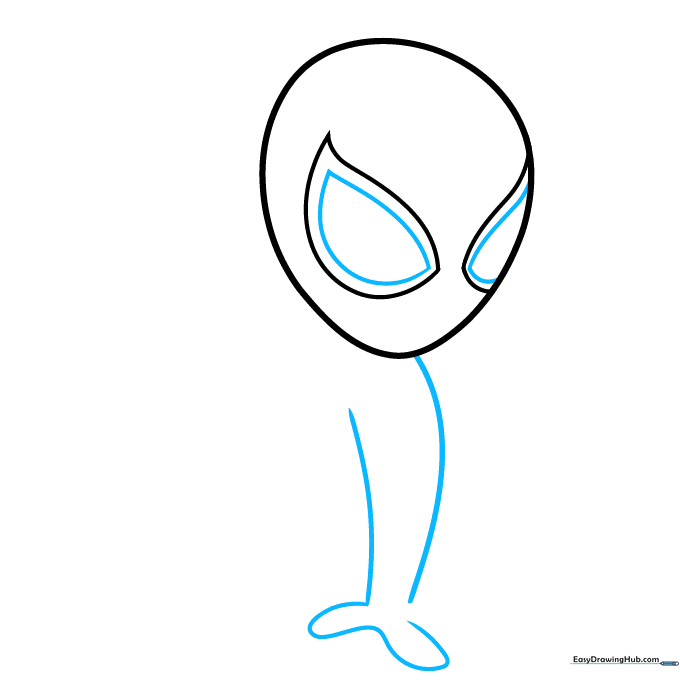
Add curved lines inside the eye patches for detail. Then, extend two curved lines downward to form the first arm. Teacher's Tip: Double the line back on itself at the end to create a simple, rounded fist.
Step 3: Adding the Second Arm
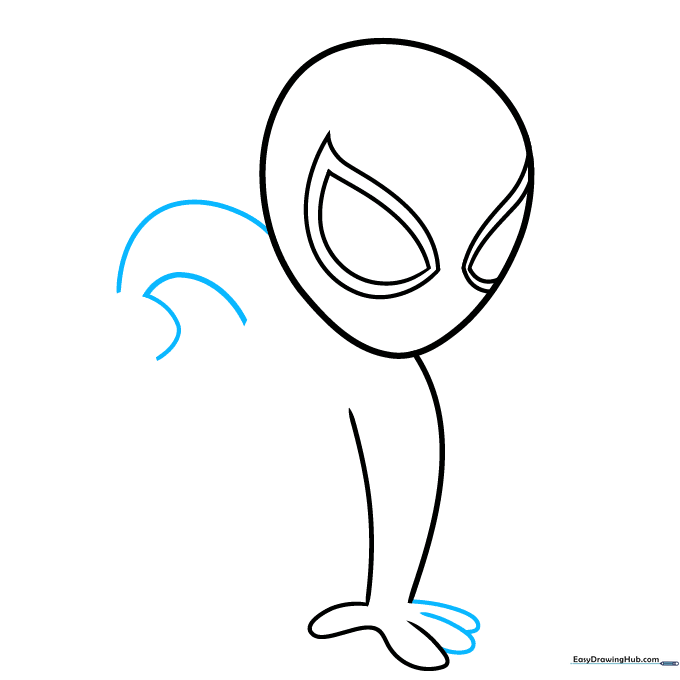
Use small, overlapping curved lines to define the fingers on the first hand. Then, draw a second arm extending from the opposite side of the head. Teacher's Tip: Keep the arms parallel to maintain a balanced cartoon look.
Step 4: Sketching the Torso
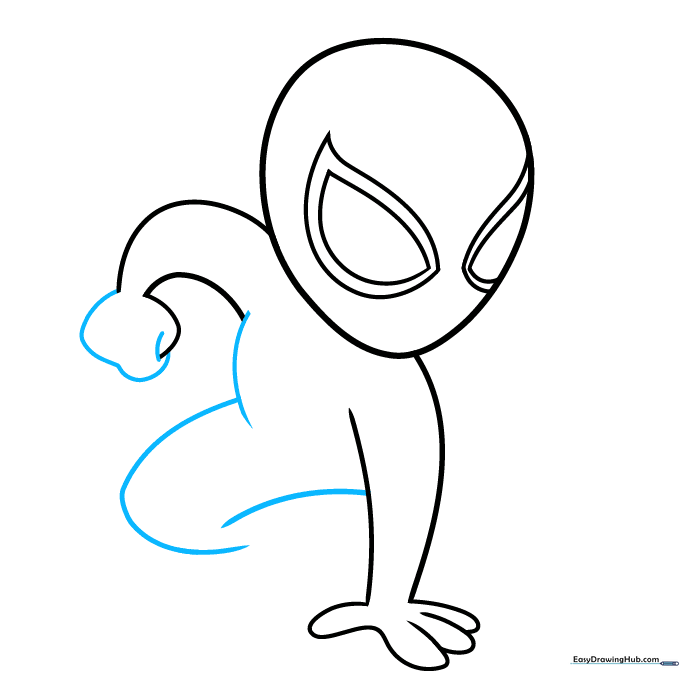
Connect the arms by drawing the torso and the start of the legs using smooth, overlapping curves. Teacher's Tip: Think of the torso as a slightly rounded rectangle to give him a sturdy superhero posture.
Step 5: Drawing the Legs and Feet
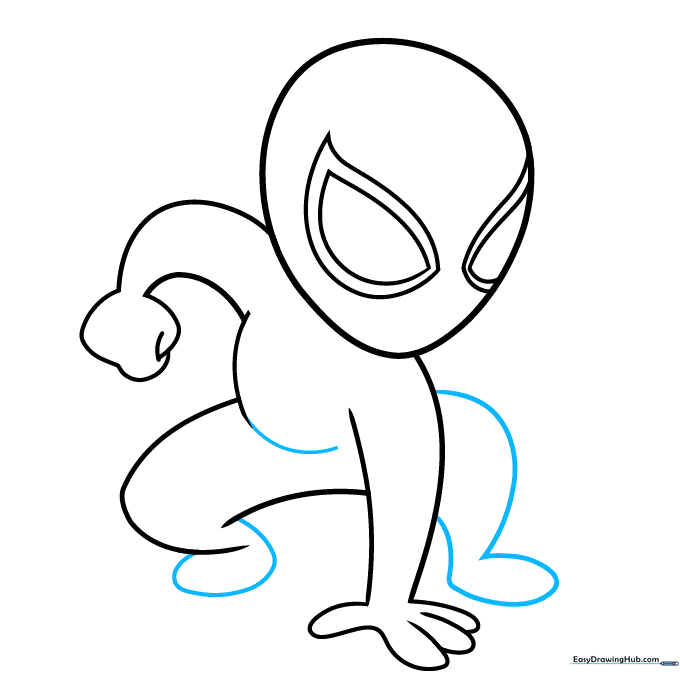
Extend the torso lines down to create the legs, finishing with rounded shapes for the feet. Teacher's Tip: Make the feet slightly larger to give the character a grounded, stable appearance.
Step 6: Adding Suit Details
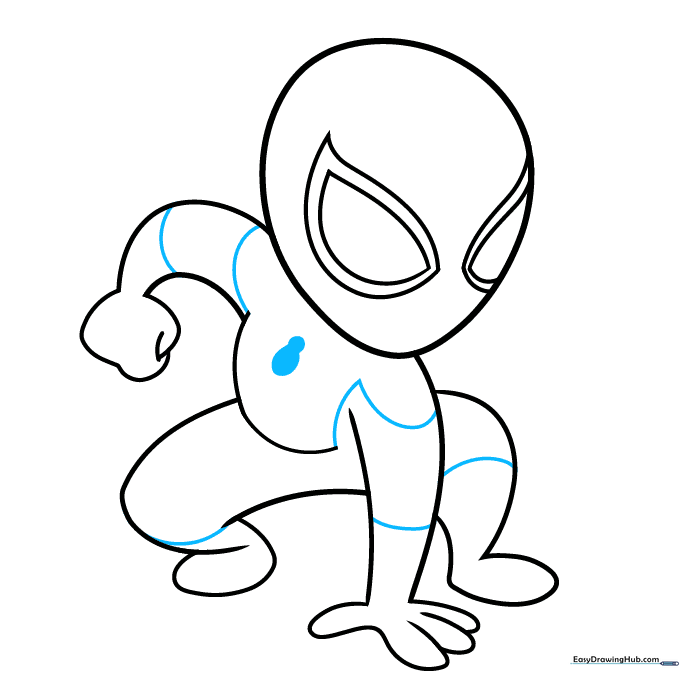
Add horizontal bands to the arms and legs. Draw the spider emblem on the chest by shading a small oval for the body and a circle for the head. Teacher's Tip: Use a steady hand for the emblem to keep it centered.
Step 7: Starting the Web Pattern
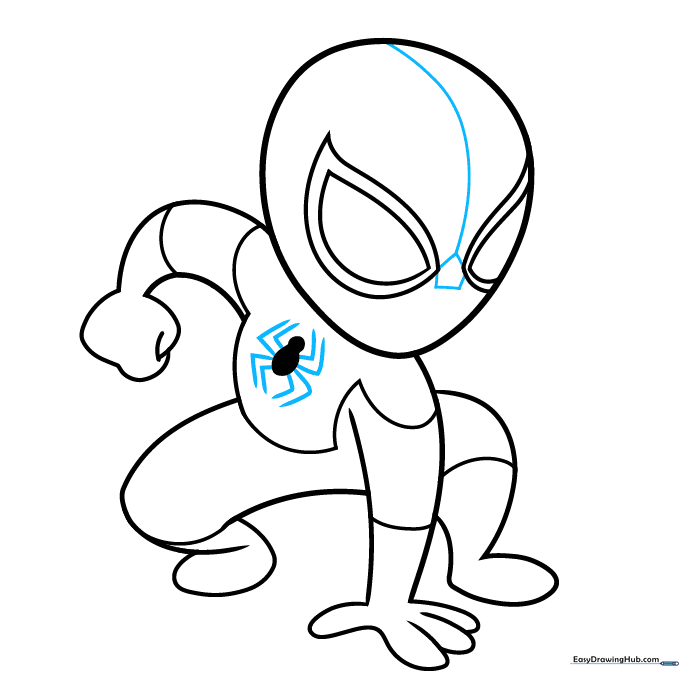
Draw eight small 'L' shaped lines for the spider's legs. Then, draw a pentagon between the eyes to begin the mask's web pattern. Teacher's Tip: The pentagon acts as the anchor point for all your web lines.
Step 8: Developing the Webbing
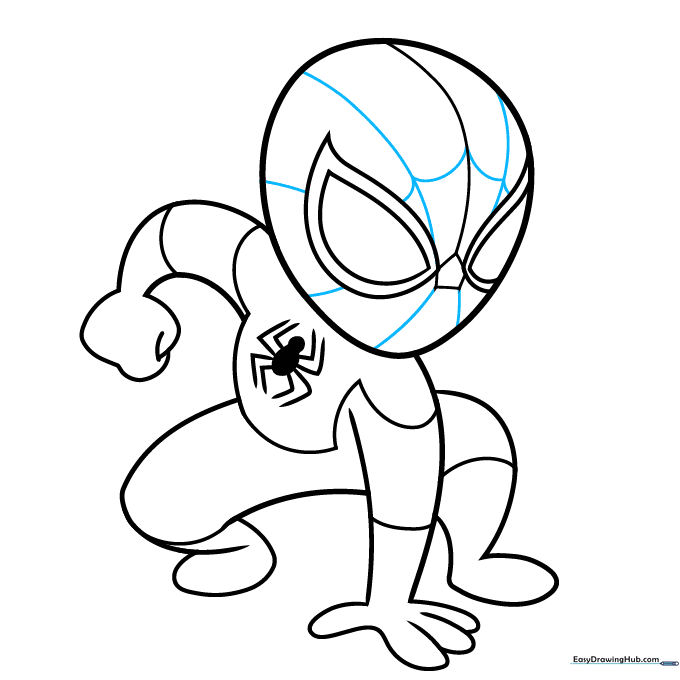
Extend curved lines from the pentagon across the face and connect them with smaller arcs. Teacher's Tip: Keep the curves consistent to make the web look symmetrical and professional.
Step 9: Finalizing the Web Pattern
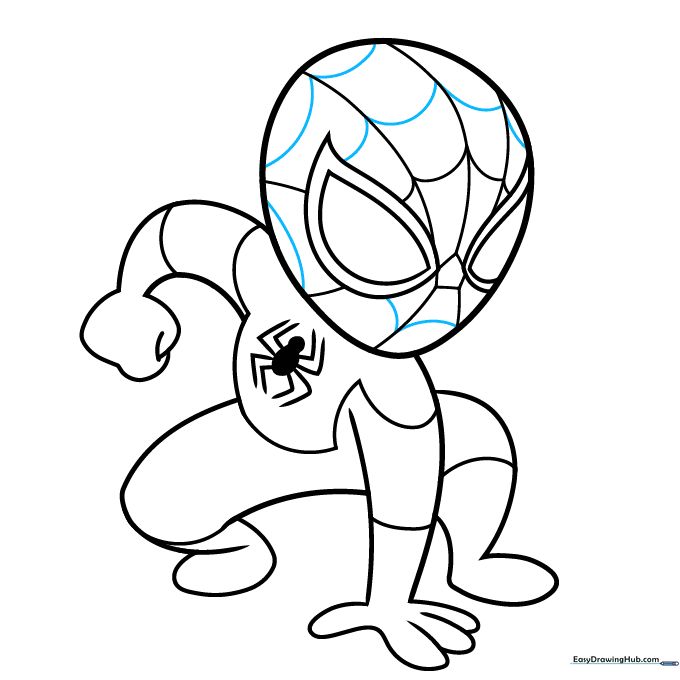
Continue adding connecting curved lines across the mask until the entire web pattern is filled in. Teacher's Tip: Don't worry if the lines aren't perfect; the web looks great with a slightly organic, hand-drawn feel.
Step 10: Bringing Him to Life with Color
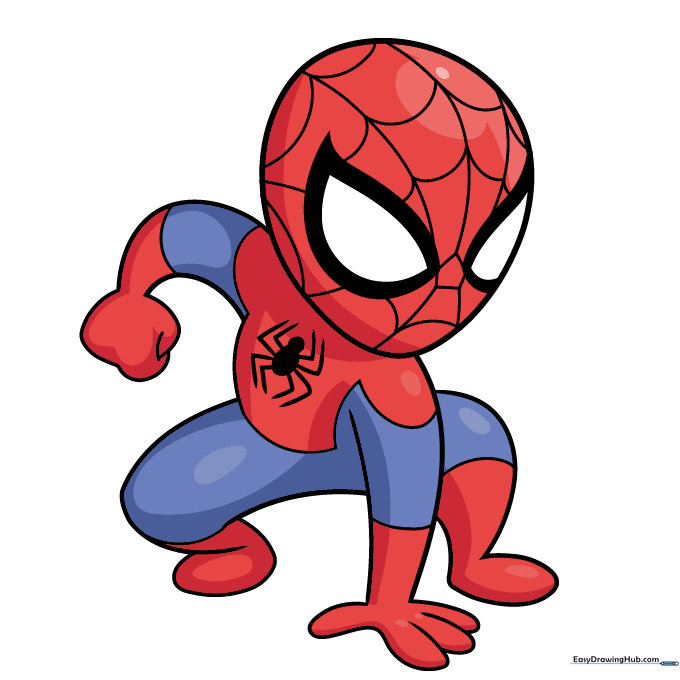
Your outline is complete! Now, use vibrant red and blue markers or colored pencils to fill in the suit. Teacher's Tip: Use a black fine-liner to trace your pencil lines before coloring for a clean, comic-book look.
More Tutorials


