How to Draw a Cartoon Mummy: Easy 10-Step Guide
Ready to create your own spooky friend? This tutorial is perfect for artists ages 6 and up. You’ll only need a pencil, an eraser, and a piece of paper to bring this classic Halloween character to life while practicing your line control and character design skills.
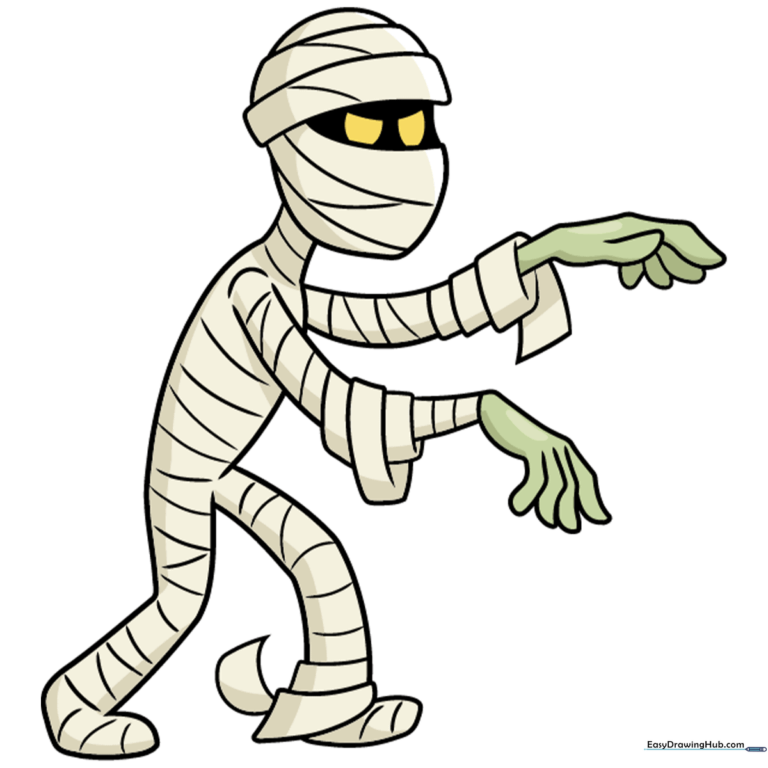
🎯 Final Result
Step-by-Step Instructions
Step 1: Sketching the Head Wrappings
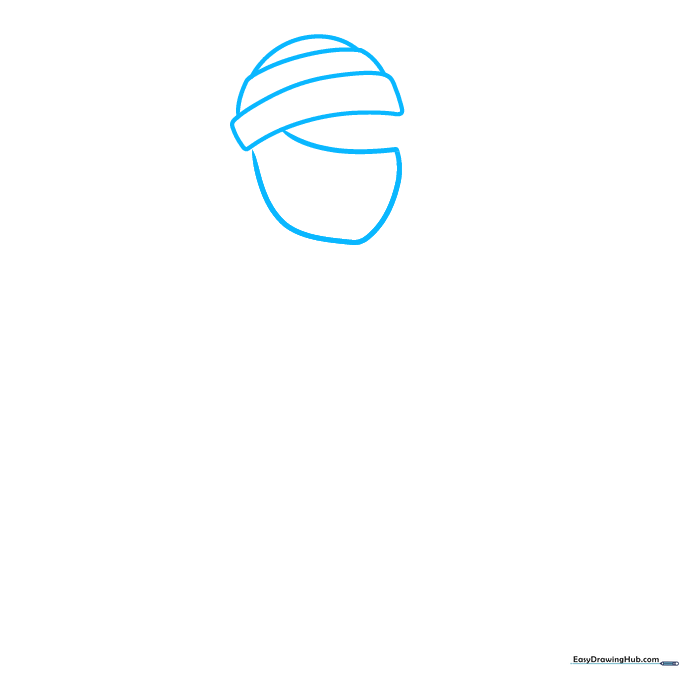
Start by drawing a narrow, curved rectangle to form the top of the head. Add a semi-circle layer above it for height. Teacher's Tip: Keep your pencil lines light and loose—mummies are messy, so your lines don't need to be perfectly straight!
Step 2: Adding the Eyes and Neck
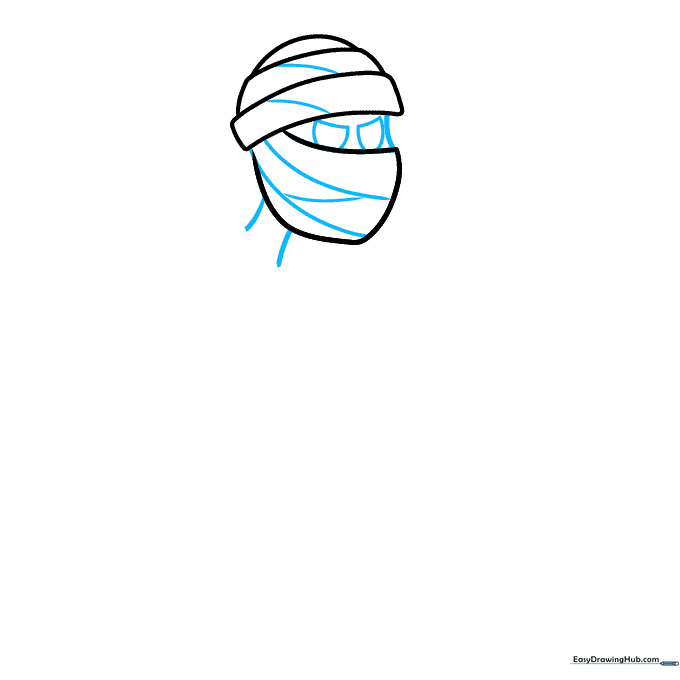
Draw two flattened ovals for the eyes, then add horizontal curved lines across the face to suggest bandages. Connect the head to the body with two short, curved lines for the neck. Teacher's Tip: Make the eyes look 'angry' by slightly tilting the top lines of the ovals.
Step 3: Shaping the Torso and Arm
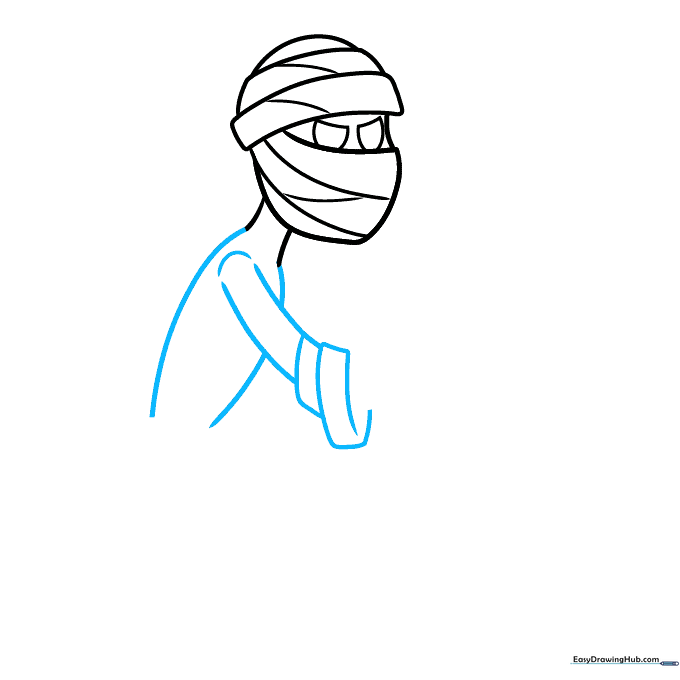
Use long, flowing curved lines to outline the narrow body and one extended arm. Add a few rectangular shapes hanging off the arm to represent loose bandages. Teacher's Tip: Think of these as 'dangling ribbons' to give your mummy movement.
Step 4: Drawing the Hand
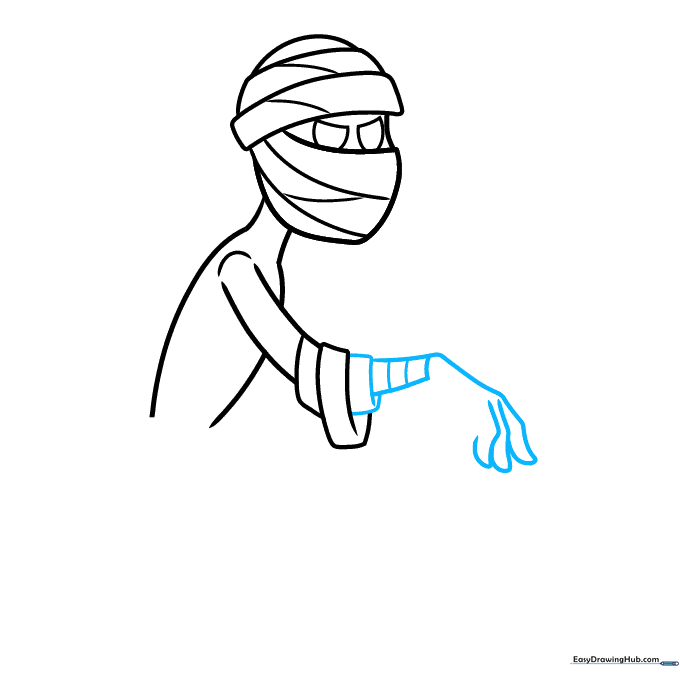
Draw a small trapezoid for the wrist, then use overlapping curved lines to sketch the hand. Band the wrist with small lines to show the wrapping. Teacher's Tip: Don't worry about drawing perfect fingers; simple, rounded shapes look great for a cartoon style.
Step 5: Finishing the Arms
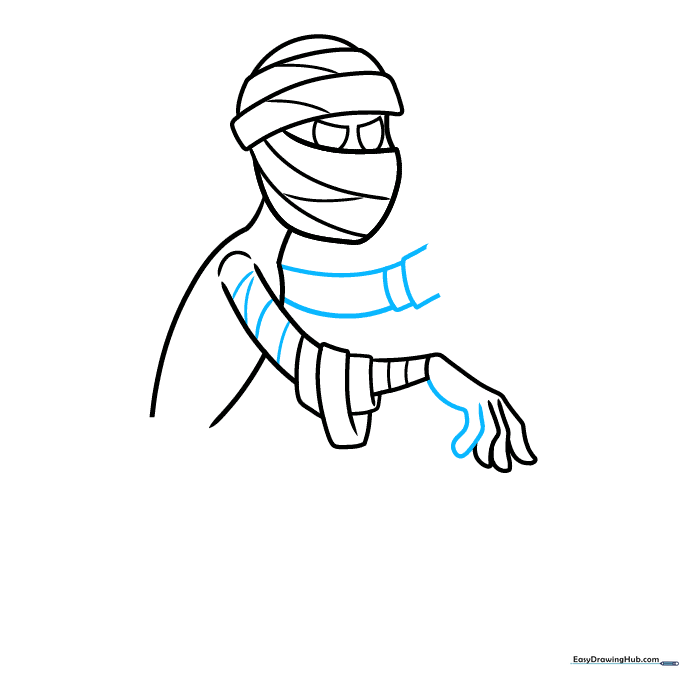
Complete the first hand and add more curved rectangles to the upper arm to show the layers of cloth. Then, sketch the second arm using similar rectangular shapes. Teacher's Tip: Vary the size of your rectangles to make the bandages look authentic.
Step 6: Adding the Second Hand
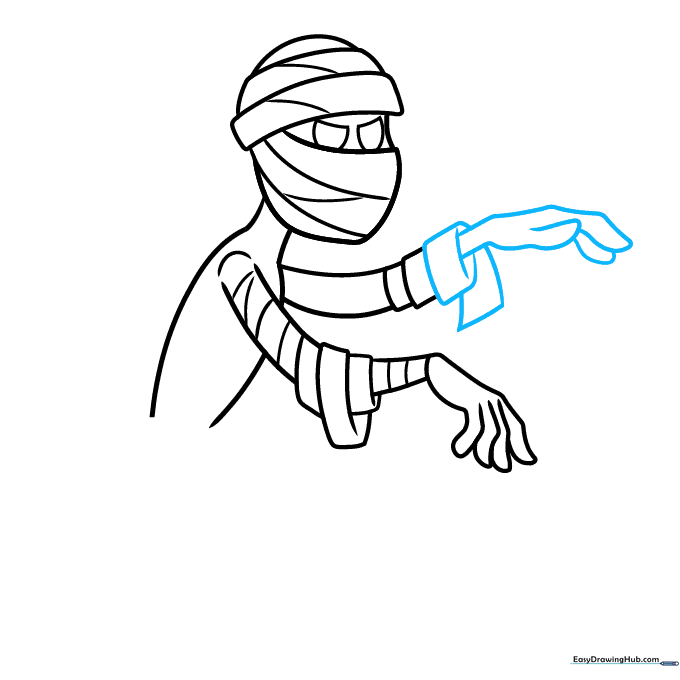
Draw two overlapping rectangles for the end of the second sleeve, then sketch the hand emerging from it. Teacher's Tip: Add a small curved line inside the sleeve to create a sense of depth.
Step 7: Sketching the Legs
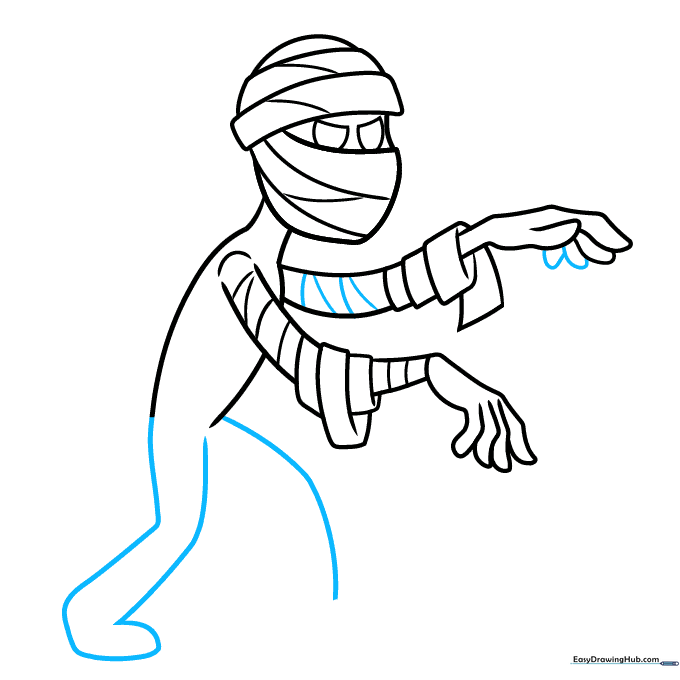
Use long, slightly curved lines to draw the legs, connecting them at the bottom with a rounded shape for the foot. Teacher's Tip: Keep the legs slightly apart to give your mummy a 'walking' pose.
Step 8: Detailing the Feet
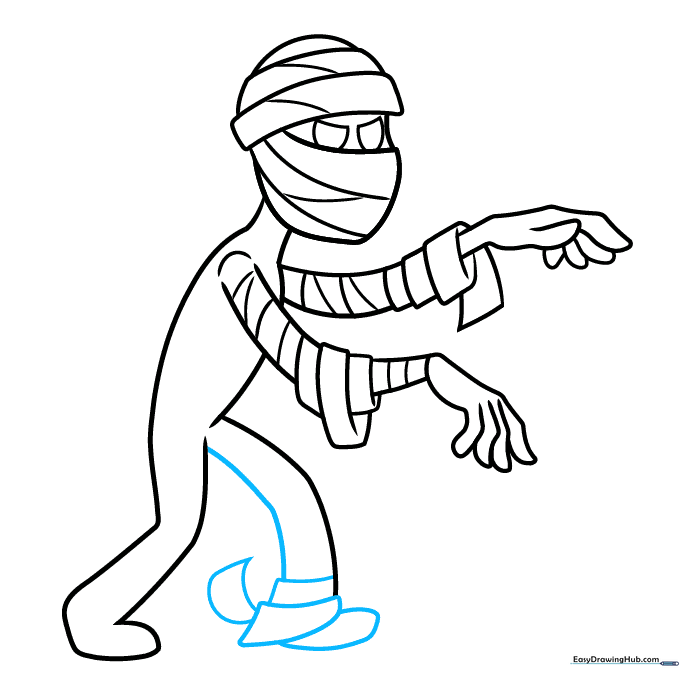
Add rectangular bands around the bottom of the second leg to match the bandage style of the rest of the body. Teacher's Tip: Consistency is key—make sure the bandage style on the feet matches the arms.
Step 9: Adding Texture
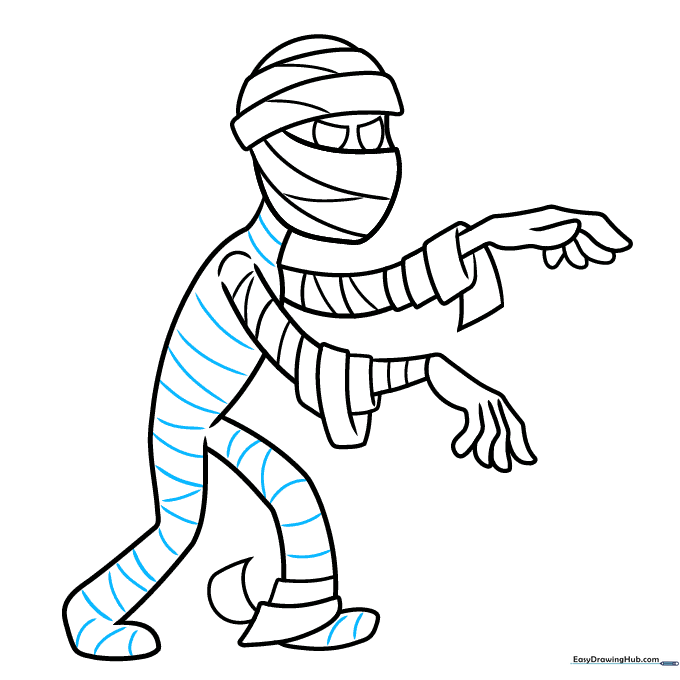
Fill the body and legs with curved lines, using 'V' shapes and parallel lines to create the look of wrapped fabric. Teacher's Tip: Don't overthink it! Random, overlapping lines actually make the mummy look more realistic.
Step 10: Bringing Your Mummy to Life with Color
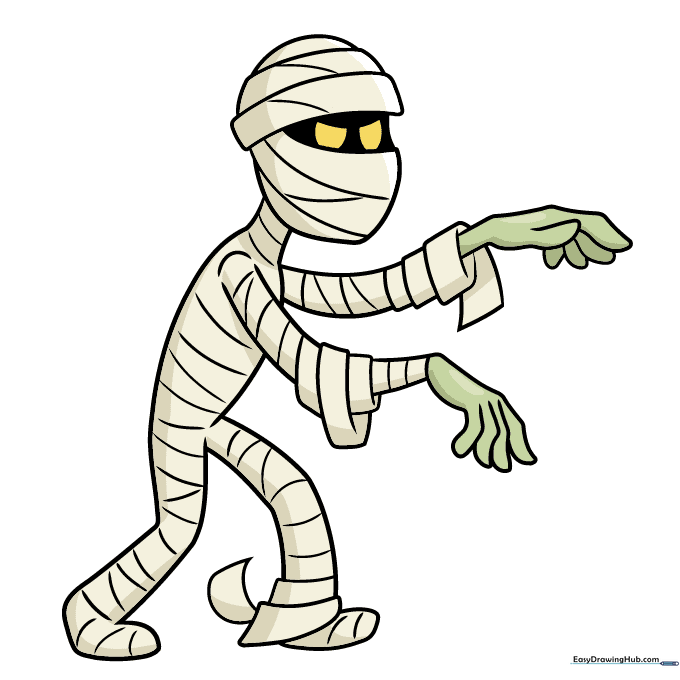
Your outline is complete! Now, color your mummy. Use shades of tan, light brown, or even a dusty grey to give it that 'ancient' look. Teacher's Tip: Use a darker brown pencil to add shadows between the bandages for a 3D effect.
More Tutorials


