How to Draw a Cartoon Dog: Simple 10-Step Guide for Kids
Looking for a fun, screen-free activity? This guide is perfect for budding artists ages 5 and up. All you need is a pencil, an eraser, and a piece of paper to bring your own happy puppy to life while practicing basic shapes and line control.
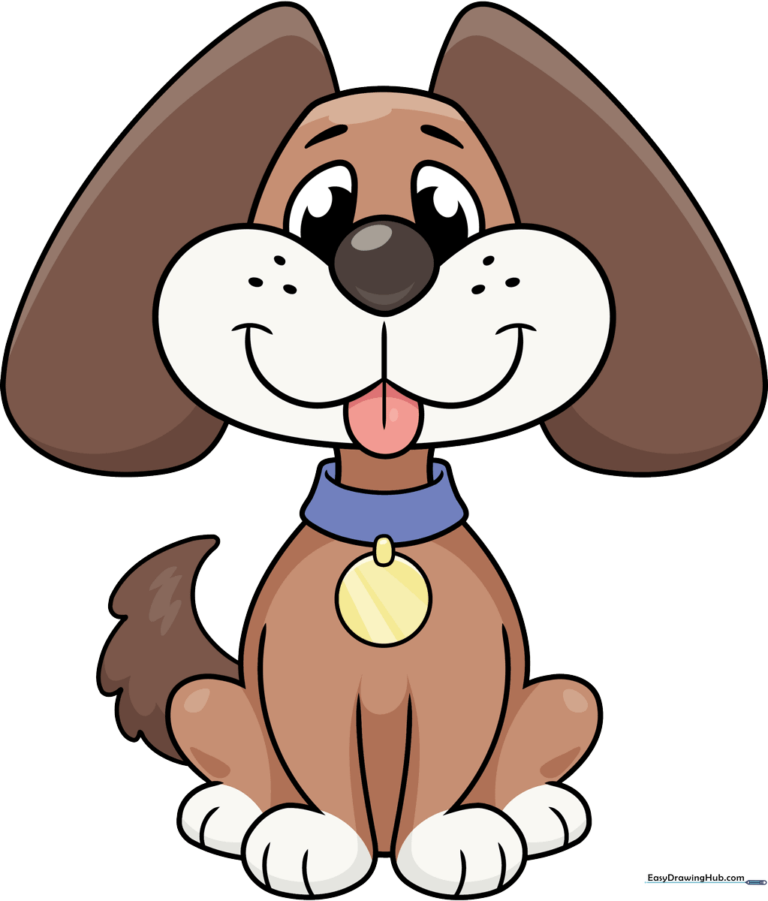
🎯 Final Result
Step-by-Step Instructions
Step 1: Sketching the Nose and Muzzle
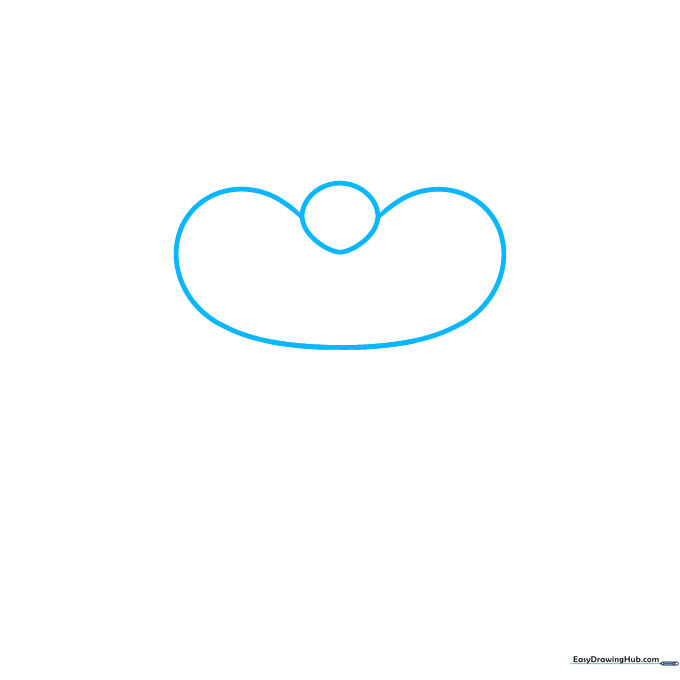
Start by drawing a small circle for the nose. Below it, draw a wide, curved 'peanut' shape to form the muzzle. Teacher's Tip: Keep this shape centered on your paper to leave room for the ears later.
Step 2: Adding the Eyes and Head
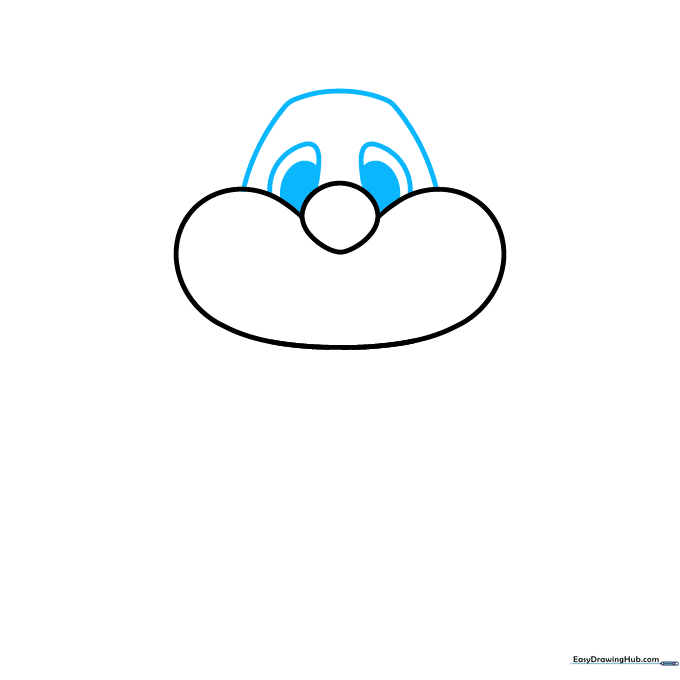
Draw two curved lines extending from the nose to create the cheeks, then add two large ovals for the eyes. Connect these with a long, sweeping curve over the top to define the head. Teacher's Tip: Make the eyes nice and big to give your puppy a friendly, curious expression.
Step 3: Drawing the Mouth and Tongue
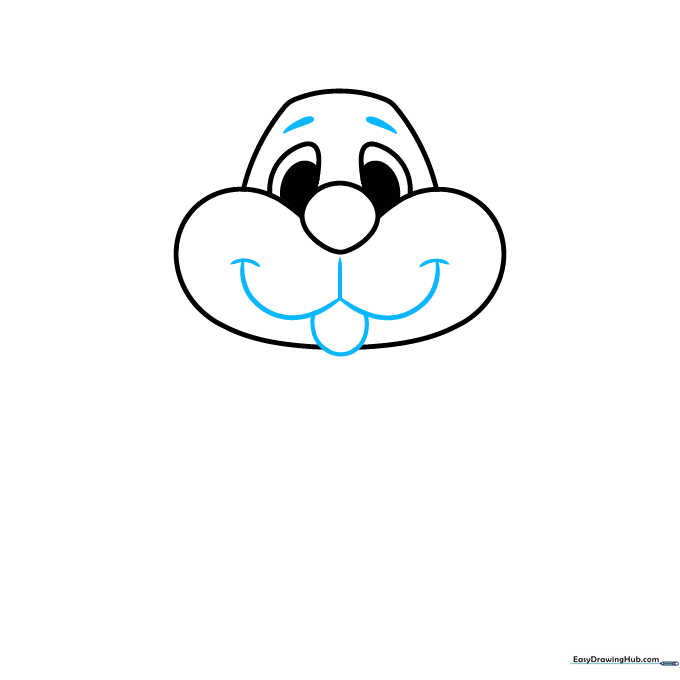
Add thick lines above the eyes for eyebrows. Below the nose, draw a wide 'W' shape for the mouth, and add a 'U' shape for the tongue. Teacher's Tip: If you make a mistake, gently dab with your eraser—don't rub too hard or you'll wrinkle the paper!
Step 4: Floppy Ears and Whiskers
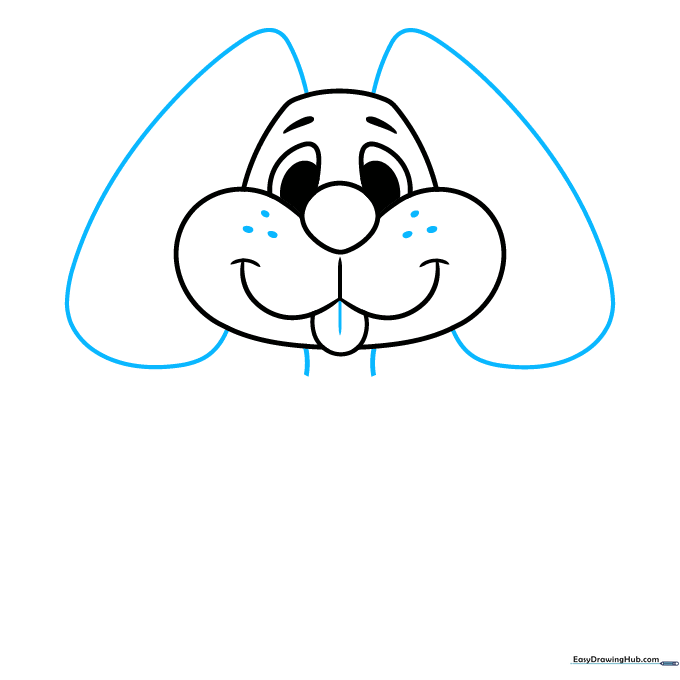
Draw two long, curved lines from the top of the head down to the jaw to create floppy ears. Add small dots on the cheeks for whiskers and two lines for the neck. Teacher's Tip: Vary the length of the ears to give your dog a unique personality.
Step 5: Adding the Collar
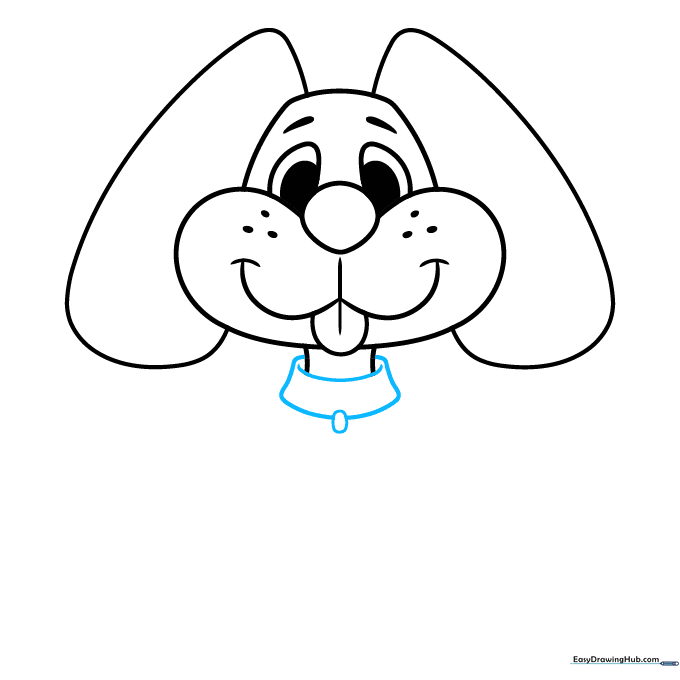
Draw a rounded rectangle around the neck to form the collar, and add a small oval in the center. Teacher's Tip: This is a great place to add a tiny initial later to personalize your dog's tag!
Step 6: Drawing the Front Leg
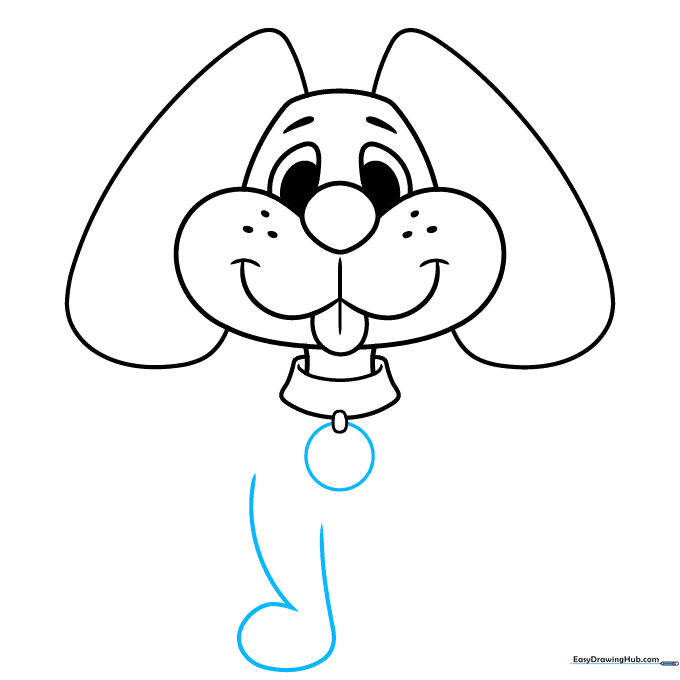
Draw a circle for the name tag, then extend a long, curved line that doubles back to create the first front leg. Teacher's Tip: Keep your lines smooth and continuous for a more professional cartoon look.
Step 7: Adding the Second Leg
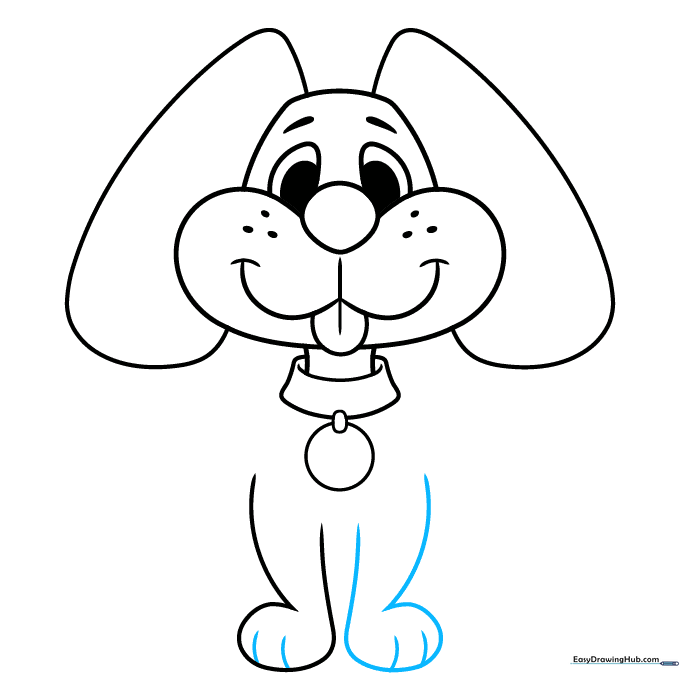
Draw the second front leg using the same technique as the first. Add small curved lines at the bottom to represent toes. Teacher's Tip: Make sure the legs are roughly the same length so your dog looks balanced.
Step 8: Shaping the Body
Use a series of soft, curved lines to draw the dog's sides and rear legs. Teacher's Tip: Think of the body as a soft, rounded shape rather than a boxy one.
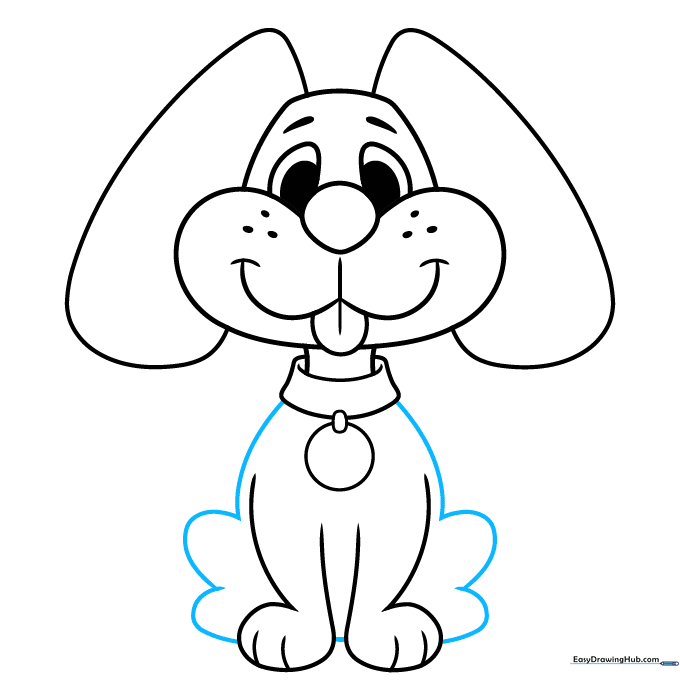
Step 9: Adding the Tail

Finish the outline by drawing a happy, curved tail. Add a few more curved lines to define the rear paws. Teacher's Tip: A wagging tail adds a lot of energy to your drawing!
Step 10: Bringing Your Dog to Life with Color
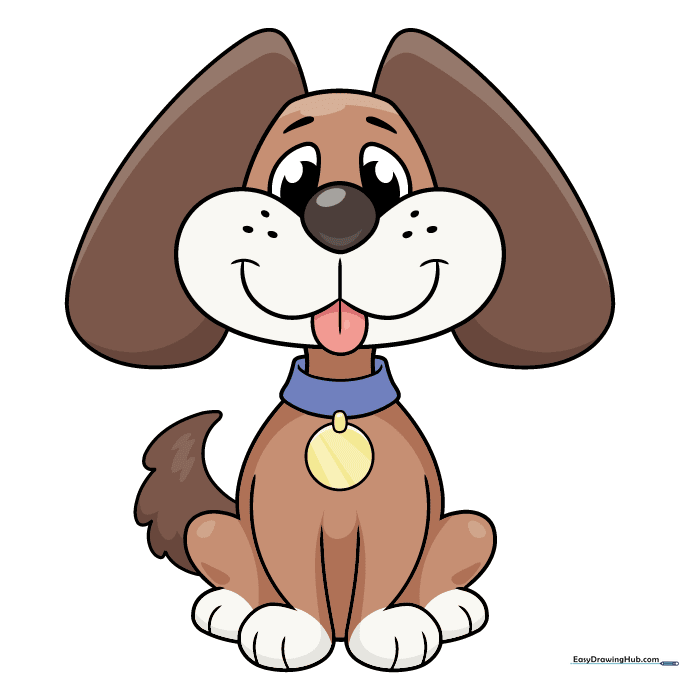
Your outline is complete! Now, choose your favorite colors. Dogs come in many shades like brown, black, or cream. Try using light pressure for a soft fur look or heavy pressure for bold, cartoon colors.
More Tutorials


