How to Draw a Jack-in-the-Box: Easy Step-by-Step Guide
Ready to create a classic prank toy? This tutorial is perfect for children ages 6+ who want to practice drawing expressive cartoon characters. You will need a pencil, an eraser, and your favorite markers to bring this colorful surprise to life.
🎯 Final Result

Step-by-Step Instructions
Step 1: Sketching the Jester's Hat

Draw a pair of curved lines connected at the ends to form the hat's brim. Below this, add a large curved line for the face. Add three triangles on top with small circles at the tips for bells. Teacher's Tip: Keep your pencil lines light so you can easily erase the overlapping parts later.
Step 2: Adding Facial Expressions

Draw an oval nose and thick, curved lines for the closed, happy eyes. Add a wide, laughing mouth with a tongue inside. Teacher's Tip: Use a darker, firmer stroke for the eyes and mouth to make the character's expression pop.
Step 3: Creating the Sign

Draw a rectangular shape below the chin and write 'APRIL FOOLS' inside. Teacher's Tip: Use a ruler if you want the box edges to look perfectly straight, or keep it freehand for a whimsical, hand-drawn look.
Step 4: Drawing the Spring
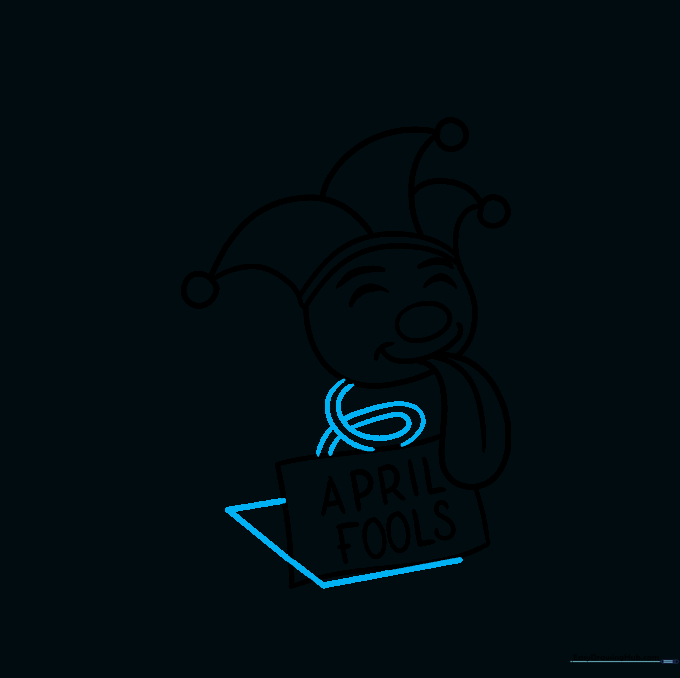
Draw a partial rectangle around the sign to represent the open box lid. Then, draw a spiral spring connecting the head to the box. Teacher's Tip: Make the spring lines parallel to give it a bouncy, 3D appearance.
Step 5: Forming the Box Base
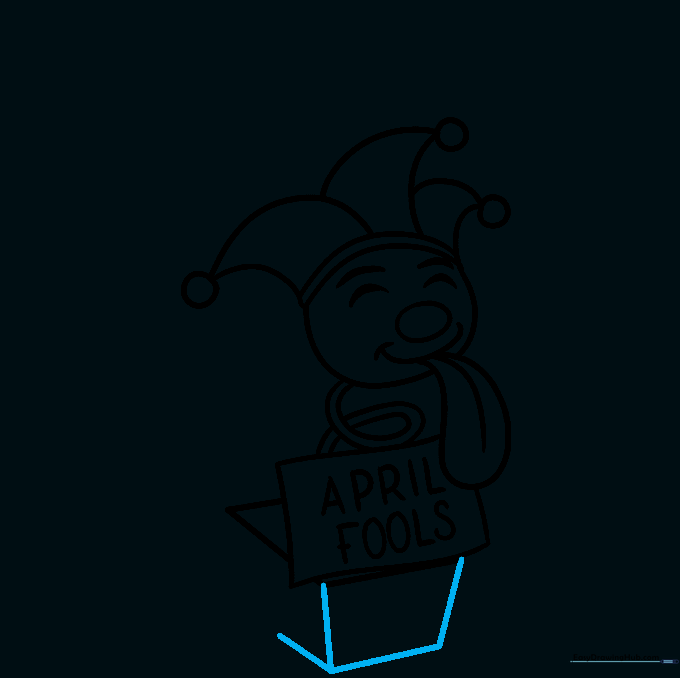
Draw a rectangle below the sign to create the front of the box. Extend a line to form the side. Teacher's Tip: Ensure your corners meet cleanly to make the box look solid.
Step 6: Adding Box Flaps
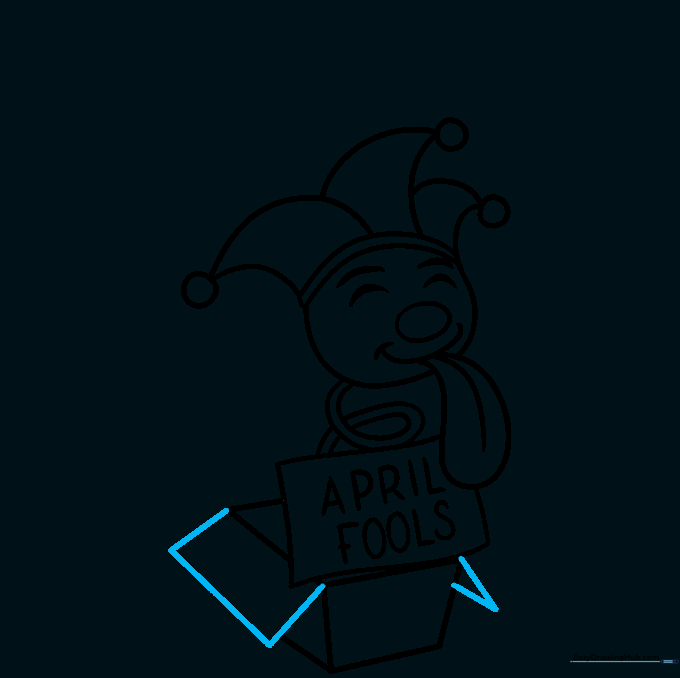
Add a rectangle to the side and a triangle to the opposite side to represent the open flaps of the box. Teacher's Tip: Flaps add depth, making the box look like it has just popped open.
Step 7: Final Box Details
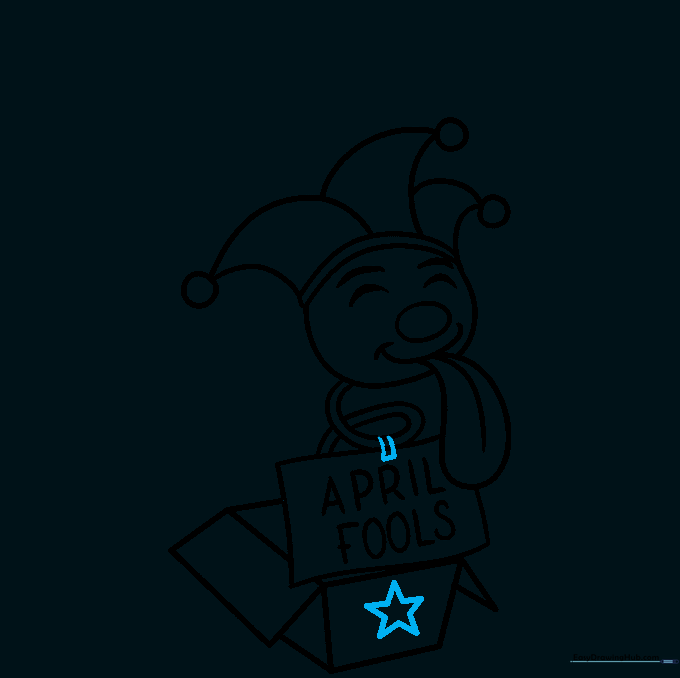
Draw a star on the front of the box and a small rectangle at the top of the sign to look like tape. Teacher's Tip: Adding a star makes the box look like a festive gift.
Step 8: Adding Streamers
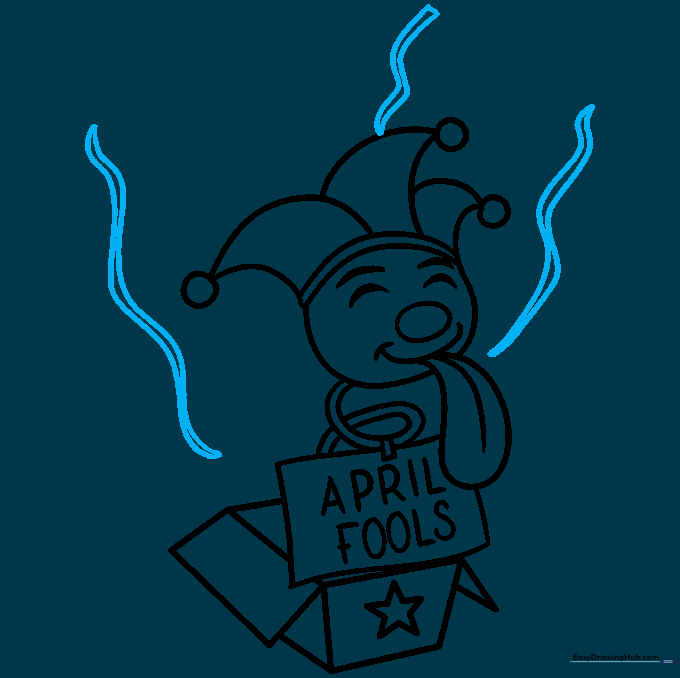
Draw curved lines erupting from the box to represent streamers. Teacher's Tip: Vary the length and curve of each streamer to create a sense of movement.
Step 9: Adding Confetti
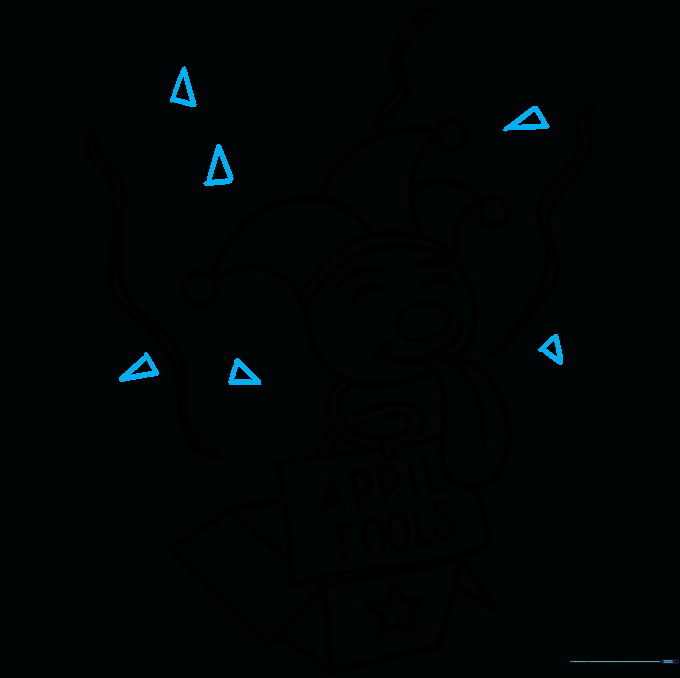
Draw small triangles around the image to represent falling confetti. Teacher's Tip: Scatter them at different angles to make the scene look lively.
Step 10: Coloring Your Masterpiece

Use bright, bold colors to fill in your jester and box. Teacher's Tip: Use alternating colors for the jester's hat to give it a classic, playful look!
More Tutorials


