How to Draw an Ant: Easy 10-Step Guide for Kids
This step-by-step guide is perfect for young artists ages 5 and up. All you need is a pencil, an eraser, and a piece of paper to bring this fascinating insect to life. Follow along to practice basic shapes and build confidence in your drawing skills.
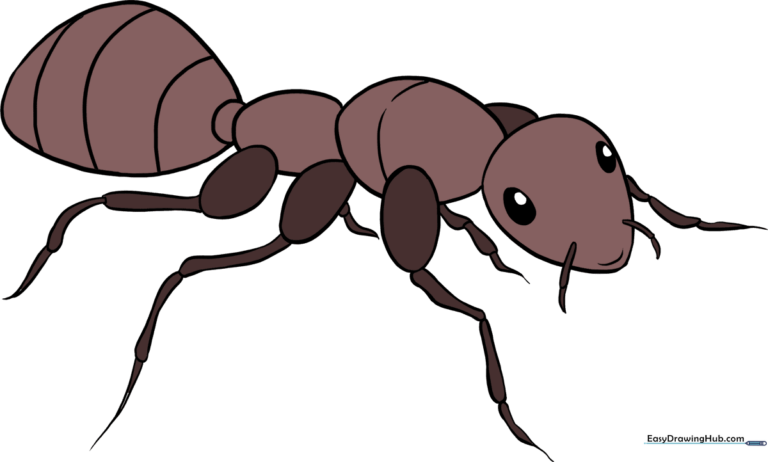
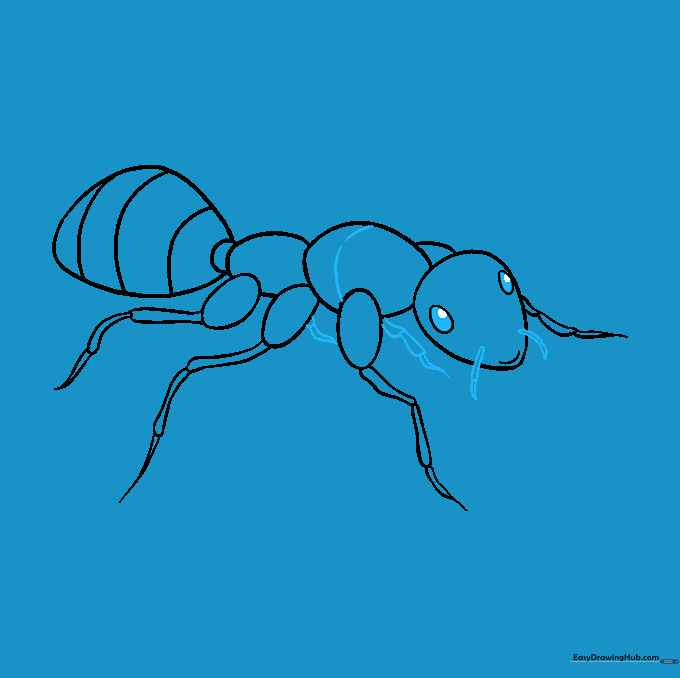
🎯 Final Result
Step-by-Step Instructions
Step 1: Sketching the Head
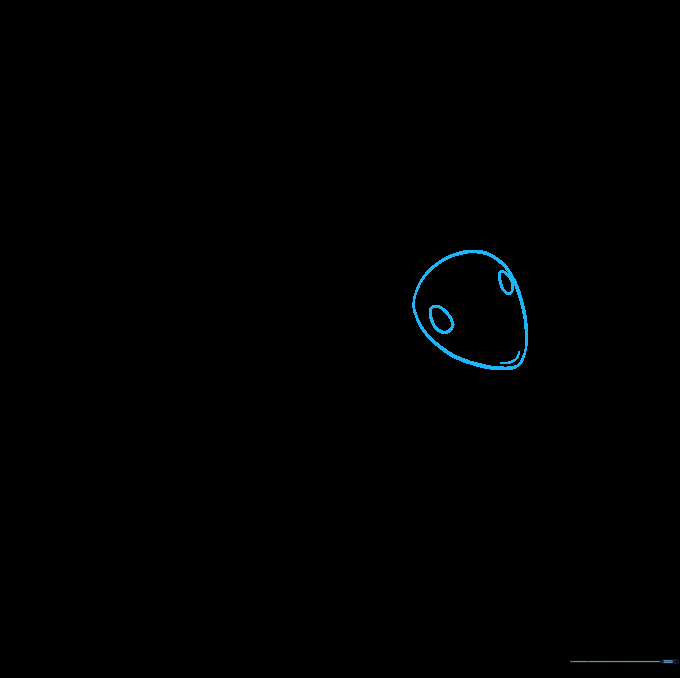
Draw a flattened oval to create the ant's head. Inside, add two small ovals for eyes and a tiny curved line for a smile. Teacher's Tip: Keep your pencil lines light so you can easily erase any overlapping marks later.
Step 2: Starting the Thorax

Draw an irregular oval partially tucked behind the head. This forms the first part of the thorax. Teacher's Tip: Think of this as a puzzle piece that connects to the head.
Step 3: Continuing the Midsection
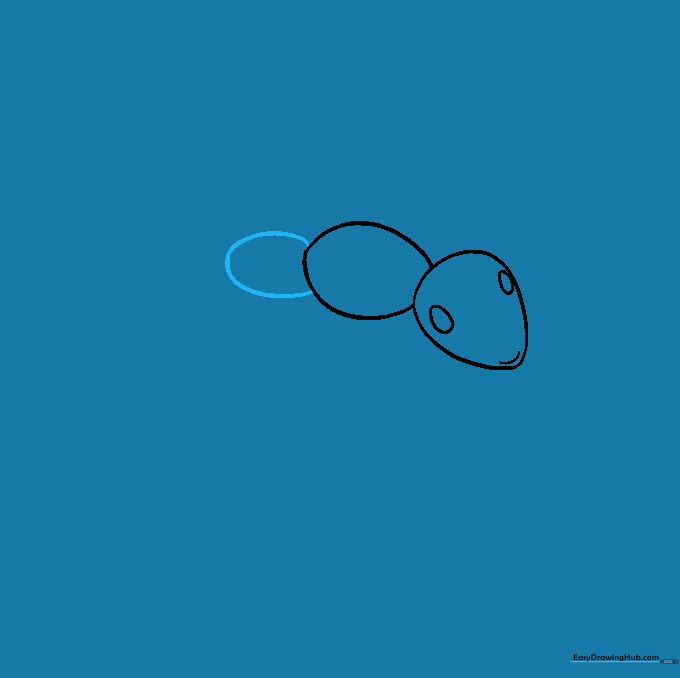
Add a smaller, overlapping oval to continue the thorax. Teacher's Tip: Overlapping shapes create a sense of depth, making your drawing look more three-dimensional.
Step 4: Drawing the Abdomen
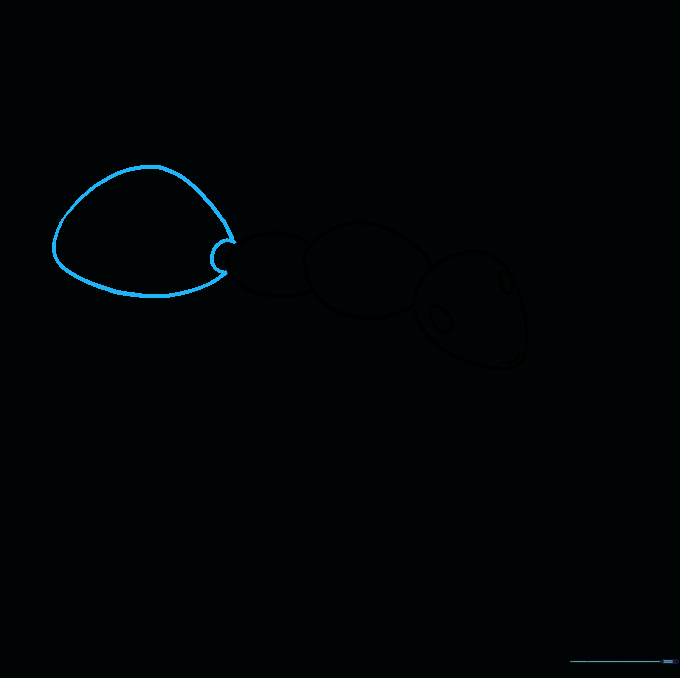
Use a short curved line for the back of the thorax, then a long, sweeping curved line to enclose the large abdomen. Teacher's Tip: Ants have big bellies, so don't be afraid to make this shape nice and round!
Step 5: Adding Abdominal Stripes
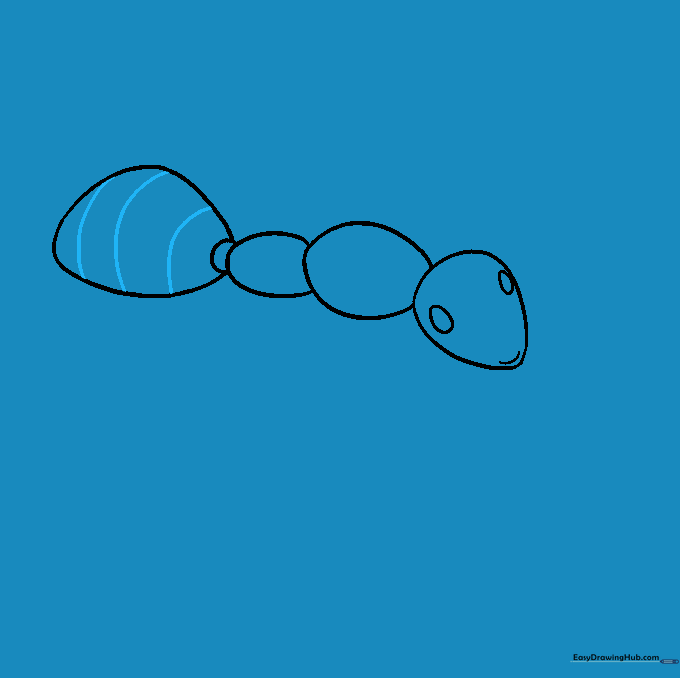
Add parallel curved lines across the abdomen to create segments. Teacher's Tip: Keep the spacing between lines consistent to make the ant look realistic.
Step 6: Sketching Front Legs
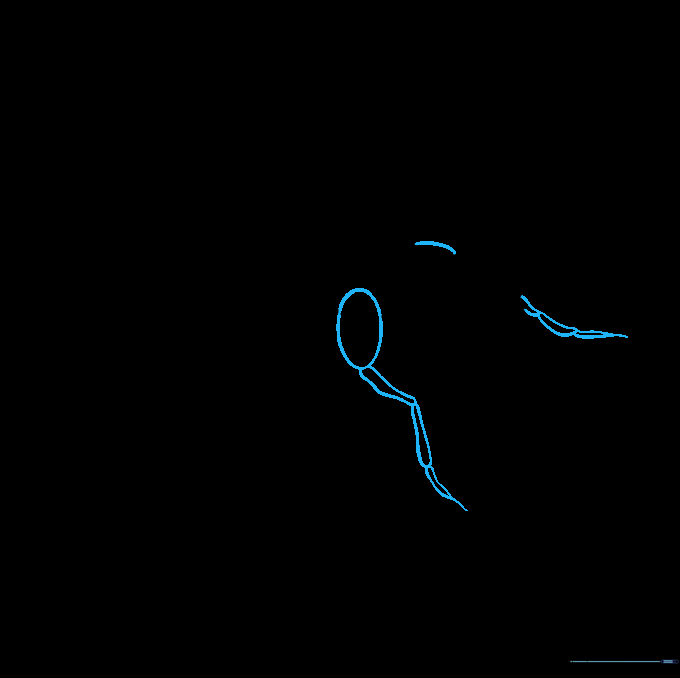
Draw an oval on the thorax for the leg base, then add segmented lines that taper to a point. Repeat for the far leg. Teacher's Tip: Remember, insect legs have joints, so draw them with slight angles.
Step 7: Adding Middle Legs
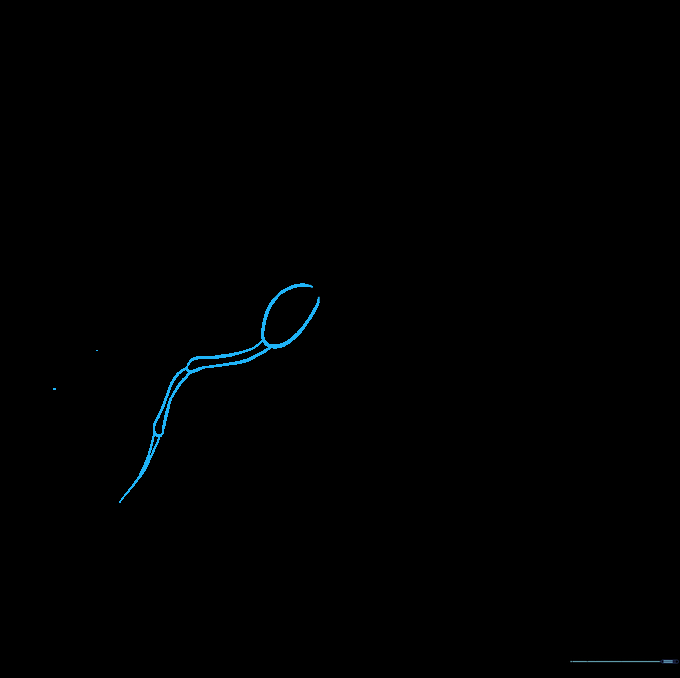
Repeat the process for the middle legs, starting with an oval base and extending the segmented limbs. Teacher's Tip: If your lines overlap the body, gently erase them to keep the drawing clean.
Step 8: Drawing Rear Legs
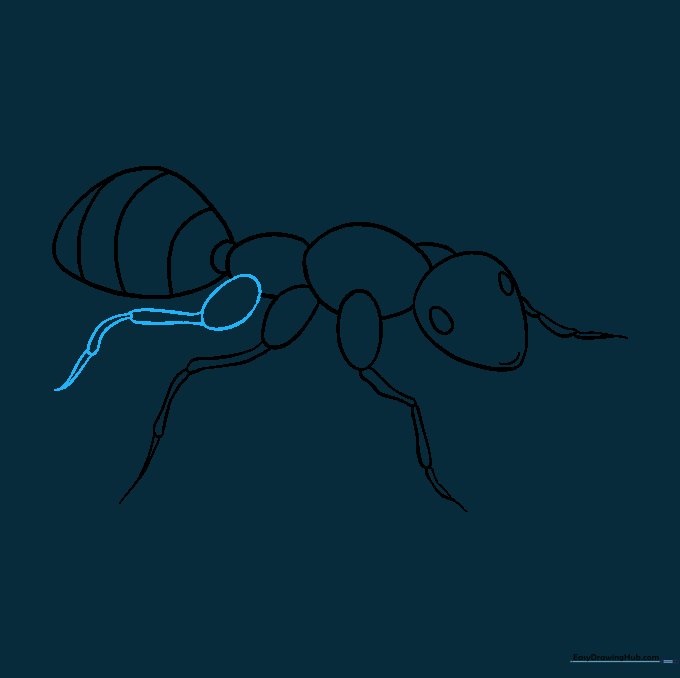
Add the final pair of rear legs using the same segmented technique. Teacher's Tip: The rear legs are often the longest, so make them reach a bit further back.
Step 9: Final Details and Antennae
Add antennae to the head and shade the eyes, leaving a small white dot for a 'glint.' Clean up any stray guide lines. Teacher's Tip: Antennae are sensitive, so draw them with delicate, thin lines.
Step 10: Bring Your Ant to Life with Color
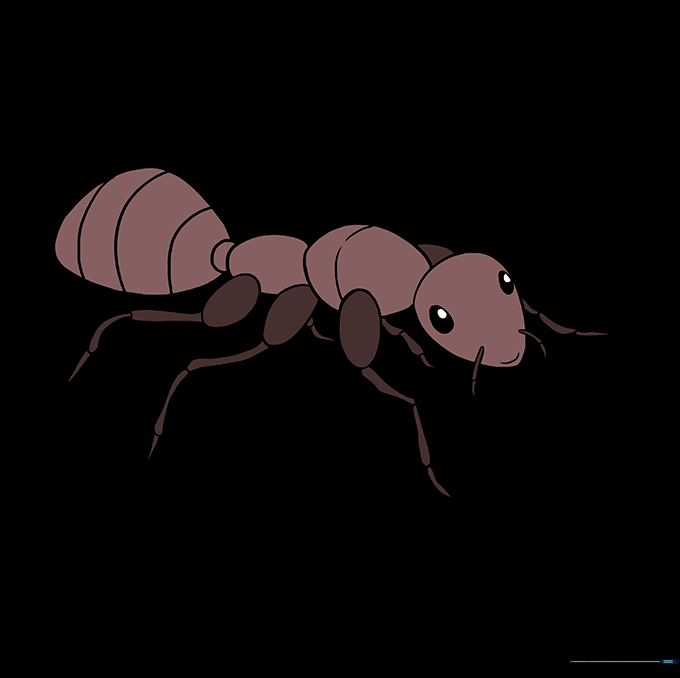
Time to color! Use shades of black, brown, or red. Some tropical ants are even green or yellow. Teacher's Tip: Use a darker shade on the edges of the body to give it a rounded, 3D look.
More Tutorials


