How to Draw an Anime Wizard: Easy 9-Step Guide
Ready to bring a magical character to life? This guide is perfect for artists ages 8+ looking to master anime-style proportions and fantasy details. Grab your pencil, eraser, and paper, and follow along to build your wizard from the ground up.
🎯 Final Result
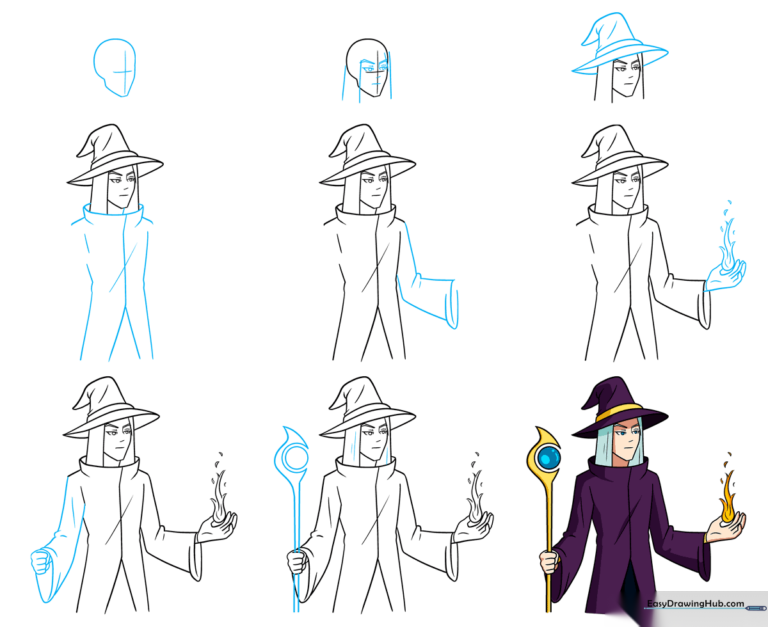
Step-by-Step Instructions
Step 1: Establishing the Face Shape
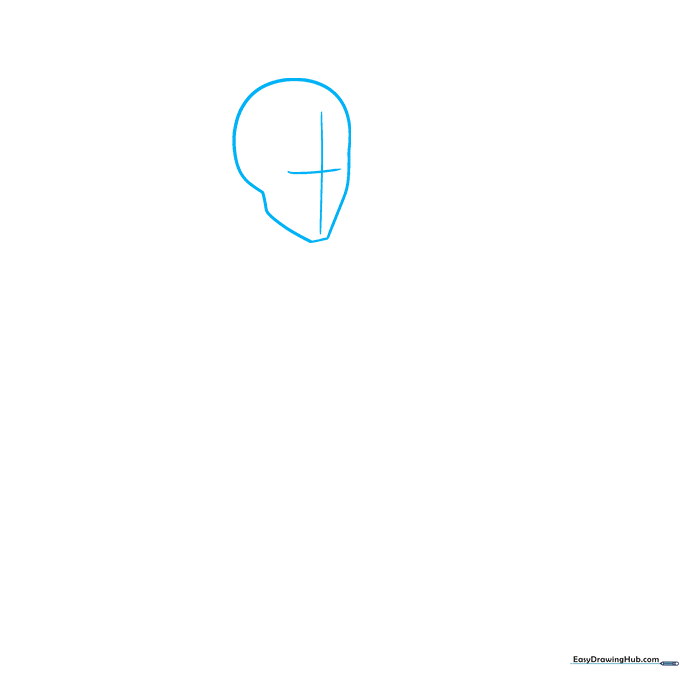
Draw a curved line to outline the face in a 3/4 perspective. Add a light grid across the face to act as a guide for your features. Teacher's Tip: Keep your pencil pressure light here; this grid is just a map, not part of the final drawing!
Step 2: Placing Facial Features
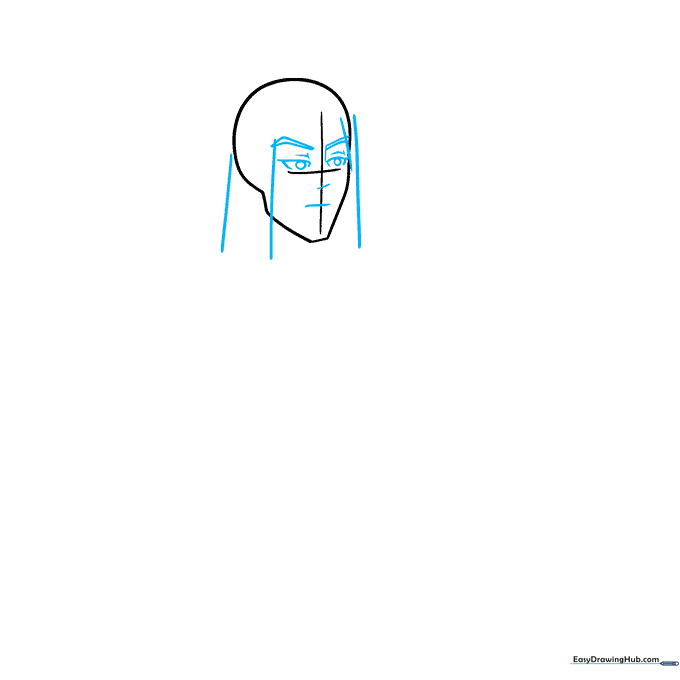
Center the eyes and arched brows on the horizontal line, and place the nose and mouth on the vertical line. Add long, straight lines falling from the head to frame the hair. Teacher's Tip: Anime eyes are expressive—try to keep them symmetrical for a polished look.
Step 3: Adding the Wizard Hat
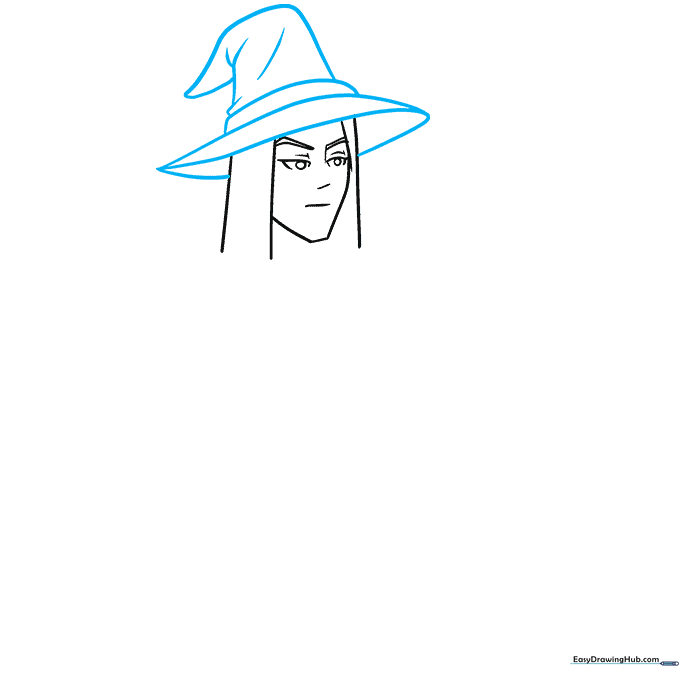
Erase your facial guidelines and the top of the head. Sketch a tall, pointy wizard hat in its place. Teacher's Tip: Don't worry if the hat isn't perfect on the first try; wizards love hats with a bit of a bend or 'slouch' to them!
Step 4: Sketching the Tunic
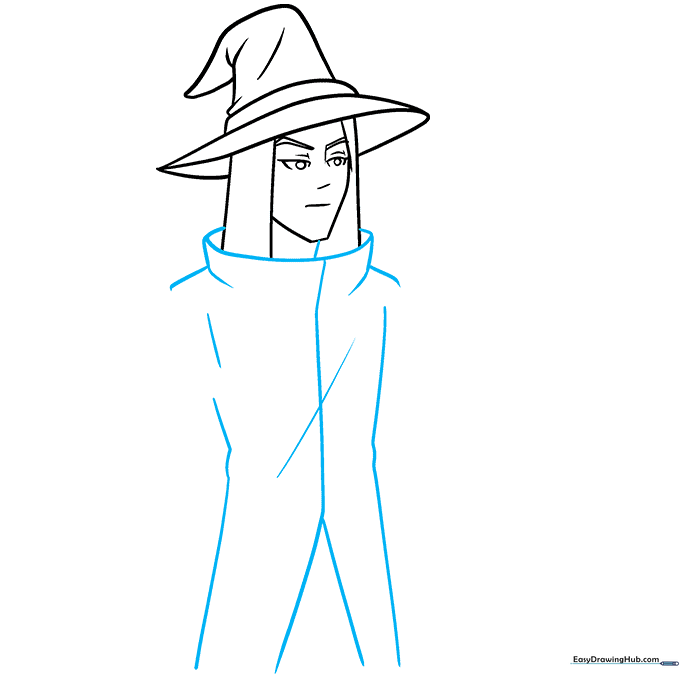
Draw the long tunic using curved lines to show the fabric's flow. Include the neck, front opening, and tails. Teacher's Tip: Use 'S' shaped curves to make the fabric look like it's moving or draping naturally.
Step 5: Drawing the Sleeves
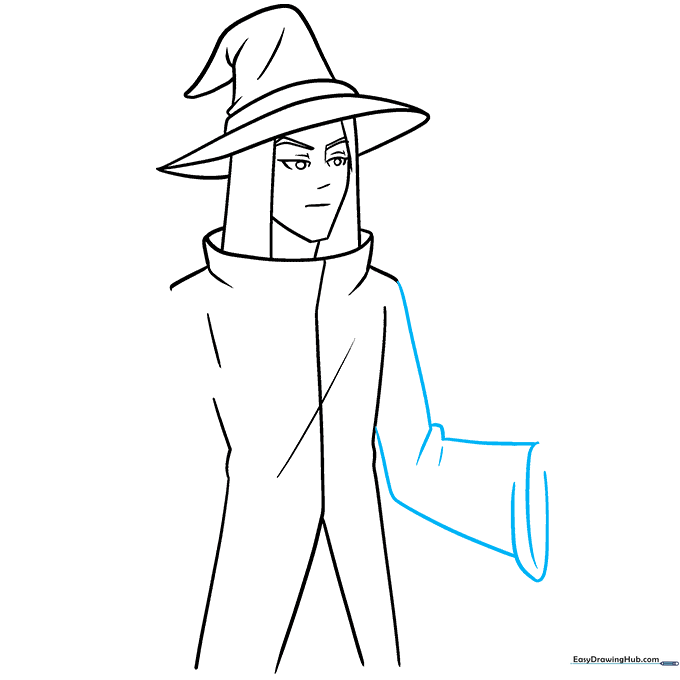
Add the oversized sleeves using overlapping curved lines to create volume. Teacher's Tip: Think of these as large, flowing bells—the more overlap you draw, the 'baggier' the sleeves will look.
Step 6: Adding Magical Flames

Draw an open hand, palm up, and sketch a flame hovering above it using jagged, pointed lines. Teacher's Tip: Make the flame look 'magical' by keeping the edges sharp and uneven.
Step 7: The Second Sleeve
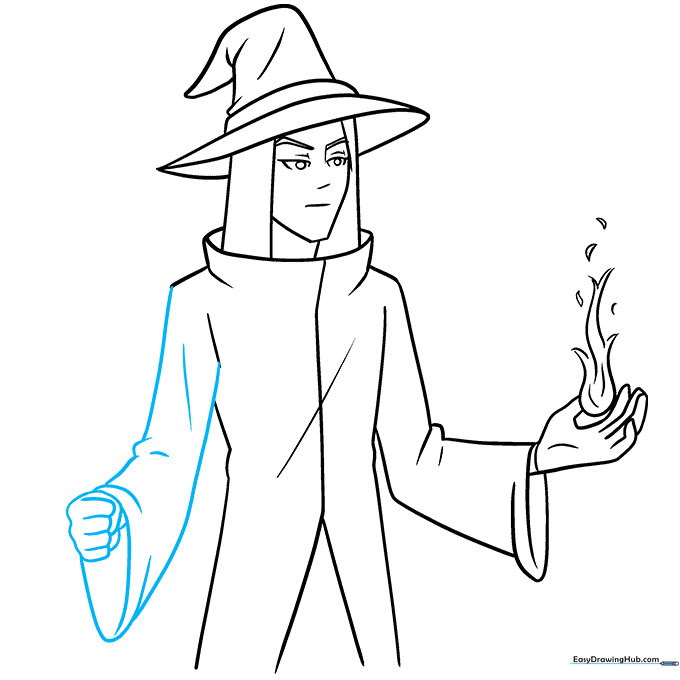
Sketch the remaining sleeve and the wizard's fist using overlapping curves. Teacher's Tip: Ensure the fist looks firm to contrast with the loose, flowing sleeve.
Step 8: The Staff and Hair Detail
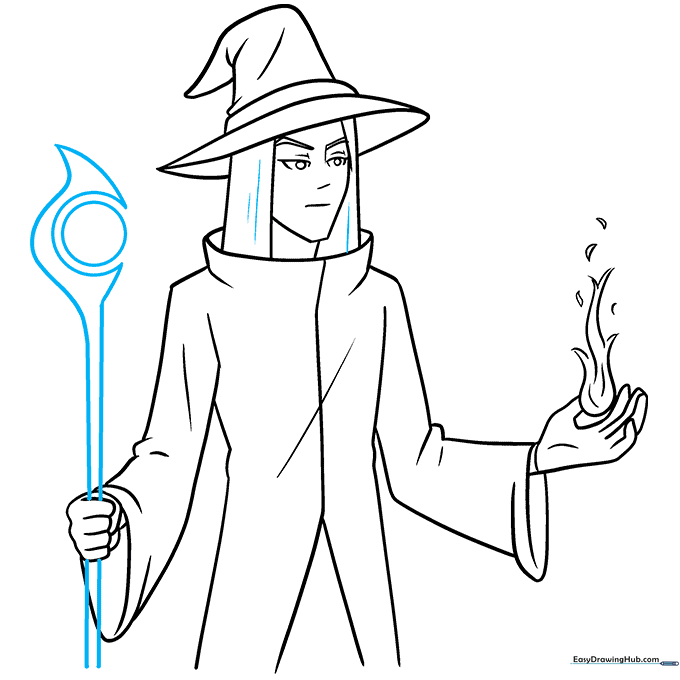
Draw a staff with a circular top and 'C' shaped accents. Add texture to the hair with light, straight lines. Teacher's Tip: Use a ruler for the staff shaft if you want it to look perfectly straight!
Step 9: Final Touches and Color

Bring your wizard to life with color! Use vibrant blues or purples for the robes to give it that classic fantasy feel. Teacher's Tip: Use a darker shade of your color to add shadows under the hat and sleeves for extra depth.
More Tutorials


