How to Draw an Anime Face: Easy 8-Step Guide
Ready to bring your own anime character to life? This guide is designed for artists ages 8+ to master the front-view face structure using simple geometric shapes. Grab a pencil, an eraser, and a sheet of paper to build the foundational proportions that make anime art look professional.
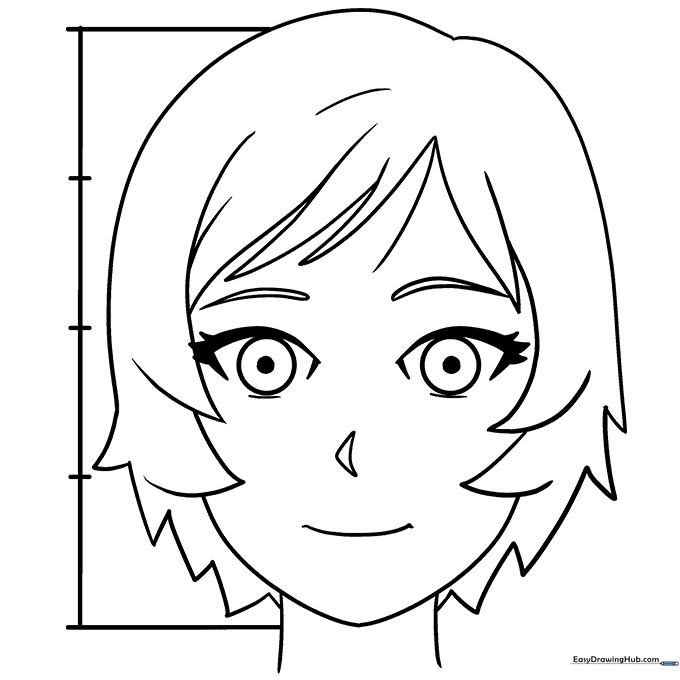
🎯 Final Result
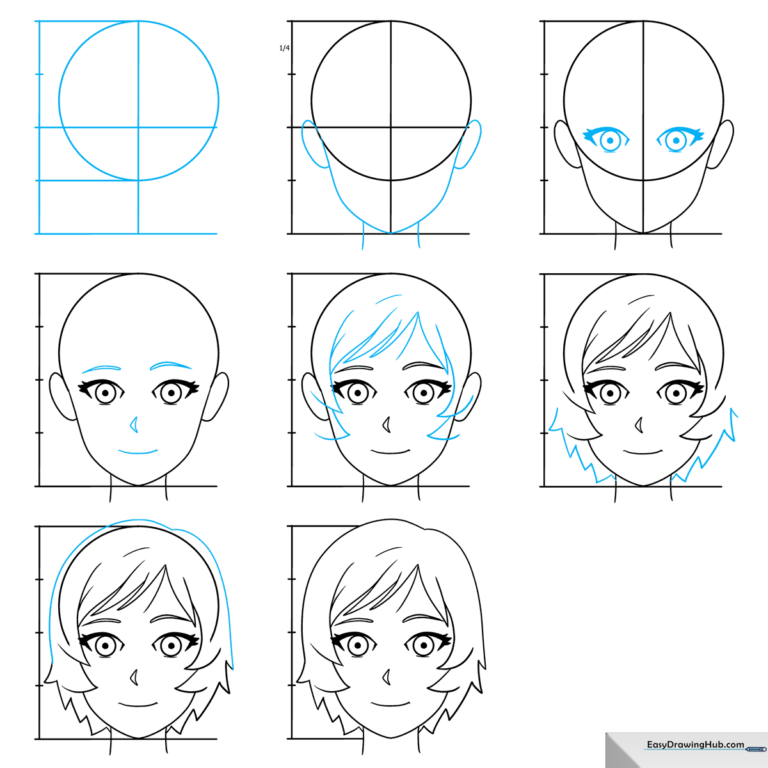
Step-by-Step Instructions
Step 1: Establishing the Grid
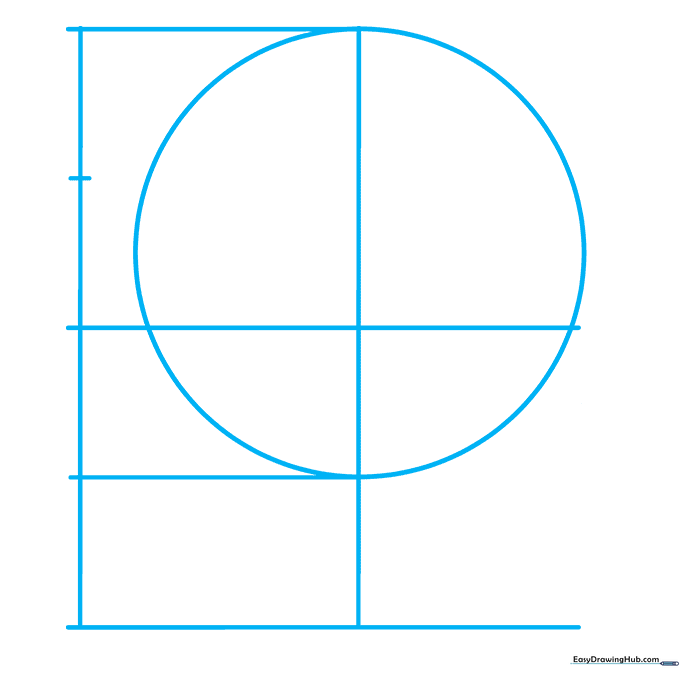
Draw a vertical and horizontal line that meet in the bottom left corner, then repeat this to create a grid. Add two shorter horizontal lines at the top and three-quarters down. Draw a circle between the top and three-quarter marks. Teacher's Tip: Use a light touch; these lines are just a map for your drawing, not the final art.
Step 2: Shaping the Jaw and Neck
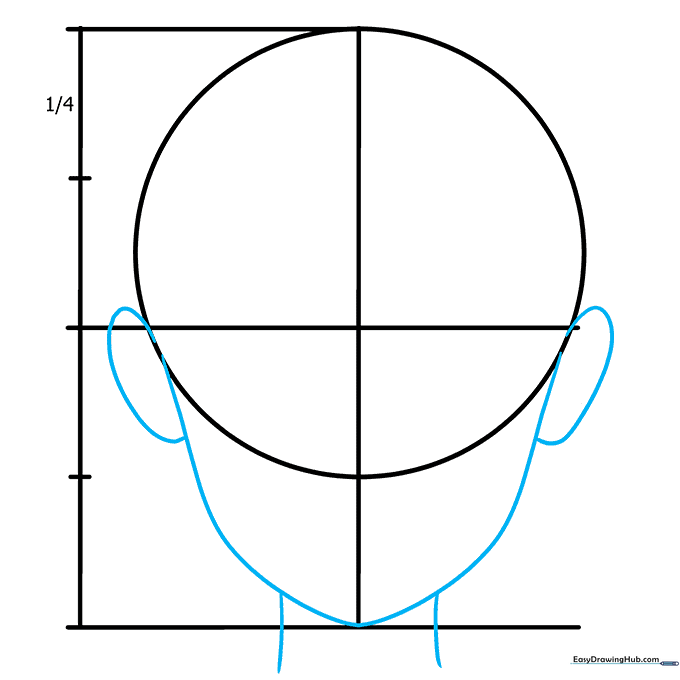
Erase the bottom of your circle and draw a 'U' shape to form the chin. Add small curved lines for ears and two lines for the neck. Teacher's Tip: Keep the jawline smooth; anime faces are often more pointed than realistic ones.
Step 3: Drawing Expressive Eyes
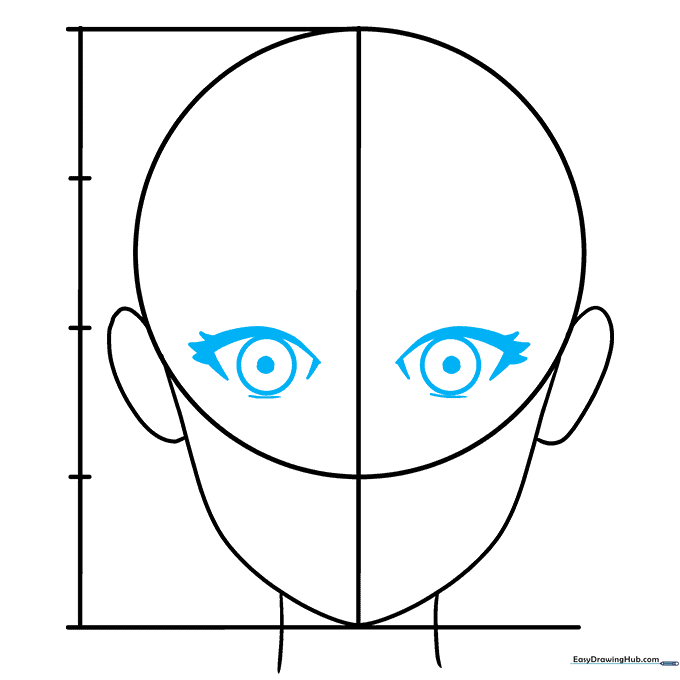
Draw two rectangular shapes just below the midline for the eyes. Add thick upper lashes and pupils inside. Teacher's Tip: Anime eyes are large and expressive—don't be afraid to make them bold!
Step 4: Adding Facial Features
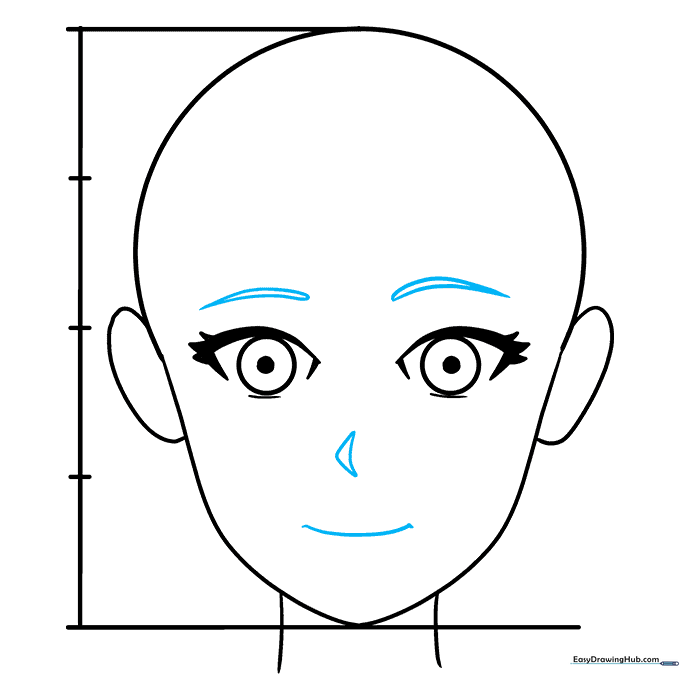
Sketch simple, pointed eyebrows, a small nose, and a delicate mouth. Erase the vertical guide line now. Teacher's Tip: Place the mouth exactly halfway between the nose and the chin for perfect proportions.
Step 5: Starting the Hairline
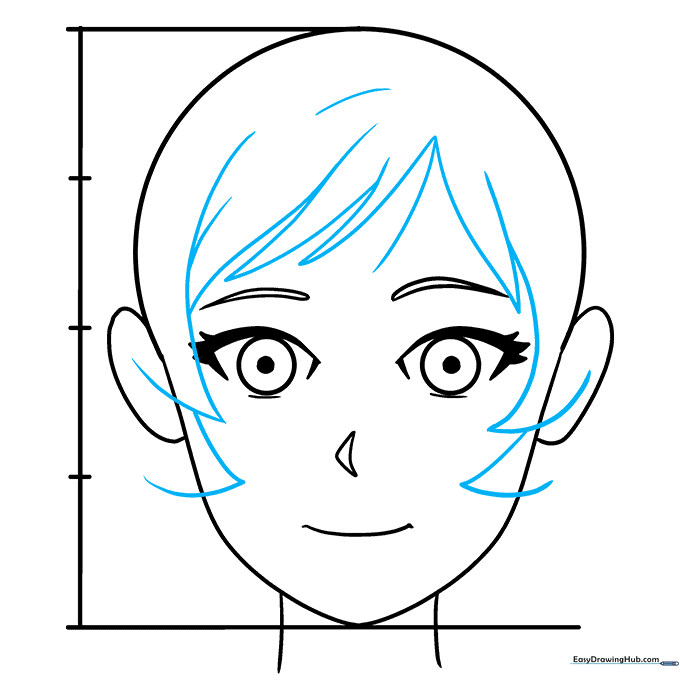
Begin sketching the hair using curved lines that meet at sharp points. Teacher's Tip: Think of hair in 'clumps' rather than individual strands to get that classic anime look.
Step 6: Framing the Face
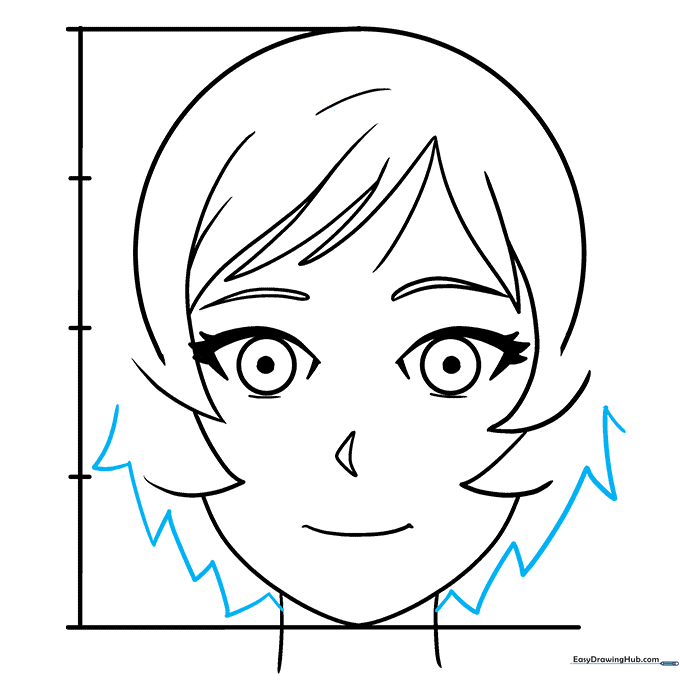
Continue drawing hair strands down the sides of the neck to frame the face. Teacher's Tip: Vary the length of the strands to make the hair look more natural and flowy.
Step 7: Completing the Hair
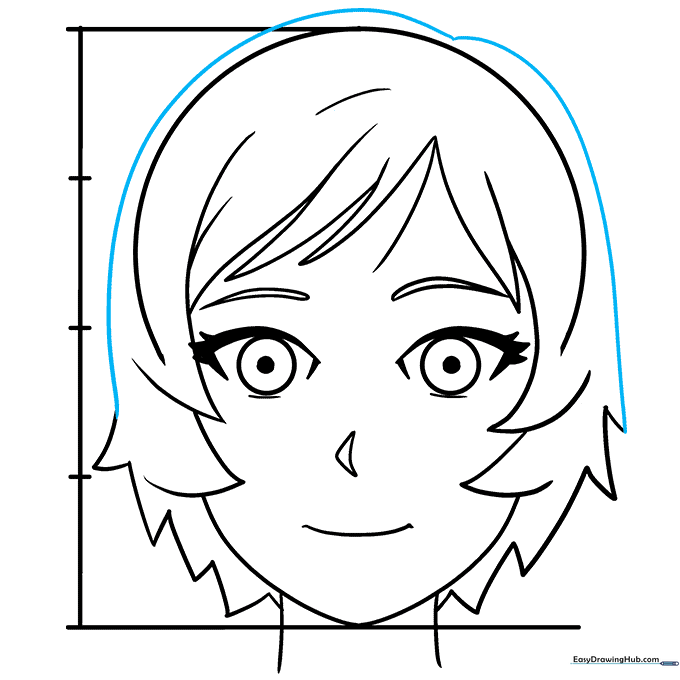
Use long, sweeping curved lines to enclose the top of the hair. Teacher's Tip: Make sure the lines dip slightly at the crown to show where the hair parts.
Step 8: Final Cleanup
Carefully erase all remaining grid lines. Your anime head is now complete! Teacher's Tip: Use a clean eraser to remove any stray pencil marks for a crisp, professional finish.
More Tutorials


