How to Draw an Anime Girl in the Rain: Easy 9-Step Guide
Capture a moody, aesthetic scene with this step-by-step guide designed for intermediate artists. You will need a pencil, eraser, and drawing paper to bring this character to life. Follow along to master 3/4 perspective and essential anime-style proportions.
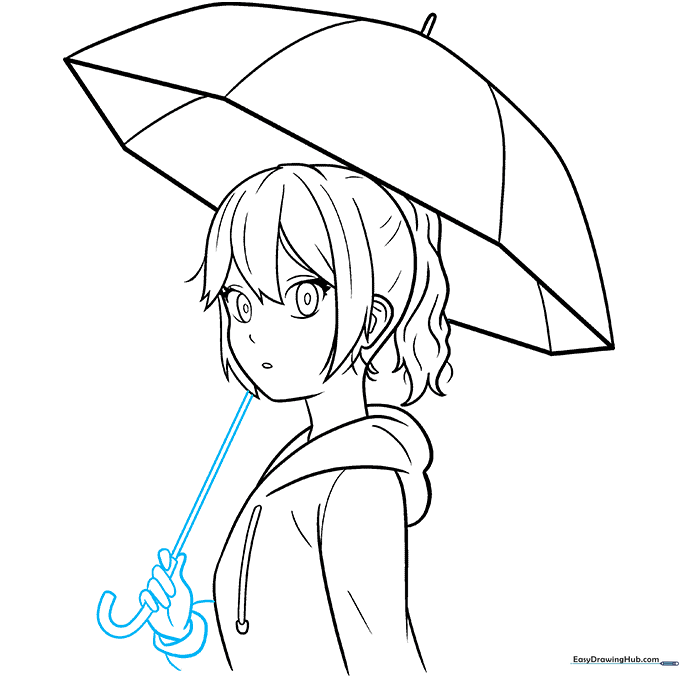
🎯 Final Result
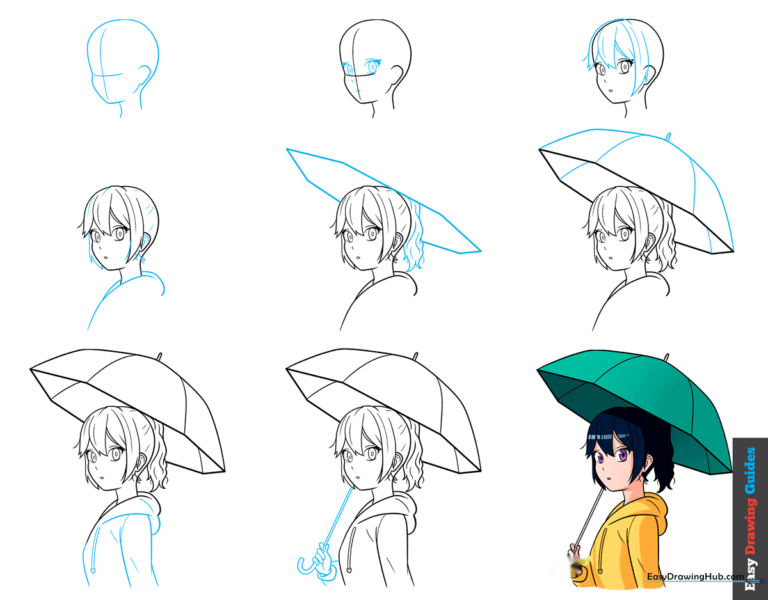
Step-by-Step Instructions
Step 1: Establishing the Head Structure
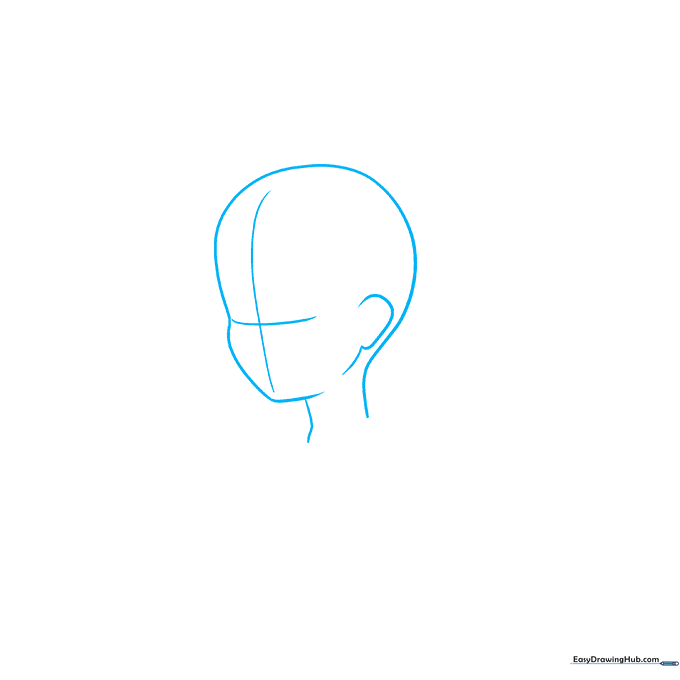
Sketch the head using a 3/4 perspective. Draw a light circle for the cranium and add a curved jawline. Tip: Use a faint cross-grid to align the facial features; keeping these lines light makes them much easier to erase later.
Step 2: Placing Facial Features
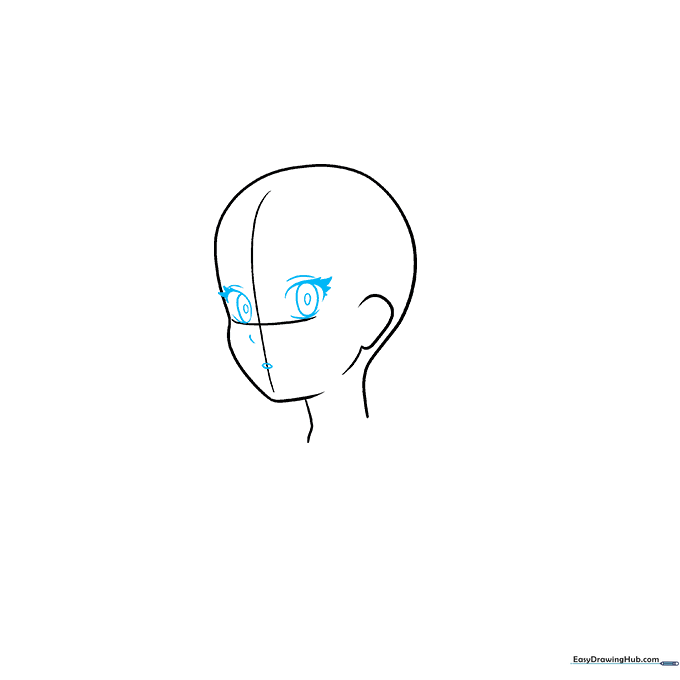
Position the eyes near the outer edges of your horizontal guide line. Place the small mouth centered on the vertical axis, with the nose slightly offset. Tip: Anime eyes are expressive; keep the upper lids thicker to give her a defined, polished look.
Step 3: Sketching the Hairline
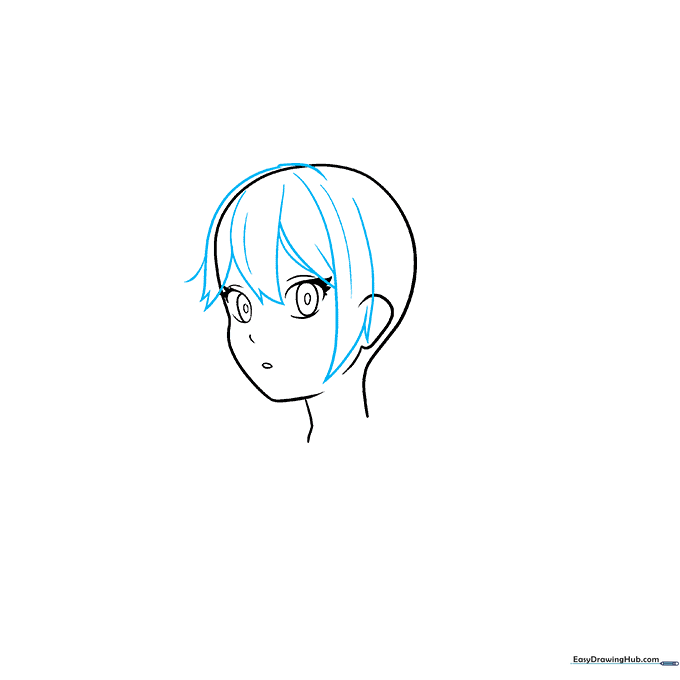
Carefully erase your construction grid. Use jagged, curved strokes to frame the face with hair. Tip: Don't draw every single strand; focus on the 'clumps' of hair to create that classic anime volume.
Step 4: Adding Hoodie Details

Add texture to the hair with extra strokes and define the ear. Begin sketching the hoodie collar using overlapping curves. Tip: Think about how fabric folds near the neck to make the hoodie look realistic and cozy.
Step 5: Drawing the Umbrella Base
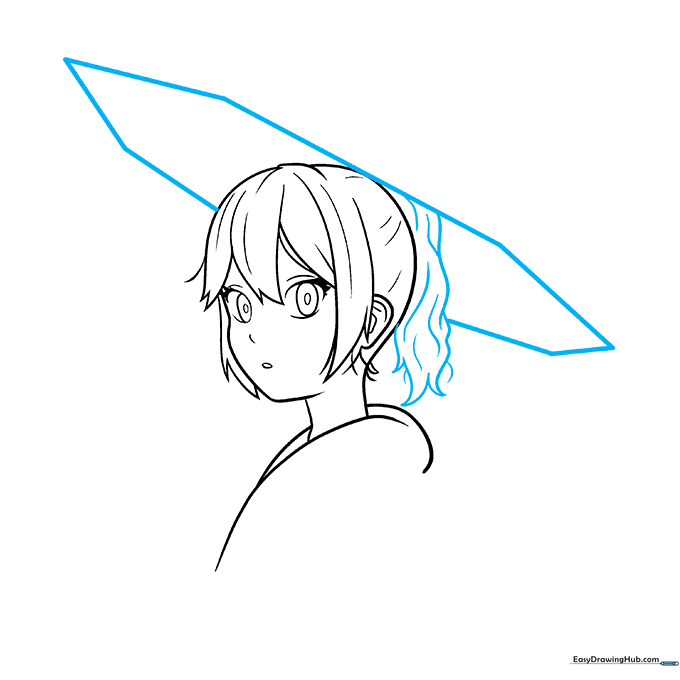
Draw a hexagon above her head to serve as the umbrella's base. Sketch the ponytail with jagged lines to match the hair style. Tip: The hexagon doesn't need to be perfect; it’s just a guide for the perspective of the umbrella.
Step 6: Shaping the Umbrella
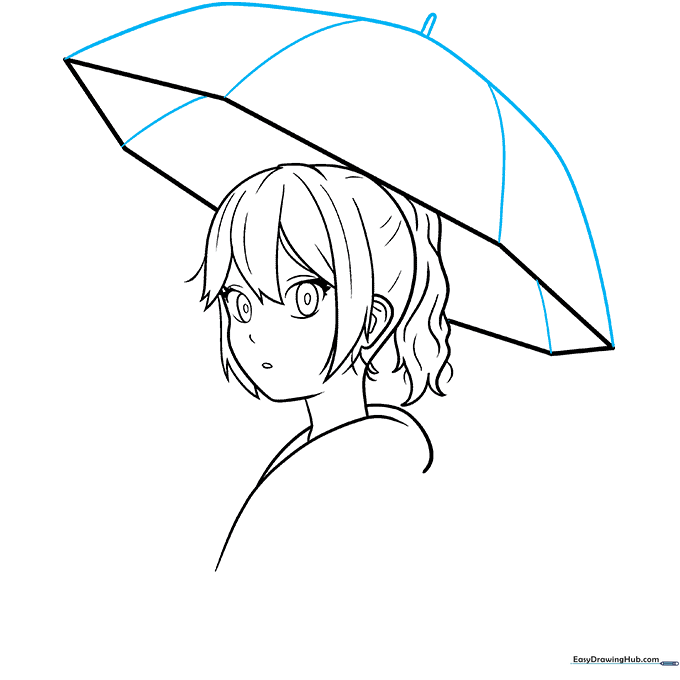
Enclose the umbrella canopy with a long, sweeping curve. Add a small point at the top and divide the surface into panels. Tip: Keep your lines smooth here to contrast with the jagged hair texture.
Step 7: Completing the Hoodie
Use confident, curved lines to finish the hoodie torso, hood, and drawstrings. Tip: Draw the drawstrings hanging slightly to suggest gravity, adding to the 'rainy day' mood.
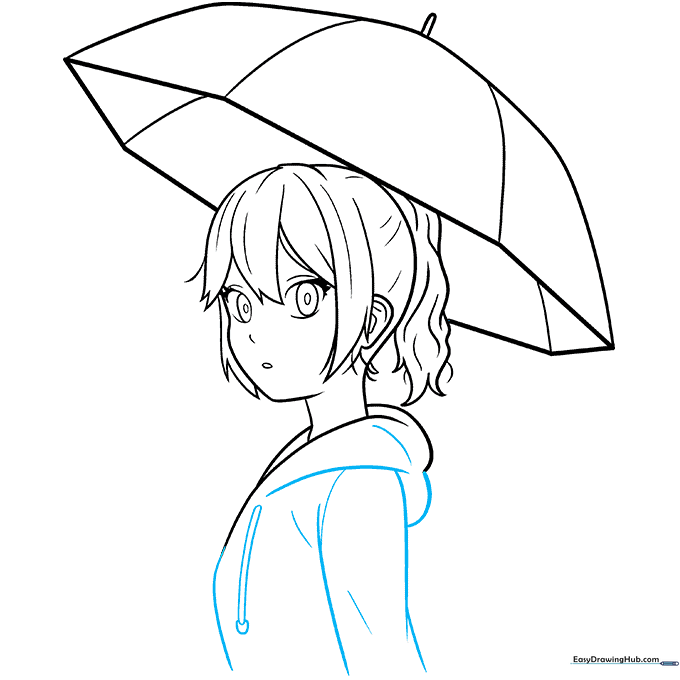
Step 8: Adding the Umbrella Handle
Draw the umbrella shaft using two parallel lines and add a 'J' shaped handle held by a hand. Finish the hoodie sleeves. Tip: When drawing the hand, keep it simple—just focus on the grip around the handle.
Step 9: Adding Color and Life

Bring your drawing to life with color! Use cool blues and greys for the rainy atmosphere, and choose a vibrant color for the hoodie to make your character pop. Tip: Add a few light streaks for falling rain to complete the scene.
More Tutorials