How to Draw an Anime Dress: Easy Step-by-Step Guide
Ready to design your own anime character? This guide is perfect for artists ages 8+ looking to master tiered dress silhouettes. Grab a pencil, an eraser, and a sheet of paper to start building your character's unique fashion style today.
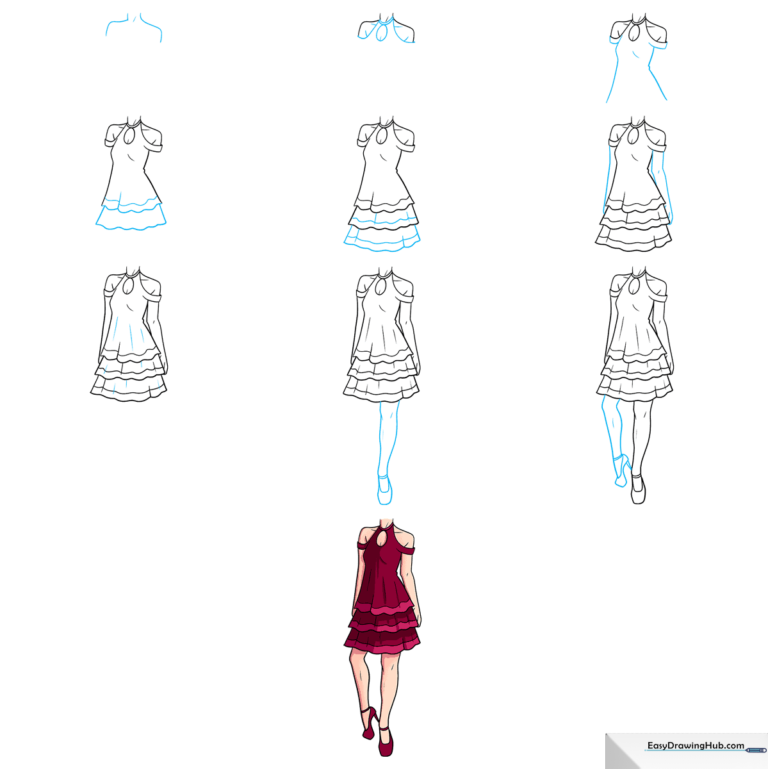
🎯 Final Result
Step-by-Step Instructions
Step 1: Sketching the Shoulders
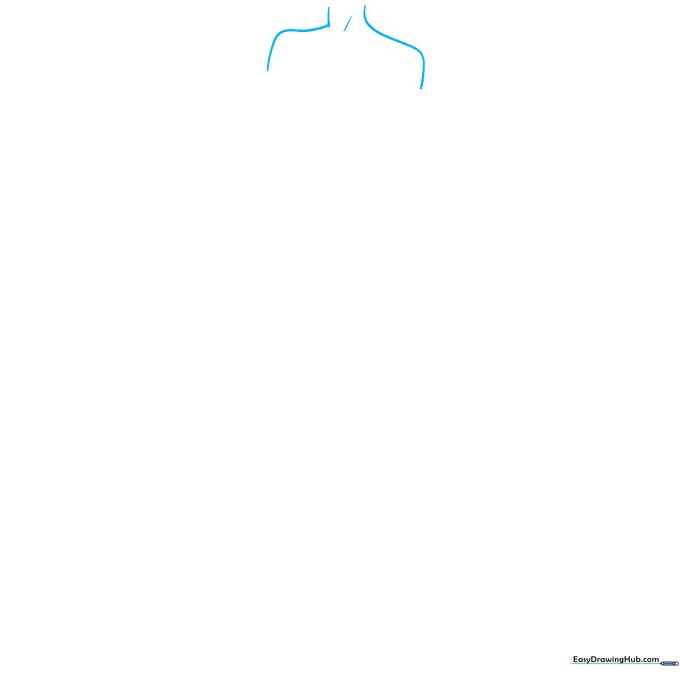
Start by drawing the girl's shoulders using long, gentle curves. Add a short, soft line for the neck. Teacher's Tip: Keep your pencil strokes very light here; you'll want to erase these guidelines later once the dress takes shape.
Step 2: Defining the Neckline
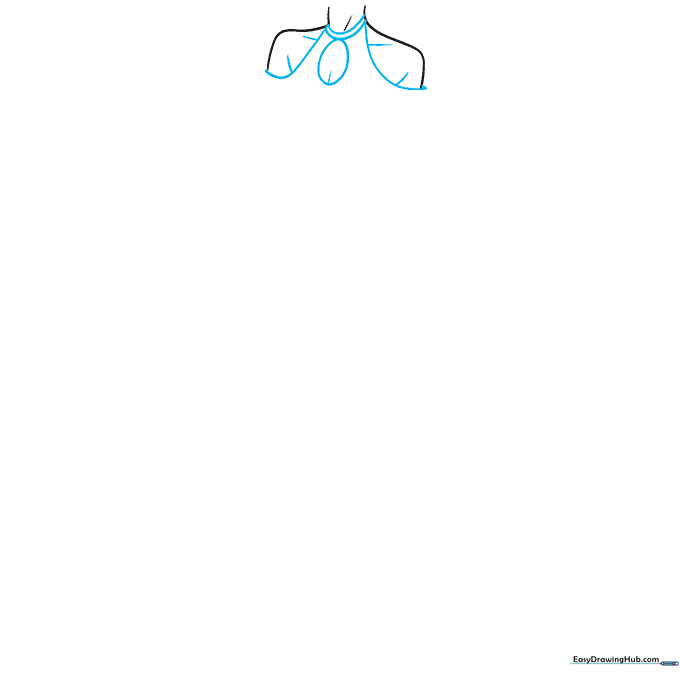
Outline the dress neckline and the cold-shoulder openings with curved lines. Add an oval keyhole cutout in the center. Teacher's Tip: Focus on symmetry—try to make the left and right sides mirror each other for a professional look.
Step 3: Shaping the Silhouette
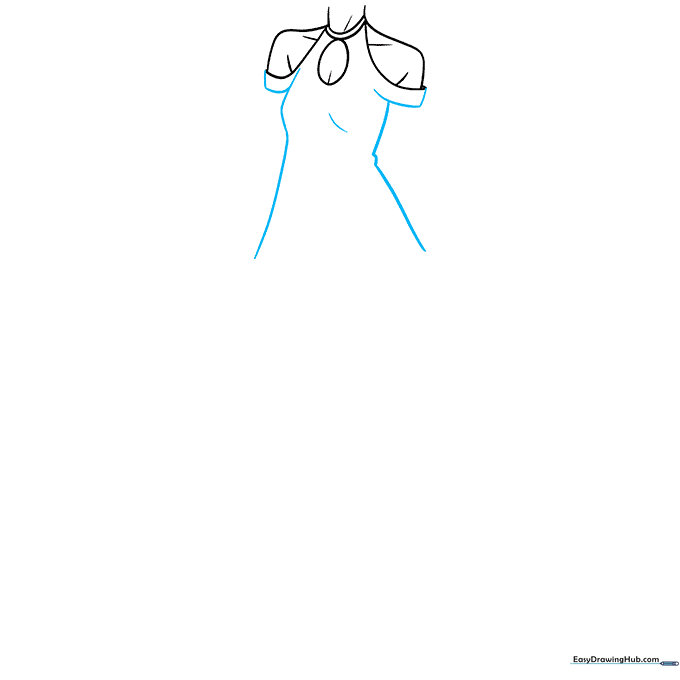
Trace the sleeve bottoms and the sides of the dress. Notice how the lines flare outward at the hips to create a natural flow. Teacher's Tip: Use smooth, sweeping motions to give the fabric a sense of movement.
Step 4: Adding the First Tier

Connect the sides with a wavy line, then add a parallel line to create a decorative stripe. Below this, draw two short lines connected by another wavy line to form the first tier of the skirt. Teacher's Tip: Wavy lines are key to making fabric look soft and ruffled.
Step 5: Creating the Skirt Layers
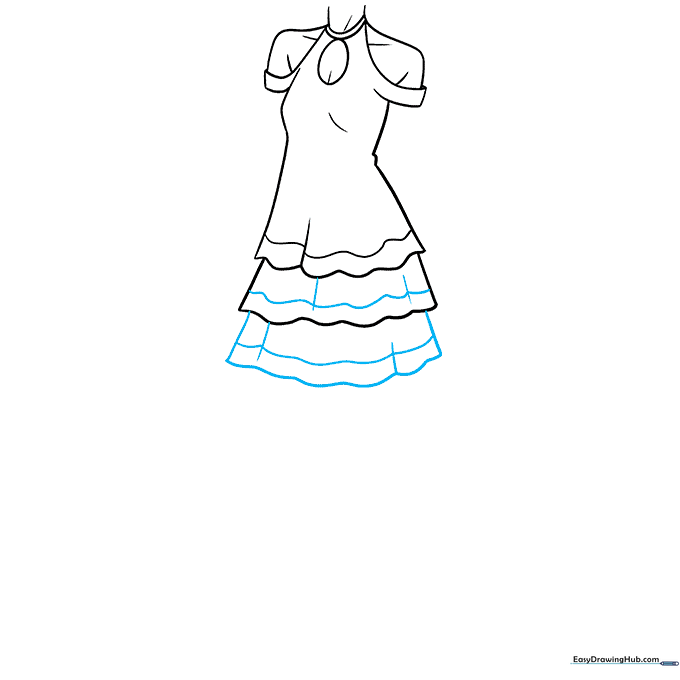
Repeat the process to add a second and third tier, making each one slightly wider than the last. Add vertical lines to suggest fabric folds. Teacher's Tip: Varying the length of your vertical lines helps create the illusion of depth and shadow.
Step 6: Sketching the Arms
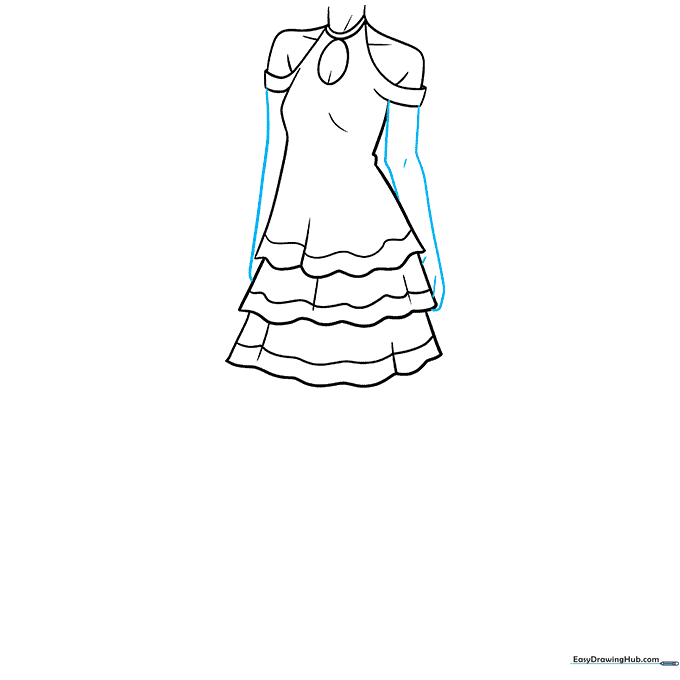
Draw the arms using long, graceful curves. Add tiny details for the elbows and fingers. Teacher's Tip: Keep the arms relaxed at the sides to maintain the character's pose.
Step 7: Refining the Fabric
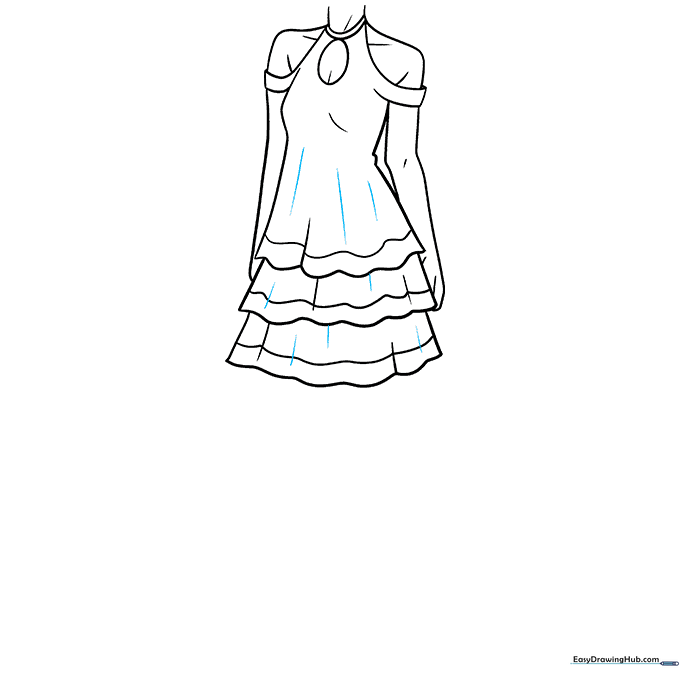
Add more vertical lines along the dress to emphasize the folds and texture of the fabric. Teacher's Tip: Think about where the light hits the dress—add more lines where the fabric bunches up to suggest shadows.
Step 8: Drawing the First Leg
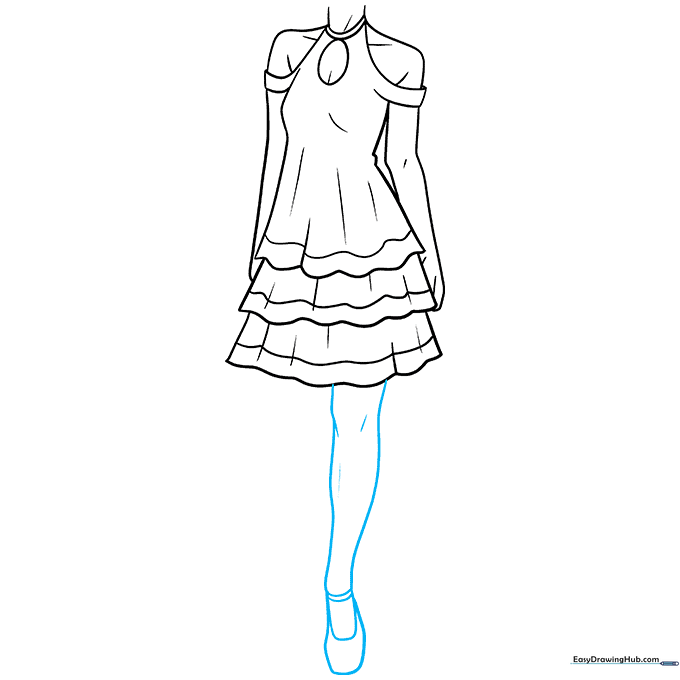
Draw the leg and high-heeled shoe using one continuous curved line that doubles back. Add bands for the shoe straps. Teacher's Tip: Drawing the heel slightly pointed helps give the character a dynamic, elegant stance.
Step 9: Adding the Second Leg
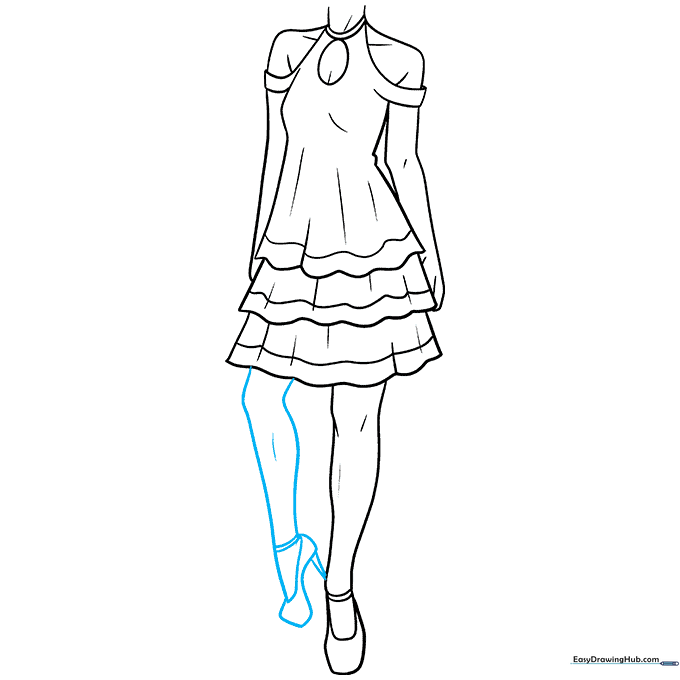
Draw the second leg at a slight angle to show the character standing on her toes. Teacher's Tip: This pose adds energy to your drawing, making it look like the character is mid-step.
Step 10: Bringing it to Life with Color
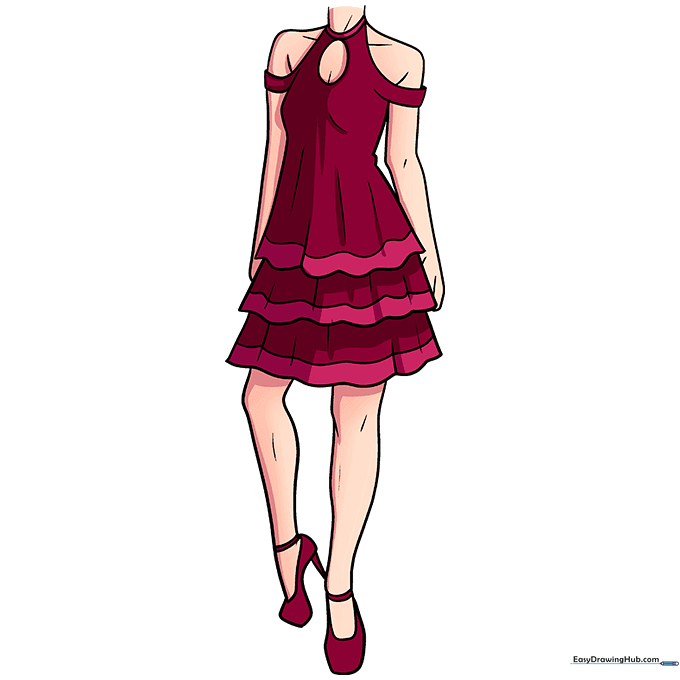
Time to color! Use your favorite markers or pencils. We chose pink and red to make the dress pop. Teacher's Tip: Use a darker shade of your main color in the folds to create a simple, effective shading effect.
More Tutorials


